WHEN SHOULD YOU REPLACE YOUR FLOORING?

Floors often face a lot of wear and tear. People walk on them throughout the day, and they’re also vulnerable to dirt and other messes that can create stains. So, how do you know when it’s time to replace your floors? Here are some giveaways. 

Common Flooring Options 

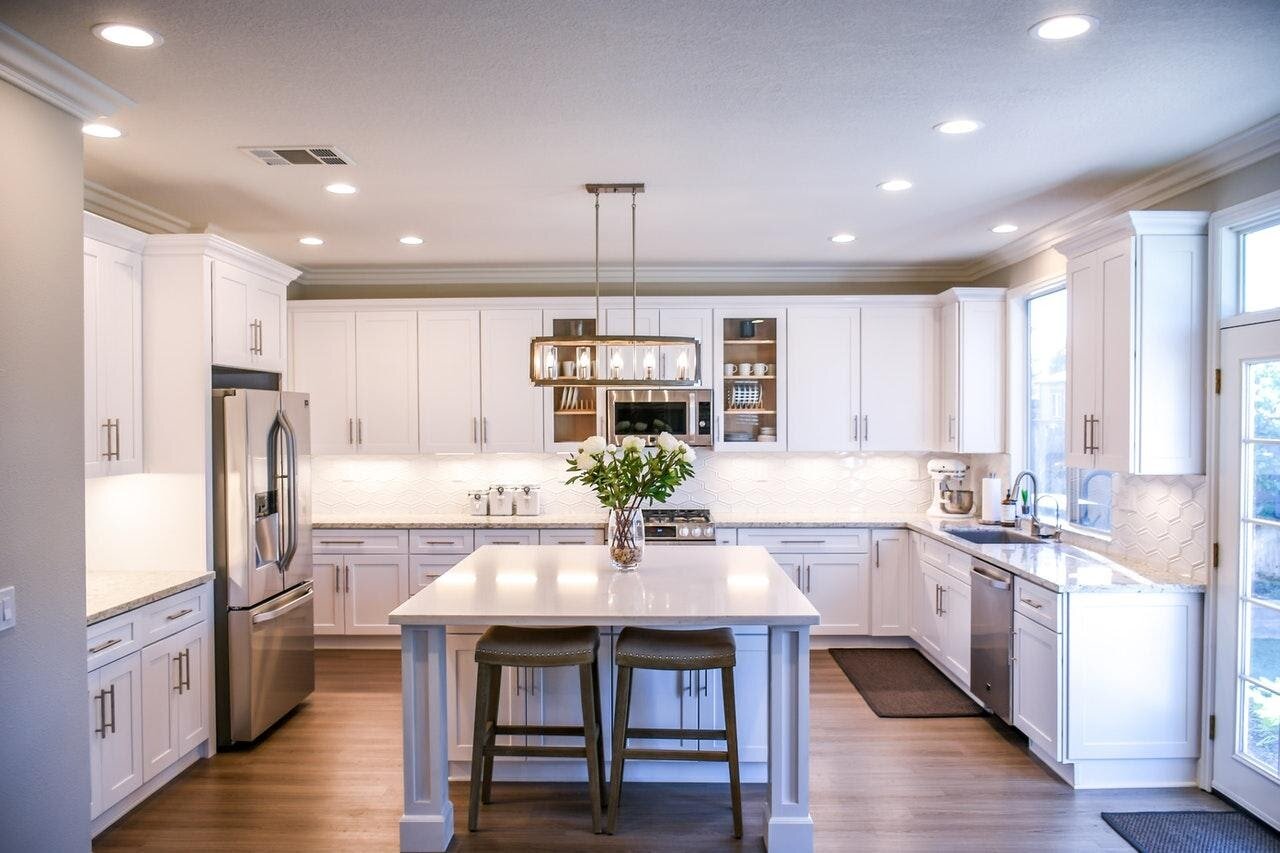
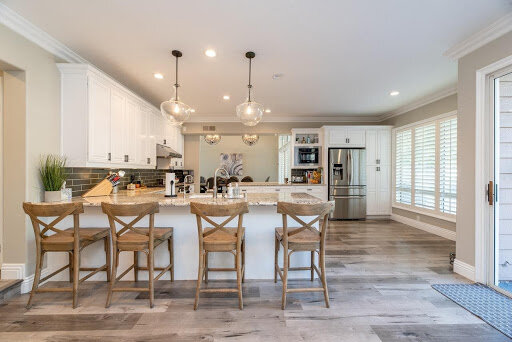
Popular flooring options can be found in many homes because they are stylish, affordable and long-lasting.

Laminate Floors 

This type of flooring provides the look of real wood, but at a more affordable price. It also requires less maintenance than other options since it is scratch-resistant and waterproof. In addition, it reduces noise. These factors have increased laminate’s popularity in homes. 

Hardwood Floors

Hardwood floors are a classic option for various rooms. They are durable and easy to repair, and also provide good insulation. However, they can be on the pricey side. The higher cost may be worth it to get more return on investment when selling your home because it’s attractive to potential homeowners. 

Vinyl Floors 

Vinyl is also a very durable and cost-effective option. It is made from plastic and available in planks, sheets or tiles. It gives off a stylish vibe at a lower cost. 

Tile Floors 

Tile floors are most effective in rooms with large amounts of moisture, such as bathrooms or kitchens. They can be used in many ways and can last for several years. Some tile textures can mimic wood, stone or even fabric. 

Alternative Flooring Options

Many options for flooring are available, including these lesser-known varieties.

Bamboo

Bamboo is a flooring option you may have not previously considered. It is less expensive than hardwood and usually more moisture-resistant. Its natural color can blend into a room well and enhance the overall design. This option is also a more environmentally friendly one. 

Concrete 

Concrete can add an industrial or modern feeling to any space. These floors are relatively inexpensive and provide a unique style. They are also long-lasting and easier to clean. 

Pennies

Pennies aren’t just things you throw into a fountain to make a wish — they can also be used to create flooring material. This is a low-cost option that will definitely stand out. The coins’ copper tones will also add a pop of color to the space. 

Cork 

Cork is an alternative option that can be used in a variety of rooms. This material is durable, comfortable, and resistant to mold and mildew, making it the perfect choice for a bathroom or living room area. It is fairly inexpensive and unique. 

Signs It’s Time to Replace Your Flooring 

There are several indicators that it’s time to install new flooring. Here are some things to consider.

Scratches or Marks 

One sign that your floors may need to be replaced is large scratches or marks. They can be damaged when furniture is moved around or if you have pets. While small scratches are OK, larger ones may be an issue. The deeper the scratch, the more likely water can seep into the floor and cause long-term damage. 

Water Damage 

Water damage can occur from spills, pipe leakages or flooding. It can cause warping or separating. These problems can’t be fixed with a simple refinish, so replacing the floors is your best option. 

Nails Peeking Through the Floor

Nails sticking up from the ground can be a painful tripping hazard for your family and guests. This issue is more common in high-traffic areas, such as living rooms. Not addressing this issue could increase the chances of injury. 

Discoloration of Wood

Long-term heat exposure or water damage can cause floors to change colors. At the beginning stage, you may be able to do a simple refinish. However, if left untreated, you will need to replace the wood. 

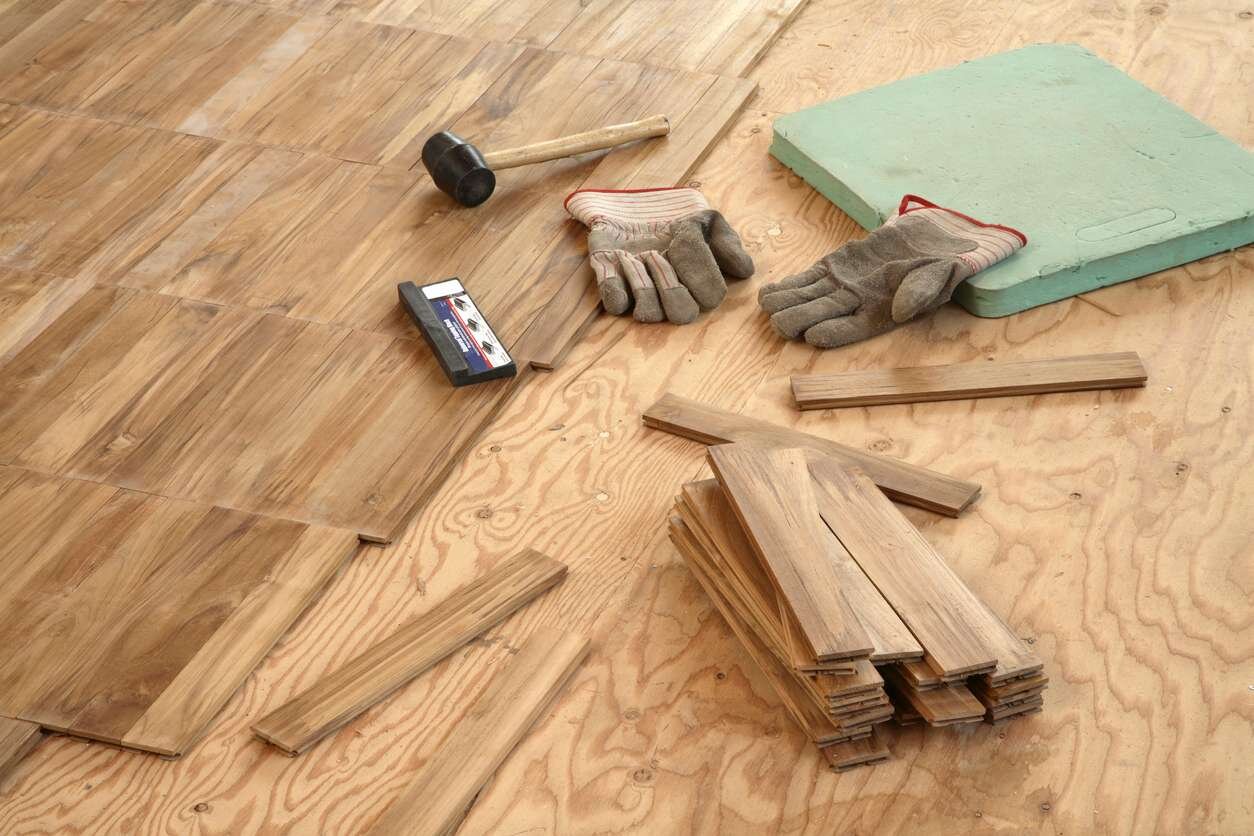
How to Replace Your Flooring

You will need to remove the adhesive of the subflooring with a floor buffer and abrasive disk. Once that step is complete, make sure to level the subfloor and add a moisture barrier to protect the floor covering. The last step is nailing or gluing it down and adding baseboards. 

The Right Time to Replace Flooring 

Your flooring is an important feature in your home, since it sees a lot of wear and tear throughout the years. It doesn’t last forever, though, so you need to know the right time to replace it. Doing so will give your house a whole new look and boost your ROI, so it’s well worth the effort.

Guest Contributor: Rose Morrison

HOW TO MAKE A GREENHOUSE AT HOME – DIY GUIDE 

Are you looking for ways to create your very own greenhouse at home? Well, you have reached the perfect place! This article focuses on the step by step process of building a greenhouse at home, which includes planning, assembling of materials, and ideal execution. 

To begin with, it is crucial to fix a budget before proceeding with the DIY project, choose the area where you want to build it, and to know what materials you need. Before proceeding further, if you love DIY and are looking for materials to set up your large flat-screen television to your eye level, go check out the motorized tv mount and flip down tv mount for more information! 

Now, follow these simple steps to create your very own greenhouse at home!

What is a Greenhouse? 

A greenhouse is a home-like structure that houses your plants, offering them an ideal climate for proper growth and development. The building is used to provide shelter for your plants and keep them healthy and alive for a long duration. Creating a greenhouse includes massive work; however, it is super fun too! 

Steps to Make a Greenhouse at Home 

1. Area/Location 

First and foremost, choosing an ideal location is exceptionally vital before building a greenhouse. Moreover, it would be best if you found an area that gets proper sunlight for the growth of your plants. Hence, don’t go for a place that has a lot of shade or doesn’t get much sunlight. 

2. Electricity 

A greenhouse needs uninterrupted electricity. It is best to make an attached connection to your home. In this way, there is less establishment cost and no hassle. To keep the temperature at the most appropriate level, the greenhouse requires proper ventilation and heat. 

3. Drainage 

If you stay in a region prone to frequent rainfall and floods, you need to make sure the area you choose for your greenhouse has proper drainage facilities. A flood would inevitably result in the destruction of your plants and the structure. Hence, the best way to prevent this mayhem is by building the greenhouse on high ground and consult a professional to know more about drainage systems. 

4. Measurement 

Once all the above steps are taken care of, start by measuring the area of your greenhouse. It entirely depends on your preference when it comes to the size of the structure. However, the most relevant measurement is eight by six feet.  

5. Greenhouse Kit 

After you are sure of the measurement, you need to purchase a greenhouse kit to set up the structure. You can find various kits on online shopping sites or any local store! 

6. Support the Structure 

The best way to build a greenhouse is to attach the structure to one side of your home. This will help provide appropriate support to the building, and nothing would affect it or break it in any way. 

7. Framing 

Once you attach the greenhouse kit at one of the outer walls of your house, it is time to build the outer frame. The best material for the outer frame would be steel. Now, create a dome-like frame on the top of the structure and fix it properly. 

After the head of the greenhouse is done, you need to create a base or foundation with the same steel material. Make the base as sturdy as possible. You might need little help from your friends or family while fixing the foundation of the structure. 

8. Coverage of the Structure 

Before covering the structure, you have to choose a material that would be durable and affordable. One of the best materials for covering a greenhouse is LDPE plastic. It is bio-friendly, long-lasting, and won’t need much effort for maintenance unline regular plastic material. 

However, keep in mind that even an LDPE plastic covering has to be washed regularly without fail. Moreover, don’t forget to attach the cover with the frame of the structure. 

9. Walls of the Structure 

FIberglass would be the most cost-effective option when it comes to the walls of the greenhouse. It would easily fit on the roof as well as the walls of the structure. The material is stable and lasts longer than glass walls. 

10. Control of Temperature 

Last but not least, you need to know how to control the temperature inside the greenhouse. Here are a few easy ways you can keep the temperature accurate for most of the times: 

  • Install fans at every corner of the greenhouse.
  • The roof of the structure must have facilities for ventilation.
  • If you have more budget, you can also purchase a heater for the greenhouse.

Your greenhouse is ready! 

Conclusion 

Now that you have detailed knowledge about making a greenhouse at home, you must also learn more about gardening and how to provide the plants with proper nourishment for appropriate growth. Don’t forget to water the plants regularly! 

Guest Contributor: Vijaykumar

HOW TO TELL IF YOU’RE A MINIMALIST OR A MAXIMALIST

Personalizing your house and making it feel like home starts with identifying your preferred style. In simplest terms, identifying whether you’re a minimalist or a maximalist can set the tone for every interior design decision you make.

Here’s what you need to know about minimalism and maximalism in design and how to identify your style. 

WHAT IS MINIMALISM?

Minimalism is a less-is-more approach to interior design. This style is defined by a clear, open flow within a room. People who prefer minimalism often have fewer furniture and art pieces, gravitating toward clean, simple lines. Rather than having two overstuffed couches with throw pillows, minimalists prefer a single, modern-style seating arrangement and accessory furniture.

Being a minimalist doesn’t mean that someone is plain or boring. People with this preference feel overwhelmed by objects that they perceive as clutter and are more intentional when choosing what has a place in their homes.

WHAT IS MAXIMALISM?

Maximalism is a more-is-more approach. People who prefer this style tend to create more warm, welcoming, and comfortable spaces. The walls in a maximalist’s home rarely have an open space, featuring photos and art that add to the atmosphere.

Color and design choices in a maximalist’s home tend to be brighter and more vibrant. There’s a misconception that maximalism is synonymous with clutter. However, many maximalist designs are well-organized if a little busy. 

DO YOU PREFER BOLD OR CALM DECOR?

If you prefer bold colors and attention-catching decor, you might be a maximalist. If windows filled with plants, shelves teeming with books and treasures, and seating that invites you to while the day away, you have maximalist tendencies. You likely feel at home in a crowded bookshop or cafe that provides warmth and comfort.

Conversely, if you prefer neutral tones and calming decor, you might be a minimalist. If the soothing, sparse spa experience appeals to you, you’ll likely try to capture that in your decor scheme. If you’re a minimalist, your art preferences will be nuanced and straightforward, or you’ll gravitate toward having one central piece on display.

DO YOU PREFER SYMMETRY OR CONTRAST?

Maximalists tend to prefer contrast over symmetry. These are the people who are more likely to have boldly colored kitchen cabinets, mismatched rugs and curtains, and chintz textiles. 

Conversely, minimalists prefer cleaner lines and symmetry. There should be balance in every room and matching accent pieces that come together for a streamlined decor scheme. 

DO YOU FEEL ATTACHED TO THINGS?

Another common difference between minimalists and maximalists is the inherent attachment or disconnect from material things. Minimalists follow the Mari Kondo attachment style, collecting and displaying only that which brings joy or feels necessary. 

Maximalists have more sentimental values attached to material belongings and often view them as memory triggers. In essence, those material belongings also spark joy but differently than experienced by a minimalist. For example, a minimalist might have fond memories of the beach and revisit those thoughts often. A maximalist might choose to have a tangible reminder— such as a jar of shells— displayed in their living room. One is not better than the other; they’re just different.

pasted image 0-2.png

ARE YOU BOTH?

Believe it or not, you can have both minimalist and maximalist tendencies. You might prefer an open concept room with minimal furniture but bright and bold accents on the walls and floors. Conversely, you might like a busy kitchen and living room but have a very minimalist style bedroom. 

As humans, we tend to label ourselves and create a dichotomy between preferences. Yet as history has shown, that black and white thinking rarely applies to everyone. 

Identifying your preference toward minimalist or maximalist design is a great starting point when personalizing your house, but it’s ultimately your unique inclinations that will make it a home. 

Guest Contributor: Ashley Lipman

HOW DO YOU FIX THE ISSUES WITH YOUR WATER HEATER’S PILOT LIGHT?

The pilot light is one of the most crucial components of your gas water heater. After all, the appliance can’t provide you with hot water if this component faces an issue. However, apart from being the most crucial component, it’s also probably the most troublesome one. Gas water heater users might come across problems, primarily associated with the pilot lighter, quite often. 

Now, you’d want to fix the issue as soon as possible. And, for that, you might usually want to hire a plumber. However, there are specific ways through which you can fix the issues all by yourself. Here, we have discussed some common pilot light issues and simple ways to fix them. Also, you do not need to have any technical skills to apply these solutions.

How does the Pilot Light Work?

The pilot light provides the igniting flame for the gas that the appliance releases through the burner. Only after that, the heater starts heating the water. Also, the pilot light should always stay lit when you ignite it. Otherwise, it will fail to ignite the gas coming out of the burner in turn. As a result, you won’t get any hot water while using the heater. 

Now, most of the issues you face with the pilot light are related to keeping it lit.  Other than that, it might sometimes fail to provide a properly sized flame to the gas. If there is an issue with its placement, then fix that first. You can simply reach out to Handyman Dubai for a quick and reliable solution. 

What to do when the Pilot Light’s Flame is too Small?

A small flame indicates that the pilot light isn’t receiving enough gas pressure. In that case, it would affect the functioning of your water heater. So, you must not ignore this issue and apply a solution for it. 

Now, this issue is mainly caused due to a clogged pilot light orifice. In that case, you can fix the issue by cleaning it. However, it’s more sensible to contact a certified professional if there are any other causes. 

Cleaning the pilot light orifice

The pilot orifice regulates the amount of gas released through the valve. So, you must clean it to improve the gas pressure. And, for that, you must stop the gas supply using the shut-off valve. 

Remove the orifice

You can’t clean the orifice as long as it’s attached to the appliance. So, you must detach it before proceeding with this task. And, for that, you must remove all the nuts that hold the orifice to the water heater. Based on the model you’re using, this might take a while. Moreover, you’d also have to detach the pilot tube and the thermocouple attached to the orifice. Once you’re done, you can simply proceed with the cleaning. 

How to clean the pilot orifice?

A can of compressed air would be one of the best tools for clearing out any dirt and debris. Apart from that, you should use sandpaper to clean its tip. You can also find a water heart cleaning brush available in the market for this task. Make sure to clean the orifice properly so that you don’t face this issue again anytime soon. Once you’re done, you must re-attach the components to the heater with the utmost care. 

Pilot Flame won’t Light or Keeps Going Out: Causes and Fixes

Many other users often report a failure to light the pilot flame. Apart from that, you might sometimes fail to light the pilot flame in the first place. Now, you must consider the following common causes behind both these issues: 

Dirty air vents

As you know, you need oxygen to light up the pilot flame or keep it lit. So, you must make sure that your appliance receives that in a proper quantity. Now, the air vents are the only means by which your water heater intakes oxygen. It might often get clogged by dirt and debris. 

In that case, the appliance may fail to light up the pilot flame. The air vents are located at the exterior of the appliance. So, you can clean them up quite easily. Also, make sure to do that regularly to avoid this issue further. 

Kinked flex tube

The kink tube is yet another exterior component you must examine for pilot light problems. As it happens, this tube might often get kinked to cause interruptions in the gas flow. In such cases, the pilot flame might keep going out or simply fail to light. 

So, you must straighten this crucial tube to fix the issue. It should work in case there aren’t any other problems with your water heater. 

Clogged pilot tube

In case, the previously mentioned fixes didn’t work, you must turn your attention to the pilot tube. This component supplies gas to the pilot light through the orifice. Sometimes, especially in old water heaters, this tube might get clogged. In that case, you simply need to clear it to fix the gas supply to the pilot light. 

So, detach the pilot tube from the heater and examine it for any blockages. You can simply use a thin wire or a needle to clear it effectively. Then, you must re-attach it to the appliance and try lighting the pilot flame. 

The sensor has bent away from the pilot flame

Apart from other parts, you must also take a look at the sensor. Do you find it bent away from the pilot light? If yes, then you’ve found the cause behind the problem. The sensor’s end should always touch the pilot flame. So, you can easily fix the issue by bending it to that position all by yourself. But, make sure to shut down the appliance before you do that. 

Dirty thermocouple

The thermocouple plays an important role in regulating the gas supply. It signals the appliance about whether the pilot flame is burning or is out. Depending on that, the heater supplies gas to the pilot light. Now, like other components, the thermocouple can often get dirt and debris on it as well. In such cases, it can mistake a lit pilot light as unlit and vice versa. 

As a result, it sends the wrong signal to the appliance. Now, if you’re wondering what should be your next step, then you simply need to clean the thermocouple to resolve this issue. 

Damaged thermocouple

Does the pilot light face issues even after you try the above-mentioned fixes? In that case, your water heater probably has a damaged thermocouple. So, you must make sure whether that’s the case. Test it with a multimeter and check whether it generates at least 20 MV voltage. 

What if it doesn’t supply the specified amount of voltage? In that case, you must replace the thermocouple. You can simply use a wrench to detach it from the water heater. Then, carefully attach the new thermocouple in its place. Also, make sure to turn the gas supply off before you proceed. 

What if these Solutions don’t Work?

In some cases, the problem might also lie with the flex tube. So, you must examine this component as well. Moreover, pilot light issues are also sometimes caused due to a broken main control valve. In that case, many service providers might offer you repairs for it. But, it’s better to get a new water heater in such situations.

Also Recommended:Plumbing Services in Dubai – Where to Book From?

Guest Contributor: Biler Charlie

4 TOP TIPS IN REDESIGNING YOUR LIVING ROOM AS YOUR WORKSPACE EXTENSION

You’re working diligently to finish your project by the deadline while your kids take a Zoom class in the other corner of the room—your partner walks in to bring them snacks while your dog follows the scent of food. You look around flustered, knowing that sharing the existing home office with your entire family just isn’t sustainable.

It’s okay—imagine this: the ample space in your living room gets redesigned for either you or the kids to work or study in peace. You can shift your furniture creatively, which allows for the inclusion of a workspace extension. Not only is it functional, but it also fits your overall aesthetic. Below, we share the top four tips for redesigning your living room as your workspace extension.


1. MAKE USE OF A CORNER

When the rest of your living room is already packed with furniture or you’re working with limited square footage in an apartment, make one corner your workspace extension—preferably by a window to invite natural light in while you work. By using a corner, you create an obvious separation between your living area and your working area.

 When choosing the desk for this space, ensure it matches the rest of your living room décor to create a seamless design. To top it off, create a gallery wall just above your desk, using elements from the rest of your living room—for example, if you’ve opted for a chic appearance throughout, use black and white prints in gold or silver frames. If you’ve opted for a more bohemian and artsy vibe, create a gallery of your favorite art prints in funky frames.


2. USE AN OPEN WALL

If you can rearrange your couches or if you have the budget to replace them altogether, you can create a workspace along an open wall. Before you jump the gun and buy a new desk or couch, take out your measuring tape. The best couches are the ones that fit perfectly into your available space. When you’ve mapped out where your furniture is going to be placed, you can begin working with the open wall.

 Using this redesign is ideal if you have multiple kiddos who need workspaces, as you can line the wall with a long desk and set up multiple workstations. Add floating shelves above each individual workspace to create a streamlined, balanced look and you’ll have a clearly divided, yet congruent appearance in your living room space. While you’re at it, make sure you’re incorporating mindful and comfortable touches that help to improve mood and keep energy levels up.


3. CREATE YOUR OWN CUBICLE

To create the feel of a separate office space in your living room, you can use makeshift walls that double as décor and storage space with the use of a tall cubby bookshelf. Open cubbies mean you can place books or other decorations facing either direction, which unites the two spaces, rather than appearing awkward and blocking off the natural flow of your living room.

 With this approach, you can create an entirely new office, rather than just an extension, and can use an L-shaped desk to create an open square within which you work. Incorporate additional design elements to complement the living area, like house plants of varying shapes and sizes. You’ll add life to the room neutrally, and it’ll feel inviting, both for work and for lounge time with friends and family.

4. USE THE SPACE BEHIND YOUR COUCH

If you’re dreading the thought of giving up a precious part of your living room for a practical addition that seems to cut into the space you share with guests, don’t worry. Try a modular sofa in an outdoor-friendly fabric to accommodate all of your guests. Simply use the space behind your couch to set up your workstation. By layering your furniture like this, you create a simple workspace that doesn’t interrupt the rest of your hosting area. You can still enjoy football watch parties without feeling cramped.

Use a slender desk that tucks behind the back of the couch nicely, add an area rug to outline the workstation, and include a desk lamp for adequate lighting. Leave an open space for your laptop and layer additional décor on the other side of the desk, like a couple of books alongside an elegant orchid.

With the tips outlined above, you can have the best of both worlds—a workstation that gets you in the zone for ultimate productivity and a spacious living area that doesn’t feel crowded by the addition of a workspace extension. All it takes is a little imagination and creativity to envision a new design for your living room and once you’ve landed on just the right touches, you’ll be amazed by how great it all comes together. Tell us about your new vision for your living room! What tips do you plan to incorporate?

Guest Contributor: Kiley Morrow

7 SIGNS THAT YOU NEED TO RENOVATE YOUR HOUSE

Everything deteriorates over time and your lovely home is no exception. The deterioration of your home is unavoidable, no matter how well you maintain it. Renovations, on the other hand, can address a number of concerns that arise as a result of aging. We modify our homes to improve their appearance or make place for additional residents in some circumstances. Despite the fact that the process takes a lot of money, effort and planning, it also has a lot of advantages. The security, attractiveness, and comfort of your home can all be improved by renovating it. This is especially true in the case of old houses. Are you unsure whether or not your home needs renovation? I have written in this article a few signs that you can consider before you decide to renovate your home. 

THE ROOF HAS A LEAK 

When water starts flowing on the ceiling or walls, you know you have a leaking roof. Your roofing system may begin to leak for one of two reasons. It could happen if the roofing installer and service you hired did a sloppy job, or if your house’s roofing system is already old and decaying. Whatever the case may be, your roof needs immediate repair and improvement. Roof leaks should be addressed as soon as possible, regardless of how minor they are, as they may escalate to a larger problem. Roof leaks can cause a variety of problems. Corrosion, mold growth, and frame and ceiling damage are just a few of them.

THE PAINT HAS BECOME DULL AND IS BEGINNING TO CHIP 

When the inside or exterior paint starts flaking off, it’s one of the most obvious signs that your home needs to be renovated. It also means that outside influences like dirt and pollutants are already having a negative impact on your property. This incident also indicates that you should think about upgrading and cleaning your property. For people working at home, a dull and messy paint is awful to the eyes and can lessen productivity. Organize your home office whether you’re working from your dining room table or a dedicated office space because it is critical for both productivity and sanity. Refresh the paint in your home’s most vulnerable areas, such as the bathrooms, kitchen, and baseboards. Newly painted walls can give your home a fresh look and make it appear new. A bright white layer will do wonders for updating the look of your home if the whitewash is starting to yellow.

IT’S EITHER TOO CROWDED OR TOO EMPTY IN YOUR HOME 

Have you ever felt strange and uneasy as soon as you walked into your home? This is common if your home is overcrowded or has a lot of open space. The longer you stay in a house, the more filthy it becomes. Remodeling your home is a quick fix for this. All you have to do is reorganize your belongings within your house to enhance your home. By doing so, you are altering the appearance and feel of your home, giving you a sense of freshness.

THE WALLS BEGIN TO SHOW SIGNS OF DETERIORATION 

The first clue that your home needs remodeling is the appearance of cracks in the walls. Cracks might form on the walls or in the foundation. It could be the result of a little imperfection and not cause for alarm. Horizontal fractures, separation cracks, and gaping cracks, on the other hand, warrant special care. As a result, have it properly examined by a specialist. Severe foundation cracks have been discovered. To address the underlying issues and assure safety, the house must be renovated. Examine the areas near the breaks to determine the severity of the cracks.

WHEN TERMITES BEGIN TO WREAK HAVOC ON YOUR HOME 

The presence of bugs and insects within your home indicates that you have used low-cost materials. When termites infest your home, you must immediately rebuild the interiors to eliminate the pests and prevent them from spreading.

IT’S TIME TO REPLACE YOUR FLOOR 

Whether your floors are tiled, wooden, or carpeted, giving them some time and attention can dramatically boost the value of your property. Individual tiles in the bathroom and kitchen may begin to detach, so keep an eye out for lifting symptoms. Detached tiles and boards are not only ugly, but they can also be a trip hazard. Carpeted flooring has a 10-year life expectancy, although this will be reduced if you have indoor pets. Wooden floors are a long-lasting and sturdy flooring option, but they are also the most expensive and are prone to deteriorate over time. The good news is that rotting wood planks may be repaired without entirely replacing the flooring, as long as you act quickly before the rot spreads.

YOUR BATHROOM AND KITCHEN APPEAR TO BE OUTDATED 

You’ve probably heard that if you want to add value to your home, the kitchen and bathroom should be the major focus and even in these functional areas, the aesthetics take precedence. Adding new quartz worktops, gleaming fixtures by a great plumbing service and having a set of new sinks could make these rooms look more modern, but if you’re looking for a complete makeover, starting from the ground up is a fantastic strategy.

A remodeling and even unexpected home renovations is a major project but if you have a solid purpose for doing it, you’ll probably find it rewarding in the end. Small changes can make a significant difference, so whether you’re renovating for lower energy bills or more room, make sure the end result is healthier for you and your family.

Guest Contributor: Kat Sarmiento

10 TIPS ON HOW TO STAY WARM THIS WINTER WITHOUT SPENDING A FORTUNE

Cooler temperatures are rapidly approaching and if you, like me, have huddled down next to the heater in the evenings, simultaneously bemoaning and dreading the impending heat bills, you’re not alone. Here are 10 simple tips on how you can stay warm this winter, without spending a fortune. 

  1. Insulate your house. Perhaps your house is older and in the middle of the winter, you notice lots of icicles hanging off your gutters. Your house is leaking heat and therefore, you’re wasting money. Spend the time before the winter really starts by properly insulating your house and especially around your windows. This may be as simple as caulking around the windows, but it can make a lot of difference, and save you money in the long run. 
  2. Buy a heat pump. Not only will it work during the summer to keep you cool, but it will reverse during the winter to help you stay warm. They’re efficient and economizing, and use less energy than regular heaters. 
  3. Reverse fan direction. During the summer you want your fan to be pushing air down so the circulation is increased. But in the winter, you want the cold air pulled up and the warmer air pushed down. Consult your owners manual to make sure you have the fan settings right. 
  4. Hot water bottle. This is a favorite trick of mine. Hot water bottles are cheap, long lasting, and retain heat for hours. You could cozy up with one on the couch while another one is heating the foot of your bed. Buy good quality bottles and accessorize them with padded exteriors that help retain the warmth and prevent you from burning yourself if the water is extra hot. 
  5. Embrace the sunshine. Don’t keep your blinds pulled during the winter. Let the sun shine in and use the natural warmth to help heat your house. It can make such a difference and that combined with better insulation allows your house to warm up and stay warm through the day. 
  6. Drink hot beverages. During the warm summer months, you probably swap your coffee for an iced one, but as the temperatures cool, you probably will want to swap back to a hot cup. Coffee, tea, and cocoa all are warming drinks that aren’t very expensive, especially if you make them yourself, and can help you stay warm during the cool winter months. 
  7. Bundle up. Break out those woolen sweaters and socks because bundling up is one of the best ways to stay warm during the winter months. If you’re looking to invest in a warmer wardrobe, buy natural fabrics, such as wool or cotton, that last longer than man-made ones and will naturally biodegrade once they’re no longer wearable. Wool especially is fantastic in the winter because it helps regulate the body temperature. Furthermore, wool fibers last longer than cotton and can be bent hundreds of times more before they wear out. There is a reason our ancestors wore wool, and we should too. 
  8. Invest in a wood stove. Using a woodstove can be an investment, or it can be a much cheaper and more efficient way to heat your house, depending on your circumstances. If you live in an area where wood is cheap and you don’t mind the extra work, using a wood stove as supplemental heating can be a great way to save money on conventional modes of heating. 
  9. Open your oven. Are you a baker or do you use your oven often? If so, once you’re done cooking, crack it open so the excess heat leaks out and helps warm up your house. It will help keep your kitchen toasty warm and comfortable and help save money. With this in mind, bake away!
  10. Turn up your heat in the morning. Keeping your house between 60*-67 at night is recommended anyhow for optimal sleep. If you keep your house cool but not chilly, you’ll be cool in the morning, so turn the heat on then and warm up your house during the day. At night, the temperature will cool down again but since your house will be set at a cooler temperature, it will cost you less overall. Essentially, you’re only using your heaters when you’re up and around there house needing it. 

In conclusion, there are lots of ways you can save money this winter by preparing ahead of time to save money on your heating. Of course, this list does not take into account a heater that is maybe broken or not working properly. If that describes your heater, definitely have it fixed before the chill of winter sets in so you stay warm and comfortable all winter long.

Guest Contributor: Allie Shivers

4 BEDROOM COLOR SCHEMES TO INSPIRE YOUR SPACE

You probably know that colors affect a person’s mood. That’s why it’s very important to choose the colors right, especially when it comes to your bedroom. 

Needless to say, you want to achieve a comfortable, calming, and relaxing space that will help you achieve a good night’s sleep.

Whether you’re renovating your bedroom or building a new one, below are some of the best color schemes for your inspiration:

Black + White + Brass

There’s nothing as timeless as black and white. 

While some people will think this color scheme is quite too heavy especially if the dominant hue is black, these colors are actually remarkably serene when used together.

You can create an entirely different mood depending on how you style your room. 

If you want to further elevate the look of your room, consider incorporating brass. It makes the space inviting, elegant, and dazzling.

Bright Blue + Gray

Blue promotes calmness and relaxation, which makes it perfect for a bedroom. Meanwhile, gray is a neutral color so it goes nicely with other hues and accents.

Blue + gray is a great option since you don’t want your room to be overly colorful or vibrant.

Natural wood details make a wonderful accent for this color scheme.

Charcoal + Gold

If you love gold and would want to incorporate it in your room, go ahead. Just make sure to pair it with warm, deep-tone neutrals, such as charcoal gray.

This color combination helps you achieve an elegant and relaxing ambiance. When working on this palette, enough lighting is important so your bedroom won’t look too dark. 

This color scheme works well with well-lit rooms or those with larger windows that allow natural light in.

Aside from charcoal gray, gold also works with chocolate brown, rich olive green, and beige.

Navy + White + Yellow

Navy and white go beautifully together and a punch of yellow makes this color scheme much more exciting. 

You can set the tone with a deep hue accent wall or some navy blue furniture, decor, or cabinetry and a backdrop of crisp, white walls.

You can use yellow for the curtains or your mattress.

For an even more dynamic color scheme, you can pair navy blue with mustard yellow or soft butter yellow. Such color offers warmth and brilliance that stands out against the coolness of the navy color.

Emerald + Mint + White

Emerald adds cheerful energy and freshness to any room. It’s a little too bright for a bedroom but it makes a beautiful option when paired with a complementary shade of mint. To tone down the vibrance of emerald, make sure to incorporate white in your color palette.

For example, you can paint the walls white and add touches of emerald wall decals or cabinetry. Then, you can choose mint green for the curtains and accessories.

Emerald also works amazing with neutral shades, particularly earth tones like gray, charcoal gray, and beige.

Factors To Consider When Choosing the Bedroom Colors

The above color schemes are just ideas. There are so many color combinations that are perfect for bedrooms. It can be a challenge deciding what colors to use for your room. To make the process easier, here are the most important factors to consider:

Start With a Mood Board

Every interior design starts with a mood board. 

A mood board lets you visualize your ideal bedroom and helps you organize your ideas for the style, mood, and colors of your dream room.

Your mood board should incorporate different elements, from the overall feel of your bedroom to the accessories, window treatments, and furniture pieces.

Don’t Forget About the Floor Color

Floor color is an important element to consider because it helps create a cohesive layout with your chosen color palette.

When choosing the color of your flooring, consider the mood you want to create, how much natural light you get, your room size, and your furniture’s color and finish.

Gray is the most popular flooring color because it’s the ultimate neutral, but you can always choose something else as long as it matches your interior design.

Pay attention to what carpets and rugs to use. Carpets should always be clean and fresh. If you can’t manage to wash your carpets deeply, there are lots of budget-friendly yet professional carpet cleaning services that will have you covered! Remember, carpet color should match your whole bedroom style. 

Consider the Orientation of Your Bedroom

Another important factor to consider when choosing paint colors is room orientation.

For example, a north-facing bedroom will have cooler light so it works well with warmer shades like pinks and yellows.

Meanwhile, a south-facing room is naturally bright so it can take cooler tones like blue or grey.

Make it Personal

Bedrooms are deeply personal spaces. Thus, you want to make sure it fits your lifestyle. If you’re a morning person, choose clean, light, and energizing paint colors.

If you’re an evening person, opt for dark, womb-like shades.

Conclusion

Creating a relaxing bedroom starts with choosing the right colors. Keep in mind that a color scheme doesn’t just involve the walls, but also the floors, accessories, and furnishings of your bedroom.

More importantly, it should reflect your personality and lifestyle.

Guest Contributor: Leila Amber

TOP KITCHEN REMODELLING TRENDS: MATERIALS AND FEATURES TO USE IN 2021

New year, new you, new kitchen. Now that 2021 is well under way and that you’re hard at work fulfilling your new year’s resolutions, the time has come to rejuvenate the most important room in your home and create the kitchen of your dreams. This is your opportunity to utilize your flair for remodelling and create something truly special, inspirational, and beautiful.

That said, remodelling a kitchen is not an easy task, and you need to know how to approach this project from an aesthetic and functional standpoint. So today, let’s bring form and function together and share with you the top materials and features you should have in your kitchen in 2021.

Use wood for a biophilic design

Wood is one of those materials that can never go out of style, and it can perfectly go in any kitchen design. Whether you’re going for a rustic look and feel or an up-scale vibe, you can work various colours and textures of wood into the cabinetry, the furniture and supporting elements like shelves, and more. 

That said, wood works best when introduced as a part of a biophilic design. This approach to interior design has become very popular nowadays, because it aims to create a relationship with nature in your home and create a more peaceful space. If you think that you need more nature in your life, then make sure to use wooden elements throughout the room. 

Emphasize the benchtop with Corian

The look and feel of your kitchen can oftentimes come down to your choice of benchtops and their style, so it’s important to focus on this crucial part of the remodel. For one, you need to choose the perfect benchtop materials that emphasize aesthetics while providing durability and functionality. One of the best choices out there right now is, of course, Corian.

This is a popular material that boasts high durability and typically comes with a ten-year warranty, which is why homeowners and interior designers love it. That said, it’s also important to note that Corian is both beautiful and functional because it’s non-porous, it doesn’t harbor bacteria, and it’s durable, but also comes in a variety of colours and boasts a sophisticated matte finish.

3.jpg

Make the appliances complement the style

When you’re remodelling your kitchen, you need to consider how the appliances will work with the overarching design while complementing the functionality of the space. This can be a tricky challenge, as you need to find the most efficient appliances that also come in a variety of design choices to suit your needs.

For one, it’s important to complement or contrast the finish on the benchtop and the cabinetry. You also want to choose the appliances you’ll actually use, and that fit into the overall design. Functionality is also important, and making sure you can cook a variety of dishes can be difficult if you’re strapped for space. A simple gas stove and a wok burner don’t take up much of your kitchen real estate but are compatible with a variety of styles – from something minimalist and sleek to rustic and exotic. 

In general, choose high-gloss appliances if you want to make certain areas pop, or go for a matte finish if you want that simple yet elegant look. Make sure to consider other colours than your typical white and black options, because nowadays appliances come in a variety of hues to complement the look of your kitchen.

1.jpg

Infuse various metals into the space

In order to give your kitchen a rich and luxurious look and feel, you might consider adding metals to your design. Metalling surfaces and features can make any kitchen beautiful and functional, so even if you’re going for eclectic or rustic, metallics can still make a big difference.

Consider brass tiles for the splashback that will act as a reflective surface and give the space a unique hue. You can also go with bronze faucets and exposed brass pipes to create a minimalist yet retro look, but remember to refrain from metallics on your appliances if you choose this approach, because the two tend to clash.

4.jpg

Finish the project with stone elements

Lastly, consider adding stone to your kitchen remodel. You can introduce stone for your countertops or your flooring, and both work great as durable and aesthetic materials. That said, keep in mind that granite countertops come with a hefty price tag because of the inherent durability and functionality of the material. Nevertheless, investing in stone is a good long-term decision, and the material comes in numerous styles and finishes to complement your new kitchen.

Wrapping up

In 2021, you want to make your kitchen more functional and beautiful than ever before. Use these tips to make the best decision and build the kitchen on your dreams.

About the author: Mike Johnston is an avid blogging enthusiast and experienced freelance writer. He’s a regular contributor to the “Smooth Decorator” blog and numerous other online publications where he writes about real estate, construction, home improvement, and interior design.

WHICH KITCHEN CABINETS MATCH YOUR TILES?

One of the hurdles when it comes to decorating a kitchen is achieving a cohesive look. The kitchen just has so many elements — cabinets and cupboards everywhere, the floor, and an island table in the center — so if you choose a lot of colors and styles for them, the whole room will simply look chaotic. 

And who wants to be in a kitchen that isn’t aesthetically pleasing? No one, that’s who.

Fortunately, there’s a way to pull off a clean and cohesive design of your kitchen. And that is to match the kitchen cabinets with the floor tiles. 

WHAT DOES IT MEAN TO MATCH KITCHEN CABINETS WITH FLOOR TILES?

unnamed.jpg

Before you get the wrong idea, you should know first that when we say, “Match the kitchen cabinets with the floor tiles,” we don’t necessarily mean that both of them share the same style or color. 

Rather, what we mean is that the styles of the kitchen cabinets and the floor styles should contrast and complement each other very well. 

Sure, it’s totally okay to choose only one color or style for all of your kitchen elements. But the overall look might end up being dull and flat, and you don’t want that. You want the kitchen elements to pop every time you look over the room, and you also want them to look harmonious with each other so that your kitchen will look clean and elegant. 

The best way to achieve that goal is to maintain a contrast between the floor tiles and the cabinets in the kitchen. This contrast should highlight their differences — but also complement each other well.

THE PERFECT COMBINATIONS OF KITCHEN CABINETS AND FLOOR STYLES

OAK CABINETS AND HARDWOOD FLOORS

Wood is a design element that’s just perfect for the kitchen. After all, a lot of tools in the kitchen are made 

up of wood, and the impact of a wood-inspired design is rustic and homey. Because of this, wood is one of the most popular design choices for kitchen floor and kitchen cabinets. 

Pulling off an all-wood look for your kitchen can be tricky, simply because it might look too boring. The perfect solution to this is to use two different kinds of wood designs for the kitchen and cabinets. 

Oak cabinets and hardwood floors seem like a good combination, especially if the floor has a light color. This is because a wooden floor with a light color adds warm tones to the room and reflects the light. 

LIGHT CABINETS AND DARK FLOORS

Another way of matching cabinets and floors is to coordinate their colors. Usually, it’s the floor tiles that need to balance the colors of all the elements in the kitchen, so if you have cabinets with a light color, choose a dark color for the floor tiles — and vice versa. 

Additionally, if you want your kitchen to have multiple shades of one color, you should select the darkest shade for the cabinets. 

TRADITIONAL CABINETS AND PATTERNED FLOORS

A patterned design makes for a more attractive kitchen element, but unfortunately, if not used properly, it can ruin your whole kitchen look. 

Basically, patterned cabinets and patterned floor tiles don’t mix well together. They will just make the kitchen look busy and hectic, instead of refined and elegant. As a result, you need to have a non-patterned element if you want to add a patterned one. 

For example, contemporary cabinets clash with patterned floors, but traditional cabinets don’t. So, if your floor tiles have accents and patterns on them, pairing them with traditional cabinets will make for a more harmonious kitchen look. 

CONCLUSION

Decorating your kitchen may seem like a fun idea at first, but trying to match the floor with the cabinets is a lot more challenging than you think. 

Luckily, you can mix various design styles for the cabinets and floor tiles that will result in a harmonious and elegant look. Even better, you can find the perfect kitchen cabinets for your floor tiles everywhere, for instance in Cabinet City – check out Cabinet City here.

So, choose the cabinet-and-floor combination from the ones mentioned above and transform your kitchen to your heart’s desire.

Guest Contributor: Ashley Lipma