As the air turns crisp and the leaves start to change, there’s no better time to embrace the beauty of fall by sprucing up your porch. Whether you’re welcoming guests or just want to enjoy a cozy space for yourself, fall porch decor can create a warm, inviting atmosphere. Here’s how you can transform your porch into an autumn haven with some easy yet impactful ideas.
1. Pumpkins and Gourds: The Essentials
No fall porch decor is complete without pumpkins! A variety of pumpkins and gourds in different sizes, shapes, and colors can bring a touch of nature right to your doorstep. Whether you choose classic orange or opt for trendy white or pastel pumpkins, they provide a simple yet iconic seasonal look.
Tip: Arrange them in clusters on steps or along the porch railing for a charming, effortless effect. For an added touch, mix in decorative elements like baskets or crates to display them at varying heights.
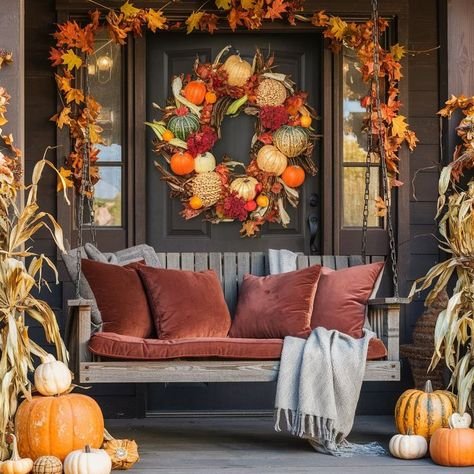
2. Cozy Seating and Textures
Cool autumn evenings are perfect for sitting outside with a warm drink. If your porch has room, consider adding a couple of comfortable chairs, a bench, or a porch swing. Layer these with plush cushions and throws in warm tones like burnt orange, deep burgundy, and mustard yellow.
Texture is key—think knitted blankets, wool pillows, or faux fur throws to create a cozy vibe. Adding textiles softens the space and makes it feel inviting.

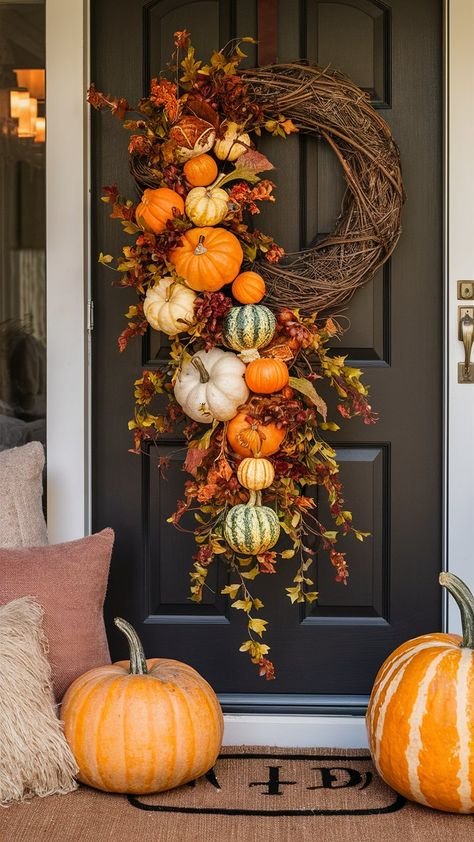
3. Seasonal Wreaths
A wreath is a simple but stunning way to make your front door pop with fall charm. Choose one with a mix of autumn leaves, pinecones, berries, or even small pumpkins. If you’re feeling crafty, you can even create your own using items found in nature, like branches and dried flowers.
For a more elegant look, consider wreaths made from eucalyptus and cotton stems, blending rustic and chic elements.

4. Lanterns and Lighting
As the days get shorter, lighting plays an important role in making your porch feel welcoming. Lanterns filled with LED candles or string lights can add a magical glow during the evening hours.
Pro Tip: Choose lanterns in rustic finishes like copper, bronze, or black to complement fall’s earthy tones. Place them around seating areas or line the porch steps for a soft, ambient light.

5. Mums and Fall Florals
Mums (chrysanthemums) are a fall favorite for porch decor. These hardy, colorful flowers bloom in deep, vibrant shades of red, orange, and yellow, perfect for the autumn season. Place them in rustic planters, such as galvanized buckets or wooden crates, to enhance their seasonal appeal.
For variety, mix mums with other fall plants like ornamental cabbage, kale, or trailing ivy. These plants thrive in cooler temperatures and add beautiful texture to your display.

6. Rustic Accents
Rustic touches bring a timeless, cozy feel to fall decor. Vintage items like an old wooden ladder, a weathered wheelbarrow, or antique metal watering cans can add personality and charm to your porch. You can use these as decor pieces or as part of larger displays to hold flowers or pumpkins.
Additionally, consider adding a burlap runner to a porch table or hanging a wooden “Welcome” sign. These rustic accents help tie your fall theme together while adding warmth and character to the space.
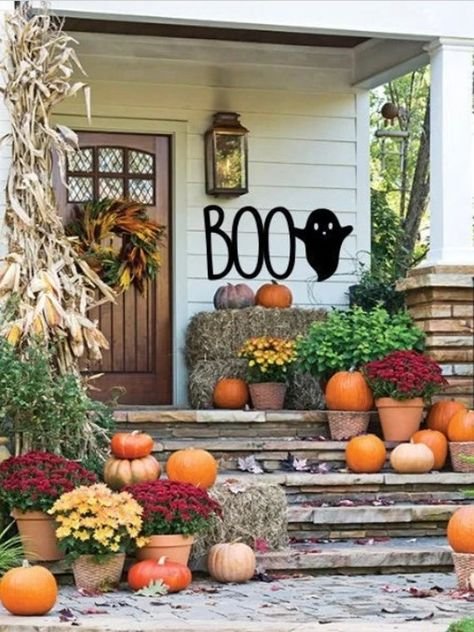
7. Hay Bales and Cornstalks
For a true farm-to-porch vibe, incorporate hay bales and cornstalks. Hay bales are perfect for stacking pumpkins or creating height in your design, while cornstalks can be tied to porch posts or grouped together in the corners for a dramatic fall statement.
These natural elements evoke a harvest feel and bring a touch of country charm to any porch.
Final Thoughts
Fall porch decor is all about creating a cozy, welcoming space that reflects the beauty of the season. Whether you go all out with pumpkins and hay bales or keep it simple with a seasonal wreath and a few lanterns, the key is to mix natural elements, warm colors, and cozy textures.
With these tips, you’ll be ready to enjoy your porch as the perfect place to sip a cup of hot cider and watch the leaves fall. Happy decorating!