5 CHANGES YOU CAN DO TO MAKE YOUR HOME MORE ECO-FRIENDLY TODAY

It’s more important now than ever for people to do all that they can to save the environment. From years of carelessness, our environment is suffering irreversible damages; however, it’s not too late to stop these damages before they worsen. If every person made small efforts to save the environment, it’s likely that the ecosystem would see outstanding benefits, preserving the environment and the organisms that inhabit it. The best ways for people to make small efforts to save the environment can be done in the comfort of their own homes. Your home is one of the places that cause vast environmental damage without you even realizing it. This post will detail 5 ways to make your home an eco- friendly place so that you can do your part in saving the environment.

HOW CAN I MAKE MY HOME MORE ECO-FRIENDLY?

Making your home eco-friendly doesn’t have to be complicated or expensive. With minimal effort, you can make a large impact on the ecosystem. Here are 5 ways to make your home more environmentally savvy. 

  • UTILIZE SOLAR ENERGY

Solar energy is an outstanding way to make your home more eco-friendly. The most popular form of solar energy is solar panels. Solar panels absorb sunlight and convert it into electricity that can be used to power your entire home. A specialist from a company that sells solar panels in Cherry Hill pointed out that solar panels can save homeowners thousands of dollars in electricity bills per year as solar panels are a sustainable energy source. 

Solar panels can be a bit costly, and though they are an investment worth making, if you can’t afford solar panels, you should consider investing in solar lighting fixtures. These lighting fixtures work the same way, storing sunlight and converting it into electricity in order to provide light to your home. 

  • INSTALL A SMART THERMOSTAT

Smart thermostats are an important energy-saving invention to incorporate into your home. Smart thermostats work the same way as regular thermostats, however, you will now have the option to adjust them from an app on your mobile device. Smart thermostats allow you to turn your heating and cooling systems down or off when you leave the house, then back on when you are on your way home. 

Smart thermostats will save you energy and money because they no longer need to be left on when you aren’t home. You can control the temperature of your home from remote locations, allowing you to still come home to a comfortable temperature without leaving your heating or cooling system on all day. 

  • USE LED LIGHTING

Lighting fixtures use copious amounts of energy which is not only harmful to the environment, they can also end up costing you hundreds of dollars in electricity bills each month. To conserve energy when it comes to lighting fixtures, consider installing LED light bulbs. LED light bulbs use only a fraction of the electricity that standard light bulbs do and have a much longer lifespan. In addition to their minimal electricity use, LED bulbs will create less waste because of how infrequently they need to be replaced. And like smart thermostats and solar energy, LED bulbs will ultimately save you money; therefore benefiting both you and the environment. 

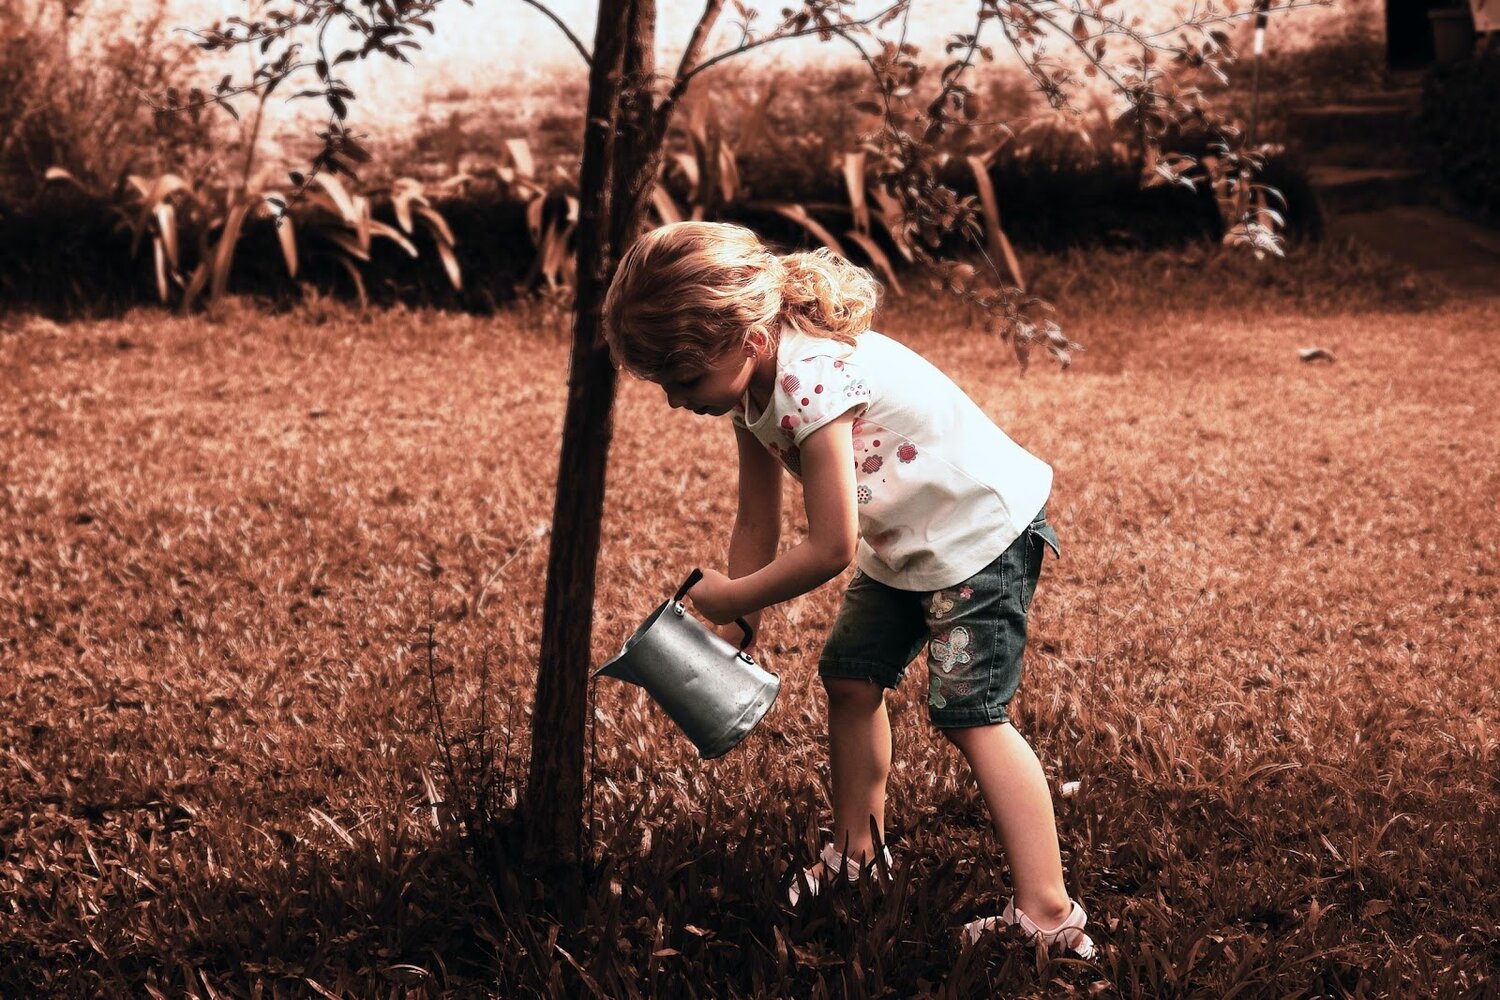
  • CREATE A COMPOST PILE

Compost piles are a free and easy way to give back to the environment. Compost piles are created to be used as natural soil in gardens in order to help plants grow. To make a compost pile, instead of disposing of food and waste that is organic and natural, such as fruits and vegetables, put it in a pile outside and let it decompose. After it decomposes, you will be able to use it as soil to give your plants top-notch nutrients.

You will be providing the ecosystem with natural resources to help the organisms within it thrive. And the best part? Compost piles will not cost you a dime; consider creating one in a corner of your yard or in a garbage can on your deck. Be sure not to add processed foods or dairy products to your pile as these foods will ruin it and cause it to smell.

  • REPURPOSE OLD FURNITURE

Repurposing old furniture is a simple, easy, and fun way to make your home eco-friendly. Instead of buying new furniture, consider repurposing your old furniture. Repurposing furniture will allow you to have the exact piece of furniture you have been looking for and will allow you to reduce waste. Try making this environmentally savvy task a family affair; you can repaint, refinish, or repair pieces of furniture with your significant other and/or with your children.

If you don’t have any furniture around the house that you can repair, consider buying furniture from a second-hand shop, or buying used furniture from online and repurposing that. You will be doing your part to save the environment by reducing somebody else’s waste. 

YOUR SMALL EFFORTS WILL PLAY A PART IN YOUR FUTURE

The small efforts you make at home now will have a huge impact on the future of the environment. It’s important for all humans to do their part to save the environment before it’s too late. By doing the small efforts such as the ones listed above, a bright future for the ecosystem is possible. Consider making these small changes to your home today, you won’t regret it, in fact, you will likely benefit too. Make some changes today. 

About the Author

Jennifer Bell is a freelance writer that works with All American Plumbing, a plumber in Sicklerville. Jennifer is also a blogger, dog-enthusiast and avid beachgoer operating out of Southern New Jersey

Guest Contributor: Jennifer Bell

5 SURPRISING REASONS TO REGULARLY WASH YOUR WINDOWS

Windows play an integral role in not only the value of your home, but to how you interact with the world around you. Windows let in the sunlight, and allow you to look out at your surroundings. 

But dirty windows not only look unsightly, but they can actually cause lasting damage to your home and health. So while cleaning your windows does wonders for making your home look its sparkling best, regularly washed windows also come with the following surprising benefits.  

CLEAN WINDOWS IMPROVE YOUR CURB APPEAL

If your windows are dirty, they’re one of the first things prospective home buyers will notice about your house. That’s not a good thing. If you’re concerned about maintaining your home’s value, “curb appeal”, or how your home looks to an outside observer, is a hugely important factor. 

Just as an unkempt lawn might lead people to undervalue your home, dirty windows similarly stop your home from showing its best version. But if your windows are cleaned with regularity, your home can look bright and welcoming to everyone stopping by.  

THEY KEEP YOUR HOME WARM

You might be wondering, how can clean windows help warm up your house? During cold months, though it might not feel like it, sunshine coming through your windows naturally heats up your home’s interior, lowering heating bills and bringing with it a natural warmth.

The dirt and grime from dirty windows can block out parts of your window, allowing less sunlight to enter, and thus robbing you of that natural heating. Keeping your windows cleans ensures that you get all the natural sunlight you can, which is great news for your thermostat and your wallet. 

CLEAN WINDOWS MEAN CLEAN AIR

While you tend to assume that you need to open your windows to bring fresh air into your home, a clean window, while closed, can actually help improve your air quality. When dirt builds up on windows, and sills, they often work their way into your home, lowering your air quality.

Even worse, dirt build up  occasionally can bring in mold, which can cause a host of health problems. By cleaning your windows regularly, you keep these bad particles out, and keep clean air in. 

REGULARLY WASHING YOUR WINDOWS INCREASES WINDOW LIFE

Repairing windows that have been worn down or damaged can be an unfortunate and wanted expense. Thankfully, you can keep your windows for longer by regularly washing them. 

Dirty windows build up grime and dirt that can penetrate the glass, which can stain and weaken your window and cause permanent damage. Even when you can’t visibly see debris on your window, consistently washing your windows clears the glass of microscopic imperfections that can lower the lifespan of your windows. 

By just washing your windows regularly, you can keep your windows shining for years! 

Guest Contributor: Jeff Good

4 LIGHTING TRICKS TO BRIGHTEN A DARK HOME

Does your house feel dark like a cave? If you want to brighten it, the following are some lighting tricks to brighten a dark house. These are a combination of advanced ideas and beginner tips. They will ensure you maximize what you have while bringing more light into your home. 

4 LIGHTING TRICKS TO BRIGHTEN A DARK HOME

There are four sure ways you can use to brighten a dark home. They do not require a big budget, and you can work with what you have. Read on to make your home brighter today!

1. LIGHT YOUR WALLS

Lights on walls will keep your edges bright. If you have lots of ceiling or pot lights, try installing shades that aim both down and up. LED Light Ideas recommends using a pair of sconces to make a room twice as bright, as long as the sconces have been placed strategically. 

When adding lights to a ceiling (especially pot lights), consider placing a few closer to the walls. The move will ensure the light is cast down onto the walls. It is a great way to highlight details such as brick or traditional cabinetry.

If you are looking for a sophisticated approach, make a focal point of a loved art piece by using a picture light. Table lamps are also a good option for spreading lights across the walls. Go for classic drum shades with openings at the bottom and top for the best effect. 

908de53ba9fdc79fcc2dfb98371295f0.jpg

2. USE MIRRORS

It is common for people to use mirrors to brighten a dark house. The idea is that mirrors will reflect light around the room. To get the best results, make sure your ceilings and walls are painted white. 

White bounces light, especially LED light. This means it will send more light around a house. Since white is a non-hue color, it doesn’t absorb any color. As such, it is the best way to scatter light in a dark house. 

3. USE BLUE COLORS

Compared to yellow-toned light bulbs, natural light is cool. Adding blue is recommended as it offers a crispness that is a reminder of the sky. Additionally, cool blue does not clash easily. It can work with any accent color you would like to add to the mix as part of your interior decoration. 

4. BALANCE THINGS OUT

Ultimately, a natural interplay between shadow and light is crucial for implementing lighting tricks to brighten a dark house. The lowlights and highlights from the lights and shadows are pleasing to the eye. 

No one can say they like the inside of a super-bright store that has perfectly even lighting but uses harsh fluorescents. At the same time, the right LED lights will ensure you do not spend excess money on power bills

You can add lights to brighten the dark corners of your house. However, be a bit subtle and avoid overdoing it. A few shadows are important. They give your home a sense of life and means your space has depth. This is what makes your house feel like a home.

CONCLUSION

If you are thinking of making your house brighter, there are a plethora of options you can use. Take note, not every guide you get will give you the results you want. You need to take into consideration the interior of your home before you make any decision. 

You can use the four tips mentioned above. However, make sure you balance them out. Use each tip where appropriate. For some people, using all four will work in their house. For others, it will not. Find a balance for using the above lighting tricks to brighten a dark house to make sure you get the best lighting for your home. 

Guest Contributor: Allen Michael

BATHROOM UPGRADES THAT SAVE WATER

Bathrooms use a lot of water. In fact, this is the room that uses most of the water in your home. The toilet accounts for 26.7% of all water usage, on average. The shower adds 16.8% to that figure. The interesting part of this is, while you can’t avoid using water, there are ways to upgrade almost every fixture you have to reduce water usage.

Below, we’ll cover the bathroom upgrades that will go easy on your water bills and the environment — while turning your bathroom into a more beautiful, contemporary space.

Choose a Low-Flow Toilet

Modern toilets use a lot less water than older ones while providing plenty of flushing power. In 1992, a U.S. law was passed that mandated all new toilets sold within the U.S. to use 1.6 gallons of water per flush or less. Contrast that with older toilets, which can require twice or even four times as much water — 3.5 to 7 gallons of water per flush. You can see where replacing those older toilets can save a lot of money while upgrading the look of your bathroom.

Replace Your Showerhead With a Low-Flow Showerhead

This is an inexpensive upgrade that you can install — and it could save you many times over on your water bill. On average, if you took seven-minute showers 25 times per month, a regular showerhead flowing at 2.5 gallons per minute would use 440 gallons of water. Replace it with a low-flow model that uses about 1.5 gallons per minute? That number drops to 262 gallons per month, which saves you roughly 2,000 gallons each year.

Opt for a Low-Flow Faucet, Too

Similarly to showerheads, you can install low-flow faucets to help rein in water usage. Though the bathroom faucet isn’t among the largest water users in the bathroom, this still chalks up to big savings. Standard faucets use about 2.2 gallons per minute, but if you get a water-saving faucet, it could consume between 0.8 and 1.5 gallons per minute.

Rethink the Bathtub

Hot baths are undeniably a relaxing luxury — but they also use a lot of water. The average bathtub will need between 25 and 50 gallons for a fill — whereas a 10-minute shower with a water-saving showerhead will use roughly 25 gallons of water. The first thing that you can do where the bathtub is concerned is to treat baths as a luxury. It’s perfectly fine to indulge once in a while, but daily baths can drive up your water usage.

Another great way to reduce water usage during baths is to replace your tub with a water-saving bathtub. These are quite unique in that they’re designed to hold less water than a traditional bath while giving you the same comfort. Essentially, they’re designed to fit the contours of the human body, which allows you to soak while using far less water.

Combine New Fixtures With Good Habits

The upgrades mentioned above will save a lot of water yearly, making them well worth the investment. They’ll enhance the look of your bathroom, too, replacing old and worn fixtures with new, stylish ones. 

Past that, you can save even more water by combining your updated fixtures with good habits:

  • Make sure to shut the bathroom faucet off when you’re not actively using the water. In other words, don’t let the water just run while brushing your teeth.
  • Minimize shower time and treat baths as a luxury to ease water usage.
  • Regularly check your plumbing. Leaks account for up to 13.7% of water usage within the home. If your toilet keeps running, faucets drip or pipes seep, that is water being wasted. It may not seem like much, but it adds up over the course of a year. Worse, plumbing leaks could cost you even more if they go unnoticed long enough to cause rot or some other kind of damage to your home.

Saving water means investing wisely in fixtures. Nowhere is this more important than in the bathroom, which is the biggest water consumer in any home. Consider upgrades to bring your water bills down and to give your bathroom a much-needed update.

Author bio: Erica Garland is Content Marketing Manager at Modern Bathroom and has 15-plus years of experience in the bathroom renovation industry. Modern Bathroom sells a variety of products you would need for any bathroom renovation project. With such a large selection of vanities, faucets, sinks, toilets and showers, Modern Bathroom is sure to have the perfect piece to give your bathroom an updated look.

WATER-WISE GARDENING ADVICE: HOW TO SAVE WATER IN YOUR YARD AND GARDEN

Countries around the world have seen persistent drought-spells and dam reservoirs hitting their lowest points in decades, and in some cases, water-restrictions have become a common occurrence. In times like these, it’s crucial for everyone to re-evaluate their water priorities and reconsider ways of protecting their gardens as they are the ones taking the hardest hit. 

Reducing water usage in gardens doesn’t necessarily mean letting your plants wither and die. It simply means being water-wise and resourceful which may require more work and preparation, but such an investment will pay off by helping both the environment and your pocket. 

Here are several water-saving tips to help your garden and yard stay healthy.

PREPARE YOUR SOIL

The key to maintaining a water-efficient garden lies in understanding the soil, good planning and its preparation. Each type of soil is different and can be improved in many ways. Compost helps water retention by adding nutrients needed for plants to grow better and stronger. 

Good-quality organic matter will improve the structure of your soil and with mulching, the flowerbeds and the area around your trees and shrubs will also prevent water evaporation during dry spells. You can also use water crystals for the same purpose and with the addition of water-retentive granules to your compost, even more moisture will stay locked in the soil. 

When it comes to your lawn, there’s no reason to panic if you notice brown or yellow spots during dry periods. When the rain returns, it will quickly recover. However, it helps to be water-savvy with your irrigation, by mowing the lawn a bit higher and giving it deep watering just once a week to boost the root system.

PICK THE RIGHT PLANTS

For a wonderful green garden that requires no excess amount of watering, after proper soil treatment, your next step is selecting the right plants that are low on water needs. Choose native varieties that can withstand dry spells and lots of sun, and add trees and tall plants for cooling shade. There are lots of plants that have evolved in dryer climates and need very little water to survive, such as lavender, verbena, mimosa and palm trees. 

WATER YOUR GARDEN AT THE RIGHT TIME

Many homeowners over-water their gardens which is not only wasteful but it also demands more work. You can easily prevent this by checking your soil at spade depth – if it’s moist, leave it be. It also depends on your soil type. If it’s clay, it may seem damp whether it’s been irrigated or not, and sandy soil can seem dry even if it has been watered. In these situations, inspect your plants for signs of water stress. If you notice leaves changing color or position, it may signify water shortage. 

USE THE RIGHT AMOUNT OF WATER

Using the right amount of water depends on your soil type. Heavy soils need less watering than light sandy ones whereas clay-based soils need lots of water but can be watered less often. The common rule for plants to stay healthy and keep growing is giving it up to 24 liters per square meter once a week.

CHOOSE THE BEST WATERING TECHNIQUES

The right watering technique will also help you maintain your garden well. You can opt for sprinklers for your lawn and unplanted areas as they have great coverage. To target specific sections of your garden, it’s best to use watering cans and hoses. They might be more labor-intensive, but they’re also very precise.

Seep hoses allow water to slowly seep through holes in the hose and being buried under soil and mulch, less water will evaporate. An automated irrigation system is the most expensive option, but it’s also one of the most effective and water-saving options as it limits the amount of water used by letting it drip slowly and only when you program it to do so.

COLLECT RAINWATER AND REUSE OLD WATER

Even in the dryer parts of the country, it’s possible to collect large amounts of rainwater from your house roof. It’s not easy to store large amounts, but if every home in the country managed to collect around 160 liters that would give 4 billion liters of free water that can be used for garden watering.

Another way to be water-savvy is to use greywater (from showers, washing up and washing machines). By way of diverters, this greywater can be used efficiently in your garden. Household soaps aren’t harmful to plants, but do avoid using water that contains bleach, dishwasher salt or any strong chemicals.

Maintaining a lush and healthy garden in hot climates can be challenging, but with these tips, it’s possible to grow a beautiful garden you can truly be proud of and enjoy year-round!

Guest Contributor: Kurtis Wilcox

STEPS YOU NEED TO TAKE TO RECOVER FROM FIRE DAMAGE IN YOUR HOME

Seeing your home on fire can’t be easy.

Even if only a portion of it burns down, it’s still painful to witness something you worked so hard to acquire or build go up in flames.

Then again, there isn’t much you can do while the fire is still ongoing. By the time firefighters declare the fire under control, your home will have already sustained fire damage.

What’s critical is what you do once the fire is out.

You will need to take steps toward fire damage restoration, among other things, and ensure that you and your family will recover from the disaster just fine.

Secure Your Family and Find A Place To Stay

Whether it’s a fire or some other disaster that strikes your home, your top priority is to ensure your loved ones’ safety. Make sure that everyone is safe, then find a place to stay not only for the night but for some time, depending on the degree of fire damage to your home.

Whether you decide to stay at a hotel or with relatives or friends, you will need to check your home insurance policy if you have one. A standard homeowners insurance policy has an ALE or additional living expenses provision, which will pay for your meals, hotel bills, and other expenses you incur while your home is under repair.

Call Your Insurance Provider

Another important thing you must do after—or even during—a fire in your home is to place a call to your insurer. Since fire is a covered peril in a standard home insurance policy, it’s best to give your provider a heads up that you will be filing a claim so the entire process can start as soon as possible.

With your home insurance coverage, you will have the money not only to pay for the cost of repairing the damaged parts of your home but also to replace the personal belongings you lost in the fire. Furniture, appliances, clothing, computers, and other possessions are usually covered by home insurance.  

Wait Until It’s Safe To Enter Your Home

Naturally, you would want to enter your home as soon as possible, but you can’t do that right away, given that it’s still dangerous to do so. Aside from the heat, soot, and fumes, your home’s structural integrity may have been compromised by the blaze.

Wait until the proper authorities declare the area safe before entering your home to try to salvage some of your belongings or assess the extent of the fire damage.

Ask For Police Assistance In Securing Your Home

If your house was only partially burned, that means some of your belongings could still be intact.

With you staying elsewhere for the next few days at the very least, your home could become a very attractive target for burglars or looters.

You also run the risk of coming home to the sight of squatters in your living room, drawn by your conspicuous absence from the premises.

Contact the police, who can lend some assistance in securing your home for the days that you’re not there.

Document All Fire Damage

When it’s safe to enter your home, document all the fire damage. Proper documentation is extremely important for insurance purposes, so take photos and videos of charred walls, collapsed ceilings, and any other evidence of the fire.

Call Your Utility Providers

In all likelihood, you never had the time or opportunity to switch your gas or electrical mains off at the onset of the fire that hit your home.

In any case, firefighters will be doing that as they put out the fire, you still need to call your utility providers and inform them of what happened.

Wait for word from the fire department if it’s safe to turn on the gas and electricity. Under no circumstances should you switch them on without their say-so.

Contact A Fire Damage Restoration Company

While you can always personally take on the gargantuan tasks of cleaning up the fire damage to your home and restoring it to the way it was before the fire hit, it would still be best to leave them all in the hands of professional fire damage restoration specialists.

A fire damage restoration company is staffed by well-trained, extensively-experienced, and well-equipped technicians who know every technique necessary to perform excellent fire damage cleanup and restoration. By the time they’re done, you can be sure that your home will look like a fire that never hit it at all.

Guest Contributor: Rachel Anderson

SMALL STUDIO APARTMENTS: ARE THEY THE NEXT BIG THING?

If you already have a studio or if you rent one, we have some good news for you: these little units are the next big thing in real estate. Since people are downsizing globally and looking for ways to live more efficiently, studios are a perfect solution for all their needs. But why are these small studio apartments so attractive to investors and buyers? Here’s all you need to know. 

Their location is usually top-notch

Location is one of the most important driving factors when it comes to investing in real estate, and what small studios lack in space, they make up for in location. Major city centers are often the best places to buy a property, but prices are usually astronomical. Finding an affordable property with a bold design can be hard in these areas, but studios have smaller square footage which lowers the price tag and allows even beginner investors to grab a property on a prime location. 

2.jpg

They are affordable

If your budget doesn’t allow you to get a traditional investment property like a multi-family or single-family home, consider getting a studio apartment. This is the best way to invest as little money as possible and gain exposure to the real estate market. Also, they are easy to rent out or sell with some minor staging efforts, so if that’s your goal, you’re all set. 

4.jpg

They are practical

Today, people are rapidly leaving the countryside and moving to cities, so urban areas need a practical and functional solution that will accommodate a large number of residents. According to some predictions, 68% of the global population will live in cities, so major urban environments are opting for the concept of compact living when it comes to residential architecture. 

Many of the world’s metropolises like Hong Kong especially love this downsizing trend, and the concept of small studio apartments is blooming there. Everyone from digital nomads to young professionals and students is choosing apartments for rent in Hong Kong thanks to their convenience, price and low-maintenance costs. With all the necessary amenities at your disposal, it’s easy to see why studios are so practical. 

They are green

More and more people today are choosing a more eco-friendly and sustainable lifestyle that rangers from dietary changes and adopting better shopping habits to saving energy and water and downsizing to more eco-conscious housing solutions. Small, compact living spaces are always greener than big houses, no matter how well designed. Smaller square footage equals less energy consumption, less maintenance and less furniture, all of which can contribute to your smaller carbon footprint. 

They are easy to maintain

Like stated above, studios are small and they naturally require less cleaning and decluttering. Small studios are also easy to organize and keep clean since there’s less room for decoration and other trinkets that do nothing but collect dust. This makes them perfect for minimalists or people who hate or simply don’t have time for cleaning. In general, one can clean and declutter an entire studio apartment in an hour while ensuring maximum living and sleeping comfort

5.jpg

They bring a good return on investment

If you intend to break into the real estate market and make money on your first try, go with small studios. According to research, small studio apartments increase your ability to make money and yield an excellent return on investment. Even though the rent in studios is more than affordable to tenants, the price is still high when taking into consideration the square footage. Usually, small units outperform big apartments and family homes, they have high occupancy rates and sport pretty high rental-rate premiums. Since they are more or less a safe bet, small studios are perfect for beginner real estate investors, especially those who don’t like to gamble too much. 

Studio apartment cons

Don’t think small studio apartments don’t come without a flaw. No matter if you’re investing or renting these small units, you need to know about the risks. In general, certain countries and states have minimum apartment size requirements, so super-small micro-apartments might create a problem. There are also various housing codes, zoning regulations, municipal ordinances, minimum parking standards, unit-mix rules, outdoor open-space and indoor common-space provisions to look into. 

Additionally, even though small studios always have their place in the rental market, they are not suitable for everyone. Usually, they are reserved for single working professionals or students. This means your tenant group will get smaller and you will need to forget about families. 

In real estate, bigger is not always better. While small studio apartments have their cons, they have a huge pile of benefits to offer to both investors and residents, so if you want something practical and cost-effective, go small with a studio. 

About the author: Mike Johnston is an avid blogging enthusiast and experienced freelance writer with a focus in real estate, home improvement, interior design, and sustainable living.

HOW DO MISTING SYSTEMS WORK?

In essence, a misting system refers to a range of outdoor cooling methods that uses a fine spray of water to cool you, your family, guests, workers, customers, and yes, even your pets! Other terms for misting systems include spray cooling and fogging systems. 

Misting Systems: How Exactly Do They Work?

All misters work with the natural cooling effect that occurs when water evaporates in warm air. This is also called evaporative cooling. Most misters work beautifully in dry weather. Some also work superbly with humid weather, although not all. It is recommended that you do your homework before purchasing one for a damp area. 

Misting systems offer several excellent benefits. They can minimize dust and odors in a specific area. They are also great at regulating the humidity, so they are fantastic for atriums, courtyards, greenhouses, and the like. What’s really amazing is misting systems can cool you down without getting you wet.

Water is forced through very minute nozzles to create a very fine fog or mist. As the droplets of water evaporate, it cools the air instantaneously—the finer the mist, the more thorough the evaporation.

The terms fogger and mister are used interchangeably, and many people often confuse one for the other. Some misters produce a spray made of large droplets that can get you wet. These systems often use larger spray nozzles and low or medium water pressures.

On the other hand, foggers use tiny spray nozzles (to create a fog-like mist) and high water pressure. The fog-like mist evaporates before it can get anything wet.  

Your Key to Categorizing Misting Systems: Think Water Pressure

Let’s get something straight: all foggers are a kind of misting system. However, not all misting systems are foggers. To avoid confusion, it is crucial to think in terms of water pressure—low, medium, and high.

Since water pressure is the primary indicator of any misting system’s performance, it is used as an accurate way to categorize the systems. Water pressure is measured in PSI (pounds per square inch) or BAR. One BAR is equivalent to 14.7 PSI, while one PSI is equivalent to .0689 BAR.

Low Pressure

Low-pressure systems can be likened to being near a sprinkler. It can cool you down and might also get you a bit wet. This kind is also the simplest and the least expensive of the three options. 

Low-pressure systems also won’t require electricity. They typically work with gravity-fed water pressures. While their spray can cool a small area, you need to be near the nozzles to cool. However, the closer you are to the nozzles, the wetter you will also get.

Medium Pressure

Medium pressure systems use motorized pumps to raise the water’s pressure to 100 – 250 psi / 7 – 17 bar. The spray water this system produces is fine enough to cool you in hot weather and is less likely to get you wet. 

High Pressure

This is the system that will provide the maximum among the three options. High pressure misting systems are considered ideal for areas with very high humidity. It can cool you down effectively without getting anything wet. 

High pressure and medium systems typically use pumps to boost the water pressure from any water source. The higher the resulting pressure, the cooler (and drier!) you’ll feel.

What Makes a Misting System Great?

A misting team has to be one thing to be considered great: it has to meet your needs. Even if you invest in the highest-powered and the best system but only have a small patio in a quiet neighborhood, the system might be too expensive, too noisy, and too much. In short, it’s not the right fit for you.

What about your kids’ sports team? In most cases, a lighter, smaller, and less expensive system that will not get them wet is ideal. However, it might not be the best option for an elegant wedding reception with 200 guests.

Conclusion

Finding the right mister that will best suit your needs is no walk in the park. However, once you gain a better understanding of how they work, you can easily make knowledgeable and educated comparisons. From there, you can effortlessly decide which system works best for you. Check out this Arizona mist systems for more details.

Guest Contributor: Anna Fox

HOW TO UNCLOG A DRAIN

The warning signs of a clogged drain are clear — water pooling or refusing to go down the drain. Sometimes, removing that clog can be quite a hassle, and that’s why people often go straight to a plumber for help.

Depending on availability, it might take a few days for a plumber to clear your drain. When it comes to minor issues, why not try a few DIY hacks before resorting to the professionals? Read below to learn some suggested methods to unclog a stubborn drain.

Start With a Plunger

Plungers are the tried-and-true method. Unless there is a serious problem (e.g., a root growing through a buried drain line), this is probably the method with which a professional plumber will start. Depending on the type of drain you’re unclogging, there are various kinds of plungers that will work:

  • Sink plungers are the conventional type that usually come to mind when we imagine plungers — with a rubber cup that is designed to seal to the bottom of the sink.
  • Toilet plungers have more of a bell shape with a flange around the bottom that helps it seal in a toilet bowl.

Choose the right plunger, and give it a try to clear debris from your drain.

Try Homemade Drain Cleaners

Commercial drain cleaners are marketed as a quick and easy solution to clogged drains, but plumbers generally don’t recommend them. That’s because these solutions contain chemicals that can damage your plumbing — and harm your septic system, if you have one. What’s more, the harsh chemicals could damage porcelain toilet bowls, sinks, and other fixtures. Thus, while a commercial drain cleaner may have cleared your drain, it can also leave you with bigger problems to fix.

That said, there are homemade options that can clear small clogs without causing damage to plumbing and fixtures. Start with soda to clear a small clog. It’s bubbly and a little acidic, which will help clear debris. If you have a 2-liter bottle handy, pour the liquid down the drain and wait a few minutes before rinsing with warm water.

Baking soda and vinegar is an all-natural method that you probably have in your kitchen. First, bring a pot of water to a boil and pour that down the drain. Once you’ve done that, measure a ½ cup of baking soda and pour down the drain. When the baking soda and water had roughly a minute to reach the clog and start working, mix 1 cup of hot water with 1 cup of vinegar. Pour this down the drain, and wait for about five minutes before rinsing the drain with clear water.

Baking soda and salt can help break up a clog, too. Mix 1 cup of baking soda with a ½ cup of salt. Then, pour it down the drain. It can take a while to work, so let it sit for a few hours or overnight, then flush the drain with boiling water.

Take Apart the P-Trap

This is among the most common areas for a clog to occur because curving pipes are more likely to catch debris than straight spans. If you can access the drain’s P-trap, then you should be able to take it apart with channel-lock pliers or a wrench. Make sure to place a bucket beneath the trap before taking it out, since wastewater is likely to spill from it. Once you’ve removed the trap, clear any debris you find. Then you’re free to reassemble. Remember to run water through it once you’ve replaced it to check fittings for leaks.

Use a Drain Snake

This is the next tool that a professional is likely to try after a plunger. Snakes are long cables — often with an attachment on the end — that are designed to be run down a drain to break up a clog so that it flushes. You can find snakes at most hardware and home improvement stores — in different lengths, too — if you have a longer drain to clear.

Try a Coat Hanger If You Don’t Have a Snake

Maybe the hardware store is closed, but if you have a metal coat hanger on hand, you can turn it into a drain snake. Simply straighten it so that you have a long, sturdy piece of wire. Then run it down the drain until it reaches the clog. This will help you break up the clog so that you can pull it out or flush it with running water.

Chances are, at least one of these options will get your drain flowing once more. If none of these methods work, however, it might be time to contact a professional.


Author bio: Excited to share her love of home design and décor with readers, Jaclyn Crawford started with ImproveNet in 2016. As a staff writer, she enjoys chronicling the latest trends and ways you can make your home the loveliest it can be. You may also find her in ImproveNet videos, sharing tips and trends for your home.

5 SIMPLE WAYS TO UPGRADE YOUR HOME GYM

As you spend more time exercising at home, you would notice some things to improve in terms of space, equipment, and the overall feel. With these five simple ways to upgrade your home gym, you can create your dream workout space and get inspired to fulfill fitness goals. 

5 SIMPLE WAYS TO UPGRADE YOUR HOME GYM

Designing a functional setup, changing equipment, constructing efficient storage, investing in lights and audio systems, and saving workout routines are simple ways to upgrade your home gym and achieve a healthier lifestyle through exercise. Use this guide to start renovating your home gym. 

INVEST IN THE RIGHT EQUIPMENT

Get rid of any machine or tools you don’t use, as these can only add clutter and take up much-needed space. Some of them may be showing signs of wear, or they simply don’t fit your fitness regimen anymore. 

Instead, upgrade into better equipment that can last long and bring new life to your home gym. You can use resources from Simple Fitness Hub to pick workout equipment appropriate for your goals.

  • Cardio: Machines such as a treadmill, spin bike, and rowing machine utilize body weight to enhance your strength and cardio. A 30-minute jump rope session is a more affordable option, especially if you don’t have space for huge equipment. 
  • Strength: Strength training involves routines that improve endurance. You can do this by using battle ropes, weights, barbells, kettlebells, and dumbbells. Wearing resistance bands also supports your mobility. 
  • Flexibility: It’s essential to retain flexibility as you age. Things like foam and rumble rollers can assist your body when exercising to avoid overstretching.

DESIGN A FUNCTIONAL SETUP

If you’ve ever gone to an overcrowded gym, you appreciate the importance of having space to exercise safely and comfortably. You can achieve that in your home by using rubber, foam, carpet, or vinyl flooring to protect the body from sweat drips and uneven surfaces. 

Since there may not be somebody else to coach you, placing mirrors on walls can help check your form and be your own coach. Besides, putting up mirrors can make space appear larger.

Moreover, set up a hydration station with clean towels and plenty of bottled water to keep your body clean and hydrated. 

BUILD AN EFFICIENT STORAGE

Sustainable storage is key if you want to pack a ton of equipment in your home gym. You can keep small items like medicine balls or yoga mats in storage cubes. You can designate one side of the wall to install panels or pegboards to hang resistance bands or jump rope. 

If you have sets of kettlebells and dumbbells, opt for a compact yet heavy-duty weight rack to keep all items neatly tucked in a corner. 

INSTALL PROPER LIGHTS AND AUDIO SYSTEM

Why listen to music on headphones when you can blast your favorite pump-up tunes through the speaker? Whether it’s a Bluetooth speaker or a boom box, make sure that the volume is on safe levels or just enough to energize you through intense workout routines. 

Meanwhile, the right lighting makes it easier to see your form, ensuring you get to do routines properly. When you see what you’re doing, you can adjust your movements and avoid making workout mistakes

SAVE WORKOUT ROUTINES

Regardless of how spacious your home gym is, or no matter how much equipment you buy, you won’t be able to optimize them without commitment to exercise. 

You can save fitness routines from the internet or various instructors to guide you. Likewise, you may download apps that can suggest exercises suitable for your body’s needs and goals.

CONCLUSION

Go over renovating ideas until you find what works best for your needs and liking. Use this list to start upgrading your workout space, and you can make it feel and look like a real gym with a personal touch. 

Guest Contributor: Allen Michael