HOME IMPROVEMENTS AND REPAIRS YOU MUST DO BEFORE MOVING IN

Moving to a new home can be an exciting time. However, it can also be stressful and exhausting, not to mention expensive to the point of draining your wallet dry. Depending on your new home state, there are some home improvements and repairs you must do before moving in. 

Are improvements and repairs expensive?

Specific improvements will increase your property’s value, which is always good when the time to sell it comes. Repairs can help reduce maintenance costs you will be facing in the future, and it’s always good to save money. If you are smart, some of the work you do on your home will end up giving you a net benefit.  Some renovations will increase your home insurance rates, so be sure to calculate this into your overall budget. Other types of work on your home simply can’t be avoided, especially for glaring issues that need to be fixed.

Can I do some of the repairs later?

The short answer is: yes, of course. On the other hand, dragging the repairs will involve you living in total chaos for a long time. You might think it will just be for a week or two, but old houses can have problems you weren’t expecting. Since you don’t know how the house was constructed, there could be hidden issues that you didn’t initially notice. These could end up causing unexpected delays, and you don’t want to be trapped in a house remodel limbo. And people promise themselves they will take care of minor repairs later when the relocation is over. But then those minor issues sit unaddressed for years because you never got around to it.

Re-polish the wood in your home to let it sit before moving in.

Renovating before you move in

Everyone has ideas of what their dream home should look like. Relocating to a new home is the perfect time to let your imagination run wild. And spring is a great time to do renovations on your home. You might think that doing everything at once is expensive, but doing multiple home improvements and repairs at the same time will probably be cheaper. Some renovations will require some touch-ups after the main work is over. We’re talking about small finishing touches like patching up walls or floors and painting the house. The best solution is to do the cleanup just once when you have done all the work.

Realistically your best bet is to schedule all of the home improvements and repairs you must do before moving in and living on the property. Once everything is finished, you can just relocate to your new home without worrying about doing more work. So, plan for how long the work will take but have backup options. Rent storage for your possessions, so they don’t get in the way of the repairs. Ensure you get a clean and mold-free unit for your items so they are safe and dry during the spring rain season. Even if the repairs last longer than expected, your possessions won’t clutter the workspace, and you will know they are secure.

Avoid water damage by fixing any leaks.

Here is a list of 8 home improvements and repairs you must do before moving in:

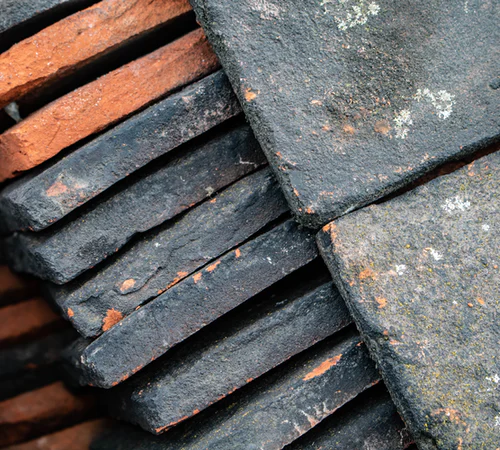
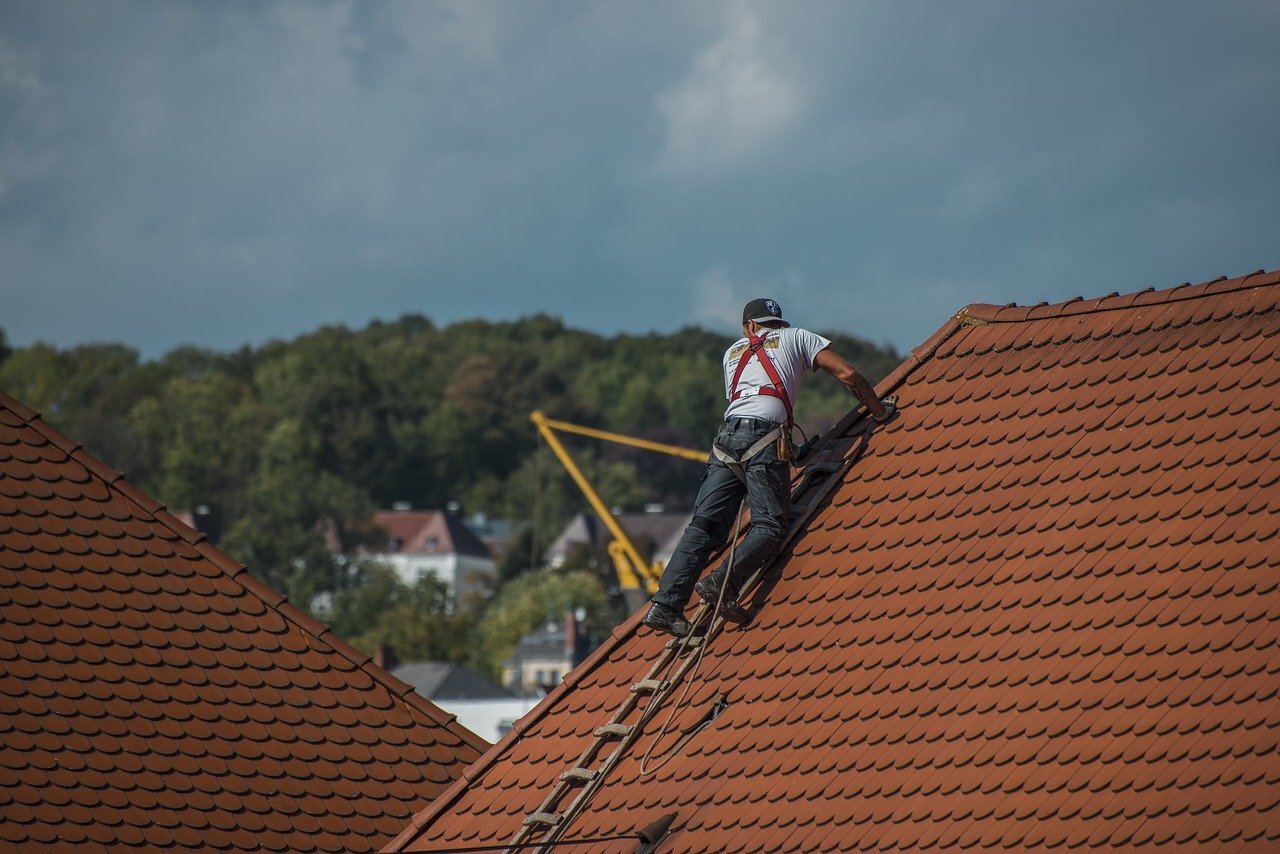
  1. Check the roof – repair any cracks or leaks since water damage can wreak havoc on your home. Invest in roof repairs to avoid rotting wood and mold buildups.
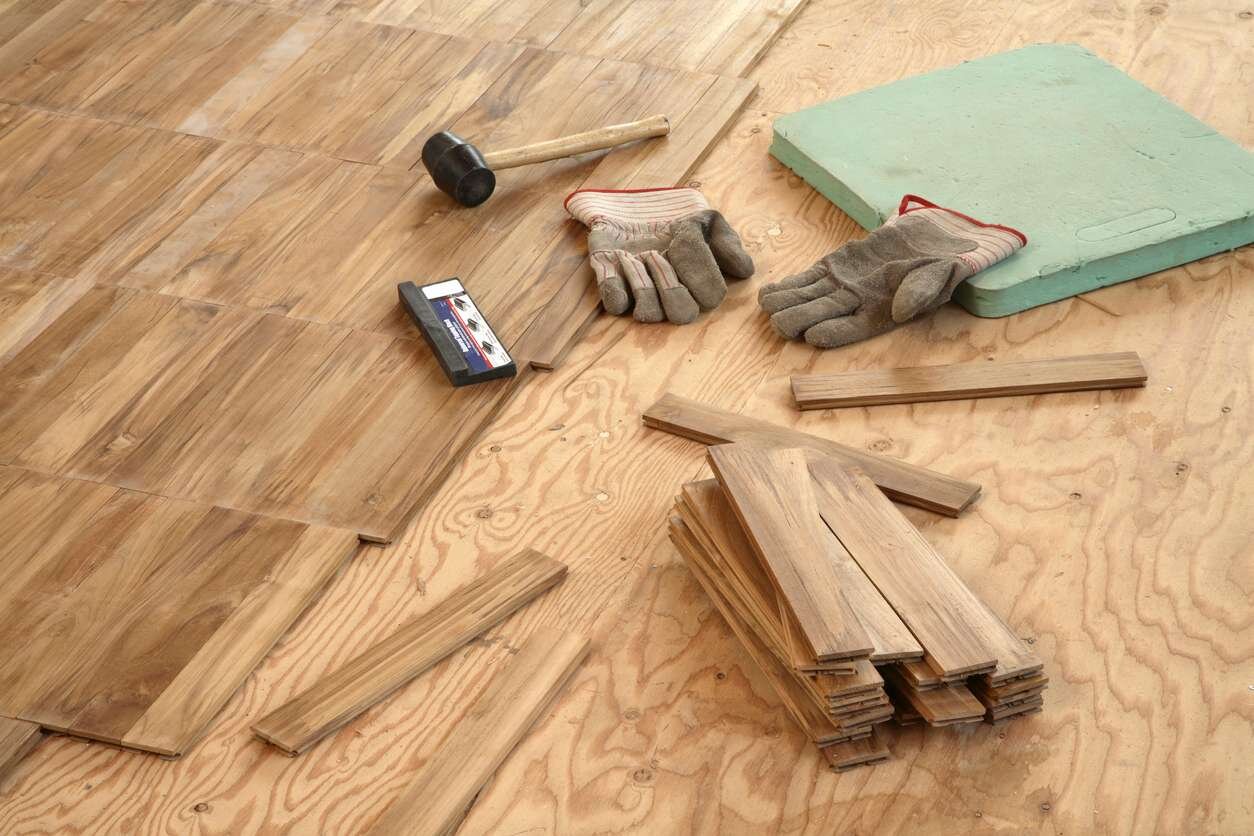
  2. Refloor – this is one of the repairs most people skip to save money. While fitting new floors can be expensive, it will be a lot cheaper and easier to do before moving in.
  3. Improve the insulation – investing some money before moving in can save you a lot in the long run. Draft-proofing and insulating are great ways to save on heating and electricity bills.
  4. Apply wood finish – it’s not just the floors that need to be re-done. It would be best to refinish all the wooden elements like panels, windows, or railings before you move in. This will give them a bit of time to sit and air out.
  5. Popcorn ceilings and walls – they used to be standard in houses constructed before the ’90s. Besides being an eyesore, popcorn fixtures can contain asbestos or other toxic materials that can be harmful to your health.
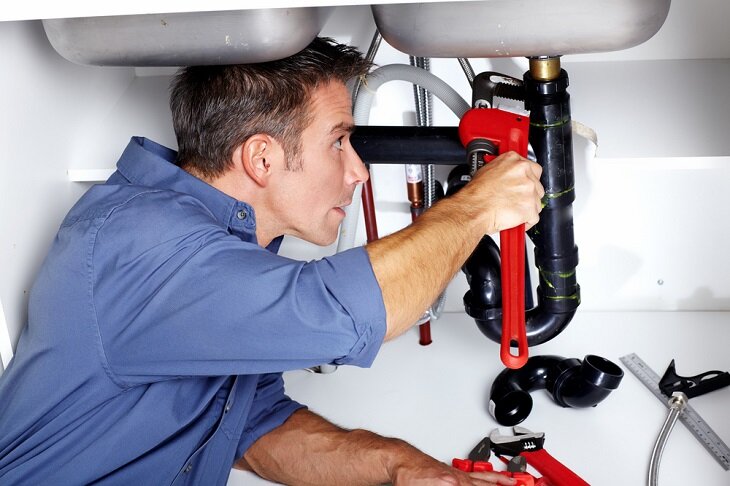
  6. Check the plumbing – leaks can cause some of the worst and most expensive damage to a home. Hire professional plumbers to take care of any problems before you move in. Mildew and mold will be much more costly to deal with later if water damage is left unchecked.
  7. Replace locks – it shouldn’t take long and doesn’t cost much. With new locks, you can be sure that no one else has the keys to your home. Replace the exterior locks; it’s cheap and will give you peace of mind.
  8. Exterior and interior painting – we recommend doing this last but before bringing in the furniture from storage. All of the other major work will already be done. Also, painting an empty home free from the clutter of furniture and boxes is a much simpler task.
Paint your home last after all of the other work is done.

One more thing we need to mention is that it is essential to pay attention to your health. People get so caught up in renovations, repairs, and moving that they can forget about their well-being. We all hope to see the end to the coronavirus pandemic, but the fight isn’t over yet. So, when the moving day finally arrives, you have to take all the necessary precautions in order to stay healthy during these hard times. Moving to a new home means that you will be interacting with many different people. Sometimes we all need reminders, even for the basics – so be smart and stay safe.

Taking care of home improvements and repairs you must do before moving in will end up saving you a lot of stress. Additionally, doing the repairs while you are not living on the property will mean they will be done faster – since nothing will be in the way of the work. And if the work is done faster, it usually means less added expenses. Taking care of everything while saving time and money – what’s not to love?

Meta description: Moving to a new home and need to renovate? Here is a list of 8 home improvements and repairs you must do before moving in.

Guest Contributor: Sophia Perry

THE SMART HOME DEVICES THAT OFFER THE MOST VALUE

As the eco-conscious movement expands, society’s values change. A few decades ago, individuals purchasing homes looked for time-efficient, convenient appliances that catered to life on the go. Now, people want sustainable and energy-efficient products.

Energy-efficient home appliances reduce the price of a homeowner’s utility bills while shrinking their carbon footprint. They also increase the value of a home. There are various smart home devices you can install to increase efficiency.

Smart Plugs

Most individuals charge their phones, tablets and laptops overnight to ensure power efficiency the following day. These devices reach a full charge within a few hours and continue to pull power from the outlet throughout the night. Their power absorption accumulates over time, increasing utility costs and the size of your carbon footprint.

You can install smart plugs in your home to restrict power pulling from unused devices. They monitor your appliances’ energy use and limit their access to electricity during certain times of the day. They also track energy use so you can make adjustments to lower the price of your electricity bills.

Smart Garage Door Opener

Homeowners can improve the efficiency of their heating and air conditioning systems by preventing the release of in-home air, and your garage door is a significant escape point. Nearly 51% of a home’s energy use derives from temperature control. If you are forgetful when it comes to closing your garage door, you can benefit from installing a smart door opener.

You can preprogram these devices to close after you leave your house. This helps the homeowner conserve energy used through temperature control systems. 

They also utilize LED lights to illuminate the inside of your garage. LEDs use 75% less energy than conventional bulbs. They also last 25 times longer than incandescents, reducing your utility bills and the size of your carbon footprint. Installing a smart garage door opener in your home can significantly increase its value.

Smart Thermostats

To further conserve the energy used by your heating, ventilation and air conditioning (HVAC) system, you can install a smart thermostat. Homeowners may program these devices to keep their homes at energy-efficient temperatures. The thermostat also turns down at night, depending on the season, to maximize your HVAC’s electricity use.

Smart thermostats use motion-detecting sensors to adjust your home’s temperature depending upon its occupancy. When your house is vacant, the system turns on its vacation mode, which you can change from your smartphone. These green appliances significantly lower electricity bills.

Smart Lights

Our homes’ lights contribute to the size of our carbon footprints. Installing smart lights in your house can reduce energy waste and conserve the environment. The system connects to your smartphone through Bluetooth and turns off all lights when you leave the property for a programmed number of hours.

The device also uses a motion detection sensor to turn off the light in an unoccupied room. When paired with LED lightbulbs, this system can be significantly more energy-efficient than conventional lighting.

Smart Energy Monitors

A valuable device for the eco-conscious homeowner is a smart energy monitor. These systems evaluate the inner power working of your house. It connects to your electricity meter and calculates which appliances pull the most power.

Intelligent energy monitors connect to your smartphone through Bluetooth to relay its electricity findings. The device converts data into charts and graphs for straightforward viewer interpretation. Homeowners can then use this information to change their energy consumption patterns and shrink their carbon footprint.  

Cater to the Market

Increase the value of your home by upgrading your appliances and devices. Maintaining an energy-efficient house is attractive to potential buyers looking to shrink their carbon footprint and pay low utility bills. Because millennials are eco-conscious and buying property now, it is essential to cater to their values. 

Visit Brands Direct Online and find great deals on smart home devices that offer the most value.

Guest Contributor: Rose Morrison

SLATE ROOFING MATERIAL BREAKDOWN

Buying a new roof? A slate roof is one of the materials you can consider as you explore your options. It is waterproof, resistant to mold, and can last more than 100 years. On the other hand, it is brittle and can easily break, and is also relatively expensive to purchase.

This extensive guide will help break down the important aspects of this material, its pros and cons, and its variants at your disposal. Follow through to make an informed roofing decision.

Types of Slate Roofs

1. Natural Slate

This is a natural quarried stone, and it’s the first thing that comes to most people’s minds when the term ‘slate’ is mentioned. It is resistant to ultraviolet rays and does not get destroyed by thermal expansion and contraction.

With proper care and adequate maintenance, this material can last over 100 years. It is among the most environment-friendly roofing materials because there is no manufacturing process involved in its production. Besides, it can be recycled and reused. You can find it in natural shades of blue, red, or gray depending on its source.

2. Synthetic Slate Roofing

Is used as an alternative to natural slate roofing. It is a reflection of the magnificence of its traditional counterpart devoid of the expense (synthetic roofing shingles are much cheaper) and the stressful installation process.

These roofs boast of being lighter than natural slate roofs, hence may not require additional support during installation. They would also present you with a wider range of colors compared to their natural counterparts.

The materials durability varies depending on their manufacturing process. Some are treated with ultraviolet inhibitors, reducing degradation from the sun. Others are not easily breakable. The durability of these roofs ranges from half the lifespan of natural slate- 50 years- to about 100 years.

Slate Roof Maintenance

If properly installed, it will require very little maintenance over its lifespan. This material is resistant to mold, fungus, and mildew, further minimizing the maintenance cost.

The greatest risk of installing slate roofs is their ease of cracking and breaking. However, this is easy to fix since you will just need to repair or replace the broken or missing shingles. Make sure this is done by a roofing professional such as Fortress Roofing

Even though most of the maintenance and repair works are generally universal, there are some details you need to take into consideration with regard to the specific types of slate on your roof. For instance, replace broken shingles with those of the same pattern and color. Additionally, when you have to replace the entire roof, get to know the alternatives available in the market. They will still provide your home with the elegance of slate.

Photo by Axinte on Unsplash

Notable Pros

1. Unique Roofing Styles

A slate roof can be designed to produce very beautiful roof designs. This is attributable to it being a natural product.

It is available in different shades depending on its chemical composition and its source. These natural colors give these roofs an allure that cannot be provided by any other material. Imagine you can still play around with colors to match your roof with the architecture of your home.

2. Recyclable

This natural roof will stay on your house for over a century if you want it to. It will lie dead, emitting no toxins at all. It is just stone after all!

If for some reason the roof has to be removed, the material can be reused on other roofs or for other purposes as may be deemed fit. If you are looking for an eco-friendly roofing material, we can proudly say that slate is the material for you!

3. Energy Efficiency

This material is dense and can help regulate the temperatures within your home. This can help you save money that would have otherwise been spent on footing energy bills.

Besides reducing energy bills, energy efficiency is enhanced by the reduced carbon footprint. The material occurs naturally, well apart from synthetic slate, and can be recycled, of course!

Cons of Slate Roofs

1. Fragility

This quality makes the roofing material easy to cut into different shapes and sizes, but it can be disadvantageous in some cases. If not handled with care or if a considerably large amount of pressure is exerted on it, it can easily be cracked or broken.

Inspecting the roofs can be challenging because if the roof inspector steps on the shingles, there is a possibility of them cracking. You need to be extra careful when handling these roofs.

2. Slate Is Heavy

Natural slate is very heavy. One tile of slate of about 100 sq. ft. can weigh between 800 pounds (ca. 363 kg) and 1,500 pounds (ca. 680 kg). Your roofing structure has to be reinforced to ensure it is able to carry this weight. This can be expensive.

If you’re installing a new roof, consider having your roofing structure assessed to see if it can bear the additional load.

Conclusion

Slate can tremendously improve your home’s curb appeal and, by extension, its value. It is a material that has a natural appearance and blends well with the environment. Despite being heavy and fragile, its durability is something to marvel at.

As you ponder over your choice of roofing material, have it in mind that you can never go wrong with slate roofing tiles if their cost is not a scare to you and your home’s structure can support the weight.

Guest Contributor: John Willmer

THINGS YOU SHOULD KNOW FOR CHOOSING THE RIGHT PLUMBING SERVICE

It is a very difficult task to control all the plumbing problems when you don’t have much knowledge about it. As a result, you have to pay a huge water consumption cost and your building can get affected by some water leakages. So it is better to take the assistance of professional water and gas plumbing service.

It ensures safety and prevents future extra costs. But for all this, you need to choose the best service. Thus we have discussed some factors that will help you choose the perfect plumbing company for your house. 

Six things to look for in your plumbing service

Below is the list that you should look for in your plumbing service to make sure it is the right one and will help you resolve your problem:

Plumbing Service.jpg
  • Local

    When choosing a plumber for your regular gas and water system’s services, you should always look for a local one. This is because they will be able to reach your place on time whenever you need their help. Apart from that, they do not charge anything extra for transportation and you can call them anytime for an emergency issue. Make sure, you must choose a plumbing service that offers 24×7 services.
  • Look for credential

    Some house owner does not ask for certificates and accreditations while taking water and gas plumbing service from a company. The plumbing service you are planning to hire must have a proper state-specific license to run their business. There are also individual licenses and certificates that every worker holds. These certificates are proof that you are paying the taxes to the government and they are liable to offer the best quality work. If you find any issue in their services then you can lodge a complaint in your local authority against the company.
  • Surf through the customer reviews

    Another important thing to look for when hiring a water and gas plumbing service is their customer review. Today you can be assured about the service you will receive only by reviewing the customer’s voice. You can expect a good service if you find good comments and reviews that reflect quality work.

    You can find these reviews either on their website or any social media platform. However, you may find some bad reviews on social media because companies cannot satisfy their customers by fulfilling their unwanted claims. So you can check their reviews and choose a gas plumbing service that has some positive reviews.
  • Service rates

    The most important thing to look for in your water and gas plumbing service is the rate at which they are offering the service. Top-notch plumbing service will be able to provide you an accurate and close amount that you may incur at the time of service. This is important to prevent any surprise charge.

    However, there may be a condition in which complications arise at the time of work and requires extra cost. But, a good plumber will always be able to explain to you why you are incurring the extra cost.
  • Area of work

    While choosing the best water and gas plumbing service for yourself, make sure you check the area in which they work. In other words, are they prepared for every kind of problem or not. They should have proper knowledge and experience to provide assistance.

Above are the vital points that you must follow when selecting the right plumbing service for your house. These will ensure you are getting the right service and at the right charge. However, don’t forget to ask someone who has taken the service from the respective plumbing company if they have specialized plumbers insurance. They will be able to guide you better. 

Guest Contributor: Emma Smith

WHEN SHOULD YOU REPLACE YOUR FLOORING?

Floors often face a lot of wear and tear. People walk on them throughout the day, and they’re also vulnerable to dirt and other messes that can create stains. So, how do you know when it’s time to replace your floors? Here are some giveaways. 

Common Flooring Options 

Popular flooring options can be found in many homes because they are stylish, affordable and long-lasting.

Laminate Floors 

This type of flooring provides the look of real wood, but at a more affordable price. It also requires less maintenance than other options since it is scratch-resistant and waterproof. In addition, it reduces noise. These factors have increased laminate’s popularity in homes. 

Hardwood Floors

Hardwood floors are a classic option for various rooms. They are durable and easy to repair, and also provide good insulation. However, they can be on the pricey side. The higher cost may be worth it to get more return on investment when selling your home because it’s attractive to potential homeowners. 

Vinyl Floors 

Vinyl is also a very durable and cost-effective option. It is made from plastic and available in planks, sheets or tiles. It gives off a stylish vibe at a lower cost. 

Tile Floors 

Tile floors are most effective in rooms with large amounts of moisture, such as bathrooms or kitchens. They can be used in many ways and can last for several years. Some tile textures can mimic wood, stone or even fabric. 

Alternative Flooring Options

Many options for flooring are available, including these lesser-known varieties.

Bamboo

Bamboo is a flooring option you may have not previously considered. It is less expensive than hardwood and usually more moisture-resistant. Its natural color can blend into a room well and enhance the overall design. This option is also a more environmentally friendly one. 

Concrete 

Concrete can add an industrial or modern feeling to any space. These floors are relatively inexpensive and provide a unique style. They are also long-lasting and easier to clean. 

Pennies

Pennies aren’t just things you throw into a fountain to make a wish — they can also be used to create flooring material. This is a low-cost option that will definitely stand out. The coins’ copper tones will also add a pop of color to the space. 

Cork 

Cork is an alternative option that can be used in a variety of rooms. This material is durable, comfortable, and resistant to mold and mildew, making it the perfect choice for a bathroom or living room area. It is fairly inexpensive and unique. 

Signs It’s Time to Replace Your Flooring 

There are several indicators that it’s time to install new flooring. Here are some things to consider.

Scratches or Marks 

One sign that your floors may need to be replaced is large scratches or marks. They can be damaged when furniture is moved around or if you have pets. While small scratches are OK, larger ones may be an issue. The deeper the scratch, the more likely water can seep into the floor and cause long-term damage. 

Water Damage 

Water damage can occur from spills, pipe leakages or flooding. It can cause warping or separating. These problems can’t be fixed with a simple refinish, so replacing the floors is your best option. 

Nails Peeking Through the Floor

Nails sticking up from the ground can be a painful tripping hazard for your family and guests. This issue is more common in high-traffic areas, such as living rooms. Not addressing this issue could increase the chances of injury. 

Discoloration of Wood

Long-term heat exposure or water damage can cause floors to change colors. At the beginning stage, you may be able to do a simple refinish. However, if left untreated, you will need to replace the wood. 

How to Replace Your Flooring

You will need to remove the adhesive of the subflooring with a floor buffer and abrasive disk. Once that step is complete, make sure to level the subfloor and add a moisture barrier to protect the floor covering. The last step is nailing or gluing it down and adding baseboards. 

The Right Time to Replace Flooring 

Your flooring is an important feature in your home, since it sees a lot of wear and tear throughout the years. It doesn’t last forever, though, so you need to know the right time to replace it. Doing so will give your house a whole new look and boost your ROI, so it’s well worth the effort.

Guest Contributor: Rose Morrison

HOW TO MAKE A GREENHOUSE AT HOME – DIY GUIDE 

Are you looking for ways to create your very own greenhouse at home? Well, you have reached the perfect place! This article focuses on the step by step process of building a greenhouse at home, which includes planning, assembling of materials, and ideal execution. 

To begin with, it is crucial to fix a budget before proceeding with the DIY project, choose the area where you want to build it, and to know what materials you need. Before proceeding further, if you love DIY and are looking for materials to set up your large flat-screen television to your eye level, go check out the motorized tv mount and flip down tv mount for more information! 

Now, follow these simple steps to create your very own greenhouse at home!

What is a Greenhouse? 

A greenhouse is a home-like structure that houses your plants, offering them an ideal climate for proper growth and development. The building is used to provide shelter for your plants and keep them healthy and alive for a long duration. Creating a greenhouse includes massive work; however, it is super fun too! 

Steps to Make a Greenhouse at Home 

1. Area/Location 

First and foremost, choosing an ideal location is exceptionally vital before building a greenhouse. Moreover, it would be best if you found an area that gets proper sunlight for the growth of your plants. Hence, don’t go for a place that has a lot of shade or doesn’t get much sunlight. 

2. Electricity 

A greenhouse needs uninterrupted electricity. It is best to make an attached connection to your home. In this way, there is less establishment cost and no hassle. To keep the temperature at the most appropriate level, the greenhouse requires proper ventilation and heat. 

3. Drainage 

If you stay in a region prone to frequent rainfall and floods, you need to make sure the area you choose for your greenhouse has proper drainage facilities. A flood would inevitably result in the destruction of your plants and the structure. Hence, the best way to prevent this mayhem is by building the greenhouse on high ground and consult a professional to know more about drainage systems. 

4. Measurement 

Once all the above steps are taken care of, start by measuring the area of your greenhouse. It entirely depends on your preference when it comes to the size of the structure. However, the most relevant measurement is eight by six feet.  

5. Greenhouse Kit 

After you are sure of the measurement, you need to purchase a greenhouse kit to set up the structure. You can find various kits on online shopping sites or any local store! 

6. Support the Structure 

The best way to build a greenhouse is to attach the structure to one side of your home. This will help provide appropriate support to the building, and nothing would affect it or break it in any way. 

7. Framing 

Once you attach the greenhouse kit at one of the outer walls of your house, it is time to build the outer frame. The best material for the outer frame would be steel. Now, create a dome-like frame on the top of the structure and fix it properly. 

After the head of the greenhouse is done, you need to create a base or foundation with the same steel material. Make the base as sturdy as possible. You might need little help from your friends or family while fixing the foundation of the structure. 

8. Coverage of the Structure 

Before covering the structure, you have to choose a material that would be durable and affordable. One of the best materials for covering a greenhouse is LDPE plastic. It is bio-friendly, long-lasting, and won’t need much effort for maintenance unline regular plastic material. 

However, keep in mind that even an LDPE plastic covering has to be washed regularly without fail. Moreover, don’t forget to attach the cover with the frame of the structure. 

9. Walls of the Structure 

FIberglass would be the most cost-effective option when it comes to the walls of the greenhouse. It would easily fit on the roof as well as the walls of the structure. The material is stable and lasts longer than glass walls. 

10. Control of Temperature 

Last but not least, you need to know how to control the temperature inside the greenhouse. Here are a few easy ways you can keep the temperature accurate for most of the times: 

  • Install fans at every corner of the greenhouse.
  • The roof of the structure must have facilities for ventilation.
  • If you have more budget, you can also purchase a heater for the greenhouse.

Your greenhouse is ready! 

Conclusion 

Now that you have detailed knowledge about making a greenhouse at home, you must also learn more about gardening and how to provide the plants with proper nourishment for appropriate growth. Don’t forget to water the plants regularly! 

Guest Contributor: Vijaykumar

HOW TO TELL IF YOU’RE A MINIMALIST OR A MAXIMALIST

Personalizing your house and making it feel like home starts with identifying your preferred style. In simplest terms, identifying whether you’re a minimalist or a maximalist can set the tone for every interior design decision you make.

Here’s what you need to know about minimalism and maximalism in design and how to identify your style. 

WHAT IS MINIMALISM?

Minimalism is a less-is-more approach to interior design. This style is defined by a clear, open flow within a room. People who prefer minimalism often have fewer furniture and art pieces, gravitating toward clean, simple lines. Rather than having two overstuffed couches with throw pillows, minimalists prefer a single, modern-style seating arrangement and accessory furniture.

Being a minimalist doesn’t mean that someone is plain or boring. People with this preference feel overwhelmed by objects that they perceive as clutter and are more intentional when choosing what has a place in their homes.

WHAT IS MAXIMALISM?

Maximalism is a more-is-more approach. People who prefer this style tend to create more warm, welcoming, and comfortable spaces. The walls in a maximalist’s home rarely have an open space, featuring photos and art that add to the atmosphere.

Color and design choices in a maximalist’s home tend to be brighter and more vibrant. There’s a misconception that maximalism is synonymous with clutter. However, many maximalist designs are well-organized if a little busy. 

DO YOU PREFER BOLD OR CALM DECOR?

If you prefer bold colors and attention-catching decor, you might be a maximalist. If windows filled with plants, shelves teeming with books and treasures, and seating that invites you to while the day away, you have maximalist tendencies. You likely feel at home in a crowded bookshop or cafe that provides warmth and comfort.

Conversely, if you prefer neutral tones and calming decor, you might be a minimalist. If the soothing, sparse spa experience appeals to you, you’ll likely try to capture that in your decor scheme. If you’re a minimalist, your art preferences will be nuanced and straightforward, or you’ll gravitate toward having one central piece on display.

DO YOU PREFER SYMMETRY OR CONTRAST?

Maximalists tend to prefer contrast over symmetry. These are the people who are more likely to have boldly colored kitchen cabinets, mismatched rugs and curtains, and chintz textiles. 

Conversely, minimalists prefer cleaner lines and symmetry. There should be balance in every room and matching accent pieces that come together for a streamlined decor scheme. 

DO YOU FEEL ATTACHED TO THINGS?

Another common difference between minimalists and maximalists is the inherent attachment or disconnect from material things. Minimalists follow the Mari Kondo attachment style, collecting and displaying only that which brings joy or feels necessary. 

Maximalists have more sentimental values attached to material belongings and often view them as memory triggers. In essence, those material belongings also spark joy but differently than experienced by a minimalist. For example, a minimalist might have fond memories of the beach and revisit those thoughts often. A maximalist might choose to have a tangible reminder— such as a jar of shells— displayed in their living room. One is not better than the other; they’re just different.

pasted image 0-2.png

ARE YOU BOTH?

Believe it or not, you can have both minimalist and maximalist tendencies. You might prefer an open concept room with minimal furniture but bright and bold accents on the walls and floors. Conversely, you might like a busy kitchen and living room but have a very minimalist style bedroom. 

As humans, we tend to label ourselves and create a dichotomy between preferences. Yet as history has shown, that black and white thinking rarely applies to everyone. 

Identifying your preference toward minimalist or maximalist design is a great starting point when personalizing your house, but it’s ultimately your unique inclinations that will make it a home. 

Guest Contributor: Ashley Lipman

HOW DO YOU FIX THE ISSUES WITH YOUR WATER HEATER’S PILOT LIGHT?

The pilot light is one of the most crucial components of your gas water heater. After all, the appliance can’t provide you with hot water if this component faces an issue. However, apart from being the most crucial component, it’s also probably the most troublesome one. Gas water heater users might come across problems, primarily associated with the pilot lighter, quite often. 

Now, you’d want to fix the issue as soon as possible. And, for that, you might usually want to hire a plumber. However, there are specific ways through which you can fix the issues all by yourself. Here, we have discussed some common pilot light issues and simple ways to fix them. Also, you do not need to have any technical skills to apply these solutions.

How does the Pilot Light Work?

The pilot light provides the igniting flame for the gas that the appliance releases through the burner. Only after that, the heater starts heating the water. Also, the pilot light should always stay lit when you ignite it. Otherwise, it will fail to ignite the gas coming out of the burner in turn. As a result, you won’t get any hot water while using the heater. 

Now, most of the issues you face with the pilot light are related to keeping it lit.  Other than that, it might sometimes fail to provide a properly sized flame to the gas. If there is an issue with its placement, then fix that first. You can simply reach out to Handyman Dubai for a quick and reliable solution. 

What to do when the Pilot Light’s Flame is too Small?

A small flame indicates that the pilot light isn’t receiving enough gas pressure. In that case, it would affect the functioning of your water heater. So, you must not ignore this issue and apply a solution for it. 

Now, this issue is mainly caused due to a clogged pilot light orifice. In that case, you can fix the issue by cleaning it. However, it’s more sensible to contact a certified professional if there are any other causes. 

Cleaning the pilot light orifice

The pilot orifice regulates the amount of gas released through the valve. So, you must clean it to improve the gas pressure. And, for that, you must stop the gas supply using the shut-off valve. 

Remove the orifice

You can’t clean the orifice as long as it’s attached to the appliance. So, you must detach it before proceeding with this task. And, for that, you must remove all the nuts that hold the orifice to the water heater. Based on the model you’re using, this might take a while. Moreover, you’d also have to detach the pilot tube and the thermocouple attached to the orifice. Once you’re done, you can simply proceed with the cleaning. 

How to clean the pilot orifice?

A can of compressed air would be one of the best tools for clearing out any dirt and debris. Apart from that, you should use sandpaper to clean its tip. You can also find a water heart cleaning brush available in the market for this task. Make sure to clean the orifice properly so that you don’t face this issue again anytime soon. Once you’re done, you must re-attach the components to the heater with the utmost care. 

Pilot Flame won’t Light or Keeps Going Out: Causes and Fixes

Many other users often report a failure to light the pilot flame. Apart from that, you might sometimes fail to light the pilot flame in the first place. Now, you must consider the following common causes behind both these issues: 

Dirty air vents

As you know, you need oxygen to light up the pilot flame or keep it lit. So, you must make sure that your appliance receives that in a proper quantity. Now, the air vents are the only means by which your water heater intakes oxygen. It might often get clogged by dirt and debris. 

In that case, the appliance may fail to light up the pilot flame. The air vents are located at the exterior of the appliance. So, you can clean them up quite easily. Also, make sure to do that regularly to avoid this issue further. 

Kinked flex tube

The kink tube is yet another exterior component you must examine for pilot light problems. As it happens, this tube might often get kinked to cause interruptions in the gas flow. In such cases, the pilot flame might keep going out or simply fail to light. 

So, you must straighten this crucial tube to fix the issue. It should work in case there aren’t any other problems with your water heater. 

Clogged pilot tube

In case, the previously mentioned fixes didn’t work, you must turn your attention to the pilot tube. This component supplies gas to the pilot light through the orifice. Sometimes, especially in old water heaters, this tube might get clogged. In that case, you simply need to clear it to fix the gas supply to the pilot light. 

So, detach the pilot tube from the heater and examine it for any blockages. You can simply use a thin wire or a needle to clear it effectively. Then, you must re-attach it to the appliance and try lighting the pilot flame. 

The sensor has bent away from the pilot flame

Apart from other parts, you must also take a look at the sensor. Do you find it bent away from the pilot light? If yes, then you’ve found the cause behind the problem. The sensor’s end should always touch the pilot flame. So, you can easily fix the issue by bending it to that position all by yourself. But, make sure to shut down the appliance before you do that. 

Dirty thermocouple

The thermocouple plays an important role in regulating the gas supply. It signals the appliance about whether the pilot flame is burning or is out. Depending on that, the heater supplies gas to the pilot light. Now, like other components, the thermocouple can often get dirt and debris on it as well. In such cases, it can mistake a lit pilot light as unlit and vice versa. 

As a result, it sends the wrong signal to the appliance. Now, if you’re wondering what should be your next step, then you simply need to clean the thermocouple to resolve this issue. 

Damaged thermocouple

Does the pilot light face issues even after you try the above-mentioned fixes? In that case, your water heater probably has a damaged thermocouple. So, you must make sure whether that’s the case. Test it with a multimeter and check whether it generates at least 20 MV voltage. 

What if it doesn’t supply the specified amount of voltage? In that case, you must replace the thermocouple. You can simply use a wrench to detach it from the water heater. Then, carefully attach the new thermocouple in its place. Also, make sure to turn the gas supply off before you proceed. 

What if these Solutions don’t Work?

In some cases, the problem might also lie with the flex tube. So, you must examine this component as well. Moreover, pilot light issues are also sometimes caused due to a broken main control valve. In that case, many service providers might offer you repairs for it. But, it’s better to get a new water heater in such situations.

Also Recommended:Plumbing Services in Dubai – Where to Book From?

Guest Contributor: Biler Charlie

4 TOP TIPS IN REDESIGNING YOUR LIVING ROOM AS YOUR WORKSPACE EXTENSION

You’re working diligently to finish your project by the deadline while your kids take a Zoom class in the other corner of the room—your partner walks in to bring them snacks while your dog follows the scent of food. You look around flustered, knowing that sharing the existing home office with your entire family just isn’t sustainable.

It’s okay—imagine this: the ample space in your living room gets redesigned for either you or the kids to work or study in peace. You can shift your furniture creatively, which allows for the inclusion of a workspace extension. Not only is it functional, but it also fits your overall aesthetic. Below, we share the top four tips for redesigning your living room as your workspace extension.


1. MAKE USE OF A CORNER

When the rest of your living room is already packed with furniture or you’re working with limited square footage in an apartment, make one corner your workspace extension—preferably by a window to invite natural light in while you work. By using a corner, you create an obvious separation between your living area and your working area.

 When choosing the desk for this space, ensure it matches the rest of your living room décor to create a seamless design. To top it off, create a gallery wall just above your desk, using elements from the rest of your living room—for example, if you’ve opted for a chic appearance throughout, use black and white prints in gold or silver frames. If you’ve opted for a more bohemian and artsy vibe, create a gallery of your favorite art prints in funky frames.


2. USE AN OPEN WALL

If you can rearrange your couches or if you have the budget to replace them altogether, you can create a workspace along an open wall. Before you jump the gun and buy a new desk or couch, take out your measuring tape. The best couches are the ones that fit perfectly into your available space. When you’ve mapped out where your furniture is going to be placed, you can begin working with the open wall.

 Using this redesign is ideal if you have multiple kiddos who need workspaces, as you can line the wall with a long desk and set up multiple workstations. Add floating shelves above each individual workspace to create a streamlined, balanced look and you’ll have a clearly divided, yet congruent appearance in your living room space. While you’re at it, make sure you’re incorporating mindful and comfortable touches that help to improve mood and keep energy levels up.


3. CREATE YOUR OWN CUBICLE

To create the feel of a separate office space in your living room, you can use makeshift walls that double as décor and storage space with the use of a tall cubby bookshelf. Open cubbies mean you can place books or other decorations facing either direction, which unites the two spaces, rather than appearing awkward and blocking off the natural flow of your living room.

 With this approach, you can create an entirely new office, rather than just an extension, and can use an L-shaped desk to create an open square within which you work. Incorporate additional design elements to complement the living area, like house plants of varying shapes and sizes. You’ll add life to the room neutrally, and it’ll feel inviting, both for work and for lounge time with friends and family.

4. USE THE SPACE BEHIND YOUR COUCH

If you’re dreading the thought of giving up a precious part of your living room for a practical addition that seems to cut into the space you share with guests, don’t worry. Try a modular sofa in an outdoor-friendly fabric to accommodate all of your guests. Simply use the space behind your couch to set up your workstation. By layering your furniture like this, you create a simple workspace that doesn’t interrupt the rest of your hosting area. You can still enjoy football watch parties without feeling cramped.

Use a slender desk that tucks behind the back of the couch nicely, add an area rug to outline the workstation, and include a desk lamp for adequate lighting. Leave an open space for your laptop and layer additional décor on the other side of the desk, like a couple of books alongside an elegant orchid.

With the tips outlined above, you can have the best of both worlds—a workstation that gets you in the zone for ultimate productivity and a spacious living area that doesn’t feel crowded by the addition of a workspace extension. All it takes is a little imagination and creativity to envision a new design for your living room and once you’ve landed on just the right touches, you’ll be amazed by how great it all comes together. Tell us about your new vision for your living room! What tips do you plan to incorporate?

Guest Contributor: Kiley Morrow