ADDING ANOTHER BATHROOM TO YOUR NEW HOME

Adding another bathroom to your new home

Unless you live on your own, you’ve most likely considered adding another bathroom to your new home. The luxury of not waiting for other people to finish is always alluring. Add to that the increase in home value that an extra bathroom brings, and the idea of adding one sounds better and better. But, what does adding an additional bathroom to your home involve, and should you undertake such a large project? Well, that is what we are here to find out.

Before adding another bathroom to your new home

The average cost of installing an extra bathroom is $15,000. Therefore, unless you are a well-off millionaire, adding one should be a well-thought-out decision. Not all homes can benefit from an extra bathroom. And, just like any other home remodeling project, the final cost might be far greater than you first anticipated. So, let’s first see whether you actually need to add another bathroom to your new home.

Do you really need another bathroom?

The mere fact that you are considering this leads us to believe that you don’t live alone. If you do, the only possible reason for adding an extra bathroom is if you plan on having a guest room. In this case, an extra bathroom is more of a luxury and less of a life improvement.

Some people just want the guaranteed privacy of having their own bathroom.

The value of an extra bathroom

If, on the other hand, you have multiple people living with you, an extra bathroom can be of great help. Ideally, you should have a bathroom for every 1,5 people living in your home (or two for every three people). So, if there are three of you, have two bathrooms. If there are 5, have three. While you definitely can make do with less, having more bathrooms ensures that people can enjoy their privacy and don’t have to hurry with morning preparations for work or school.

Furthermore, even if this is your new home, you might end up selling it at some point. And before that happens, know that adding an extra bathroom can dramatically increase the value of your home. Most buyers look for the 2:3 ratio of bathrooms to bedrooms. But, if your house can accommodate it nicely, it certainly doesn’t hurt to have more.

Adding the extra bathroom

So, let’s assume that you need an extra bathroom. How are you supposed to go about adding it? Well, there are a couple of things you need to take care of.

Plan in advance

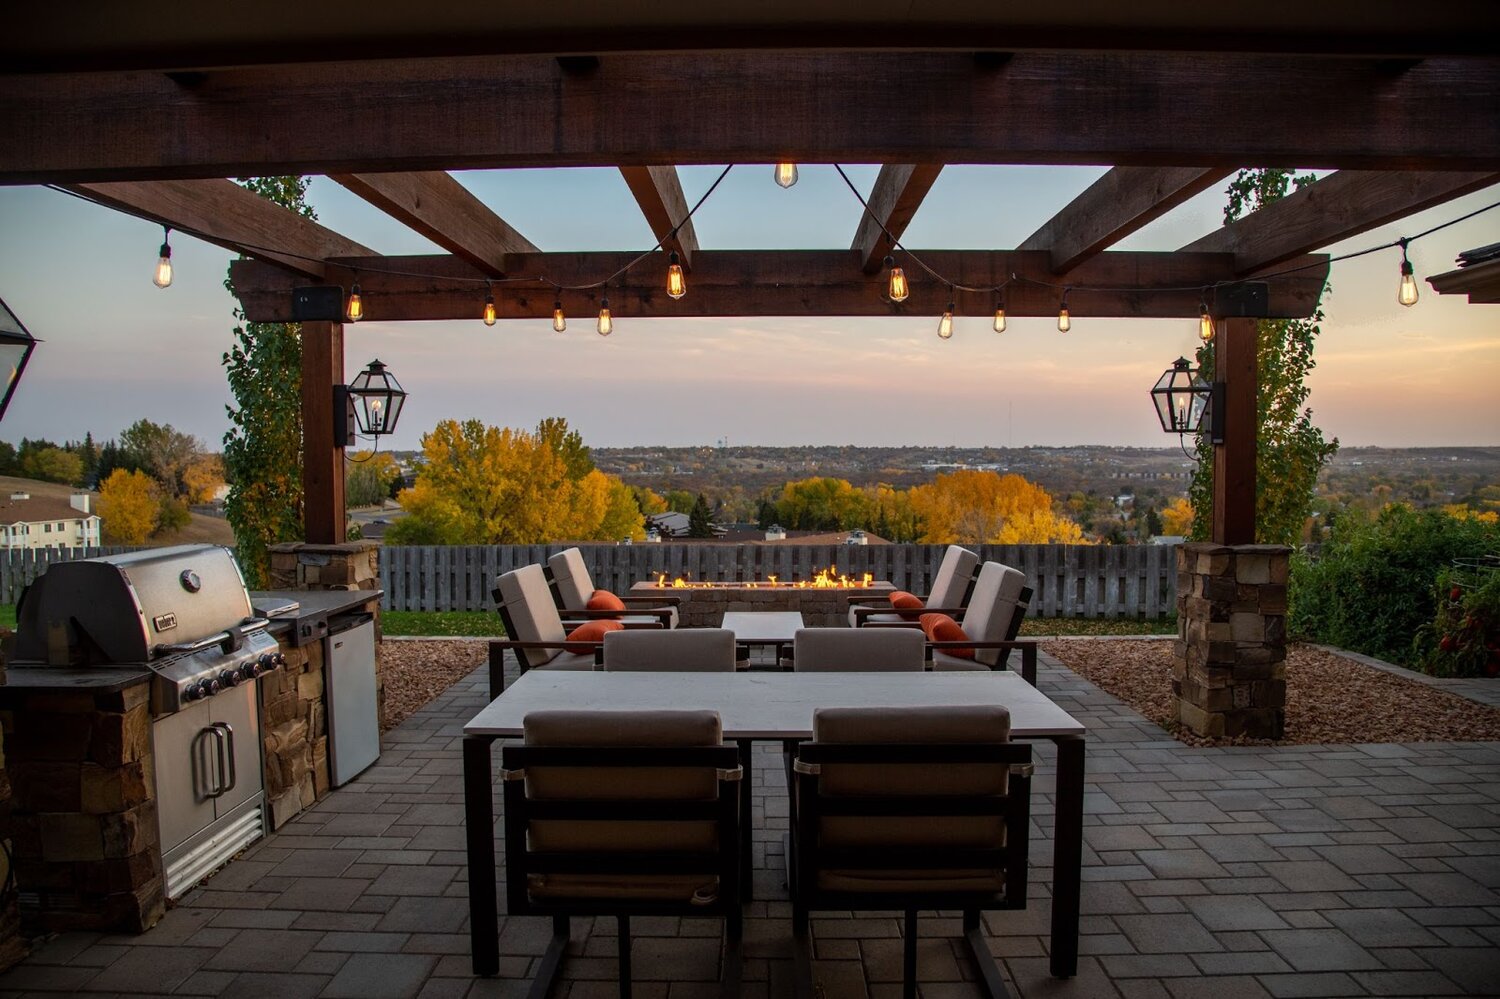
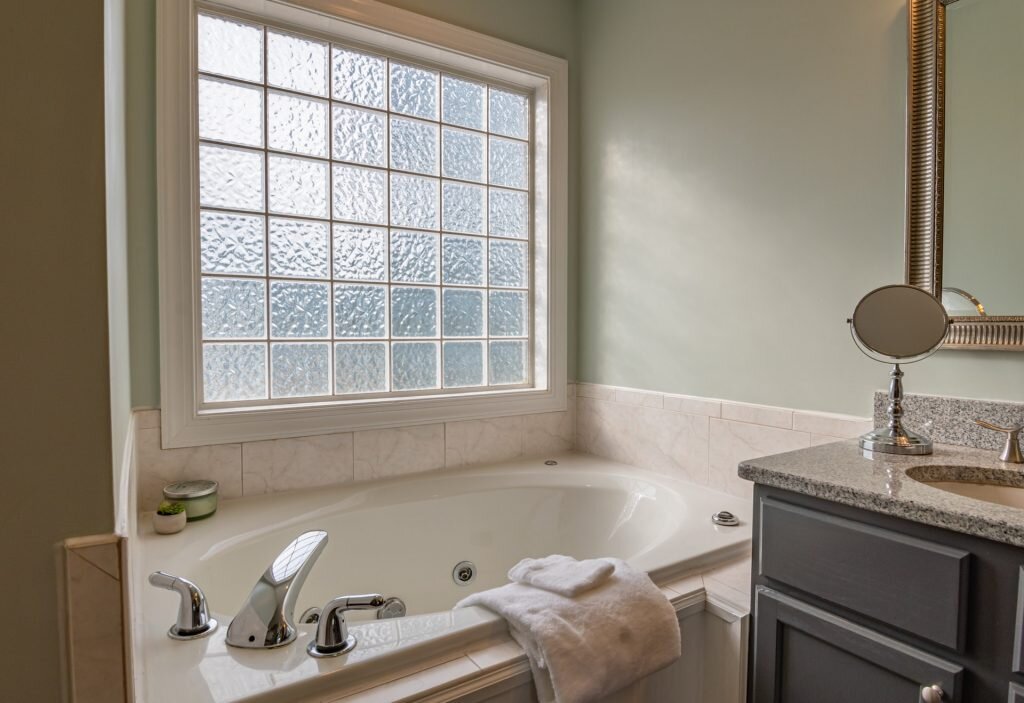
The first thing to do is to carefully consider where your bathroom will be. Know that the term “bathroom” can cover anything from a sink and toilet to a full-fledged spa with a hot tub. Even when renovating their bathrooms, people can be pretty creative. So, figure out what your bathroom will have and where you will place everything. Remember to factor in the necessary sockets for appliances and consider whether your bathroom will have the required ventilation.

Carefully consider windows and ventilation before adding another bathroom to your new home.

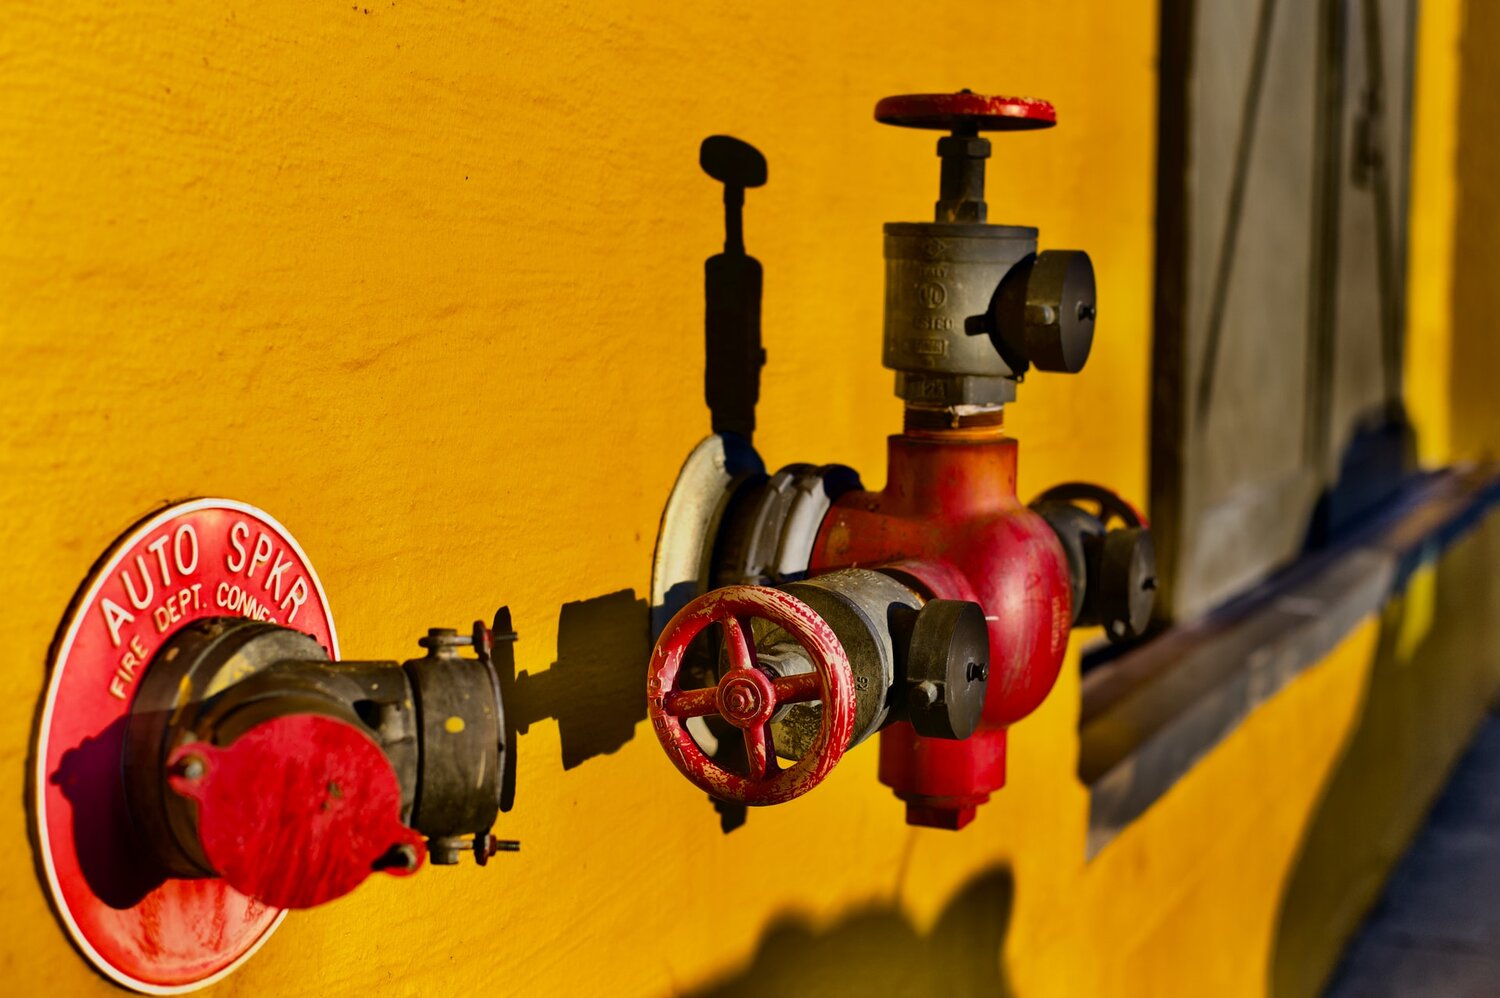
Furthermore, when it comes to plumbing and electricity, you should also plan and measure carefully. A skilled plumber can pretty much install the necessary pipes for a bathroom wherever you see fit. And electricity, by its nature, is relatively easy to spread out wherever need be.

But that doesn’t mean that you should push your luck. If you put your bathroom in a difficult spot, you can be in for major plumbing renovation. This will mean that you’ll need to pack your things and move out of your home for a while, as there will be no running water. And even if you pack in the most efficient way, this usually means that you will have to put your items into storage until the project is done. 

The closer your bathroom is to the original pluming, the safer, cheaper, and more resilient it will be. So, take a close look at your home, and create a detailed and careful plan before you start. Don’t shy away from consulting with a professional home designer.

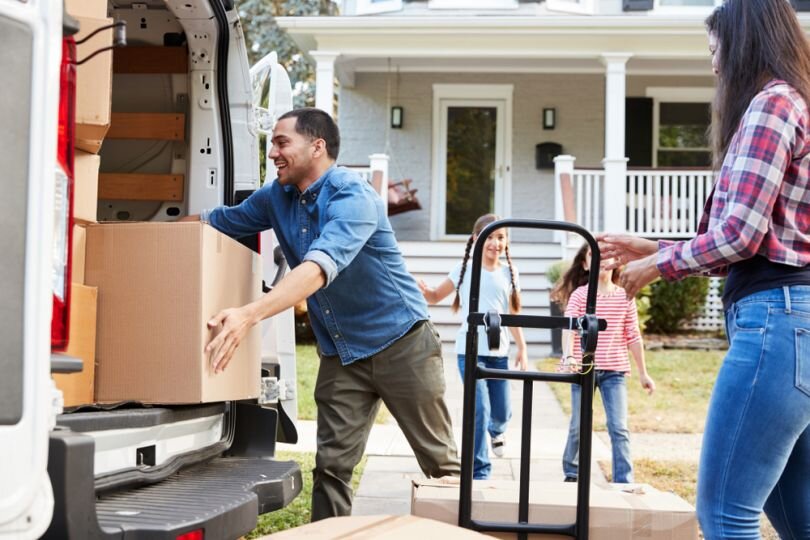
Preparing for the project

Once you’ve figured out where you will put your extra bathroom, you need to start preparing for the ordeal. As we have said, depending on the complexity of the project, you might need to move out. Given the stress you will inevitably be under, it’s important to stay healthy when moving. And seeing that health comes first during relocation, even if it is temporary, you really should prepare adequately for it. Our advice is to either move in with family members or find a hotel (if the bathroom installation will last longer than a week).

The second thing to consider is finding the right professionals to take care of your bathroom for you. An all-in-one contractor is a good start as they can go over your plans and see whether they are feasible. To find them, you can look online and see whether there are any reputable contractors in your area. While price is a significant factor, don’t let it be the only one. Poor contractors can put you in a difficult situation where you need to redo your bathroom in a month or two. And, while bathroom renovations might not be as terrible as they seem, you really ought to avoid them whenever possible.

If, by chance, you are considering DIY plumbing, know that it is usually ill-advised.

All in all, the safest and the cheapest option is to do things right from the start. This means ensuring that you find the best possible contractor (ideally one with bathroom installment experience). Check for reviews online, and don’t shy away from asking for referrals. The more you know about your contractor before hiring them, the better the odds that you will avoid bad ones.

Final thoughts

All things considered, adding another bathroom to your new home need not be a challenging endeavor. The main thing to do is to do your research, prepare properly, and hire the right person for the job. Do that, and you will soon enjoy the peace and quiet of having a bathroom all to yourself.

Guest Contributor: Sophia Perry

HOW TO REDUCE THE RISK OF A GAS PIPE LEAK IN YOUR HOUSE

Natural gas is commonly used in households for kitchen and heating purposes however, one of the major threats is a gas pipe leakage in the house which can be extremely dangerous and even fatal in some cases. In most countries, gas is used as the essential energy resource for water boilers and kitchen needs. 

Natural gas is also relatively cleaner, cheaper, and produces abundant heat for different purposes. People use gas stoves, boilers, heaters, and much more appliances that use natural gas. Natural gas is safe to use but you have to be careful to avoid any unfortunate incident. 

Some of the commonly used gas appliances at home are:

  • Fireplaces
  • Furnaces
  • Grills
  • Water Heaters
  • Backup Generators
  • Gas ovens
  • Laundry Dryers
  • Outdoor Lights
  • Pool Heaters
  • Space Heaters

These appliances are commonly used by people in everyday life and are not a big threat but you must ensure that you are using these appliances correctly to avoid any leaks. 

Dangers and Causes of a Gas Leak

If not detected on time, a gas leak can be fatal and cause huge losses. A gas leak can even burn down your entire house if not controlled on time. Following are the potential risks associated with a gas leak:

  • Adverse health effects
  • Accidental fire
  • Explosion
  • Carbon Monoxide (CO) poisoning
  • Death

Natural gas must be treated carefully as it can be dangerous which is why it is suggested to keep children out of reach. Natural gas is extremely inflammable and even the slightest spark can cause a huge fire. Some of the common causes of gas leaks are:

  • Faulty appliances, like boilers or ovens
  • Loosely fitted gas pipes
  • Poor Appliance Maintenance
  • Appliance Malfunctions
  • Damaged gas pipes
  • An unattended stove that’s been left turned on
  • Damaged gas cylinder
  • Fitting and Connection Issues

 Ways to Reduce the Risk of a Gas Pipe Leak in Your House

1. Installing a Carbon Monoxide Detector

Due to incorrectly fitted appliances or other reasons, there can be a gas leak at any point in your house. One way to reduce the risk of leakage is by installing a carbon monoxide detector at your home. 

Any appliance that burns fuel can produce carbon monoxide which is extremely hazardous for health. The carbon monoxide detector is just like a smoke detector that can be installed at your house. You must place a carbon monoxide detector in every room where there is a gas/ fuel-burning appliance. 

 Before installing the detector, carefully read the instructions mentioned. Do not place the detector near the fireplace or any flame-producing area. Make sure the alarm is placed in an area that is audible in the entire house.

2. Inspecting the Vents on Your Appliances

The vents on your appliances can get clogged with dust and fumes and must be cleaned regularly. Uncleansed or blocked vents can accumulate gas inside which can cause an accident. To avoid any accumulation of gas in vents, you must inspect all your appliances regularly to make sure they are operating normally. You should check chimneys, flues, and vents of all appliances.

3. Check the Ventilation of the Rooms

Ventilation of the house is extremely important especially for the rooms where there are gas appliances. If you are using gas heaters in a room for heating purposes make sure the room is well ventilated. 

 Ventilation should be carried out for at least 30 minutes daily so that there is no threat of gas accumulation in the room.

4. Hire a Professional Team to Check for Leaks in Your Gas Pipes

Using natural gas is safe if the fittings are done correctly by professionals. However, to avoid any unfortunate incident you must get professionals to check the gas pipes at your house. If it has been a long since you got the pipes installed, you must get them thoroughly checked by a team of professionals so they can suggest to you what to do next. 

In case of broken or damaged pipes, you may be asked to completely repair them. Make sure you get an inspection and a Gas Safety Certificate. Whatever is your case, getting the pipes checked regularly for leaks is essential to avoid any unfortunate incident. Avoid calling your local plumber in case of gas leaks and only go for licensed gas professionals. 

5. Educate yourself With the Symptoms of a Gas Piping Leak

You must also be aware enough of the gas situation at home to avoid any trouble. Learn about the symptoms and what to do in an emergency situation to help protect yourself and your loved ones. Having a basic knowledge of gas maintenance is important to avoid any dangerous situation. 

The problem with natural gas is that it is odorless and colorless hence you cannot detect it with the naked eye initially. However, there are a few symptoms that you can observe to detect a gas leakage. Some of the early symptoms of gas leakage at home are: 

  • Nausea
  • Headache
  • Dizziness
  • Confusion
  • Exhaustion
  • Rapid breathing

Other symptoms include discoloration of plants due to carbon monoxide leakage and rotten egg smell. If there is a gas leakage or a threat of leakage:

  • Turn off the gas supply at the source, usually a gas meter
  • Do not light a match and avoid turning on any light, as electrical circuits can cause a spark
  • Open all of the doors and windows to ventilate the space
  • Immediately evacuate the building and inform others as well.
  • Call the emergency to resolve the matter and do not enter the building until the matter is resolved.

Beware of Gas Pipe Leaks During Home Remodeling 

You must be careful before thinking of renovating your house or breaking any wall. You may block the gas pipelines or even damage them unknowingly which can cause a huge problem at your house. Before making any changes, first, consult a professional engineer who can guide you about the pipelines and how to save yourself from any unfortunate incident. 

Moreover, always consult licensed professionals before construction so that your pipelines are fixed correctly. Also, avoid planting any trees or shrubs near the gas source.

Guest Contributor: Arslan Hassan

A GUIDE TO RELOCATION ASSISTANCE

Relocation assistance is a type of service that assists people who relocate to a new place. Relocation assistance can be done in many ways, but it is generally divided into three categories: financial, professional, and personal. In addition, there are various types of relocation packages that have different prices depending on what you need. In this article, we will go through all these aspects and provide information about relocation policy and how much the package should cost for relocating to a new place.

What is Relocation Assistance?

Relocation assistance means when a company assists recruits of an existing employee, which can help him find financial assistance when relocating work from one location to another. It is also for the employee’s benefit because while moving employee doesn’t have any financial burden on them. And by this employee can start in his new position as soon as possible.

The employee usually gets relocation assistance benefits to make it easy for them in their new location. In some companies, if employees have a family, they also receive spouse and children’s move with the employee called domestic partner relocation (DPR).


Types of Relocation Assistance

Direct billing means the hiring company directly deals with the moving company and pays the bill for the move, including selling old home and services for helping in relocating.

Lump-sum – In this, a certain amount of money is given to the employee directly to pay the moving company and related expenses. And if the moving cost is more than the amount given to the employee, he has to pay from his pocket.

Reimbursement – In this, the employee pays from his pocket for the move, and after moving, the company reimburses the amount to the employee. But drawback in this is the employer has to keep all the records of the move carefully.

Third-party relocation – All the logistic, rental expenses, and real estate related to the move are outsourced to the third party, which coordinates with the services and takes care of them.

What is Included in Relocation Package?

Most expenses are included, like interim living, lodging, meals, etc.

  • The company may also offer a relocation bonus or reimbursement.
  • A moving allowance is also included, which helps the employee transport their goods from one place to another on an expense basis. Temporary housing until the new home purchase is completed and includes any additional costs, such as security deposits, utility connection fees, etc., incurred in making this transition is also covered by some companies.
  • Unreimbursed expenses like increased childcare for children under 12 years old while at school; pet care if there’s no family member available to take care of them during the move can be reimbursed by companies too. It also includes selling the old home, moving and storing, furnishing, and other household goods.

What is Included in Relocation Policy?

In relocation policy, mostly short-term hosing, selling and purchasing fees, furniture, and moving costs are covered.

  • It is usually up to the company’s discretion how much of a relocation package they would be willing to offer their employees. The average length for an employee in this process can range from one day or less to three months, depending on what type of work you do and where it needs to happen.
  • Mileage reimbursement can also be included as part of your benefits package if you’re required by federal law, state law, or local ordinance laws to maintain driving records for business purposes. All mileage will need receipts that must include the date and miles traveled between destinations, destination location address with zip code (i.e., hotel name), and vehicle used during travel time.

Are Relocation Packages Common?

In the past years’ relocation was only for the high level of employees. But in today’s global economic scenario and global workforce development, it is common to offer relocation assistance as part of the compensation package.

  • Most employers are trying to save money by not having employees relocate themselves and provide everything they need in one location.
  • Most companies have started offering this type of benefits packages for their key members because more people were looking for employment opportunities outside their current locations. This trend has continued, so now even small businesses are giving out similar packages.

Conclusion

If you need help moving, it is best to get a relocation package. Relocation packages are common and can be used for any move (local or long distance). A relocation policy will detail what the company offers in terms of assistance with packing, unpacking, transporting furniture, etc., as well as how many days off work employees receive if they have to relocate. You may also want to determine whether there’s an option for reimbursement for travel expenses like gas money or plane tickets. Please feel free to contact us.

Guest Contributors: Komal Shah

10 STEPS TO KEEP YOUR PIPELINE DURABLE AT ALL TIMES

Bursting of pipes isn’t something you really want to get into, considering the severity of the effects that would follow. From floods or unpleasant and dangerous puddles to poisoning, these are risks you may not want to run into. Especially if there is something you can do about it.

Just like you’d take care of your gas to reduce risks of gas leakage in the house, it is also imperative that you take good care of your pipeline to make them stand the test of time. This guide explores ten common causes of pipeline problems that may make them burst and what to do about it.

1. Extreme Water Pressure

Water pressure is one of the most common factors linked to the bursting of water pipes. Ideally, if the pressure levels spike to levels that your pipe won’t contain, it will burst.

The bottom line here, therefore, is to keep checking your pipeline to ensure that the pressure levels are within the recommended ranges. This will help you avoid the risks of the sudden surge in water pressure that would cause your pipes to burst.

You can know for sure that your water pressure levels are within the ideal limits by monitoring them using a water pressure gauge. You will need to hook it up to your hose faucet to get accurate water pressure readings.

The ideal water pressure should average 30 to 50 psi and not go past 60 psi. If you notice that the pressure reading is 60 psi+, be sure to contact an experienced plumber to install a pressure valve that will help you keep the pressure levels at the ideal limits and avoid pipe bursts.

2. Freezing Temperatures

Cold temperatures are not really a concern until when the water in your pipes begins freezing. The freezing of water in the pipe increases the pressure in your pipes, thus increasing the pipes’ risks of bursting. You can manage this risk to prevent your pipes from bursting by turning your faucets on to release a steady water flow and prevent pressure buildup. 

3. Corrosion

Most pipes can give you a long-term service, but this does not mean that they will never get damaged. Corrosion is a relatively common cause of pipe bursting, especially for pipes that are used for long periods.

Ideally, the risks of your pipes bursting due to corrosion after long periods of use would be high if hard water passes through the pipes. Over time, the unfavorable pH balance of the water may cause corrosion, leading to a buildup of rust and ultimately bursting of the pipe when the rust blocks it completely.

You can slow down the rate of corrosion on your pipe by ensuring that your water is chlorinated. This will help clear away harmful bacteria like legionella, which thrive in corroded water pipes.

4. Flushing Big Items down the Toilet

Flushing big items down your toilet isn’t a wise idea as it increases the risks of your pipes clogged. Again clogging in your pipes would increase the pressure inside your pipes and increase the risks of bursting.

Managing this risk is pretty straightforward and would not need an expert intervention unless you’ve noticed a leak. Simply find a way of getting rid of items that may clog your pipes, like sanitary pads, instead of flushing them down the toilet.

5. Leaving Home During Winter

If you live in a cold area and you are just coming back home from a vacation and you suspect that your pipes could have burst, the number one culprit, in this case, is freezing of the water. Just as mentioned early, freezing of the water increases pressure in your pipes, and this may make them burst.

To avoid this risk, if you stay in a cold area, leave your heat on if you will stay away for quite some time. It would help if you keep the heat just above 10ºC or 50ºF, as this would do a good job preventing the freezing.

6. Cracks or Holes in the Pipes

Cracks or holes in pipes aren’t uncommon and are also notorious contributors to the sudden bursting of pipes. The cracks or holes in your pipes will let cold air inside.

As you probably already know, this would increase the pressure causing them to burst. To prevent the bursting of pipes due to cracks or holes in them, ensure that your pipeline is sealed both inside and outside to prevent cold air from getting into the pipes.

7. Water Hammer Damages

Water hammer damage happens when your pipes bang and rattle when you turn on the water. You can detect this just from the sound whenever you turn on the water.

If this water hammer isn’t managed promptly, it will weaken surrounding pipes and make them burst. Therefore, if you hear strange sounds, have a professional examine the pipes and repair them to prevent the looming problem.

8. Frozen Garden Hose

Now, this is something that you really wouldn’t expect, but a frozen garden hose may also make your pipes burst. Ideally, when the ice in your frozen garden hose expands, it will increase pressure buildup in the pipes, something which may end up making them burst. You can prevent this problem by disconnecting your garden hoses from the pipes during cold weather.

9. Very Cold Temperatures in the Home

Very cold temperatures around the home may also be to blame if your pipes burst. If you leave in very cold temperatures, here’s what you can do to protect your pipeline.

Ensure the temperatures around the areas of your home where the lines pass through don’t drop below 32ºF. You can achieve this by directing warm air to cold areas in the home. You can also apply heating tapes to your pipes.

10. Poor Insulation

If your pipelines pass through areas like the attics or basements with poor insulation, they may also burst. A typical red flag of a frozen pipe is the molds that would form along the property’s exterior walls. 

To manage this risk, you will need to get in touch with a professional who will improve the insulation of your pipes. Any exposed water pipe will need to be properly insulated.

In Closing

You can make your pipeline stand the test of time by taking measures that reduce risks of damage to the pipes. Taking timely precautions will help you prevent damages that may not only be dangerous but also costly to repair.

Author Bio:

Leon Collier is an expert blogger and academic writer based in the UK. He has expansive experience working with experts offering assignment writing services at Write my dissertation. Leon is a go-getter who doesn’t mind taking on challenges thrown at him. He loves to read books and play tabletop games with friends in his free time. Connect with him on Twitter @ LeonCollier12

6 EASY ROOF MAINTENANCE TIPS TO MAKE IT LONG LASTING

Placing a new roof costs a lot and you’ve spent a lot on something, you have to protect it. A roof is something significant to deal with. Some people will ignore that their roofs might need maintenance, and the consequences come when they need to sell the house or roof problems such as leaking. Proper maintenance of the roof should be the best way to avoid unnecessary problems in the future, hence reducing your roof’s cost.

Roof maintenance can be successful by removing moss on the roof, removing leaves, roof coating, checking for shingle damage and prune overhanging branches, preventing ice dams, and checking the attic. Call this Baltimore roofing contractor for all your needs.

Removal of leaves

A simple peaked roof surrounded by a low landscape can probably stay clear, but if trees are nearby and the roofs are complicated, then the roofs are always filled with leaves. The leaves collect near chimneys or in roof valleys. If not removed, the leaves will trap moisture and decompose, then allow moisture to compile in your roof, creating a fertile ground for weeds to grow. If the house is a one-story house with a low-slope roof, then the leaves can be removed using a car washing brush placed on a telescoping pole. A unique tool is known as a leaf rake and a leaf blower can also be used, especially on dry leaves.

1. Removal of moss

Like leaves, moss also damages a roof, but you can remove them by using chemical substances. Roofs that are composed are mostly covered with black algae, and its growth does not hurt the roof. A detergent mixed with water or a little chlorine will finish it off, but it’s advised to leave it alone for the safety of both the roof and you. The moss needs to be killed first if there is a lot of build-ups. It’s then recommended to use products based on potassium salts of fatty acids instead of toxic formulas that zinc sulfate. It can also be removed by applying soap on where the moss is growing and try preventing the wash water from getting in the storm drains.

After the roof is cleaned and free from moss, you should install the zinc strips on the roof to prevent the moss from coming back. The runoff from the strips inhibits the growth of mosts when raining. Zinc strips are more eco-friendly and effective instead of treating the whole roof with pesticides.


2. Prevent Ice Dams

Ice dams are nasty any they cause damage to the roof and removing them from the roof might cause leaking into the house. It’s not advisable to pry off the ice formed already since that can damage the roof. Instead, use a roof rake to remove the snow within three feet of the gutters. One can also get a telescoping pole and work from the ground and if a ladder is necessary, work at an angle that the falling snow won’t push you down.

Air leaks and inadequate insulation into the attic the risk of ice dams, so after a great storm, check on the roofs.

3. Prune overhanging branches and check shingle damages

Tree trimming prevents damage to a roof by keeping moss and leaves off the roof. Friction from leaves and limbs that touch a roof can damage shingles, incredibly high wind. Overhanging branches also give other rodents and squirrels the chance to access your roof; thus, they can gnaw on the roof. The branches should be away from the roof, or if not possible, the tree trunk can be wrapped with a metal-sheet bank to prevent the rodents and squirrels from climbing the tree.

Check the shingle daily since you may never know if it’s damage from something striking the tree. If the shingles are buckled, curled, or missing, then the roof must be repaired immediately.

4. Check the attic

The attic is an indication that shows if a roof needs to be replaced or it’s still holding. If water stains are evident and daylight peeks pass through the boards, then the roofs need to be fixed earlier before any more damages. The attic also shows how well a roof can perform after a big storm.

5. Roof coating

Roof coating is the best method used if you want your roof to last for a long time. There are different types of roof coating that includes;

Acrylic coating: They are durable and inexpensive elastomeric coatings that have potent biocides and emulsion polymers that prevent dirt accumulation on the roof and provide superior resistance to mildew.

Silicone: Silicone coating is the best choice for providing UV protection and resisting pond water. They erode slowly without becoming hard and contain high solids content. You can use less material to achieve this film thickness.

Asphalt Emulsion: It has asphalt particles dispersed in water with clay as a bonding element. It is black or brown and contains inorganic and organic compounds that strengthen and durability of the roof.

Butyl Rubber: They are also the best due to their tensile strength and extreme elongation. It contains a solvent-based polymer that is fast drying, highly reflective, and suitable for roof maintenance and repair.

Importance of roof maintenance

Roof maintenance is essential since it reduces costs used to replace another roof and makes a roof last longer. If you want a long-lasting roof, then you should follow the above steps.

Author Bio

For the past 20 years, American High Tech Roof Coating has been owned by Javier Chavez who runs their company throughout the Los Angeles, California Area servicing commercial buildings that require new roofs but opt into silicone cool roofing instead.

PRACTICAL DESIGNS FOR YOUR BACKYARD PATIO

Your backyard is your family’s personal play space. You’ve got room for the animals and kids to run around, a space to grill out in the summers, and an area for you and your guests to sit and chat. In most cases, the backyard patio is the place a lot of people are looking to improve when they say “I’m going to sell my house.” A simple and practical looking patio can make your house pop before you put it on the market. Not only that, it’ll easily help add to your value and get a great return.

SIZE DOESN’T MATTER

A lot of people think that the size of the backyard and patio limit what you can do, and they’d be half right. But even a smaller space can be personalized to fill a family’s needs. There’s no shortage of ideas for smaller back patio designs. You can go as far as to add a fire pit, a grill, a seating area, and posted plants. Or you can just clean it up, fix some basics, add some decor and a few plants. The key to a small backyard patio is minimalism and efficiency of space.

BIGGER DOESN’T ALWAYS EQUAL BETTER

Assuming you have a good-sized backyard, you have a lot of canvas to work with. With a lot of area comes a lot of ideas. But when it comes to backyard patios, bigger isn’t always better. In some of the best-kept backyard areas, a patio is an accent to make space stand out from everyone else. Some outdoor furniture, a simple grill or fountain, and a few well-placed accents on the patio or even side of the house can change the entire look.

ORGANIZE

No amount of accents, grill tops, or chairs can make a backyard patio work if the whole thing keeps you from getting to it. We don’t mean to hire a feng shui master to make sure the elements align for good flow. But making sure you do not trip over a garden gnome when you try to sit in a chair would be a good start. The basics you want to stick with is to have enough room for two people to stand in between each piece of outdoor furniture or appliance.

We know that you have probably seen some picture-perfect patios with pergolas, a 57″ TV, and a hidden beer fridge that pops open with a key fob. That might be right for the millionaires, but keeping up with those might not be practical. Getting creative not only will help keep your space practical, but it’ll also save some money. Recycling old pallets to make border planters, or even just cleaning up the old grill can help add to your outdoor space. There’s really no limit when it comes to having a practical design for your backyard patio.


Alex Capozzolo is a partner of Henry Buys Homes, a real estate company in Jacksonville, FL. He has been writing for the real estate industry for several years. Henry is a licensed agent that operates in the Florida market.

YOU MUST AVOID THESE 4 AMATEUR UPHOLSTERY MISTAKES

The easiest way to transform the interiors of your house is to upgrade the furniture. But isn’t that a tad too expensive? 

What if I tell you that you can do exactly that but without carving a hole in your pocket? 

Reupholstery is an effective way to revamp your house and get rid of your old and worn out furniture. You can find professional upholsterers who can help you redesign the interiors of your house or take on a DIY project. While professionals bring you years of expertise and the right tools, DIY is somewhat a challenge. Either way, you will be able to get an upgrade at a fraction of the price you would have spent on purchasing new furniture. 

There are a number of Youtube videos that can help you but it is not as easy as it seems. While they can assist you gear up for the job, the techniques and suggestions shared are sometimes inconsistent which leads to mistakes. Don’t worry! We will help you. 

Here are some common amateur upholstery mistakes that you must avoid. 

USE THE RIGHT TOOLS

The first step to upholstery is getting the right tools for the job. The most common rookie mistake is using the wrong tools. While purchasing the necessary tools may seem an expense but it will be worth it. In other words, you need a staple remover to reupholster otherwise you will end up doing the job in double the time. So, prioritize – time is more important for you or a little money. 

To put things into perspective, just like any other DIY project, why do you want to use a sword when you have a gun?

COMPROMISING THE QUALITY

Restoring the interiors of the house is always exciting. We all want our house to look presentable. While reupholstery is an effective alternative to purchasing expensive furniture, there are several things you need to take when taking up this job. One of which is ensuring that you do not compromise the quality. 

Chiefly, the purpose of upholstering is to make your room and furniture look the best wherever it is placed. Most people fall into the trap of budgeting and end up compromising the quality of the fabric. In the end, you should understand that the whole purpose of upholstery is to renew your old furniture. And you do not want to do that with poor quality fabric. 

While being economical is something that we will not hold against you as in most circumstances it works best, it is not the best option in this case. In other words, when you are restoring your old furniture, you do not want low quality fabrics which will not hold their ground in a few years. Then what is even the point of upholstering? Low quality fabrics lose color and get worn out easily. That means for a little more money, you can purchase premium fabric which will make you design your dream furniture without any hassles. 

DO NOT FALL FOR TRENDS

In an attempt to remain updated with the latest trends in the world of furniture and interior design, do not go overboard with unwanted items. Simple is the new beautiful. Sober is the way forward, so do not overburden yourself with over the top items. Instead, reupholster your furniture and suit it with the style that suits you. 

Most people get overwhelmed with the trending designs and try to replicate it in their homes. That does not always work well. Rather it is best to go with what you like and what resonates with your personality. This will help you create a timeless decor that you always wanted. 

LIVING ON FALSE HOPE

There is one thing worse than losing good furniture is keeping it even after it has worned out a little too much. There is no point trying to prolong the life of already dying furniture. You are just wasting your time and effort on something that just won’t work. If not today, it will die tomorrow. You must realise that they have finally reached the end of their useful life. 

Also, avoid purchasing furniture from garage sales or thrift stores. There is a reason why they were being sold at those places in the first place. Which is precisely why you must avoid the upholstery mistake of trying to make them look presentable. But if you do want to purchase it from such places, begin by thoroughly inspecting the used piece before you invest too much in revitalizing it. 

Do not just skim through the surface of the furniture but take a hard look at its underside. If you see something wobbling and dangling, the best thing to do is to avoid putting down any money for the purchase. Instead, in that case it is better to invest and purchase new furniture

CONCLUSION

If you enjoy upholstery and want to practise restoring your old furniture, you must avoid the aforementioned mistakes. We do not want you to make such costly mistakes. Precisely why we drafted this guide. In case, if your DIY project seems too much, you can always have professionals help you with it. Rest assured, your house will look as elegant as you wanted it to be. Isn’t that all what you want? 

So, do not settle for factory grade material when you can make your own and that too at a fraction of the cost. 

Share with us your experience in the comment section below.

10 BEST ECO-FRIENDLY KITCHEN COUNTERTOP OPTIONS

If you’re renovating your house, start from the kitchen. You can have a non-toxic cabinet finish and other sustainable materials, but what about the countertop? Are you sure if that’s eco-friendly? 

Installing a stunning countertop makes it the room’s focal point, but not all countertops are eco-friendly. To illustrate: Granite is used for making countertops; granite is a non-renewable resource and often has to travel long distances, so if they are not sealed properly, it can off-gas radon, a colorless, odorless radioactive gas. 

Here are some eco-friendly countertop materials that can add a stunning look to your kitchen and also ensure you to be sustainable: 

PaperStone

This countertop material is made from recycled paper and petroleum-free resin. When it comes to durability, paperstone is as strong as steel. In addition, these materials are available in different sizes and thicknesses. Therefore they can be cut and optimized for your project. 

IceStone

Icestone is another excellent countertop material made from glass and concrete. Hundreds and thousands of wine bottles were dumped earlier. These glasses are diverted to icestone slabs by combining with concrete. 

Therefore, many glasses that were previously termed as garbage materials are now recycled into durable materials like icestone. Icestone is 75% recycled glass in weight. This makes an excellent sustainable option. 

Durat

Durat materials are made from 28% recycled plastic and over 200 tons of plastic have been converted from the waste and processed to make this countertop material. They are manufactured in Europe and the US. This is a sustainable option as this is made from recycled plastic. 

Lapitec Sintered Stone

Tired of stains and scratches on the countertop? Sintered stone is made by fusing the minerals into a completely impermeable surface by heat and pressure. Moreover, the integrated technology of sintered stone kills harmful bacteria on the surface. 

They are scratch and stain-resistant. But, most importantly, they also clean the air. This material has an integrated titanium dioxide technology that purifies the air and breaks down pollutants. 

Eco by Cosentino

If you prefer a quartz countertop, this is one of the excellent eco-friendly options. Eco by Cosentino is the company’s contribution to utilize waste. However, Cosentino still pushes the primary line on non-recycled quartz. 

Eco by Cosentino is 75% recycled material and contains materials like a mirror, glass, porcelain, earthenware and vitrified ash. Therefore, adding a quartz-like look to your kitchen can be a good option with a better background. 

GEOS

GEOS materials are made from recycled glass and resin surfaces and they sometimes offer a more durable surface than concrete options because they use petroleum-based or epoxy resins. At Least the glass is recycled in this process and not ended up in some landfill. 

TorZo

TorZo surfaces are appropriate for vanity tops or tabletops. They use wood fibers for manufacturing that would be left behind and use an acrylic technology that makes it ten times more durable. 

Reclaimed Wood

This is a great sustainable option if you don’t mind the counter ‘wearing in.’ But, again, if you accept the wood limitations, reclaimed wood can be a very suitable countertop option.  

Richlite Composite Surface

Richlite is an FSC certified product. How is it made? Post-consumer recycled paper is stacked up and saturated with a phenolic resin and brought under heat and pressure. Due to the effect of heat and pressure, the resin sets permanently with zero off-gassing. 

Moreover, Richlite is a popular option for interior and exterior applications of kitchen and other bathrooms. This is gorgeous and attracts your attention. 

Bamboo

Bamboo can be a great surface option for countertops as it is economical and durable. However, not all bamboo surfaces are reliable enough. If you find a viable supplier like Plyboo, ecoFusion or Kerei, bamboo can be a good fit. 

Bamboo surfaces make a great vanity top or tabletop material. Bamboo is harder than many hardwoods and they last for a longer period like the wood countertops. There are also a lot of color options for bamboo countertops according to your preferences. 

Conclusion 

Kitchen countertops play a great role in your journey to a sustainable home. Cabinets and other kitchen options are quite easy to replace, but most of us are unaware of the countertop surfaces. Eco-friendly countertop options are not dull at all. They are just like the other countertop options, but the plus point is that they are organic and do not impact the environment and last longer than any general surface. Therefore, be wise to choose the right countertop according to your needs. 

Author bio:

Jared McMillen

Jared spent most of his working life in financial markets. He observed corporations making decisions for profit regardless of the impact on the environment. As these decisions were outside of Jared’s control, he decided to make changes in his own life to help our planet. 

Since then, he’s been spreading the knowledge of how families and households can have a sustainable lifestyle and consume what’s best for them.

Website: www.theecofriend.net/