HOW TO RAISE YOUR VIBRATIONS AND KEEP YOUR HOME CLEAN

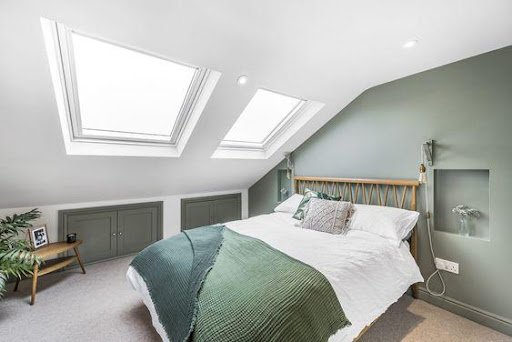
The idea that your environment can affect how you feel is nothing new. It’s something that we’re all familiar with, even if we don’t realize it. It’s true that your home has a huge impact on how you feel. And it’s also true that the state of your energy can affect your home environment. The key is to find ways to keep yourself feeling good while also keeping your house clean and organized.

In this article, we’ll explore some of the ways that you can do just that. We’ll look at how to raise your vibrations so you feel good and then keep the energy flowing by keeping your home clean and organized. But first, what exactly are vibrations and how do they work?

WHAT ARE VIBRATIONS?

Vibrations are the frequencies of energy that surround you, and everything around you. They can be positive or negative, and we can feel them when they surround us. The vibrations of our bodies, our emotions, and our thoughts are all interacting with each other all the time.

This makes it so important to be mindful of what we’re sending out into the world. The energy that you send out are like seeds that will grow into either positive or negative outcomes for yourself.

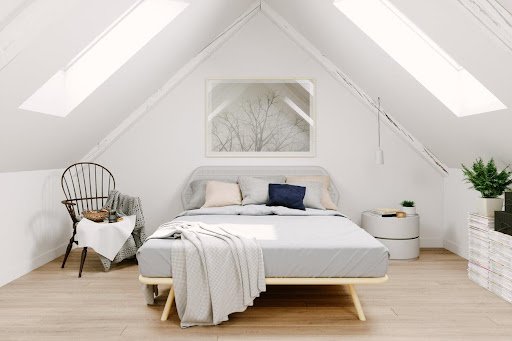
Vibrations are also affected by their environment: if you put something with bad vibes into a space full of good vibes (like a home), the space will start to feel like what it’s surrounded by.

People with negative energy often live in messy homes because the good vibes of cleanliness are replaced by bad feelings caused by those living there—and it shows.

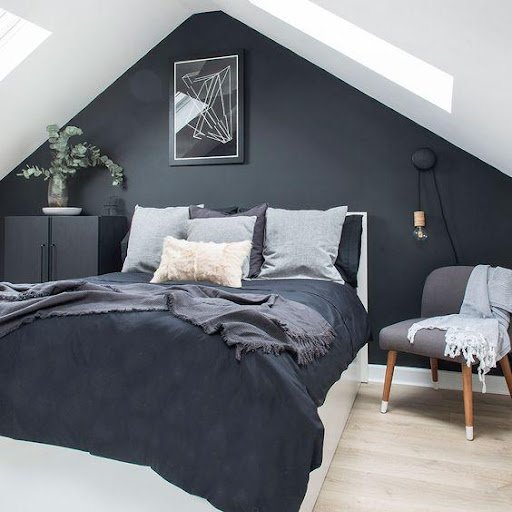
In the same way that we can feel how a room feels, we can also feel how space and objects are affected by our own energy. If you put something into a space that already has positive vibrations, those good vibes will be amplified. Likewise, if you put something negative into a space full of positive vibes, it will amplify what’s already there.

So, how can you achieve both a higher vibrational frequency and cleanliness in your home? Here are several ways you can do just that.

ALLOW FOR MORE NATURAL LIGHT AND FRESH AIR.

Natural light has been proven to reduce depression, improve moods and energy levels, boost productivity at work and help you sleep better at night by resetting your internal body clock. It also helps cleanse the air in your home by filtering out harmful toxins that can cause allergies or asthma symptoms in sensitive individuals. Fresh air is also important for cleaning the air in your home, as it allows toxic gases to escape and helps circulate oxygen throughout the space.

By simply opening the blinds and a window when you can, you’ll allow more natural light and fresh air in to your home. This can help cleanse the air of harmful toxins and improve your mood and vibration levels.

DECLUTTER THE HOME.

Decluttering the home is an important part of raising your vibration. It not only helps you feel less stressed and overwhelmed, it also makes your home look more beautiful and inviting. If you want to keep your home clean, one of the most important steps is removing clutter and unnecessary items from your life.

When you declutter, you can make more room for the things that are important to you. This will help you feel more organized and in control of your life. If you make a habit of decluttering and tidying your home regularly, not only will it improve your vibrations, but also keep the house clean.

It’s important to keep in mind that decluttering is more than just throwing away old items, it’s also about getting rid of things that are no longer useful to you. This can include anything from clothing and household items to old books and magazines.

If you have a garage sale or donate the items, this will help raise your vibration even more because it helps others as well.

ADD PLANTS.

Plants are one of the easiest ways to raise your vibrations and keep your home clean. They take in carbon dioxide and emit oxygen, which helps purify the air you breathe. Plants also absorb dust, allergens, and other particles that can make you sick. In addition to cleaning the air around them—and thus helping themselves—plants add a natural aesthetic to any room they occupy.

Plants also make great companions because they are living things that can give off positive energy. Plants are generally easy to care for and can help you feel more connected and grounded in your home. They’re also a great way to bring nature into your life.

SCENTED CANDLES.

Scented candles are a great way to make your home feel cleaner. The warm, pleasant scent can help mask other odors and create an inviting environment for relaxation and sleep.

The right scented candle can help you relax, feel more positive and boost your mood. Scented candles are also a great way to bring the outside world into your home if you’re looking for a change of scenery.

The beauty of scented candles is that it lets you choose the type of mood you want to create, whether it’s calm and relaxing or upbeat and energizing. This can help you achieve the vibrations and energy that you desire.

FOCUS ON YOURSELF FIRST.

Change should start with you. If you want to achieve higher vibrations that can help keep a more positive and cleaner environment, then start by cleaning up your own act. You can’t expect your home to be clean if you’re not taking care of yourself. Consider starting by maintaining a good standard of personal care, such as taking a shower, eating enough food, exercising regularly and learning continuously.

These simple things may seem insignificant, but they can make a huge difference in how you feel and the energy of your environment.

By first focusing on yourself, you’ll be better able to focus on other areas in your life. This will help you create the type of environment that supports a higher vibration.

Plus, the investment of time and energy you put into your well-being can be a source of enjoyment like how some people can think of plenty of reasons to love aerial yoga or find that personal development books help them improve and learn more about themselves.

FINAL THOUGHTS

It’s important to keep your home clean, but it’s also important to raise your vibrations. If you want to create a home that is supportive of your highest potential, then start by raising your own vibration. This will allow you to attract more positive energy into your life and help you reach new heights in all areas.

By following the steps outlined in this article, one at a time and with patience, you will gradually raise your vibration while simultaneously keeping your home clean.

Guest Contributor: Sophia Young

15 CHIC LOFT BEDROOM DESIGN IDEAS

For those looking for more storage space, an extra bedroom, or even a home office, loft conversions are a great solution as well as being a good investment into your property. 

With their unusual layout and shape, designing and decorating a loft conversion can be challenging to get right, especially as you will want it to flow with the rest of your home’s style. You may be navigating your way around exposed brick, beams, pipework, and Velux windows with your new conversion which leaves less room for furniture and to be clever with your designs. 

We’re on hand with 15 loft bedroom design ideas that will help you transform your space, injecting your own personality into the room, in a practical yet stylish way. 

KEY SUMMARY

  • Loft conversions have some unusual shaped walls, make use of these by having built-in storage and shelving installed. You could use the eaves as cupboard space.
  • Using Velux windows or skylights will help to enhance lighting in dark loft spaces.
  • Retaining exposed beams and joists can work well for those wanting industrial styles or period charm in their loft bedroom. 

LOFT CONVERSION BEDROOM IDEAS

  1. MINIMALIST 

A minimalist loft conversion is a timeless style that allows you the chance to easily switch out décor accessories if you fancy a change. The skylight windows allow light into the room without overwhelming the space, and the addition of the recessed spotlights creates a gentle ambience. Keep furniture, bedding, and accessories simple to maintain the ultimate minimal style.

2. EARTHY GREENS

Green is having a moment in the interior design world, but by no means is this a one-hit wonder, as this classic colour will stand the test of time. The built-in storage within the eaves utilises every inch of the loft space to its full potential. Recessed walls make a great alternative to shelving and the double Velux windows leave the earthy tones of this room being lifted for the perfect balance between light and dark. 

3. SCANDI-STYLE

Scandi-style bedrooms have been a popular design in recent years, and this trend shows no sign of slowing down. If you are looking for loft conversion layout ideas that make the most of space, this built-in shelving behind the bed makes perfect use of an awkward shaped wall whilst also providing a functional storage solution. Small loft conversions often lack light, the addition of recessed lighting in the ceiling and large Velux windows helps to maximise brightness. 

4. RUSTIC

Rustic style loft conversion bedrooms utilise the wooden features that lofts often have before they are converted, creating a charming style that gives a charming nod to the room’s beginnings. A natural wood feature wall creates a warmth in the room that can be personalised with accessories and lighting. Make large windows a part of your design plans to lift the dark nature of rustic wood tones, if this is the bedroom décor style you desire. 

5. ALL-WHITE

Loft conversions can often be darker than other rooms in the house, even with the addition of skylights, so keep your interior bright by using an all-white scheme. Add pendant lights on the slopes of the loft ceiling for added visibility on a dreary day.  

6. MONOCHROME

Monochrome can be an overwhelming colour palette to get right but this clean style creates a great loft bed aesthetic that really makes the most of the room’s features. Make a statement with a black feature wall which plays with the angular shapes of the room. By leaving the remaining walls white, as per this image, and with the addition of the large windows, the space becomes really open and maximises light within the bedroom. 

7. GREY

Grey is a versatile shade that has become a key colour within a modern neutrals colour palette. It works well if you plan to keep your furniture, bedding, and accessories in similar tones but equally, if you want to add in pops of colours, grey walls can accommodate this. Keeping the doors and frames white, with a natural wood flooring enhances the warm tones in this grey bedroom. The additional storage in the eaves will help to keep the space uncluttered, whilst painting the cupboards in the same shades as the wall keeps them discreet and hidden. 

8. BOLD

Bold colours can seem scary at first, but use of strong bright shades can create a playful, happy aesthetic in a room. Make use of the sloped ceiling space by adding recessed and pendant light fittings on to support visibility in the room. Be mindful that darker colours can sometimes overwhelm tighter spaces, so if you have a small loft conversion stick to lighter bright shades such as a zesty yellow!

9. COSY COTTAGE

If you have a period cottage with a loft room, retain character by leaving the joists and beams exposed, as this loft conversion example shows. Your loft conversion construction company will be able to advise you on this.

 Keep the décor and furniture simple to allow the walls to do all the talking, bringing in some subtle floral prints on cushions and other soft furnishings to add to the cottage theme of the room. 

10. URBAN

Industrial, urban styles are what many people may automatically think of when it comes to loft bedrooms, particularly as it lends itself well to the exposed brick walls and beams that can often form part of a loft conversion design.

Industrial style attic rooms are popular in America but are also becoming a more popular loft conversion idea in the UK, with furniture and accessories easily obtainable from home stores. Keep to dark woods and rustic metals to execute an urban style well. 

11. NEUTRALS

A classic style that will never fail, neutrals are a popular décor palette and it’s easy to see why. The bright, airy nature helps to support the natural light in the room and stops the space from feeling overwhelmed. The rounded shape of the headboard in this loft conversion example counteracts the harsh, angular lines created by the walls. 

If you have an ensuite in your loft conversion bedroom, try to use similar tones throughout that keep a cohesive, gently flowing space. 

12. TRADITIONAL

For a more traditional property, you will want this style reflected within the design of your loft conversion bedroom, to make your entire home feel harmonious and balanced. Using a traditional style window, as per this image, as well as using more classic style furniture will help. 

The large rug used under this bed helps to make a feature of the classic bed frame placed below the cottage window. The suspended spotlights from the ceiling add a contemporary edge without disrupting the overall style. 

13. COLOUR BLOCK

Make use of awkward spaces that can come from loft conversions by creating storage and shelving, as this image shows. Painting in a soft, pastel tone like this putty-coloured bedroom enhances the shape of the room and gives the illusion of space. If you are looking for inspiration and small loft conversion ideas, colour blocking is a straightforward yet stylish concept but be sure to add visual interest with texture. 

14. MODERN

Keep your new loft conversion calm and clutter free with a modern style bedroom. Clean lines and soft, light neutrals give this room a relaxed feel. The glass bannister on the staircase into the room opens the space up further and helps to support the light flow. Light is important, especially in a modern bedroom, so the addition of a skylight in this mansard conversion keeps the space light and airy as well as being practical as it improves visibility.

15. ELEGANT

This dormer loft conversion offers light, open space with windows on multiple walls and plenty of headspace. The built-in wardrobes keep clothes and clutter neatly stored away without detracting from the rest of the space.

SUMMARY

Loft conversions can be as stylish and comfortable as the rest of your home, and the styles we’ve listed go some way to demonstrating their versatility. There are plenty of clever ways to incorporate good lighting and storage spaces in the design of your conversion that won’t make it the struggle you may have feared it to be. 

Whatever your loft conversion ideas are, be it contemporary, traditional, or urban, this unique space can easily reflect the style of the rest of your interiors for a perfectly balanced home.

ARE BATH PRODUCTS SAFE FOR YOUR PLUMBING?

If you’re like most people, you probably don’t think too much about the products you put down the drain. But if you’re using bath products that contain harmful ingredients, they could be putting your plumbing at risk. In this blog post, we’ll explore some of the dangers that certain bath products can pose to your plumbing and offer some tips for avoiding them.

WHAT ARE SOME OF THE INGREDIENTS IN POPULAR BATH PRODUCTS THAT CAN BE HARMFUL TO YOUR PLUMBING SYSTEM IF THEY END UP DOWN THE DRAIN?

Popular bath products can be a great source of relaxation, but it is important to remember that some products contain ingredients which can cause damage if they make their way down the drain. So, are bath bombs safe for plumbing?

Common items such as soaps, gels, shampoos and conditioners have potential to harm the plumbing system if they are not disposed of correctly. Many of these items contain oils, alcohols and phosphates which can all make your pipes more susceptible to corrosion.

In addition, bubble bath products often include foaming agents like sodium lauryl sulfate which can cause build-up on the inside of pipes and clog drainage systems. To avoid any issues with your plumbing system when using bath products, it’s best to purchase those without any harsh chemicals listed on the label and always dispose of used product properly in the trashcan instead of down the drain.

With this in mind, you should be able to enjoy safe and relaxing baths without disrupting your plumbing system!

HOW CAN YOU AVOID THESE PRODUCTS AND STILL GET CLEAN IN THE TUB OR SHOWER WITHOUT HARMING YOUR PIPES OR SEPTIC TANK SYSTEM?

Cleaning yourself in the bath or shower doesn’t have to involve harsh chemicals and products that may damage your pipes and septic tank systems. An all-natural approach is an effective and environmentally friendly option.

Start by using plain soap made from plant-based ingredients like coconut oil and shea butter, which are naturally antibacterial and nourishing for the skin.

Additionally, you can make your own body scrub to exfoliate with natural ingredients like sugar, sea salt, oats, coffee grounds, baking soda or coconut oil. For those looking for even more cleansing power, herbal infused oils are an excellent alternative to chemical soaps.

Additionally, using a periodic vinegar rinse or a non-toxic cleanser designed specifically for plumbing systems will help keep your pipes clog-free without the need for harsh chemical detergents. By combining a few simple strategies like these into your routine, you can feel clean in the bathtub or shower without compromising your plumbing system! 

WHAT ARE SOME TIPS FOR AVOIDING PLUMBING PROBLEMS WHEN USING BATH PRODUCTS

Plumbing issues are among the most frustrating and expensive problems homeowners can face. But with a few preventative measures, you can avoid plumbing nightmares caused by bath products.

First, always make sure any product like bubble bath or bath oils are used according to the distilled water restriction specified on the packaging. As soapsuds enter the septic system they will damage and clog if too much is used.

Additionally, it’s important to check that your bathroom sink isn’t blocked as this can stop liquids passing through easily and build up pressure in your plumbing system. Finally, ensure all cleaning devices such as tubs or showers have good drainage systems for excess water to exit quickly rather than pooling and damaging seals or pipes around joints that could down the line cause significant damages.

With a little bit of effort, you can keep your plumbing from becoming a costly pain due to improper use of bathroom products.

ARE THERE ANY ENVIRONMENTALLY-FRIENDLY ALTERNATIVES TO CONVENTIONAL BATH PRODUCTS THAT WON’T DAMAGE YOUR PLUMBING BUT WILL STILL HELP YOU GET CLEAN?”

Everyone loves to take a nice, relaxing bath or shower, but it’s important to remember that traditional bath productscan have negative environmental impacts. Many of them contain harsh chemicals and pollutants, which can damage sensitive plumbing systems and cause long-term damage to the environment.

Fortunately, there are a variety of environmentally-friendly alternatives available for those looking for an eco-friendly bathing experience. For instance, liquid castile soap is plant-based and all-natural, so it won’t strip away natural oils from your skin like conventional products may.

Additionally, bamboo charcoal products are growing in popularity due to their ability to detoxify both skin and water as it runs down the drain. Lathers made with sugar or salt are also becoming increasingly popular—the sugar helps remove dirt while providing needed hydration, while salt can disinfect and soothe your skin without over drying.

Finally, solid shampoos are the perfect alternative if you’re looking to avoid single-use plastic packaging altogether—you don’t need many additional ingredients when using these compounds other than water!  

With all these options available, there’s no excuse not to make an environmentally responsible choice when choosing bath products—your plumbing loves you for it & Mother Nature will thank you too!


Conclusion: While it’s important to get clean in the shower or bath, it’s also crucial to do so in a way that doesn’t damage your plumbing system. By avoiding harmful ingredients in popular bath products and using environmentally-friendly alternatives instead, you can enjoy a squeaky-clean bathing experience without worrying about harming your pipes.

Guest Contributor: Peter Yordanov

WHY SHOULD YOU PAY EXTRA ATTENTION WHEN DOING FLOOR INSTALLATION?

It’s no secret that a well-done floor installation can add tremendous value to your Perth home. Not only will it make your space more attractive and comfortable, but it can also increase the overall resale value of your property.

That’s why it’s so important to pay extra attention when doing floor installation – whether you’re hiring a professional or doing it yourself. Here are four reasons why.

POOR INSTALLATION CAN LEAD TO WATER DAMAGE

The flooring you install will be exposed to the elements, so it’s important to ensure that it’s properly sealed and installed correctly. If this is not done correctly, water can seep in and cause major damage to your property, resulting in costly repairs. For instance, if moisture gets beneath the flooring and causes mold or rot, this can spread to other areas of your home and damage the structural integrity of your walls or foundation.

When it comes to decking, it’s also important to use the proper fasteners and concrete when fixing them into place. Additionally, architectural cladding for Perth homes and businesses is often made from composite timber that’s designed to withstand the elements, like composite timber decking and cladding. So, it’s important to make sure that you are using the right materials and techniques for installation as well.

IT CAN REDUCE ENERGY EFFICIENCY

When you’re installing a floor, it’s important to consider how this will impact the energy efficiency of your home. Poor installation can create air leaks, which will cause your heating and cooling systems to operate inefficiently and increase your utility bills. In addition, a poorly insulated floor can also allow moisture to seep in and cause mold growth, which can be hazardous to your health.

Therefore, it’s important to ensure that all gaps are sealed properly and that the insulation is adequate for your needs.

IT CAN INCREASE LIABILITY

If you’re doing the installation yourself, it’s important to be aware of your liability in case something goes wrong. Poorly installed floors can cause injuries, and if you’re found liable for this, it could lead to legal action being taken against you. To avoid such issues, make sure that all safety precautions are followed when doing floor installation – both when working with a professional or on your own.

IT CAN IMPACT RESALE VALUE

Finally, you should consider how floor installation will affect the resale value of your home because poorly installed floors can be an eyesore and decrease the appeal of a property to potential buyers. Furthermore, buyers may be wary of purchasing a home with a floor that has been installed incorrectly and could offer less money for it when the time comes to sell.

Additionally, if you are doing the installation yourself, it is important to use the right tools and materials for the job. For instance, certain flooring types may require special drill bits or saws, which can be costly if purchased incorrectly.

Ultimately, there are many reasons why you should pay extra attention when doing floor installation in your Perth home. From avoiding water damage and increasing energy efficiency to reducing liability and impacting resale value, taking the necessary steps will ensure that your floors look great and last for years to come. 

Moreover, hiring a professional to do the job may be the best course of action, as they will have the necessary skills and experience to install your floor correctly. 

With careful consideration and preparation, you can make sure that your floors look amazing while adding value to your home.

6 TIPS TO FIX YOUR HOME SAFE AFTER A STORM

After a storm, your home looks like a disaster zone. The water damage is extensive, and the cleanup is time-consuming. How can you fix your home safely after a storm?

Storms are common occurrences during hurricane season, especially if you live in the South; you are aware of the harm a storm may cause to your house.

They cause flooding, power outages, and property damage. As soon as you and your family are secure, you should evaluate the damage and begin repairing and rebuilding.

Before a storm hits, you should prepare your home for the worst. Here are six ways to fix your home safe after a storm.

1.                  ALWAYS PUT SAFETY FIRST

If you live in an area prone to storms, ensure you have enough food and water supplies. Also, keep a flashlight with batteries nearby to see where you’re going when leaving the house.

Before beginning any cleanup, the CDC always advises using the appropriate safety gear. This calls for using heavy-duty gloves, a face mask, a hard cap, and tall, water-resistant boots. Until you are certain that you won’t get wounded while fixing anything, you are not ready to do so.

Wait till the storm has passed and daylight has begun before doing any work. After a storm, the power is frequently down, making it dangerous to operate without lighting.

2.                  BE SURE TO INSPECT EVERYTHING 

After a storm, check your home for any signs of damage. Make sure everything is secure and safe. Look at the roof, windows, doors, and other areas vulnerable to wind and rain.

To completely comprehend what must be done, take a thorough walkaround of the inside and outside of your home. Be aware of damage to doors and windows, as well as flooding.

Look for wet carpets, as they can get mold quickly. Make sure to dry them as soon as possible to avoid any damage. You can speed up the carpet drying process by using a fan, air conditioning, or leaving them under the sun.

If you don’t want lasting damage from water, you will have to replace everything. Always collaborate with a partner to watch for any hidden dangers.

 Remove plywood that has been installed to safeguard your home gently, gathering the nails along the way. Also, check your lawn for any sewage overflows; if there are any, you will need to call a professional to pump your septic tank.

3.                  MAKE SURE THERE IS NO SECONDARY DAMAGE 

If there is no visible damage, it’s time to consider secondary damage. This includes things like water damage, mold, and structural issues. You should also inspect for utility damage under the ground.

In addition to the apparent indications of damage, such as downed trees or a leaky roof, you should be vigilant for concealed threats. Electrocution can occur because of flood water. Keep an eye on any downed electrical wires near water, and contact your utility company immediately.

Hurricanes can cause chemical fires in your home. You should contact the fire service department immediately if there is a sudden fire. They will safely put out the fire and indicate when to enter your home.

Chemical fire can leave a long-lasting bad smell in your house. Toxic substances may also be present in addition to their bad odor. Never use water to put out a fire caused by grease or chemicals.

4.                  BE SURE YOUR HVAC IS WORKING

It’s important to check your home’s heating and cooling system after a storm hits. Ensure everything is operating correctly after the storm and make any necessary repairs.

It can be challenging to resolve flooding in your HVAC system. Almost any moist environment can result in dangerous mold growing within 24 hours. A moldy HVAC system may spread a fungal colony, which will send spores flying into every nook and crevice of your house.

If you require a complete replacement or only a few repairs, speak with your HVAC provider. They will assist you with what steps you should take to fix them. 

5.                  TAKE PHOTOS FOR PROOF

You must take photos of the damage before leaving your house during a storm to submit an insurance claim later on. Always document the damage with pictures to show your insurance company.

It will be much easier to deal with them when you need emergency repairs after the storm is gone. Also, if you are a tenant it will help you claim the repair cost from your landlord.


6.                  BE PREPARED FOR THE NEXT EMERGENCY

After cleanup and repairs have been completed, it’s time to start thinking about the next disaster. Be sure to prepare an emergency kit before an emergency strikes. Blankets, bottles of water, non-perishable food, fire extinguishers, solar or crank radios, batteries, and external phone chargers should be included in the emergency kit.

Prepare your home as well. Check that all your shutters are functioning to protect your home from flying glass, and invest in adequate insulation to keep your building watertight and prevent basement flooding. Even renovate your storm shelter so you have a place to be safe during the next storm.

You won’t be able to predict with certainty when the next hurricane will strike, and you might need more time to prepare. Get ready right away, and you’ll be grateful.

CONCLUSION

Even if you have no control over the weather, taking precautions and putting an emergency plan in place can shield your family and house from many storm-related damages.

To avoid feeling overwhelmed by the amount of labor, divide the chores into checklists based on the season and the needs. Consult with experts if you are unsure of how to prevent storm damage on your own; they will be able to provide you the best advice.

HOME IMPROVEMENT CHECKLIST

When doing a home improvement project, there are things to consider first before having to spend some money or have something in your house be replaced. First, identify what you want to change in your home’s current design. For example, living room setup, kitchen equipment, bathroom shower, and many more. Next, after you identify the areas you want to improve, you would want to list down what are the things you want to change or upgrade in that area. Another example is if you want to change the design of your sofa.

There are two categories that need to be considered which are functional and aesthetic. But for home improvements, both of these factors are needed. Here are some checklists for Home Improvement projects.

1. REPLACE BROKEN UTILITY

Functionality of the house is very important. It should be the top priority of every home. Every homeowner should have maintenance to their plumbing system, electrical wiring, water supply, etc. The aesthetic of your house is also important. There are several ways to add aesthetics to your utility tools such as having more modern showers, modern faucets, and even light switch plates that can now be decorated. Although the light switch cover doesn’t get much attention, it is actually great to have designs even in the smallest details.

 2. REARRANGGING FURNITURE AND APPLIANCES

To have more creativity and uniqueness in your home, consider having rearrangements in your home. To avoid having a boring and somehow repetitive layout in your house, try changing the things in your house from time to time to add a new perspective.

3. PAINTS

Paint jobs are also one of the factors to add to the checklist for home improvements. If there are signs of paint chips, faded colors, cracked, peeling, or when you no longer like the color of your paint. Consider having your house repainted so your walls will be protected. Having a new paint job can also have your house look elegant instantly. When choosing the right color of paint, choose the color that you really like to match your personality.

4. NEW MATTRESS

If you are no longer comfortable in your bedroom, consider buying a new mattress. When choosing  a mattress, it should be made from a high-end material that gives comfort and coziness. Choose a mattress that gives both durability and comfort at the same time. Since you will be using your new mattress for a really long time.

5. NEW TOOLS

Tools can also have an expiration date, if you are using a microwave for a really long time, it might not work perfectly as it was before. Buying out new tools for your home can also avoid you from getting infections and bacteria. For example, if you still use the same kitchenware for years, some of its properties might peel off and be included in your food. So it’s best to change it from time to time. Another examples are knives, when it becomes dull, it is time to change it. Appliances are also included in this list since it becomes a tool that you use every day. Having functional home results in an elegant home.

6. EXTERIORS

Exterior walls also need to repaint, pathway and walkways also need cleaning maintenance from to time, and windows needs to be treated. The roof also needs to be checked from time to time, especially if there is bad weather. It’s better to spend some money on repairs rather than getting wet from leakage when it’s raining.


In conclusion, for every household, there will be a different checklist for home improvement. The lists that were mentioned earlier are just an example. Home improvements vary for each individual. So to have the right checklist, always identify the things that you wanted to improve first from your house and create a list on what you want to do after figuring out what are the areas in your home that needs improvements.

HOW TO SELF-INSTALL YOUR NEW INTERNET SERVICE

Have you ever wondered how to self-install your new internet service? You can usually achieve this by following the instructions given to you by your service provider. 

It’s often a simple process that involves plugging in the modem and router to a central location of the home and signing onto the network using a default password before updating it to a password of your choosing.

While it might seem overwhelming to take on such a technical task, we’ve done it before and have helped many others complete their own internet self-installation, so you can do it, too.

Below, we share how to self-install your new internet service with step-by-step instructions. While details may vary depending on your service provider, these instructions should help you get up and running.

MAKE SURE YOU’RE ELIGIBLE

Before you begin the process of self-installing your new internet service, it’s crucial to check that you’re eligible to do so. Your eligibility is typically indicated by whether or not you were given (or offered) a self-installation kit when you signed up for the service.

If you don’t have a self-installation kit, that usually means you’re not eligible to self-install and will need to wait for a technician to do it for you. Waiting for a technician can take days or even weeks. If you’re eager to get online, self-installing is your fastest option.

Some addresses may not be eligible for self-installation if there has never been internet provided at that address by the provider before. You can find out if you’re eligible by entering your street address as you order your internet online. Another option is utilizing chat or their customer service phone number to check.

Other providers may not offer a self-installation option. Some popular providers that do offer this option include:

  • At&T
  • Century Link
  • Google Fiber
  • Cox Communications
  • Spectrum
  • Verizon
  • Xfinity

If you’re eligible for self-installation but still prefer to have someone do it for you, that’s possible, too. However, you’ll need to wait longer for an available technician.

Also, if you have a provider like Verizon, your self-installation might be a bit harder. Here is an extra resource on this

ORDER A SELF-INSTALLATION KIT

If you’re eligible to self-install your new internet service, you should have received (or been offered) a self-installation kit. Your kit will include everything you need to get online, including the:

  • Modem
  • Router
  • Coaxial cables
  • Ethernet cables
  • Printed instructions or a link to access online instructions

If you didn’t receive a self-installation kit, don’t worry. You can try ordering one from your internet service provider’s website or customer service line. They may even send one to you overnight so you can get started as soon as possible.

You may need to return your old equipment before they ship you a new self-installation kit if you’re upgrading your internet speed and need a new modem that’s compatible with the higher speeds.

FOLLOW INSTRUCTIONS AS PROVIDED

Once you have your self-installation kit, it’s time to get started. The first thing you’ll want to do is read through the instructions provided. Either read the printed material that came with your kit or follow the link to online instructions.

It’s crucial to follow the instructions since they are specific to your service and equipment. Don’t try to shortcut the process, as it could result in problems later.

If you have questions about the instructions, don’t hesitate to contact your internet service provider’s customer service department for help.

FIND A CENTRAL LOCATION TO INSTALL

One of the first things you’ll need to do is find a central location to install your modem and router. A good location should be somewhere near an outlet and close to where your main computer or TV is located. 

You don’t want to place it on either end of the house, as the WiFi signal may not reach the other side. Try to find a place that’s in the middle of your home so it can reach every room. It’s also important that the location has enough ventilation to help keep your equipment cool.

If you’re not sure where the best place to install your modem and router is, take a walk around your home and look for potential locations. Once you’ve begun the installation process, you can try doing a test WiFi connection from that location to double-check the strength of your signal from various spots in the house.

INSTALL THE MODEM

Once you’ve found the best location for installation, it’s time to set up your modem. Start by plugging the power cord into an outlet and then connecting it to the back of the modem.

To do this, take the modem out of the box and use the cord to plug it into the wall. You may be plugging it into a:

  • Phone jack
  • Coaxial jack
  • Optical or Ethernet jack

The specifics will vary for different providers, so refer to your specific provider’s instructions.

CONNECT MODEM AND ROUTER

Now, plug your modem into your router to connect the two using an Ethernet cable.

PLUGIN ROUTER

Plug your router in so that both devices are plugged into the wall and connected to each other.

WAIT FOR A LIGHT INDICATOR

After about 30 seconds to 1 minute, check the light status on your modem and router. They should be blinking or solid, depending on your provider’s instructions.

LOCATE NETWORK DEFAULT PASSWORD

Check the back of the router or the box it came in for a network default password. You’ll use it to sign on to your WiFi for the first time.

CONNECT TO WIFI FROM YOUR DEVICES

Using your default password, connect to your WiFi network. Once you’re connected, you should be able to follow the instructions given to you by your provider to change the password to something you’d prefer.

WRAPPING UP

By following these simple instructions, you should know how to self-install your new internet service without any problems. 

If you have any trouble along the way or run into issues, don’t hesitate to reach out to your provider’s customer service department for help. They’ll be more than happy to assist you.

Guest Contributor: Andreas Grant

AWESOME HOME IMPROVEMENT IDEAS FOR DOG OWNERS

Our dogs are our family members, and every family member deserves to feel comfortable, safe and welcome in their own house. So if you’re planning to conduct some home improvements in the future, don’t forget to surprise your pup with some improvements for their own comfort. If you need dog-friendly renovation ideas, you’ll find plenty here:

INSTALL DOG-FRIENDLY FLOORING

Let’s start your renovation from the bottom up by installing new flooring. If you have an indoor pup, choose the flooring that’s easy to clean and resistant to slips. For dogs, concrete, tile and hardwood floors are the best choices that can’t be damaged by your dog’s claws and accidents. And consider installing heating under the floor—this will feel so good on your senior dog’s joints and bones.

BUILT-IN DOGGY DOORS

Suppose you don’t like the open space concept, then you know how annoying it can be to constantly go around the house, opening the doors for your pup. Well, you can make your life much easier with built-in doggy doors. There are costly but super-practical sliding doggy doors that are built into the walls, but those that install on your regular doors are a great option too.

BUILD A MUD ROOM

If you regularly walk your dog or let them into your yard (as you should), you know how much dirt your furry friends can drag inside. This can be solved with a practical mud room. This small room is usually built near the entrance of the house and can be used to leave dirty clothing and shoes, as well as wipe your dog’s paws and store their personal items. If you have space to work with, you can also install a small dog shower in your mud room and have a practical grooming station in a safe and easy-to-clean place.

BUILD A DOGGY SANCTUARY

Dogs usually love to be surrounded by people, but sometimes even they need some peace and quiet. When there’s a lot of noise and chaos in your home, or when you have visitors over, your dog will love to retreat to their sanctuary and avoid over-stimulation. You can easily designate a corner under the stairs or in your catch-all closet to make a cozy dog nook. Make this place soundproof, and boost the comfort with a cozy dog bed for sweet dreams and relaxation. The best bed options are doggy cots which are lightweight, easy to move and wash. Providing your dog with a safe space will create a calm and secure dog without stress and anxiety.

CREATE A DESIGNATED DOG FEEDING AREA

If you want to additionally boost comfort for both you and your dog, then build a designated feeding area. This doggy dining room will ensure they get all the privacy they need while eating without taking away any space in their kitchen or living room. A practical solution for a feeding station is a pull-out drawer with bowls for feeding. Next to it, you can build a cabinet with kibble bins for easy access. Since these cabinets and drawers close after use, they prevent the spreading of any dog food odors and allow you to avoid spillage.

STYLISH GATES

We usually allow our dog access to all the parts of the house, but sometimes, we just need to limit their access to certain rooms, either for their safety or for the safety of other people. What most people resort to are baby gates, but these can be very ugly and short. A better solution is a sliding half-door with a metal railing resistant to scratching and biting. These are easy to build between the kitchen peninsula and the wall, on top of the staircase or between rooms.

INCLUDE EASY ACCESS FOR SENIOR DOGS

Some dogs are very susceptible to joint and spine issues, especially in their senior years. To make your pup easier to navigate their home, you can consider building ramps to your entrance, couch or first floor. This can often be a very cheap improvement that will mean a lot to your pup.

SURPRISE YOUR DOG WITH A VIEW

Don’t worry, you’re not a bad dog parent if you sometimes leave your dog alone at home—this is a sad necessity for many of us. However, you can also expect your dog to get bored while you’re not there. One thing that can give them something to do is look outside the window. Build a practical window seating for your pup so they can get a nice view outside, keep an eye on the intruders and watch squirrels play around outside—it’s like a blockbuster for dogs!

Like any family member, your dog deserves to have their needs met at home. With these practical home improvement ideas, you’ll not only make your dog’s life better, but also make your house easier to clean, maintain and keep beautiful and stylish. You’ll get to spend less time stressing over your house and more time cuddling with your dog!

Guest Contributor: Diana Smith

BED BUG DIY MISTAKES YOU SHOULD NEVER DO AT HOME

Insanitation concept. Woman holds lens, shows there are bugs in bedclothes, detects bad insects demonstrates dirty conditions. Dirtiness, unhygienic conditions and uncleanness

Bed bugs have always been a looming problem in both residential and industrial areas. While both business owners and homeowners have been shown bed bug removal methods they can do by themselves, doing the wrong thing could lead to mishaps.

DIY isn’t entirely wrong, but it should be well-informed and done right so as to avoid hazardous issues. But just to be on the safe side and avoid further mishaps, the best option for treating bed bugs is to contact a professional that can do bed bug heat treatments in Sacramento, CA.

Here is a rundown of some bed bug DIY mistakes that should never be done at home.

USING THE WRONG PESTICIDES

Of course, pesticides are highly toxic and hazardous. Even the ones that are registered by the US EPA (Environmental Protection Agency) have been linked to multiple health problems such as acute poisoning, certain types of cancer, hormone disruption, asthma, neurotoxicity, organ damage, and more. The use of these pesticides are more dangerous than their benefits.

That’s why it’s important to check with a professional exterminator. After assessing the infestation, they will come up with a proper treatment plan to deal with the bed bugs in your area. They also have the right tools and equipment to carry out these treatments.

NOT BUYING A VAPOR STEAM CLEANER

Nowadays in the cleaning industry, steam cleaners are one of the fastest growing technologies. We’d even go as far as saying that these are a heaven-sent item for anyone that’s wary about bedbugs. Vapor steam cleaners look similar to a vacuum, but they are much more powerful. Steam cleaners use water and electricity to clean, disinfect, and deodorize any surface. These are safe for use in homes since they don’t need any kind of chemicals. 

Vapor steam cleaners are great for maintaining a bed bug-free environment because they generate  a tremendous amount of heat, eliminating pests from clothes, furniture, and beddings. The steam vapor can also reach nooks and crannies, just where bed bugs like to hide most. If you’re trying to steer clear of bed bugs, vapor steam cleaners are worth an investment.

NOT USING A BED BUG MONITOR

Bed bug monitors/interceptors have been one of the most useful devices ever invented for bed bug monitoring and management. These devices are usually shaped like a plastic dish with an outer shallow part designed to catch and contain bed bugs. They function on the assumption that bed bugs do not have the ability to climb slippery, vertical surfaces. So with these things, you can breathe easy for a bit knowing bed bugs won’t reach your pillows.

Other uses for a bed bug monitor and interceptor include the following:

●      Keeps bed occupants from bed bugs

●      Sees and counts bed bugs present

●      Assess the effectiveness of certain bed bug treatments

●      Serves as an early detection system for bed bugs in hotels, apartments, houses

●      Used as part of a DIY bed bug management practice

NOT PREPPING THE ROOMS PRIOR TO TREATMENT

Most, if not all, pest control companies will require homeowners to do significant preparations prior to the start of a treatment. These requirements may differ based on the type of treatment as well as the type of residence. Unfortunately, some clients don’t think this is necessary, leading to a myriad of problems that pest control companies are all too familiar with.

The actions they require Below is a sample checklist for clients to complete before their bed bug service begins.

Below is a list of the preparations homeowners should take note of before having exterminators begin their treatment:

●      Lift mattresses and box springs out of the bed frame

●      Empty all closets, dressers, drawers

●      Wash and dry all clothing within the room on high heat

●      Bag all personal items that cannot be laundered

●      Empty all luggage and travel bags into untied bags

●      Remove all sofa, chair, and other upholstered furniture cushions and accessories

●      Remove all sheets, blankets, pillowcases, and other bed coverings from the mattress and box spring and dry for at least 50 minutes on high heat

●      Thoroughly vacuum your mattress, box spring, inside of dresser drawers, all carpeting throughout your entire home, floors, area rugs, sofas, futons, recliners, upholstered furniture, and physical bugs you may see

●      Remove and dry all curtains and window dressings on high heat

●      Inspect items that cannot be washed such as books, electronics, picture frames, and plastic toys

●      Place them into plastic bags only if you do not find bed bugs on these items

●      Reduce clutter under your bed and around the room

●      Encase your mattress using specialized mattress encasements

Unless homeowners do these themselves, technicians will leave the room just as it is. This results in a lot of mishandling in materials that could spread bed bugs throughout your home, or even destroy your beddings and belongings. Neglecting proper preparation could prolong the whole treatment process.

BED BUGS ARE TOUGH, BUT YOU HAVE TO BE EVEN TOUGHER

Dealing with bed bugs takes so much time and energy, but that’s why there are pest control companies that can help. These companies have exterminators that are properly trained and equipped with the right tools for carrying out bed bug heat treatments in Sacramento, CA. DIY methods may be cheaper, but these may not be as effective and some mistakes can even cost you more money instead.

BEST PLUMBING TIPS FROM EXPERTS: 2022 LIST

You can never know too much about plumbing: how it is still changing with new and innovative ideas. Understanding the basics of your plumbing systems is often a must if you do not want to deal with the hassle of leaky pipes in your building. If you’re new to plumbing work, read this plumbing checklist to help you understand it better and how it works.     


Plumbing Tips    

These are some of the essential plumbing tips in 2022 that will help you care for your plumbing system. If you want to ensure that your plumbing systems continue to function correctly, consider these tips:    


Tip 1: Inspection is A Must  

It will help if you do assessments routinely. Your plumbing system is an integral part of your building, and problems with it can cause problems in some other parts of your structure. Your plumbing system controls water flow, wastewater, drains, and more.     

Inspection can help you find possible problems in your system and fix them right away. Without this, you may encounter minor issues that can turn into something serious, which causes more problems and additional costs. It would be best if you also considered hiring a professional to inspect your plumbing systems as an amateur or someone with little to no experience will be unable to spot not-so-obvious signs of deterioration or damage.  


Tip 2: Cleaning and Maintenance      

Maintaining and cleaning your plumbing systems are just as crucial as inspection. Professionals inspect to see if repairs are needed or if you have significant problems with your unit. Consider installing access doors for easier access to your plumbing systems while keeping them safe and protected. Consider hiring professionals to clean and maintain your plumbing systems, as they would know what to do and how to do it properly.       

By ensuring your pipes are getting their routine cleaning and maintenance done, you are prolonging their lives and durability, saving them from damage and deterioration. It would also be best not to attempt to clean your pipes alone, as you will need more than just a brush and some cleaning chemicals.  


Tip 3: Know the Important Parts    

You should always know the essential parts of your plumbing systems, especially the shut-off valves. You can shut it off by twisting these valves to save yourself from water damage or flooding in your building. Every central plumbing fixture in your building will come with a shut-off valve for emergencies.  


Tip 4: Always Trust the Professionals    

Another tip you should not take lightly is to trust professionals over your intuition or some random DIY YouTube video. Don’t take any chances, especially regarding something as important as your plumbing systems. One amateur mistake can lead you to more significant problems and costly repairs. If you are unsure about the problem with your plumbing systems, call a plumber and deal with that issue immediately.   


Tip 5: It is Always Worth the Cost    

While some people might think they can do the plumbing work themselves, it does not usually end on a good note. Without proper experience and tools, you cannot expect to get an easy fix by following a guide online. Plumbing problems may cause various issues, especially if you run a commercial business like a restaurant or a hotel. Remember that paying for plumbing work will always be worth the cost.     


If there is any doubt, always call a professional. To prevent plumbing issues early after construction, hire a plumbing expert to provide you with the design of your plumbing system, not someone who understands just the basics of how plumbing works.   

Guest Contributor: Chris Jackson