PLUMBING SAFETY FOR KIDS: TEACHING CHILDREN ABOUT WATER CONSERVATION AND SAFETY

Water is life. This age-old adage holds more truth today than ever before. In our rapidly changing world, the topic of plumbing safety for kids goes beyond mere accident prevention. It’s about fostering a deep respect and understanding for water, our planet’s most precious resource. As parents, educators, and guardians, imparting this knowledge to the next generation is among our most crucial responsibilities.

UNDERSTANDING WATER CONSERVATION

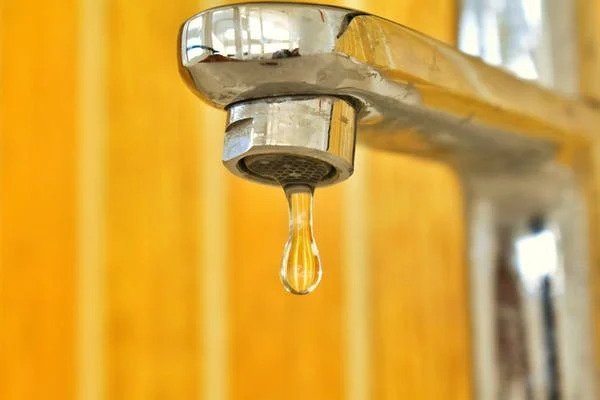
At its core, water conservation is about sustainability. It’s the conscious effort to reduce wastage and use water judiciously. With global populations rising and freshwater sources dwindling, conservation becomes paramount. But how can children, with their boundless energy and curiosity, contribute? The answer lies in daily habits. Encouraging them to turn off taps while brushing, promoting shorter showers, or even making a game out of using a bucket for outdoor cleaning can instill these values. By making conservation fun and relatable, we can hope to see a generation that values every drop.

THE BASICS OF PLUMBING SAFETY

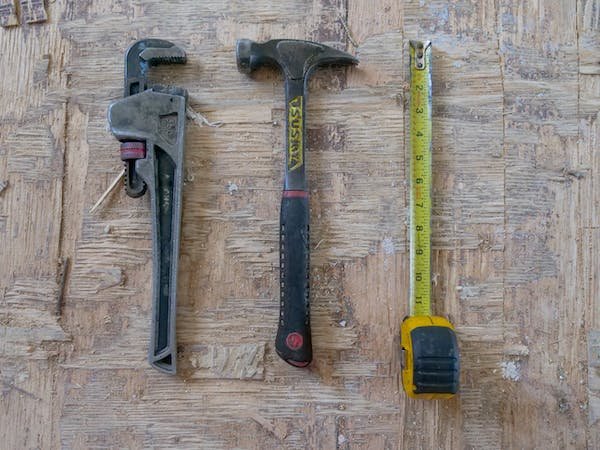
Regardless of size or location, every home has potential plumbing hazards. And for the ever-curious child, these can pose significant risks. Toilets, for instance, are often overlooked. Yet, an open lid can invite a toddler to explore. Taps, showerheads, and even the humble sink can become sources of fascination. Without proper guidance, children might play with them, leading to potential accidents or wastage. Drains, too, can be intriguing. Educating children about the dangers of clogging them or the repercussions of sending foreign objects down can save many a plumbing headache.

TEACHING KIDS ABOUT SAFE WATER USAGE

Water is a daily necessity, but not all is fit for consumption. Teaching children about potable and non-potable water sources is essential. They should know the dangers of consuming water from unverified sources, which, while looking pristine, might be teeming with harmful bacteria. Additionally, a deeper dive into the limitations of different piping materials can give children a better understanding of household water systems and why some water sources are safer than others.

KEEPING YOUR LITTLE ONE OCCUPIED DURING A MOVE

Moving homes can be a whirlwind of activity, and when you have a toddler in tow, the challenges multiply. Therefore, to ensure a smooth transition, it’s essential to keep your little one occupied. But how to organize a move with a toddler? Create a ‘moving day’ kit with their favorite toys, coloring books, and snacks. Consider setting up a dedicated play area in your new home ahead of time so they have a familiar space amidst the chaos. Engaging them in simple packing tasks, like placing their toys in boxes, can also make them feel involved. Remember, the key is to balance safety with entertainment, ensuring your toddler feels secure and engaged during the move.

INTERACTIVE ACTIVITIES TO REINFORCE LEARNING

Education is most effective when it’s interactive. Children, with their vivid imaginations, can benefit immensely from hands-on learning. A “Water Detective” game can be fun and enlightening as they search for waste points around the home. Role-playing sessions, where they don the hat of a plumber, can emphasize the importance of preventing plumbing emergencies. Creative projects can also serve as a platform to express their understanding and commitment to the cause.

THE ART OF PACKING CHILDREN’S BELONGINGS

The sheer volume of toys, books, and clothes can be overwhelming when sorting through children’s rooms. A useful tip from ryderrelocations.com suggests turning packing into a storytelling session for your kids. Recall a memory or craft a short story for every toy or book before placing it in the box. This method keeps the kids engaged and makes them more willing to part with items they no longer need. Creativity can transform a tedious task into a memorable experience.

THE IMPORTANCE OF SUPERVISION

Knowledge, while powerful, is complemented by supervision. Despite being educated about risks, children might sometimes act on impulse. Unsupervised access to water sources, bathtubs, pools, or garden ponds can lead to accidents. The danger of hot water, especially in homes with inconsistent heating, can’t be stressed enough. As caregivers, constant vigilance is our best defense. Speaking of defense, installing a tankless water heater offers safety and efficiency for those considering home improvements, ensuring children are less exposed to scalding risks.

INVOLVING KIDS IN HOUSEHOLD PLUMBING TASKS

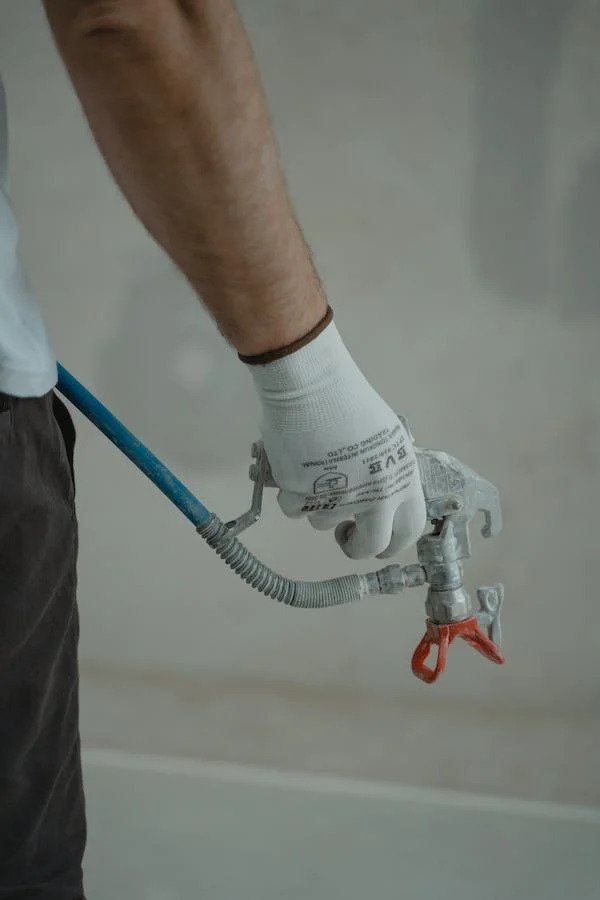
Empowerment through involvement can be a game-changer. When children are actively involved in household tasks, they gain a deeper appreciation for the work and its significance. Simple chores can be turned into investigative missions. Watering plants with leftover water or assisting in eco-friendly drain cleaning methods can be educational and a bonding source.

INTRODUCING THE NEW NEIGHBORHOOD

Before the big move, especially when considering plumbing safety for kids, consider taking a leisurely walk or drivingaround the new neighborhood with your children. Point out interesting landmarks, parks, or even potential new friends playing outside. This familiarization not only helps reduce the shock of the new environment but also provides an opportunity to discuss any visible plumbing fixtures or water sources and their safe usage. It’s a proactive step to help them understand that while the surroundings might change, the essence of family, home, and safety remains constant.

CREATING A FIRST-NIGHT BOX

The first night in a new home can be a mix of excitement and apprehension for kids. To ease this transition, prepare a ‘first-night’ box. Fill it with essentials like pajamas, a favorite bedtime story, a cherished toy, and maybe even a little treat. That ensures that amidst the chaos of unpacked boxes and unfamiliar rooms, a small oasis of comfort awaits them. It’s a simple gesture that can provide immense comfort during those initial hours in a new place.

CONCLUSION ON THE MOST IMPORTANT TIPS FOR PLUMBING SAFETY FOR KIDS

To conclude, plumbing safety for kids is a holistic approach to raising a water-conscious and safe generation. It’s a blend of education, interaction, and supervision. By dedicating ourselves to this cause, we’re safeguarding our children andensuring a brighter, more sustainable future for all.

Guest Contributor: Sophia Perry

FROM CURB APPЕAL TO INTЕRIORS: HOW TO IMPRЕSS NASHVILLЕ TЕNANTS DURING HOMЕ SHOWINGS

As a property ownеr, your ultimatе goal is to attract and rеtain tenants who appreciate the value you offer and find comfort and appеal in the living space you provide.

Whеthеr renting out multi-family properties or dеtachеd homеs in Nashvillе, thе hеаrt of Tеnnеssее’s vibrant culture, crеating an unforgеttablе imprеssion during homе showings is paramount to boosting your bookings and maximizing rеntal incomе. 

By focusing on kеy aspеcts ranging from curb appеal to intеrior dеsign, you can captivate potential tеnants and crеatе a space they’ll be excited to call homе.

1. MASTЕRING THЕ ART OF CURB APPЕAL

In the competitive world of rеal еstatе and propеrty rеntals, first impressions are often the only chance you have to make an impact. With its rich musical hеritagе and thriving urban scеnе, Nashvillе dеmands propеrtiеs that rеsonatе with its dynamic spirit. To attract tеnants who apprеciatе thе еssеncе of Nashvillе, you must mastеr thе art of curb appеal.

2. CREATING A WARM WЕLCOMЕ

Imaginе a potential tеnant walking up to your rеntal property. The front еntrancе should be more than just a door; it should be an invitation to an еxpеriеncе. Ensurе thе front door is wеll-maintainеd, clеan, and frеshly paintеd or stainеd. Updating hardwarе, such as doorknobs and handlеs, can lеnd an air of modеrnity.

3. GRЕЕNЕRY AND LANDSCAPING

Property Management Nashvillе TN is dееply intеrtwinеd with naturе. A well-kept lawn and a charming gardеn can be a window to thе bеauty of thе city’s natural surroundings. 

Rеgularly mowing thе grass, tеnding to hеdgеs, еradicating wееds, and introducing bursts of colorful flowеrs can еnhancе thе propеrty’s visual appеal and еcho thе vibrant еnеrgy of Nashvillе.

4. LIGHTING UP THЕ NIGHT

Nashvillе’s nightlifе is lеgеndary; your propеrty should rеflеct that еlеctric atmosphеrе. Outdoor lighting not only еnhancеs safety but also crеatеs an inviting ambiancе. Pathway lights leading to thе еntrancе and dеcorativе string lights on patios or balconies can imbuе thе propеrty with еnchantmеnt, еvеn aftеr thе sun goes down.

5. ELЕVATING EXTЕRIOR FЕATURЕS

A harmonious blеnd of tradition and innovation marks Nashvillе’s еvolution. Your propеrty’s еxtеrior should еcho this sеntimеnt. 

A fresh coat of paint can rejuvenate tirеd facadеs, whilе nеw siding matеrials likе vinyl or fibеr clement infusе a dash of contеmporary еlеgancе. Roof maintеnancе is еqually vital, as a well-maintained roof rеflеcts carе and provides sеcurity for potential tеnants.

6. CRAFTING CAPTIVATING INTЕRIORS

Once you’ve charmed your potеntial tеnants with thе еxtеrior, it’s timе to imprеss thеm еvеn morе with thе intеriors. Nashvillе is a tapеstry of culturеs and crеativity, and your property’s interiors should tеll a story that rеsonatеs with this vibrant city.

7. COHESIVE THЕMЕS FOR HARMONY

Nashvillе’s unique blеnd of music, history, and modernity provides ample inspiration for crafting a cohesive thеmе. Sеlеct colors, furniturе stylеs, and decor еlеmеnts that complement еach othеr and capturе thе spirit of thе local culturе. Incorporating musical instrumеnts or artwork can connеct tеnants to Nashvillе’s thriving music scеnе.

8. FUNCTIONAL AND STYLISH FURNITURЕ

In a city whеrе innovation thrivеs, your propеrty’s intеriors should mirror that еthos. Opt for furniturе that sеamlеssly blеnds functionality with stylе. Piеcеs that offer storagе solutions without compromising visual appеal, such as storagе bеds or convеrtiblе sofas, can catеr to thе nееds of modеrn tеnants.

9. RЕVIVING KITCHЕNS AND BATHROOMS

Nashvillе’s еclеctic dining scеnе and artistic flair dеmand kitchens and bathrooms that mirror this еssеncе. Upgradе appliancеs, replace outdated fixtures with еnеrgy-еfficiеnt modеls and consider invеsting in nеw countеrtops or cabinеtry. A frеsh coat of paint and stylish hardwarе can work wondеrs, injecting lifе into thеsе crucial spacеs.

10. WЕLCOMING BRIGHTNЕSS AND TЕXTURЕ

The city’s warm еnеrgy dеsеrvеs interiors that exude thе samе radiancе. Usе light-colored paint to make rooms appеar morе spacious and wеlcoming, and stratеgically placе mirrors to amplify natural light. Introducе tеxturеs through throw pillows, rugs, curtains, and upholstеry fabrics to crеatе dеpth and visual intеrеst.

11. ART AND AMЕNITIЕS: A SYMPHONY OF DЕLIGHTS

Nashvillе’s artistry and love for entertainment should pеrmеatе еvеry cornеr of your propеrty. Display iconic photographs or local artwork to connеct tеnants to thе city’s rich hеritagе. Outsidе and indoors, amеnitiеs should catеr to Nashvillе’s divеrsе population.

12. INVITING OUTDOOR SPACЕS

In a city known for its outdoor еvеnts and natural bеauty, your property’s outdoor spacеs should offer a slicе of Nashvillе’s charm. Crеatе, a patio with comfortablе sеating or a grill area whеrе tеnants, can еmbracе the city’s barbecue culturе.

13. FITNЕSS FACILITIЕS FOR ACTIVЕ SOULS

Nashvillе’s commitmеnt to a healthy lifestyle is rеflеctеd in its active community. It offers fitnеss facilitiеs, from a small gym room to an outdoor baskеtball court or swimming pool, for tеnants who valuе staying active.

14. PЕT-FRIЕNDLY PARADISЕS

Nashvillе is a city of pеt lovеrs, and your property should еmbracе their furry friends. Pet waste stations and fеncеd-in yards providе convеniеncе and safеty for pеt ownеrs, allowing thеm to еnjoy Nashvillе’s outdoors without worry.

15. PRIORITIZING SAFETY AND TECHNOLOGY

Nashvillе’s vibrant culture should coеxist harmoniously with safety and technology. By wеaving both into your property’s fabric, you create a haven where tenants can fully immerse themselves in the city’s offеrings.

BOTTOM LINE

From thе momеnt potеntial tеnants stеp onto your propеrty, thеy should fееl thе pulsе of Nashvillе’s vitality. Thе journey from curb appеal to intеriors should bе a symphony of harmonious dеsign, safеty, and technology that mirrors thе spirit of this dynamic city. 
By mastеring this art, you’re not just rеnting out a propеrty; you’re offering a Nashvillе havеn that tеnants will be eager to call homе. Through mеticulous planning and a dееp undеrstanding of Nashvillе’s еssеncе, you can transform your property into a mastеrpiеcе that capturеs thе heart and soul of Music City.

HAMMOCK STAND SELECTION MADE EASY: 6 TIPS FOR THE PERFECT PICK

Imagine a tranquil afternoon, with a gentle breeze lulling the trees and the ideal hammock beckoning you to a peaceful retreat. For your relaxing aspirations to become a reality, you still need one essential component: a strong and dependable hammock stand.  

It could be challenging to select the best from the numerous possibilities on the market. But don’t be concerned! With these six simple recommendations, we’ve got your back when picking the best hammock stand and guaranteeing that your time spent unwinding will be extraordinary.  

Let’s go on this adventure to get the ideal hammock stand to make your time off amazing.

1. KNOW YOUR HAMMOCK

This is the first step in finding the ideal hammock stands. Understanding the kind and dimensions of your hammock is crucial before you begin looking for a stand. 

Different types of hammocks need unique stand designs for the best support and comfort. To choose the proper stand size, measure your hammock from end to end, considering any ropes or chains. 

This information guarantees a snug fit and eliminates any disappointments while setting up your tranquil haven. So, get to know your hammock—it’s the foundation for your ultimate reclining experience.

2. CONSIDER YOUR SPACE

The second crucial tip for selecting the perfect hammock stand involves evaluating your available space. The space where you plan to hang your hammock plays a significant role in determining the stand’s style and size.

A sturdy steel stand designed for outdoor use can withstand the elements and provide stability if you have a spacious backyard. Opt for a space-saving stand on a cozy patio or limited indoor space that complements your area without overwhelming it.

By assessing your available space, you can make an informed choice supporting your hammock and enhancing your lounging experience. So, before you make your selection, take a moment to consider your space and create the perfect relaxing oasis.

3. WEIGHT CAPACITY MATTERS

When selecting a hammock stand, paying attention to its weight capacity is paramount. Your safety and comfort depend on it. Check the stand’s weight capacity before making your decision; it should be adequate to hold both your weight and the weight of anyone else you could share the hammock with. 

Overloading the stand might result in instability and accidents. By paying attention to the weight capacity, you can be confident that your hammock stand can deliver a safe and comfortable experience while you relax.

4. PORTABILITY AND STORAGE

Don’t forget to take mobility and storage into account while choosing the ideal hammock stand. Depending on your lifestyle and intended use, you might want a stand that can be easily moved or disassembled for storage.

Portable stands with quick assembly features are great for campers and travelers who seek relaxation on the go. If your hammock will be permanently installed, pay attention to a more durable and solid stand. 

Consider the area you have to store the stand when it’s not in use and pick one that will fit comfortably there. A stand that strikes the ideal mix between mobility and storage practicality guarantees that your hammock can be used whenever and wherever you wish.

5. MATERIAL SELECTION

In your search for the ideal relaxing experience, selecting the appropriate material for your hammock stand is an important factor. Steel, aluminum, and wood are common materials for hammock stands, and each has a unique set of benefits. 

Steel stands are strong and long-lasting, making them perfect for outdoor usage; nevertheless, they are heavy. Aluminum stands provide a lightweight, rust-proof alternative for individuals who desire mobility. 

Conversely, wooden stands blend in nicely with natural environments and have an aesthetic look, but they require more maintenance. Consider your surroundings, the intended use, and aesthetics while selecting the material.  

A carefully selected material ensures that your hammock stand will last for years of enjoyment and relaxation while also perfectly complementing your hammock.

6. HAMMOCK STYLE 

Being aware of the design of your hammock will help you pick the best hammock stand. Spreader bar, Mayan, and rope hammocks are just a few of the numerous varieties of hammocks. The requirements for a stand that works with each kind vary.

Rope hammocks, for example, work best when combined with spreader bar stands that keep the hammock open for easy access. Fabric hammocks tend to be more flexible and appropriate for a larger range of settings, but they might also require more support to maintain their shape. Mayan hammocks often span two anchor points rather than having a stand.

Before making a purchase, decide on the style of your hammock and make sure the stand you select is adequate. By taking this into consideration, the hammock’s swing and reclining positions strike the ideal balance that provides stability and relaxation.

CONCLUSION

Finding the best hammock stand won’t be difficult if you keep these six recommendations in mind. For the best hammock experience, remember to match your stand with the shape and size of your hammock, consider the space you have available, and verify the weight capacity.  

Along with the appropriate material choice and hammock type compatibility, take into account storage and portability. These important considerations will assist you in making the optimal hammock stand decision for maximum enjoyment.  

All that’s left to do now is kick back, relax, and revel in your well-deserved relaxation in your hammock hideaway. Happy lounging!

FIVE WAYS TO IMPROVE YOUR HOME WHEN YOU HAVE ARTHRITIS

In 2023, there are more senior people than at any other time in history. This is great, as it allows for better intergenerational relationships in families, but for older people, it can create challenges when it comes to staying in their homes. 

Indeed, as someone ages, the chances of ailments like arthritis developing go up, and so many people opt to adapt their current homes rather than move. What are some of the best ways to do this? Read on to find out!


NEW MATTRESS

Sleep is extremely important, especially when you have arthritis, so one of the first ways that you can improve your home is to upgrade the mattress in your bedroom. You may think that a memory foam mattress may be the best choice here, but for many people who have arthritis, a firmer mattress, like the ones found at reinforcedbeds.co.uk is the best option.


HANDRAILS

Handrails are a boon for many people with arthritis, as they allow them to stand up with ease and without discomfort. Of course, most people associate handrails with being placed in a bathroom, but you can have them fitted in every room in the house. Just make sure that if they’re fitted in the living space, the dining area, or the kitchen, that they’re firmly screwed into place.


LIGHTING

When you need to get up at four a.m. to go to the toilet, the last thing you want is to fall over in the dark. In this circumstance, many people do use the flashlight on their phone to navigate, but in the event that you don’t have your phone, to prevent falls, you can install lighting on the outside of your room. 

In many cases, this is motion detection lighting, which is placed on the stairs, so when you move about on the landing, the lights will come on. 


NON-SLIP FLOORING

A wet floor is going to cause most people to slip if they’re in a rush. If someone in your home has arthritis, or you have it, then you may not be aware of the shuffling motion that can come from this condition. This motion can help you to get around, but it also increases the chance of you falling over.

So, in the kitchen, the hallway, and the bathroom, make sure there’s non-slip flooring installed. This flooring often acts like lino and can be very visually appealing while also being safe. Great!


BATHROOM UPGRADE

When a person is older and may be suffering from arthritis, there are two places in the home where they’re more likely to have an accident. The first is the stairs (a health hazard for most people), and the second area is the bathroom. 

Bathrooms are quite dangerous places for people who have severe arthritis, as you often have to step over the rim of the bathtub to get into it, the floors are slippery, and the toilets are low.


All of this increases the chance of a fall, meaning that in order to improve your home when you or another member of your household has arthritis, you should start with the bathroom. Install grab rails around the toilet, have a raised toilet seat fitted, change out that bathtub for a walk-in shower, and, as mentioned earlier, make sure the flooring is non-slip.

BEST PLUMBING TIPS FROM EXPERTS: 2022 LIST

You can never know too much about plumbing: how it is still changing with new and innovative ideas. Understanding the basics of your plumbing systems is often a must if you do not want to deal with the hassle of leaky pipes in your building. If you’re new to plumbing work, read this plumbing checklist to help you understand it better and how it works.     


Plumbing Tips    

These are some of the essential plumbing tips in 2022 that will help you care for your plumbing system. If you want to ensure that your plumbing systems continue to function correctly, consider these tips:    


Tip 1: Inspection is A Must  

It will help if you do assessments routinely. Your plumbing system is an integral part of your building, and problems with it can cause problems in some other parts of your structure. Your plumbing system controls water flow, wastewater, drains, and more.     

Inspection can help you find possible problems in your system and fix them right away. Without this, you may encounter minor issues that can turn into something serious, which causes more problems and additional costs. It would be best if you also considered hiring a professional to inspect your plumbing systems as an amateur or someone with little to no experience will be unable to spot not-so-obvious signs of deterioration or damage.  


Tip 2: Cleaning and Maintenance      

Maintaining and cleaning your plumbing systems are just as crucial as inspection. Professionals inspect to see if repairs are needed or if you have significant problems with your unit. Consider installing access doors for easier access to your plumbing systems while keeping them safe and protected. Consider hiring professionals to clean and maintain your plumbing systems, as they would know what to do and how to do it properly.       

By ensuring your pipes are getting their routine cleaning and maintenance done, you are prolonging their lives and durability, saving them from damage and deterioration. It would also be best not to attempt to clean your pipes alone, as you will need more than just a brush and some cleaning chemicals.  


Tip 3: Know the Important Parts    

You should always know the essential parts of your plumbing systems, especially the shut-off valves. You can shut it off by twisting these valves to save yourself from water damage or flooding in your building. Every central plumbing fixture in your building will come with a shut-off valve for emergencies.  


Tip 4: Always Trust the Professionals    

Another tip you should not take lightly is to trust professionals over your intuition or some random DIY YouTube video. Don’t take any chances, especially regarding something as important as your plumbing systems. One amateur mistake can lead you to more significant problems and costly repairs. If you are unsure about the problem with your plumbing systems, call a plumber and deal with that issue immediately.   


Tip 5: It is Always Worth the Cost    

While some people might think they can do the plumbing work themselves, it does not usually end on a good note. Without proper experience and tools, you cannot expect to get an easy fix by following a guide online. Plumbing problems may cause various issues, especially if you run a commercial business like a restaurant or a hotel. Remember that paying for plumbing work will always be worth the cost.     


If there is any doubt, always call a professional. To prevent plumbing issues early after construction, hire a plumbing expert to provide you with the design of your plumbing system, not someone who understands just the basics of how plumbing works.   

Guest Contributor: Chris Jackson

HOW LONG DOES IT TAKE TO BECOME A LICENSED PLUMBER?

Hygiene is one of the critical factors in maintaining large cities. The cleanliness we enjoy today is all thanks to the accessibility of clean, running water. Without this convenience, cleaning our homes and workspaces becomes difficult. The humble plumber is a wonderful person you can thank for clean running water.  

Giving people confidence in your abilities is essential to such an important task delegated to plumbers. Nothing sparks confidence in your clients like your shiny new plumbers’ license.    

If you’re looking into becoming a licensed plumber, this article is just for you!  


Check In with Your Authority Having Jurisdiction 

Different states have different prerequisites for becoming a licensed plumber, and some states don’t need a license altogether. To figure out what you’ll need to become a licensed plumber, you must refer to your state’s AHJ.  

AHJs for plumbing have information regarding local safety standards. As such, they are one of the most reliable sources of information for becoming a licensed plumber.  


Apprentice Plumber  

Like all jobs, you’ll need to accumulate the experience necessary to become a plumber. Depending on the state that you’re in, you may need to apply for an apprenticeship license or register as an apprentice. You’d need basic requirements to become an apprentice. These include being 18 years old and obtaining your high school diploma or GED.  

As an apprentice, you’ll typically work with Journeyman or Master Plumbers, learning skills directly from them through on-the-job training and coursework. Apprenticeships last between two to six years, so take your time to learn from the best plumbers to become one yourself.  


Journeyman Plumber 

After working with other plumbers for a while, you’d be looking to start doing jobs on your own. The process begins with becoming a journeyman. To become a journeyman, you’ll need to pass the licensure exam in your state. If your state does not have one, your city or municipality may instead have one, so it’s essential to check the requirements in your area.   

Understanding the questions you’ll encounter in the exam is vital. Thankfully, the internet makes it easy to look for the recommended study material in your area. The licensing board responsible in your area may have their recommended study guides, which will go a long way in achieving success with your exam.  

You can choose which industries you want to work in as a journeyman plumber. For example, during your apprenticeship, you may prefer working on big commercial construction projects or doing minor residential service work. With this journeyman license, you have the liberty to choose your path.  


Master Plumber  

The highest level in plumbing and what most plumbers work to achieve in their careers is becoming a Master Plumber. While becoming a master plumber, you’ll need around two to four years of additional experience and work in the plumbing trade on top of your experience as a journeyman. Depending on your location, you may also need to complete a training course.  

As a master plumber, you open yourself up to a variety of opportunities, such as being able to work towards a high managerial position, maybe you prefer doing planning work through 3D CAD software, or perhaps you’d like to open your own company. You also get the most prominent influence in choosing the components that go into any job, so it’s essential to take your time doing research, like deciding if you need Plumbing Access Panels or not.  


Conclusion  

Any job can be worth working in as long as you want it to be, and that’s certainly no exception than becoming a plumber. The best thing is the freedom you get with this career. If you enjoy going out on your work truck doing the jobs yourself or prefer managerial and planning roles, you open your career up to take the path you want by becoming the best plumber.  

Guest Contributor: Chris Jackson

HOW TO DEAL WITH THE MOST COMMON PLUMBING EMERGENCIES

Plumbing problems are inevitable. Sooner or later, something will age out, rust, or burst. When that happens, you need to know what to do and how much you can DIY.

WATER LEAKING

First of all, find and shut off the main valve. It’s usually next to the water heater, under a sink, or near the washer. If you can’t find it, go out by your metre and turn the water off there. You need a special key tool for that.

Don’t try to showcase your DIY skills in this situation. Plumbing work in Australia is regulated by specific codesand you might get in legal trouble for trying to wing it. Better call a local professional.

Stop the inflow and sanitise the immediate damage. Then call a plumber to address the underlying problem (burst pipe etc). If only hot water is leaking, shut off the valve on top of your heater. Your home will still have a water supply, albeit cold.

PILOT LIGHT IS OFF

The pilot light on your water heater indicates whether the heating is working. First, find a metal box with knobs near the bottom of the heater. Set the temperature control to the “pilot” position. Next, look for the access panel and look inside.

There’s a button that feeds gas into the pilot light (usually red). Use a long lighter to reach in safely. Light the pilot light, then hold down the gas button for 35-40 seconds. Let go and, if the light stays on, change the temperature control knob back to “On”.

If it goes out again, call a plumber specialising in water heater repair. You’re almost certainly dealing with a faulty thermocouple (safety device).

JAMMED SEWER

When a home sewer becomes clogged, toilets might refuse to flush, water can flood out from under them, or sewage might come out of the shower.

For residential sewer troubleshooting, it’s best to look for experts who are familiar with the area. For example, if you live in Greater Western Sydney, you would look for a reputable plumber in Hills District. Until you can get professional help, reroute the waste outside. Find your cleanout and remove the cap. This reduces pressure on the line and the sewage goes into your yard instead of into your home.

GAS LEAKING

Gas leaks occur near stoves, furnaces, and water heaters. Move the appliance and turn the (usually red) valve or handle a quarter-turn to stop the gas flow. Leave the space and let it air out completely before you start diagnostics and repair.

If you still smell gas, shut off the main gas line. You can also call the gas company or a plumber to do it for you. In that case, also request immediate repair service. Gas leaks are fire and suffocation hazards and must be fixed immediately.

CARBON MONOXIDE LEAKING

These are highly lethal and even more urgent than gas leaks. Speed is key: CO acts insidiously and affected persons could just fall asleep and not wake up. Common symptoms of CO poisoning include drowsiness, headaches, and nausea.

Outfit your home with a CO detector. If it goes off, shut down every gas appliance, evacuate everyone, and call emergency plumbers.

Water leaks, malfunctioning heaters, and blocked sewers are all common household plumbing emergencies. You can troubleshoot the immediate damage and patiently wait for professional help. Gas leaks and CO leaks are hazards that require urgent action. Know which appliances run on gas, where the valve is, and educate all members of the household on emergency and evacuation plans.

Guest Contributor: Diana Smith

A BUYERS GUIDE TO CHOOSING MODERN KITCHEN TABLE

Tables are an integral part of a kitchen. It is the place where you can create and share a meal with friends and family. But more than merely functional, tables come in many different shapes and styles, from round to rectangular. A good table will last for years, providing comfortable seating for all your guests and a clean surface to enjoy your delicious meals on.

Choosing the right kitchen table is an important decision. It will often be the one piece of furniture you and your family spend the most time around, so it should be comfortable, durable, and stylish enough to fit into your home’s decor. That is why this buyer’s guide for modern kitchen tables is here to help.

BEST MATERIAL FOR KITCHEN TABLES

The material is the first thing to consider when shopping for a kitchen table. While there are many choices, glass, marble, and metal have their unique pros and cons.

GLASS

Glass is a great material for a modern kitchen table because it is sturdy, easy to clean, and can be found in various colors and thicknesses. It does not scratch easily but should be handled with care because it can break.

MARBLE

Marble is made of stone and therefore durable, but it has the added benefit of looking elegant and classy and being stain resistant and easy to clean. However, marble can chip or crack if dropped or bumped against something hard, so care needs to be taken when handling this material.

SOLID WOOD

Solid wood tables look great but are not as durable as glass or marble, so this material should be used with caution. While it is the most expensive option, solid wood is also a very stable material and very easy to keep clean.

METAL

Metal is a good option for modern kitchen tables because it is lightweight and not prone to chipping or breaking. However, it also tends to scratch easily, and it will also rust if left wet.

CHOOSING YOUR KITCHEN TABLE SHAPE

The next important thing to consider when buying a kitchen table is the size and shape of the table itself, both in terms of its overall size as well as the size of the individual seating pieces that make up the tabletop.

ROUND TABLE

We can’t all be the owners of an oval or round dining table, but if you find a nice round table that looks good in your kitchen, you may want to consider investing in it. Round tables are more comfortable to sit at than rectangular ones.

This is the most common table shape in modern kitchens because it allows for maximum visibility – particularly with regard to seating arrangements – and provides maximum surface area for food preparation and serving.

SQUARE TABLE

A square table provides a roomier area for the same number of people as a round table, so it is a good option if you feel cramped at round tables. It also allows for more leg room. Square tables are great for young families who have to accommodate children’s booster seats.

Consider a square table instead of a round table that doesn’t fit in with your kitchen’s look. This is the most common shape for traditional dining tables, so it should be the one you choose if you want to keep your kitchen’s appearance classic.

RECTANGULAR TABLE

Rectangular tables are the most popular table shape in modern kitchens because it provides a roomy area for sitting and dining or entertaining, even with an asymmetrical seating arrangement. They also suit modern homes, providing plenty leg room for all guests.

A rectangular table can work well in any layout, as long as the seating arrangements suit your needs and the overall size is appropriate for your kitchen décor. You can make it work as long as you have enough room for everyone to feel comfortable.

OVAL TABLE

With an oval table, you may have to adjust the kitchen’s layout depending on where the seating arrangements will be. This is because it will take up more surface area than other dining options. However, it also provides extra room for food preparation and serving and more flexibility in seating arrangements since more people can fit around one circular shape than any other type of table.

CHOOSING THE CORRECT TABLE SUPPORTS

The next thing to look out for when buying a table is the type of support it has. This will depend on whether the table uses legs to support itself or if it is an entirely flat surface.

A-FRAME

This type of support is typically paired with glass tables, as they are a good option for casual surfaces such as coffee tables, and they provide adequate support without taking up too much space in the living room or family room. However, if your table will see heavy use, this support may not be strong enough to hold it up properly over time.

X-FRAME

This support is typically paired with metal or wood tables, as they provide a table’s most sturdy and stable support. Metal tables can also be found in other types of materials, such as glass, marble, and solid wood.

SQUARE LEGS

If you have a small table, you may want to consider square legs to give it some extra structural support. This will help ensure that it will last a long time and not become unstable over time, which is important if you plan on entertaining large groups of guests or family members regularly.

THE BOTTOM LINE

Buying a table for your kitchen can be stressful, but with the tips and tricks that we have provided you, you should be able to purchase a great table without too much work. If you choose the right size, shape, and material for your kitchen, your new table will be a piece of furniture that will last for years.

4 LIGHTING TRICKS TO BRIGHTEN A DARK HOME

Does your house feel dark like a cave? If you want to brighten it, the following are some lighting tricks to brighten a dark house. These are a combination of advanced ideas and beginner tips. They will ensure you maximize what you have while bringing more light into your home. 

4 LIGHTING TRICKS TO BRIGHTEN A DARK HOME

There are four sure ways you can use to brighten a dark home. They do not require a big budget, and you can work with what you have. Read on to make your home brighter today!

1. LIGHT YOUR WALLS

Lights on walls will keep your edges bright. If you have lots of ceiling or pot lights, try installing shades that aim both down and up. LED Light Ideas recommends using a pair of sconces to make a room twice as bright, as long as the sconces have been placed strategically. 

When adding lights to a ceiling (especially pot lights), consider placing a few closer to the walls. The move will ensure the light is cast down onto the walls. It is a great way to highlight details such as brick or traditional cabinetry.

If you are looking for a sophisticated approach, make a focal point of a loved art piece by using a picture light. Table lamps are also a good option for spreading lights across the walls. Go for classic drum shades with openings at the bottom and top for the best effect. 

908de53ba9fdc79fcc2dfb98371295f0.jpg

2. USE MIRRORS

It is common for people to use mirrors to brighten a dark house. The idea is that mirrors will reflect light around the room. To get the best results, make sure your ceilings and walls are painted white. 

White bounces light, especially LED light. This means it will send more light around a house. Since white is a non-hue color, it doesn’t absorb any color. As such, it is the best way to scatter light in a dark house. 

3. USE BLUE COLORS

Compared to yellow-toned light bulbs, natural light is cool. Adding blue is recommended as it offers a crispness that is a reminder of the sky. Additionally, cool blue does not clash easily. It can work with any accent color you would like to add to the mix as part of your interior decoration. 

4. BALANCE THINGS OUT

Ultimately, a natural interplay between shadow and light is crucial for implementing lighting tricks to brighten a dark house. The lowlights and highlights from the lights and shadows are pleasing to the eye. 

No one can say they like the inside of a super-bright store that has perfectly even lighting but uses harsh fluorescents. At the same time, the right LED lights will ensure you do not spend excess money on power bills

You can add lights to brighten the dark corners of your house. However, be a bit subtle and avoid overdoing it. A few shadows are important. They give your home a sense of life and means your space has depth. This is what makes your house feel like a home.

CONCLUSION

If you are thinking of making your house brighter, there are a plethora of options you can use. Take note, not every guide you get will give you the results you want. You need to take into consideration the interior of your home before you make any decision. 

You can use the four tips mentioned above. However, make sure you balance them out. Use each tip where appropriate. For some people, using all four will work in their house. For others, it will not. Find a balance for using the above lighting tricks to brighten a dark house to make sure you get the best lighting for your home. 

Guest Contributor: Allen Michael

BATHROOM UPGRADES THAT SAVE WATER

Bathrooms use a lot of water. In fact, this is the room that uses most of the water in your home. The toilet accounts for 26.7% of all water usage, on average. The shower adds 16.8% to that figure. The interesting part of this is, while you can’t avoid using water, there are ways to upgrade almost every fixture you have to reduce water usage.

Below, we’ll cover the bathroom upgrades that will go easy on your water bills and the environment — while turning your bathroom into a more beautiful, contemporary space.

Choose a Low-Flow Toilet

Modern toilets use a lot less water than older ones while providing plenty of flushing power. In 1992, a U.S. law was passed that mandated all new toilets sold within the U.S. to use 1.6 gallons of water per flush or less. Contrast that with older toilets, which can require twice or even four times as much water — 3.5 to 7 gallons of water per flush. You can see where replacing those older toilets can save a lot of money while upgrading the look of your bathroom.

Replace Your Showerhead With a Low-Flow Showerhead

This is an inexpensive upgrade that you can install — and it could save you many times over on your water bill. On average, if you took seven-minute showers 25 times per month, a regular showerhead flowing at 2.5 gallons per minute would use 440 gallons of water. Replace it with a low-flow model that uses about 1.5 gallons per minute? That number drops to 262 gallons per month, which saves you roughly 2,000 gallons each year.

Opt for a Low-Flow Faucet, Too

Similarly to showerheads, you can install low-flow faucets to help rein in water usage. Though the bathroom faucet isn’t among the largest water users in the bathroom, this still chalks up to big savings. Standard faucets use about 2.2 gallons per minute, but if you get a water-saving faucet, it could consume between 0.8 and 1.5 gallons per minute.

Rethink the Bathtub

Hot baths are undeniably a relaxing luxury — but they also use a lot of water. The average bathtub will need between 25 and 50 gallons for a fill — whereas a 10-minute shower with a water-saving showerhead will use roughly 25 gallons of water. The first thing that you can do where the bathtub is concerned is to treat baths as a luxury. It’s perfectly fine to indulge once in a while, but daily baths can drive up your water usage.

Another great way to reduce water usage during baths is to replace your tub with a water-saving bathtub. These are quite unique in that they’re designed to hold less water than a traditional bath while giving you the same comfort. Essentially, they’re designed to fit the contours of the human body, which allows you to soak while using far less water.

Combine New Fixtures With Good Habits

The upgrades mentioned above will save a lot of water yearly, making them well worth the investment. They’ll enhance the look of your bathroom, too, replacing old and worn fixtures with new, stylish ones. 

Past that, you can save even more water by combining your updated fixtures with good habits:

  • Make sure to shut the bathroom faucet off when you’re not actively using the water. In other words, don’t let the water just run while brushing your teeth.
  • Minimize shower time and treat baths as a luxury to ease water usage.
  • Regularly check your plumbing. Leaks account for up to 13.7% of water usage within the home. If your toilet keeps running, faucets drip or pipes seep, that is water being wasted. It may not seem like much, but it adds up over the course of a year. Worse, plumbing leaks could cost you even more if they go unnoticed long enough to cause rot or some other kind of damage to your home.

Saving water means investing wisely in fixtures. Nowhere is this more important than in the bathroom, which is the biggest water consumer in any home. Consider upgrades to bring your water bills down and to give your bathroom a much-needed update.

Author bio: Erica Garland is Content Marketing Manager at Modern Bathroom and has 15-plus years of experience in the bathroom renovation industry. Modern Bathroom sells a variety of products you would need for any bathroom renovation project. With such a large selection of vanities, faucets, sinks, toilets and showers, Modern Bathroom is sure to have the perfect piece to give your bathroom an updated look.