HOW TO REMOVE CLUTTER FROM YOUR YARD

HOW TO REMOVE CLUTTER FROM YOUR YARD

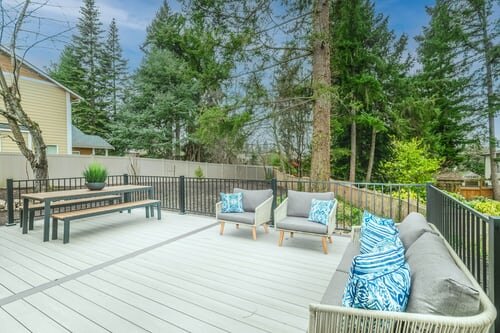
Many home owners notice that their yard never looks as they imagined it would. That’s because it’s not neat and there’s always clutter in the yard that makes it look less than what it could be, even if your plants are all doing rather well.

There are ways to fix this problem and return your yard to its true glory. This doesn’t require that much work or that much investment, if you discount the work that you’ll need to put in. However, making sure your garden is clean will be a long-term job.

THROWING THINGS OUT

The first step may seem like a rather simple one, but it’s the one that will take the most work and the most planning. You should start by throwing out everything in your yard that isn’t actually used. It’s possible to hire professional junk removal from Sydney if there are a lot of items that you need to throw away at once.

It’s important to be strict with this and to throw away just everything that isn’t supposed to be there, regardless of how old it is and whether it could be useable at some point.

SHED

There are many tools that you’ll need to maintain your yard and most of them are used seasonally, which means that storing them until they are needed becomes a problem of its own. That’s why some yards have a pile of tools laying in a corner somewhere until they are actually used.

It’s best to avoid this by setting up a small shed. That’s both better looking and it will keep the tools useable for a longer period of time, simply by hiding them from the elements. The sheds could be pre-made and installed in a yard within hours.

crestwood plumber

PRUNING

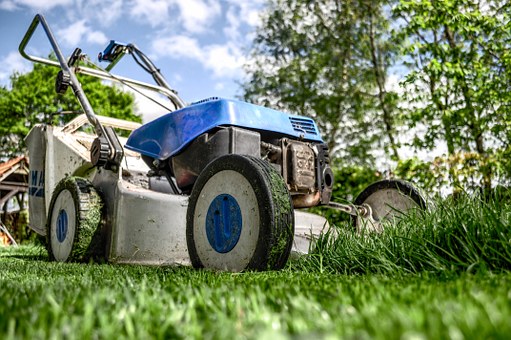
A lot of the times, the yard isn’t crowded and ill designed at all – it’s just not maintained as it should be. Plants grow faster in the summer and they could quickly overtake your yard if they aren’t pruned and maintained on a regular basis.

It’s best not to wait for the plants to grow, but to have a schedule for pruning and mowing the lawn that you’ll stick to regardless of how grown the plants are at any moment. The same goes for watering, which should be done on the schedule based on what plants you are planting.

GARBAGE

The yard needs to have at least a few garbage bins and recycling cans. You’ll end up using them more often than you think and it’s best to always have one nearby. However, these cans don’t look that nice, especially if you’re going for a clean look for your yard.

There are ways to hide them, that will still keep the recycling accessible and easy to organize, but won’t damage the overall look and feel of the yard. The cans could be painted green and hidden behind bushes or within wooden and decorative containers, for instance.

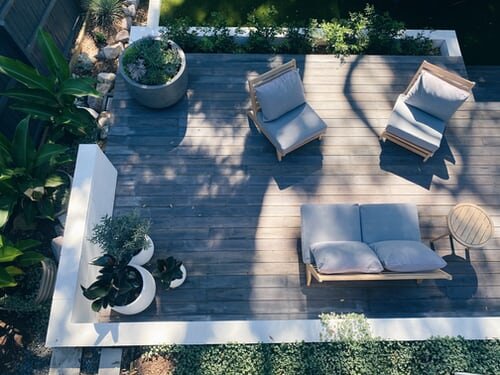
Yards can easily get crowded and cluttered if they are not maintained properly and with care. This can make even the most beautiful of yards look bad and it can easily be avoided with a little bit of work and a little bit of planning.

The work starts with throwing away all the things that are laying in your yard and that shouldn’t be there. It’s also important to have a storage area for the yard alone, since you’ll need a lot of tools and you need a place to store them away. The yard should also have plenty of recycling bins but they could be hidden not to spoil the overall look.

Guest Contributor, Diana Smith

SIX HOUSEPLANTS THAT ARE GREAT FOR BATHROOMS

Six Houseplants That Are Great for Bathrooms

You might think your bathrooms aren’t good candidates to grow indoor plants seeing as they typically don’t have much in the way of natural lighting and experience dramatic shifts in humidity and temperature, but did you know there are still plants that can easily thrive in these conditions with a minimum of maintenance?

Even small indoor plants continuously add fresh oxygen to your space and absorb carbon dioxide. They also tirelessly work to purify the air by removing toxins like formaldehyde, benzene, xylene and others. Some plants even become more adept at eliminating indoor pollutants with practice.

Just about any common indoor plant offers benefits both aesthetically and to the overall health and wellness of your household. But some are easier than others to maintain, especially in the tricky environmental factors that go part and parcel with a bathroom.

But it’s worth the extra effort to make sure that the enclosed, somewhat claustrophobic spaces bathrooms inevitably represent are decorated with the invigorating and lively presence of living species. And as you read on, you’ll come to find that with the right selections it really isn’t much extra effort at all.

Did you know that formaldehyde is a carcinogen that is found in virtually every household where synthetic materials can be found? Even if you carefully choose what household products you bring into your kitchen and bathroom, it turns out formaldehyde is outgassed even by many building materials, which means that it is almost impossible to avoid. Fortunately, plants can minimize the impact of formaldehyde by filtering it out of the air. Other plants can reduce odors by working as nature’s air fresheners.

Let’s take a look at some of the plants that make the best additions to your bathroom:

CAST IRON PLANT (ASPIDISTRA ELATIOR)

The cast Iron plant is an excellent choice for most bathrooms. This plant thrives in a low light setting and can tolerate a stingy watering schedule. It can do well with both higher and lower temperature settings. The plant should be kept in an area with indirect sunlight.

The plant comes in both small (18 inches) and full size (2-3 feet high) varieties. Leaves may vary from dark green to yellow striped or dotted.

To care for your Cast Iron Plant, water it thoroughly when the soil becomes dry.

The Aspidistra does well in the humid conditions

The plant is also a great air purifier that effectively removes formaldehyde, benzene and trichloroethylene from the air.

FERNS

Ferns do very well in bathrooms because they like humid environments. Different types of Ferns such as Bird Nest, Boston Fern and Staghorn Ferns do well in low light settings.

Ferns need regular watering and misting. However, with too much water they will develop yellow or droopy fronds – a sign of root rot.

Ferns can tolerate significant temperature fluctuations characteristic of most bathrooms. However, if a bathroom is kept cold to the point that humidity is reduced, the fern may begin to struggle. Try misting them more frequently or move them to a location where the air isn’t as dry.

Note: some ferns and fern-like species can be mildly toxic. If you have pesty pets who are likely to munch on whatever they come across (or babies who do the same… you know who you are) then you may want to do some research on the species you have or look for an alternative.

DRAGON PLANT (DRACAENA)

Dracaena comes in more than forty varieties. It has long spear-like leaves which range in width from a few millimeters to a couple of inches wide. The available colors range from solid green to greenish-maroon and variegated. The leaves of the plant emerge from the stem.

The plant works as an excellent air purifier for the bathroom. It grows well in artificial light and indirect light. Direct sunlight should be avoided.

Dracaena is a drought-resistant plant and doesn’t need a lot of watering. Water it only when the soil feels dry and then pour lukewarm water generously until water trickles through the holes in the pot. Empty the drainage receiver pan after about an hour and never allow the pot to stand in water. The plant thrives in rich soil with plenty of organic material.

SNAKE PLANT (SANSEVIERIA)

Sansevieria also known as “Snake plant” or “Mother-in-Law’s tongue” is very suitable for bathrooms. It is one of the most low-maintenance plants you can grow.

The plant filters out formaldehyde from the air which is commonly found in cleaning materials and cosmetics.

The plant would grow well in light levels ranging from low to bright indirect sunlight. It will also thrive well under fluorescent light.

Water the plant only when the soil is almost completely dried out, which should be ever two to six weeks depending upon the temperature, light and humidity of your home. The plant does well at most humidity levels. Choose a soil which drains freely, and use a terracotta pot to make sure that water doesn’t accumulate in the pot.

PEACE LILY (SPATHIPHYLLUM)

The white flowers of the Peace Lily make a great complement to the décor of most bathrooms. The plant does well in low light conditions and is easy to take care of.

Don’t let the Peace Lily’s delicate appearance fool you: it is a hard working plant when it comes to air purification. The plant also reduces the mold spore levels in bathrooms.

Peace Lily does well in low light during summer and spring but in order to grow well, it will need exposure to indirect sunlight during the rest of the year.

Peace lily requires consistently moist soil, but like other low-maintenance plants, it doesn’t like to sit in standing water. Water it when the top inch of the soil is dry, and keep watering until the overflow of water starts from pot’s drainage holes. Return the pot to its regular place once drainage has stopped.

ENGLISH IVY (HEDERA HELIX)

Ivy is one of the easiest indoor plants to keep. The plant enjoys warm and humid conditions which makes it perfect for greening up the bathroom. Ivy can give a very good display if the aerial roots of the plant are trained to climb a moss stick or trellis.

Ivies grow well in the medium light, but will also thrive in bright light. They are generally less tolerant of low light conditions than the other plants listed here.

Ivies prefer drier soil, so let the soil dry out before watering it again.

The plant can effectively remove traces of airborne mold spores – making it a perfect addition to bathrooms, the kitchen or anywhere else mold or mildew can loom.

Guest Contributor, Ryan from Fast Partitions

FAVOURITE OUTDOOR DESIGN TRENDS OF 2021

Spending most of the time outdoors has become the new normal for many. Following the rules of social distancing, homeowners with large backyards made the most of their gardens with a variety of trendy furniture, privacy solutions as well as an array of tech solutions. From having fire pits in their garden to enclosing the property with fencing solutions, homeowners have made a lot of effort in turning their gardens into their favourite hangout spot. Want to know more about the outdoor trends that we loved in 2021? Keep on reading. We may just let you know what’s coming in 2022 too.

Furniture to die for

Multipurpose furniture gives you a full spectrum of possibilities and uses. Having a comfortable sofa to sit on while also having a spacious storage space underneath is very beneficial. Modular tables are another favourite trend of ours. Who wouldn’t like a table that can be pulled apart to accommodate seating and social distancing? How about a table with hidden beverage compartments? All of those sound perfect and have been very popular among homeowners everywhere in 2021.

Outdoor kitchens

Taking the indoors outdoors is another trend that many followed. Instead of cooking delectable meals inside, homeowners decided to have outdoor kitchens and do all the work in the yard. The convenience of preparing food outdoors allows you to spend time with everyone as you cook. A satellite kitchen features several additional cooking elements, including pizza ovens and grills. Another option is an independent kitchen that features prep space, a sink, storage, and refrigeration. On top of that, you’ll also have cooking elements to complement the rest of the kitchen space.

Added privacy

While lounging outdoors tends to be very enjoyable, it can be rather uncomfortable if you have neighbours’ prying eyes on you. That’s why they need for secluded spaces in the garden skyrocketed. Whether you want to lounge with friends, practice yoga or sunbathe, having an outdoor drapery panel or an outdoor screen. You can also consider various fencing products to enclose your property and make it both more secure and private as well. Having a fence will increase the net value of your property too, so if you ever consider selling your house, that will be a good investment in the long run.

Making the most of the outdoors with technology

The more time you spend in the fresh air, the more you realise what you could use to entertain yourself. When hanging out and landscaping finishes, you can easily continue on with streaming movies. You don’t have to go inside, just to watch your favourite film. All it takes is a Wi-Fi booster to allow you to have a strong signal in your yard and enjoy your favourite flick whilst kicking back in the garden. Bring along outdoor music speakers or portable sound systems and have a full-on cinema-like experience. Incorporate LED lights for added comfort and ambience by stringing them across your fence or the privacy structure you chose. As announced by trendsetters, in 2022, designer metal sconces and floor lamps in the garden and at the corners of the terrace or balcony will be another huge trend that will allow you to make the most of the outdoors and extend your time in the garden.

Fire pits for added warmth and ambience

You can never have too much cosiness. That’s why adding a fire pit to your yard is one of the most popular outdoor trends in 2021. Whether built-in or freestanding, they’re breaking records in popularity in 2021. Making you feel maximally cosy at any time of the day is the goal. Once the sun has set, you won’t have to go inside to be warm. Just decide on having a fire pit between your outdoor sofas and chairs to keep you warm and comfy. Heat lamps will do a similar thing, making you prolong your outdoor times by keeping you warm. For cooling down, consider misting systems and fans.

With 2021 being in its final quarter, we thought we could sum up some of the biggest outdoor design trends for you. Some of them announced the arrival of 2022 trends, while others may prolong their ruling and stick in the year ahead of us.

Guest Contributor: Diana Smith

RENOVATIONS TO CONSIDER WHEN BUYING AN OLD HOUSE

When you buy an older home, you preserve a piece of history. You also have a unique property worth more when you go to sell. Although, these houses often require structural upgrades to keep your family safe. Here are seven renovations you may want to consider.

1.  Electrical

Older homes tend to have outdated electrical systems. For example, your home may still have knob and tube wiring installed. This was popular before the 1930s but isn’t safe for modern homes. The system used porcelain knobs to the run wires. However, the rubber insulation can dry out, leading to cracks and exposed wiring. Also, insurance companies may not provide coverage until you replace it.

Along with an outdated structure, here are some other signs to look out for:

  • Frayed wires
  • Excessive heat marks
  • Tripping circuit breakers
  • Smoke
  • Dimmed lights

If you notice any of these issues, upgrade your system before moving in. To do this, hire a professional electrician. It can cost between $3,500 and $8,000 to rewire an older home. However, the price may vary depending on labor and material expenses. Your home’s size and the scope of the project will also impact the cost.

2.  Plumbing

Your plumbing is another system that could be upgraded. Materials used to construct pipes in older homes often consisted of lead. Over time, the tubes become corroded, and the lead can seep into your drinking water. This causes health concerns, such as abdominal pain or memory loss. Galvanized pipes were also commonly used, but the zinc corrodes over time. This leaves the pipes susceptible to breakage.

Another issue is if your home is using a well system. This could lead to higher levels of sulfur in your drinking water. Too much sulfur can cause diarrhea or dehydration. It can even damage your pipes. So, consider disinfecting your water heater with chlorine to remove the sulfur.

Also, be sure to hire a professional plumber to update all your pipes. Consider installing copper pipes for their durability and heat resistance.

3.  Replacing Your Roof

An outdated roof can cause structural issues. The worn-down material leaves your exterior vulnerable to the elements. Also, a weaker awning can lead to water leaks and mold growth. Keep in mind slate or copper tiles last about 50 years, and asphalt shingles last about 20 years. So, if your roof is past its prime, consider replacing it.

You will want to hire a roofing contractor. The cost will depend on many factors, such as the roofing material and the square footage of your roof. Also, consider hiring a contractor during the off-season to reduce costs.

4.  Strengthening the Foundation

Older homes may have foundation issues that you need to address. Check for signs of cracked walls or uneven flooring and keep an eye out for any signs of rotting wood. These may appear on window frames or siding. To fix any foundation issues, call an expert.

The cost to repair your foundation could be hundreds or thousands of dollars, but a successful outcome means the investment keeps your family safe. Professional contractors can also help prevent any costly or unsafe mistakes. Plus, some areas may require a permit for this type of renovation.

5. Repairing Your Windows

You may not necessarily need to remove your windows entirely. Making simple repairs and adding weatherstripping can be a suitable alternative. You can even glaze them or add additional carpentry to minimize heat loss. These updates can keep the character of your home intact while improving its function.

6.  Checking for Lead Paint

Many older homes feature lead-based paints, which can cause health issues. Check to see if your paint is crumbling or cracked. Also, one way to determine whether its designers used lead paint is to find out the year your home was built. For example, 87% of houses constructed before 1940 used some type of lead paint.

You will also want to hire a certified professional to conduct an inspection. If you have any lead-based materials, you’ll want to remove these from the surface. You can do this through various methods, such as wire brushing or using liquid paint remover.

7. Updating Your HVAC Unit

Your older home may come with an outdated furnace, boiler, or air conditioner. Updating this can make sure you have a properly functioning and efficient climate control system.

When updating your heating unit, consider upgrading to an Energy Star-rated one. This can improve your home’s energy efficiency and reduce your electricity bill. In 2019, Energy Star-rated products saved residents about $39 billion in energy costs.

How to Remodel Your Old Home

Historic homes have such a unique charm! When it comes to renovations, the key is increasing functionality while keeping its character intact. Consider these renovation projects to do just that.

Guest Contributor: Rose Morrison

ADDING ANOTHER BATHROOM TO YOUR NEW HOME

Adding another bathroom to your new home

Unless you live on your own, you’ve most likely considered adding another bathroom to your new home. The luxury of not waiting for other people to finish is always alluring. Add to that the increase in home value that an extra bathroom brings, and the idea of adding one sounds better and better. But, what does adding an additional bathroom to your home involve, and should you undertake such a large project? Well, that is what we are here to find out.

Before adding another bathroom to your new home

The average cost of installing an extra bathroom is $15,000. Therefore, unless you are a well-off millionaire, adding one should be a well-thought-out decision. Not all homes can benefit from an extra bathroom. And, just like any other home remodeling project, the final cost might be far greater than you first anticipated. So, let’s first see whether you actually need to add another bathroom to your new home.

Do you really need another bathroom?

The mere fact that you are considering this leads us to believe that you don’t live alone. If you do, the only possible reason for adding an extra bathroom is if you plan on having a guest room. In this case, an extra bathroom is more of a luxury and less of a life improvement.

Some people just want the guaranteed privacy of having their own bathroom.

The value of an extra bathroom

If, on the other hand, you have multiple people living with you, an extra bathroom can be of great help. Ideally, you should have a bathroom for every 1,5 people living in your home (or two for every three people). So, if there are three of you, have two bathrooms. If there are 5, have three. While you definitely can make do with less, having more bathrooms ensures that people can enjoy their privacy and don’t have to hurry with morning preparations for work or school.

Furthermore, even if this is your new home, you might end up selling it at some point. And before that happens, know that adding an extra bathroom can dramatically increase the value of your home. Most buyers look for the 2:3 ratio of bathrooms to bedrooms. But, if your house can accommodate it nicely, it certainly doesn’t hurt to have more.

Adding the extra bathroom

So, let’s assume that you need an extra bathroom. How are you supposed to go about adding it? Well, there are a couple of things you need to take care of.

Plan in advance

The first thing to do is to carefully consider where your bathroom will be. Know that the term “bathroom” can cover anything from a sink and toilet to a full-fledged spa with a hot tub. Even when renovating their bathrooms, people can be pretty creative. So, figure out what your bathroom will have and where you will place everything. Remember to factor in the necessary sockets for appliances and consider whether your bathroom will have the required ventilation.

Carefully consider windows and ventilation before adding another bathroom to your new home.

Furthermore, when it comes to plumbing and electricity, you should also plan and measure carefully. A skilled plumber can pretty much install the necessary pipes for a bathroom wherever you see fit. And electricity, by its nature, is relatively easy to spread out wherever need be.

But that doesn’t mean that you should push your luck. If you put your bathroom in a difficult spot, you can be in for major plumbing renovation. This will mean that you’ll need to pack your things and move out of your home for a while, as there will be no running water. And even if you pack in the most efficient way, this usually means that you will have to put your items into storage until the project is done. 

The closer your bathroom is to the original pluming, the safer, cheaper, and more resilient it will be. So, take a close look at your home, and create a detailed and careful plan before you start. Don’t shy away from consulting with a professional home designer.

Preparing for the project

Once you’ve figured out where you will put your extra bathroom, you need to start preparing for the ordeal. As we have said, depending on the complexity of the project, you might need to move out. Given the stress you will inevitably be under, it’s important to stay healthy when moving. And seeing that health comes first during relocation, even if it is temporary, you really should prepare adequately for it. Our advice is to either move in with family members or find a hotel (if the bathroom installation will last longer than a week).

The second thing to consider is finding the right professionals to take care of your bathroom for you. An all-in-one contractor is a good start as they can go over your plans and see whether they are feasible. To find them, you can look online and see whether there are any reputable contractors in your area. While price is a significant factor, don’t let it be the only one. Poor contractors can put you in a difficult situation where you need to redo your bathroom in a month or two. And, while bathroom renovations might not be as terrible as they seem, you really ought to avoid them whenever possible.

If, by chance, you are considering DIY plumbing, know that it is usually ill-advised.

All in all, the safest and the cheapest option is to do things right from the start. This means ensuring that you find the best possible contractor (ideally one with bathroom installment experience). Check for reviews online, and don’t shy away from asking for referrals. The more you know about your contractor before hiring them, the better the odds that you will avoid bad ones.

Final thoughts

All things considered, adding another bathroom to your new home need not be a challenging endeavor. The main thing to do is to do your research, prepare properly, and hire the right person for the job. Do that, and you will soon enjoy the peace and quiet of having a bathroom all to yourself.

Guest Contributor: Sophia Perry

HOW TO REDUCE THE RISK OF A GAS PIPE LEAK IN YOUR HOUSE

Natural gas is commonly used in households for kitchen and heating purposes however, one of the major threats is a gas pipe leakage in the house which can be extremely dangerous and even fatal in some cases. In most countries, gas is used as the essential energy resource for water boilers and kitchen needs. 

Natural gas is also relatively cleaner, cheaper, and produces abundant heat for different purposes. People use gas stoves, boilers, heaters, and much more appliances that use natural gas. Natural gas is safe to use but you have to be careful to avoid any unfortunate incident. 

Some of the commonly used gas appliances at home are:

  • Fireplaces
  • Furnaces
  • Grills
  • Water Heaters
  • Backup Generators
  • Gas ovens
  • Laundry Dryers
  • Outdoor Lights
  • Pool Heaters
  • Space Heaters

These appliances are commonly used by people in everyday life and are not a big threat but you must ensure that you are using these appliances correctly to avoid any leaks. 

Dangers and Causes of a Gas Leak

If not detected on time, a gas leak can be fatal and cause huge losses. A gas leak can even burn down your entire house if not controlled on time. Following are the potential risks associated with a gas leak:

  • Adverse health effects
  • Accidental fire
  • Explosion
  • Carbon Monoxide (CO) poisoning
  • Death

Natural gas must be treated carefully as it can be dangerous which is why it is suggested to keep children out of reach. Natural gas is extremely inflammable and even the slightest spark can cause a huge fire. Some of the common causes of gas leaks are:

  • Faulty appliances, like boilers or ovens
  • Loosely fitted gas pipes
  • Poor Appliance Maintenance
  • Appliance Malfunctions
  • Damaged gas pipes
  • An unattended stove that’s been left turned on
  • Damaged gas cylinder
  • Fitting and Connection Issues

 Ways to Reduce the Risk of a Gas Pipe Leak in Your House

1. Installing a Carbon Monoxide Detector

Due to incorrectly fitted appliances or other reasons, there can be a gas leak at any point in your house. One way to reduce the risk of leakage is by installing a carbon monoxide detector at your home. 

Any appliance that burns fuel can produce carbon monoxide which is extremely hazardous for health. The carbon monoxide detector is just like a smoke detector that can be installed at your house. You must place a carbon monoxide detector in every room where there is a gas/ fuel-burning appliance. 

 Before installing the detector, carefully read the instructions mentioned. Do not place the detector near the fireplace or any flame-producing area. Make sure the alarm is placed in an area that is audible in the entire house.

2. Inspecting the Vents on Your Appliances

The vents on your appliances can get clogged with dust and fumes and must be cleaned regularly. Uncleansed or blocked vents can accumulate gas inside which can cause an accident. To avoid any accumulation of gas in vents, you must inspect all your appliances regularly to make sure they are operating normally. You should check chimneys, flues, and vents of all appliances.

3. Check the Ventilation of the Rooms

Ventilation of the house is extremely important especially for the rooms where there are gas appliances. If you are using gas heaters in a room for heating purposes make sure the room is well ventilated. 

 Ventilation should be carried out for at least 30 minutes daily so that there is no threat of gas accumulation in the room.

4. Hire a Professional Team to Check for Leaks in Your Gas Pipes

Using natural gas is safe if the fittings are done correctly by professionals. However, to avoid any unfortunate incident you must get professionals to check the gas pipes at your house. If it has been a long since you got the pipes installed, you must get them thoroughly checked by a team of professionals so they can suggest to you what to do next. 

In case of broken or damaged pipes, you may be asked to completely repair them. Make sure you get an inspection and a Gas Safety Certificate. Whatever is your case, getting the pipes checked regularly for leaks is essential to avoid any unfortunate incident. Avoid calling your local plumber in case of gas leaks and only go for licensed gas professionals. 

5. Educate yourself With the Symptoms of a Gas Piping Leak

You must also be aware enough of the gas situation at home to avoid any trouble. Learn about the symptoms and what to do in an emergency situation to help protect yourself and your loved ones. Having a basic knowledge of gas maintenance is important to avoid any dangerous situation. 

The problem with natural gas is that it is odorless and colorless hence you cannot detect it with the naked eye initially. However, there are a few symptoms that you can observe to detect a gas leakage. Some of the early symptoms of gas leakage at home are: 

  • Nausea
  • Headache
  • Dizziness
  • Confusion
  • Exhaustion
  • Rapid breathing

Other symptoms include discoloration of plants due to carbon monoxide leakage and rotten egg smell. If there is a gas leakage or a threat of leakage:

  • Turn off the gas supply at the source, usually a gas meter
  • Do not light a match and avoid turning on any light, as electrical circuits can cause a spark
  • Open all of the doors and windows to ventilate the space
  • Immediately evacuate the building and inform others as well.
  • Call the emergency to resolve the matter and do not enter the building until the matter is resolved.

Beware of Gas Pipe Leaks During Home Remodeling 

You must be careful before thinking of renovating your house or breaking any wall. You may block the gas pipelines or even damage them unknowingly which can cause a huge problem at your house. Before making any changes, first, consult a professional engineer who can guide you about the pipelines and how to save yourself from any unfortunate incident. 

Moreover, always consult licensed professionals before construction so that your pipelines are fixed correctly. Also, avoid planting any trees or shrubs near the gas source.

Guest Contributor: Arslan Hassan

A GUIDE TO RELOCATION ASSISTANCE

Relocation assistance is a type of service that assists people who relocate to a new place. Relocation assistance can be done in many ways, but it is generally divided into three categories: financial, professional, and personal. In addition, there are various types of relocation packages that have different prices depending on what you need. In this article, we will go through all these aspects and provide information about relocation policy and how much the package should cost for relocating to a new place.

What is Relocation Assistance?

Relocation assistance means when a company assists recruits of an existing employee, which can help him find financial assistance when relocating work from one location to another. It is also for the employee’s benefit because while moving employee doesn’t have any financial burden on them. And by this employee can start in his new position as soon as possible.

The employee usually gets relocation assistance benefits to make it easy for them in their new location. In some companies, if employees have a family, they also receive spouse and children’s move with the employee called domestic partner relocation (DPR).


Types of Relocation Assistance

Direct billing means the hiring company directly deals with the moving company and pays the bill for the move, including selling old home and services for helping in relocating.

Lump-sum – In this, a certain amount of money is given to the employee directly to pay the moving company and related expenses. And if the moving cost is more than the amount given to the employee, he has to pay from his pocket.

Reimbursement – In this, the employee pays from his pocket for the move, and after moving, the company reimburses the amount to the employee. But drawback in this is the employer has to keep all the records of the move carefully.

Third-party relocation – All the logistic, rental expenses, and real estate related to the move are outsourced to the third party, which coordinates with the services and takes care of them.

What is Included in Relocation Package?

Most expenses are included, like interim living, lodging, meals, etc.

  • The company may also offer a relocation bonus or reimbursement.
  • A moving allowance is also included, which helps the employee transport their goods from one place to another on an expense basis. Temporary housing until the new home purchase is completed and includes any additional costs, such as security deposits, utility connection fees, etc., incurred in making this transition is also covered by some companies.
  • Unreimbursed expenses like increased childcare for children under 12 years old while at school; pet care if there’s no family member available to take care of them during the move can be reimbursed by companies too. It also includes selling the old home, moving and storing, furnishing, and other household goods.

What is Included in Relocation Policy?

In relocation policy, mostly short-term hosing, selling and purchasing fees, furniture, and moving costs are covered.

  • It is usually up to the company’s discretion how much of a relocation package they would be willing to offer their employees. The average length for an employee in this process can range from one day or less to three months, depending on what type of work you do and where it needs to happen.
  • Mileage reimbursement can also be included as part of your benefits package if you’re required by federal law, state law, or local ordinance laws to maintain driving records for business purposes. All mileage will need receipts that must include the date and miles traveled between destinations, destination location address with zip code (i.e., hotel name), and vehicle used during travel time.

Are Relocation Packages Common?

In the past years’ relocation was only for the high level of employees. But in today’s global economic scenario and global workforce development, it is common to offer relocation assistance as part of the compensation package.

  • Most employers are trying to save money by not having employees relocate themselves and provide everything they need in one location.
  • Most companies have started offering this type of benefits packages for their key members because more people were looking for employment opportunities outside their current locations. This trend has continued, so now even small businesses are giving out similar packages.

Conclusion

If you need help moving, it is best to get a relocation package. Relocation packages are common and can be used for any move (local or long distance). A relocation policy will detail what the company offers in terms of assistance with packing, unpacking, transporting furniture, etc., as well as how many days off work employees receive if they have to relocate. You may also want to determine whether there’s an option for reimbursement for travel expenses like gas money or plane tickets. Please feel free to contact us.

Guest Contributors: Komal Shah

10 STEPS TO KEEP YOUR PIPELINE DURABLE AT ALL TIMES

Bursting of pipes isn’t something you really want to get into, considering the severity of the effects that would follow. From floods or unpleasant and dangerous puddles to poisoning, these are risks you may not want to run into. Especially if there is something you can do about it.

Just like you’d take care of your gas to reduce risks of gas leakage in the house, it is also imperative that you take good care of your pipeline to make them stand the test of time. This guide explores ten common causes of pipeline problems that may make them burst and what to do about it.

1. Extreme Water Pressure

Water pressure is one of the most common factors linked to the bursting of water pipes. Ideally, if the pressure levels spike to levels that your pipe won’t contain, it will burst.

The bottom line here, therefore, is to keep checking your pipeline to ensure that the pressure levels are within the recommended ranges. This will help you avoid the risks of the sudden surge in water pressure that would cause your pipes to burst.

You can know for sure that your water pressure levels are within the ideal limits by monitoring them using a water pressure gauge. You will need to hook it up to your hose faucet to get accurate water pressure readings.

The ideal water pressure should average 30 to 50 psi and not go past 60 psi. If you notice that the pressure reading is 60 psi+, be sure to contact an experienced plumber to install a pressure valve that will help you keep the pressure levels at the ideal limits and avoid pipe bursts.

2. Freezing Temperatures

Cold temperatures are not really a concern until when the water in your pipes begins freezing. The freezing of water in the pipe increases the pressure in your pipes, thus increasing the pipes’ risks of bursting. You can manage this risk to prevent your pipes from bursting by turning your faucets on to release a steady water flow and prevent pressure buildup. 

3. Corrosion

Most pipes can give you a long-term service, but this does not mean that they will never get damaged. Corrosion is a relatively common cause of pipe bursting, especially for pipes that are used for long periods.

Ideally, the risks of your pipes bursting due to corrosion after long periods of use would be high if hard water passes through the pipes. Over time, the unfavorable pH balance of the water may cause corrosion, leading to a buildup of rust and ultimately bursting of the pipe when the rust blocks it completely.

You can slow down the rate of corrosion on your pipe by ensuring that your water is chlorinated. This will help clear away harmful bacteria like legionella, which thrive in corroded water pipes.

4. Flushing Big Items down the Toilet

Flushing big items down your toilet isn’t a wise idea as it increases the risks of your pipes clogged. Again clogging in your pipes would increase the pressure inside your pipes and increase the risks of bursting.

Managing this risk is pretty straightforward and would not need an expert intervention unless you’ve noticed a leak. Simply find a way of getting rid of items that may clog your pipes, like sanitary pads, instead of flushing them down the toilet.

5. Leaving Home During Winter

If you live in a cold area and you are just coming back home from a vacation and you suspect that your pipes could have burst, the number one culprit, in this case, is freezing of the water. Just as mentioned early, freezing of the water increases pressure in your pipes, and this may make them burst.

To avoid this risk, if you stay in a cold area, leave your heat on if you will stay away for quite some time. It would help if you keep the heat just above 10ºC or 50ºF, as this would do a good job preventing the freezing.

6. Cracks or Holes in the Pipes

Cracks or holes in pipes aren’t uncommon and are also notorious contributors to the sudden bursting of pipes. The cracks or holes in your pipes will let cold air inside.

As you probably already know, this would increase the pressure causing them to burst. To prevent the bursting of pipes due to cracks or holes in them, ensure that your pipeline is sealed both inside and outside to prevent cold air from getting into the pipes.

7. Water Hammer Damages

Water hammer damage happens when your pipes bang and rattle when you turn on the water. You can detect this just from the sound whenever you turn on the water.

If this water hammer isn’t managed promptly, it will weaken surrounding pipes and make them burst. Therefore, if you hear strange sounds, have a professional examine the pipes and repair them to prevent the looming problem.

8. Frozen Garden Hose

Now, this is something that you really wouldn’t expect, but a frozen garden hose may also make your pipes burst. Ideally, when the ice in your frozen garden hose expands, it will increase pressure buildup in the pipes, something which may end up making them burst. You can prevent this problem by disconnecting your garden hoses from the pipes during cold weather.

9. Very Cold Temperatures in the Home

Very cold temperatures around the home may also be to blame if your pipes burst. If you leave in very cold temperatures, here’s what you can do to protect your pipeline.

Ensure the temperatures around the areas of your home where the lines pass through don’t drop below 32ºF. You can achieve this by directing warm air to cold areas in the home. You can also apply heating tapes to your pipes.

10. Poor Insulation

If your pipelines pass through areas like the attics or basements with poor insulation, they may also burst. A typical red flag of a frozen pipe is the molds that would form along the property’s exterior walls. 

To manage this risk, you will need to get in touch with a professional who will improve the insulation of your pipes. Any exposed water pipe will need to be properly insulated.

In Closing

You can make your pipeline stand the test of time by taking measures that reduce risks of damage to the pipes. Taking timely precautions will help you prevent damages that may not only be dangerous but also costly to repair.

Author Bio:

Leon Collier is an expert blogger and academic writer based in the UK. He has expansive experience working with experts offering assignment writing services at Write my dissertation. Leon is a go-getter who doesn’t mind taking on challenges thrown at him. He loves to read books and play tabletop games with friends in his free time. Connect with him on Twitter @ LeonCollier12

6 EASY ROOF MAINTENANCE TIPS TO MAKE IT LONG LASTING

Placing a new roof costs a lot and you’ve spent a lot on something, you have to protect it. A roof is something significant to deal with. Some people will ignore that their roofs might need maintenance, and the consequences come when they need to sell the house or roof problems such as leaking. Proper maintenance of the roof should be the best way to avoid unnecessary problems in the future, hence reducing your roof’s cost.

Roof maintenance can be successful by removing moss on the roof, removing leaves, roof coating, checking for shingle damage and prune overhanging branches, preventing ice dams, and checking the attic. Call this Baltimore roofing contractor for all your needs.

Removal of leaves

A simple peaked roof surrounded by a low landscape can probably stay clear, but if trees are nearby and the roofs are complicated, then the roofs are always filled with leaves. The leaves collect near chimneys or in roof valleys. If not removed, the leaves will trap moisture and decompose, then allow moisture to compile in your roof, creating a fertile ground for weeds to grow. If the house is a one-story house with a low-slope roof, then the leaves can be removed using a car washing brush placed on a telescoping pole. A unique tool is known as a leaf rake and a leaf blower can also be used, especially on dry leaves.

1. Removal of moss

Like leaves, moss also damages a roof, but you can remove them by using chemical substances. Roofs that are composed are mostly covered with black algae, and its growth does not hurt the roof. A detergent mixed with water or a little chlorine will finish it off, but it’s advised to leave it alone for the safety of both the roof and you. The moss needs to be killed first if there is a lot of build-ups. It’s then recommended to use products based on potassium salts of fatty acids instead of toxic formulas that zinc sulfate. It can also be removed by applying soap on where the moss is growing and try preventing the wash water from getting in the storm drains.

After the roof is cleaned and free from moss, you should install the zinc strips on the roof to prevent the moss from coming back. The runoff from the strips inhibits the growth of mosts when raining. Zinc strips are more eco-friendly and effective instead of treating the whole roof with pesticides.


2. Prevent Ice Dams

Ice dams are nasty any they cause damage to the roof and removing them from the roof might cause leaking into the house. It’s not advisable to pry off the ice formed already since that can damage the roof. Instead, use a roof rake to remove the snow within three feet of the gutters. One can also get a telescoping pole and work from the ground and if a ladder is necessary, work at an angle that the falling snow won’t push you down.

Air leaks and inadequate insulation into the attic the risk of ice dams, so after a great storm, check on the roofs.

3. Prune overhanging branches and check shingle damages

Tree trimming prevents damage to a roof by keeping moss and leaves off the roof. Friction from leaves and limbs that touch a roof can damage shingles, incredibly high wind. Overhanging branches also give other rodents and squirrels the chance to access your roof; thus, they can gnaw on the roof. The branches should be away from the roof, or if not possible, the tree trunk can be wrapped with a metal-sheet bank to prevent the rodents and squirrels from climbing the tree.

Check the shingle daily since you may never know if it’s damage from something striking the tree. If the shingles are buckled, curled, or missing, then the roof must be repaired immediately.

4. Check the attic

The attic is an indication that shows if a roof needs to be replaced or it’s still holding. If water stains are evident and daylight peeks pass through the boards, then the roofs need to be fixed earlier before any more damages. The attic also shows how well a roof can perform after a big storm.

5. Roof coating

Roof coating is the best method used if you want your roof to last for a long time. There are different types of roof coating that includes;

Acrylic coating: They are durable and inexpensive elastomeric coatings that have potent biocides and emulsion polymers that prevent dirt accumulation on the roof and provide superior resistance to mildew.

Silicone: Silicone coating is the best choice for providing UV protection and resisting pond water. They erode slowly without becoming hard and contain high solids content. You can use less material to achieve this film thickness.

Asphalt Emulsion: It has asphalt particles dispersed in water with clay as a bonding element. It is black or brown and contains inorganic and organic compounds that strengthen and durability of the roof.

Butyl Rubber: They are also the best due to their tensile strength and extreme elongation. It contains a solvent-based polymer that is fast drying, highly reflective, and suitable for roof maintenance and repair.

Importance of roof maintenance

Roof maintenance is essential since it reduces costs used to replace another roof and makes a roof last longer. If you want a long-lasting roof, then you should follow the above steps.

Author Bio

For the past 20 years, American High Tech Roof Coating has been owned by Javier Chavez who runs their company throughout the Los Angeles, California Area servicing commercial buildings that require new roofs but opt into silicone cool roofing instead.

PRACTICAL DESIGNS FOR YOUR BACKYARD PATIO

Your backyard is your family’s personal play space. You’ve got room for the animals and kids to run around, a space to grill out in the summers, and an area for you and your guests to sit and chat. In most cases, the backyard patio is the place a lot of people are looking to improve when they say “I’m going to sell my house.” A simple and practical looking patio can make your house pop before you put it on the market. Not only that, it’ll easily help add to your value and get a great return.

SIZE DOESN’T MATTER

A lot of people think that the size of the backyard and patio limit what you can do, and they’d be half right. But even a smaller space can be personalized to fill a family’s needs. There’s no shortage of ideas for smaller back patio designs. You can go as far as to add a fire pit, a grill, a seating area, and posted plants. Or you can just clean it up, fix some basics, add some decor and a few plants. The key to a small backyard patio is minimalism and efficiency of space.

BIGGER DOESN’T ALWAYS EQUAL BETTER

Assuming you have a good-sized backyard, you have a lot of canvas to work with. With a lot of area comes a lot of ideas. But when it comes to backyard patios, bigger isn’t always better. In some of the best-kept backyard areas, a patio is an accent to make space stand out from everyone else. Some outdoor furniture, a simple grill or fountain, and a few well-placed accents on the patio or even side of the house can change the entire look.

ORGANIZE

No amount of accents, grill tops, or chairs can make a backyard patio work if the whole thing keeps you from getting to it. We don’t mean to hire a feng shui master to make sure the elements align for good flow. But making sure you do not trip over a garden gnome when you try to sit in a chair would be a good start. The basics you want to stick with is to have enough room for two people to stand in between each piece of outdoor furniture or appliance.

We know that you have probably seen some picture-perfect patios with pergolas, a 57″ TV, and a hidden beer fridge that pops open with a key fob. That might be right for the millionaires, but keeping up with those might not be practical. Getting creative not only will help keep your space practical, but it’ll also save some money. Recycling old pallets to make border planters, or even just cleaning up the old grill can help add to your outdoor space. There’s really no limit when it comes to having a practical design for your backyard patio.


Alex Capozzolo is a partner of Henry Buys Homes, a real estate company in Jacksonville, FL. He has been writing for the real estate industry for several years. Henry is a licensed agent that operates in the Florida market.