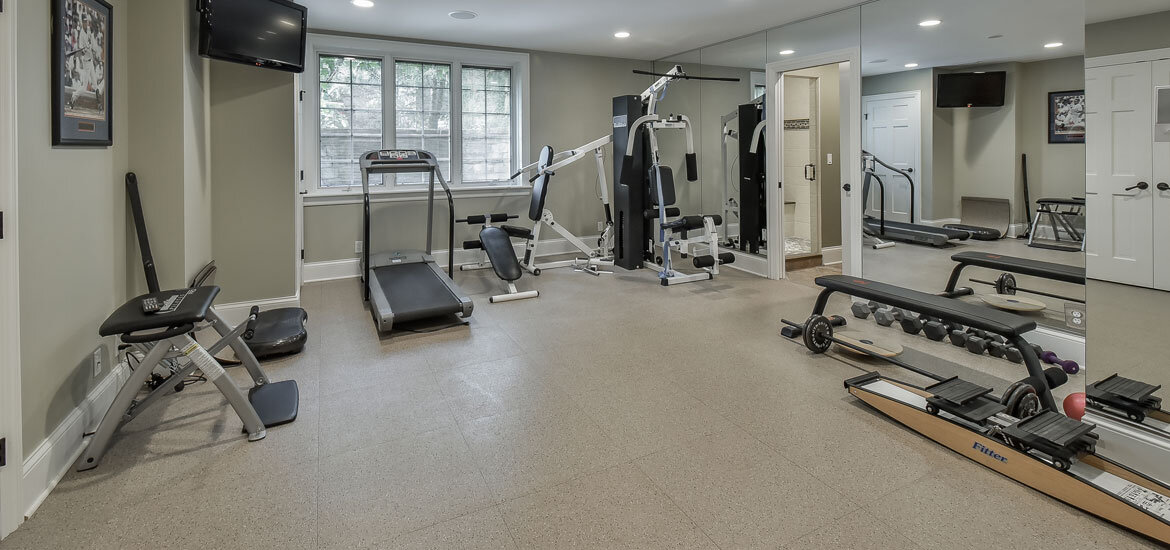
As you spend more time exercising at home, you would notice some things to improve in terms of space, equipment, and the overall feel. With these five simple ways to upgrade your home gym, you can create your dream workout space and get inspired to fulfill fitness goals.
5 SIMPLE WAYS TO UPGRADE YOUR HOME GYM
Designing a functional setup, changing equipment, constructing efficient storage, investing in lights and audio systems, and saving workout routines are simple ways to upgrade your home gym and achieve a healthier lifestyle through exercise. Use this guide to start renovating your home gym.
INVEST IN THE RIGHT EQUIPMENT
Get rid of any machine or tools you don’t use, as these can only add clutter and take up much-needed space. Some of them may be showing signs of wear, or they simply don’t fit your fitness regimen anymore.
Instead, upgrade into better equipment that can last long and bring new life to your home gym. You can use resources from Simple Fitness Hub to pick workout equipment appropriate for your goals.
Cardio: Machines such as a treadmill, spin bike, and rowing machine utilize body weight to enhance your strength and cardio. A 30-minute jump rope session is a more affordable option, especially if you don’t have space for huge equipment.
Strength: Strength training involves routines that improve endurance. You can do this by using battle ropes, weights, barbells, kettlebells, and dumbbells. Wearing resistance bands also supports your mobility.
Flexibility: It’s essential to retain flexibility as you age. Things like foam and rumble rollers can assist your body when exercising to avoid overstretching.
DESIGN A FUNCTIONAL SETUP
If you’ve ever gone to an overcrowded gym, you appreciate the importance of having space to exercise safely and comfortably. You can achieve that in your home by using rubber, foam, carpet, or vinyl flooring to protect the body from sweat drips and uneven surfaces.
Since there may not be somebody else to coach you, placing mirrors on walls can help check your form and be your own coach. Besides, putting up mirrors can make space appear larger.
Moreover, set up a hydration station with clean towels and plenty of bottled water to keep your body clean and hydrated.
BUILD AN EFFICIENT STORAGE
Sustainable storage is key if you want to pack a ton of equipment in your home gym. You can keep small items like medicine balls or yoga mats in storage cubes. You can designate one side of the wall to install panels or pegboards to hang resistance bands or jump rope.
If you have sets of kettlebells and dumbbells, opt for a compact yet heavy-duty weight rack to keep all items neatly tucked in a corner.
INSTALL PROPER LIGHTS AND AUDIO SYSTEM
Why listen to music on headphones when you can blast your favorite pump-up tunes through the speaker? Whether it’s a Bluetooth speaker or a boom box, make sure that the volume is on safe levels or just enough to energize you through intense workout routines.
Meanwhile, the right lighting makes it easier to see your form, ensuring you get to do routines properly. When you see what you’re doing, you can adjust your movements and avoid making workout mistakes.
SAVE WORKOUT ROUTINES
Regardless of how spacious your home gym is, or no matter how much equipment you buy, you won’t be able to optimize them without commitment to exercise.
You can save fitness routines from the internet or various instructors to guide you. Likewise, you may download apps that can suggest exercises suitable for your body’s needs and goals.
CONCLUSION
Go over renovating ideas until you find what works best for your needs and liking. Use this list to start upgrading your workout space, and you can make it feel and look like a real gym with a personal touch.
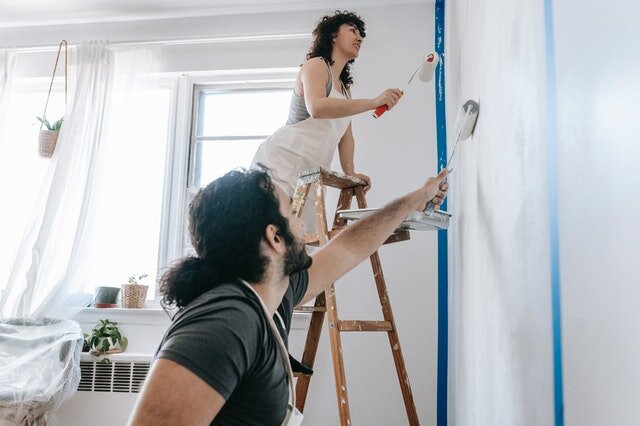
Most people have been spending more time at home lately – you might be sick of those bright blue walls that were so trendy five years ago. Does a room in your home need a refreshment? A good place to start is with a fresh layer of paint. If you plan to sell your home, painting is a great remodeling strategy that provides a handsome ROI. But before you break out a bucket and roller, you’ll need to take some steps to get everything in order. Properly preparing a room before painting it will ensure the best results:
Move or cover all the furniture.Ideally, you should move all your furniture out of your room, but that’s not always possible if you’re short on space. In that case, use drop cloths to cover all your furniture from accidental paint splatters. Protect your floors by covering them with drop cloths, as well.
Clean the walls.Dust will interfere with a smooth paint application. Use a vacuum on baseboards and crown molding to clean those hard-to-reach places. Then, wash your walls with a cloth and warm soapy water. This will remove any stains and dirt. If you’re painting a room that’s been exposed to oil (like a kitchen), you may need to use a grease-removing product. Humid areas like the bathroom may have mildew growing in the corners, in which case you’ll need an abrasive sponge and a solution with bleach. Allow the walls to dry completely before applying any paint.
Assemble your tools.Unfortunately, paint doesn’t apply itself. You’ll need to arm yourself with the right supplies to do a good job. Make a list of the items that you have and what you’ll need to pick up from the hardware store. To name a few here, you’ll need paint, brushes, a roller, a tray, painter’s tape, cleaning rags, drop cloths, and clothes that you won’t mind getting covered in paint.
Wear protective equipment.Before you open up a paint bucket, wear a respirator mask! It’s important to wear one that can filter out harsh chemicals. Beware of harmful chemicals that can irritate your lungs and cause headaches. If you can’t wear a mask, be sure to open all doors and windows to allow a cross breeze through the room.
Repair any holes or damages in the walls. For this step, you’ll need putty, a knife, and sandpaper. Fill in any holes or imperfections on your wall using the putty and smooth the raised edges with the knife. Once it’s dry, file it down with sandpaper so that it’s level with the rest of the wall. If the existing paint is flaking in any areas, smooth it away using sandpaper to ensure a smooth application of paint.
Protect electrical elements and light switches.Remove thecovers from electrical outlets and switches, and cover them with painter’s tape. You don’t want the paint to get inside of your electrical outlets, so don’t neglect this step.
Use painter’s tape around baseboards and windows.You are painting your room, but you don’t want to paint everything in it. Seal the edges surrounding your doors, windows, baseboards, and crown molding. If you have painted before, then you’ll know the satisfaction of removing the painter’s tape once you’ve finished the job. Something to keep in mind is that you should never remove the tape before the paint has dried completely, or else you’ll wind up with jagged edges. Rather than ripping it off all at once, try to do it slowly.
Choose your wall color. The final step is choosing which color will work best for your space. If your room is small, select paint colors to make a room look bigger. But if size isn’t a concern, then you have free reign. Those who want to sell their homes in the future should keep in mind that most buyers like neutral colors. There’s also the option of going bright and bold – it is your home, after all. Once you’ve chosen your color, determine how many gallons of paint you’ll need by measuring the square feet. When covering a darker color with a lighter one (like black to white), you will need a few extra coats. Factor in that you might want a little extra to use for touch-ups in the future.
Apply a primer. A base coat will help your paint job last for years to come. It can also help you transition from a darker color to a lighter one. The primer you need will depend on the type of paint you’re using. Oil and water don’t mix, so if you’re using an oil-based paint, you’ll need an oil-based primer (and vice versa for latex-based paint).
The painting process will go much more smoothly if you take the above steps first. After all this preparation, rolling layers of paint on your walls will seem like a breeze. It’s amazing what a coat of paint can do to transform a familiar space and make it feel brand new.
Are you getting hit with bad smells as soon as you walk through your door? Whether you’re a landlord getting your unit ready for new tenants or a renter looking to freshen up your space, learn how to deodorize a room naturally to stop unpleasant odors in their tracks. If your former renters were messy, smoked, or had pets, there’s a chance they’ve left behind some unappealing smells.
Natural deodorizers are perfect for freshening up your space, plus they’re a perfect eco-friendly apartment hack. Ensure that future tenants won’t turn up their nose at your listing and try out these natural remedies.
Essential oils are biodegradable and all-natural. Many also can contain antibacterial, antiseptic, antifungal, and antiviral properties that can help freshen your rentals. Plus, various scents can help boost your mood.
Several studies have indicated that smells can have a positive effect on humans and can even encourage certain emotions — this is where essential oils come into play. Here are some of our favorite essential oils with both cleaning and mood-boosting properties:
Lavender: Lavender essential oils can help fight bacteria, viruses, and fungus. The scent can also help promote relaxation and sleep, which makes it the perfect deodorizer for bedding or clothing.
Peppermint: Essential oils containing peppermint have antiseptic properties which makes it a great cleaning agent. Plus, peppermint is known to revitalize and stimulate your mood — perfect motivation when preparing and cleaning an apartment for new tenants.
Orange: Orange essential oil has both antiseptic and antibacterial properties and is also a great degreaser for any stains previous tenants might have left behind on stubborn surfaces like countertops and stoves. Orange also has a very uplifting and refreshing scent — great for relaxing.
Tea tree: Tea tree essential oil is an all-around great cleaner and contains a number of antibiotic compounds, including terpinen-4-ol, that have been shown to kill certain bacteria, viruses, and fungi. Its herbaceous scent is also said to curb depressed thoughts and boost mental clarity.
Essential oils are great to have in your home and are a non-toxic alternative to traditional chemical cleaners. They also work well to deodorize your home when combined with other ingredients, like baking soda. As a landlord, you’re responsible for making sure your rental is safe and welcoming for future tenants. Using all-natural essential oil cleaners can help send the message that you care about your property.
11 NATURAL RECIPES TO DEODORIZE A ROOM
We all deal with home odors from time to time, and luckily there are simple and easy recipes you can make with ingredients that are probably already in your pantry. As a landlord, freshening up a unit space is equally important in attracting potential renters. Use the following recipes, tips, and tricks below to ensure your unit is ready for new tenants.
1. DIY BASIC ROOM SPRAY
Instead of purchasing an air freshener, create your own DIY room spray using your favorite essential oils. With this recipe, you’ll have an easy way to quickly freshen up any room:
Room spray recipe:
2 to 3 drops essential oils: for a seasonal twist, choose cinnamon or peppermint
1 tablespoon baking soda
Distilled water
Mix the essential oils, water, and baking soda. Add mixture to a spray bottle and shake well to create the perfect freshening spray for your space. You can even get into the holiday spirit by using cinnamon or peppermint essential oils.
To help the smell linger, feel free to add some witch hazel — this ingredient helps the oil and water combine better! This remedy is also great for cleaning units before a new tenant moves in.
2. EASY CARPET REFRESHER
Is the carpet in your rental smelling a little less than fresh? If you’re in the process of deep cleaning and getting your unit ready to rent out, reach for that baking soda in your pantry. Baking soda is a great non-toxic cleaner that does the job when it comes to busting bad odors. Here’s a simple and cheap recipe for an easy carpet refresher:
Carpet refresher recipe:
1 tablespoon ground cinnamon
1 cup baking soda
1 shaker container
Mix these ingredients and throw in a shaker container — a clean parmesan cheese container is ideal. Sprinkle into the carpet and let sit for about an hour or so. Then, vacuum it up. To make the space smell as if you just baked a batch of snickerdoodles, add some ground cinnamon to your mixture — with the holidays right around the corner, this is the perfect scent to welcome guests to an open house!
3. PET ODOR BUSTER
If a past tenant’s pet left behind stinky odors in your rental, make this recipe to spray on surfaces:
Fresh pet recipe:
3 tablespoons of rubbing alcohol
12 drops of lavender or spearmint essential oil
2 cups of water
1 spray bottle
Mix these ingredients and spritz liberally on areas of your house that need some freshening up! Consider choosing essential oils from lavender or spearmint — these are safe for pets, however, it’s always a good idea to check with your veterinarian before using.
Additionally, if your pet’s bedding requires some TLC, sprinkle it with some baking soda. Let this sit for a while and then vacuum.
4. FRIDGE SMELL ELIMINATOR
Did past tenants leave behind some odors in the fridge? If you get a funky whiff when you open the fridge, say goodbye with this natural remedy:
Fridge deodorizer recipe:
1 cup baking soda
12 drops of essential oils
1 jar
Place a cup of baking soda in a jar. Mix in 12 drops of your favorite essential oil fragrance — for the fridge we recommend using a citrus like lemon. Set the open jar of baking soda on a shelf and let the magic happen — baking soda is great for absorbing those bad fridge smells. Be careful not to add too much essential oil, though, you don’t want it to affect the taste of your fresh food.
5. DE-MILDEW THE WASHING MACHINE
If previous renters have let gunk build-up in the washing machine, you might be looking for a solution to get rid of that mildew smell. Washers are a humid environment prone to a build-up of dirt, hair, and soap. To get rid of this problem, a simple mixture of common household products and essential oils should do the trick:
Washing machine cleaner recipe:
3 to 4 cups of white vinegar
½ cup of baking soda
20 drops of essential oils
First, using vinegar, wipe down any debris that may be present, like in the rubber liner or gasket. Then, pour this mixture into the detergent tray and run a cycle on the hottest setting — without clothes! When the cycle is done, wipe down any remaining moisture with a cloth to prevent new mildew growth. To further prevent any funky smells, encourage the next tenant to leave the washer door open when they’re done to avoid trapping any moisture in the machine.
6. MICROWAVE OVEN DEODORIZER
Bad smells from old soup stains, burnt popcorn, and other greasy foods aren’t ideal in the microwave. However, you can deodorize it just as fast as you can heat up today’s lunch:
Microwave cleaner recipe:
2 tablespoons baking soda
1 cup of water
1 microwave-safe bowl
All you need to do is fill a microwave-safe bowl with baking soda and mix with a cup of water. Place the bowl in the microwave and heat for three minutes. The hot baking soda steam will loosen up any grime stuck to the side or ceiling of the microwave. Carefully remove the hot bowl from the microwave and wipe down the steamy oven with a paper towel. To leave a fresh scent, wipe the microwave down with a drop or two of lemon-scented essential oil.
7. SEASONAL SIMMER POT AIR FRESHENER
As the holidays get closer and the weather gets colder, try a seasonal simmer pot air freshener. This long-lasting aroma will instantly create a homey and warm ambiance that you and any touring potential tenants will love. Try out this easy recipe, but feel free to mix and match your favorite seasonal ingredients for a unique scent:
Simmer pot recipe:
2 cinnamon sticks
4 whole cloves
1 orange, sliced
1 lemon, sliced
1 bay leaf
Add all these items to a medium pot or a small slow cooker. Add water to fill about halfway. Turn the burner on to low and let this simmer all day. If you’re using a slow cooker, set on low and let it freshen the air. Periodically check the water level and add more as needed.
8. KEEP YOUR CLOSET CRISP
Closets are common culprits of stale smells as they’re often stuffed with piles of clothes, dirty laundry, and shoes. If you need to air out a closet from a previous tenant or you just want to keep the small space smelling fresh, use this simple scented sachets hack:
Scented sachet recipe:
Dried herbs or flowers of your choice
Small fabric sachets
Ribbon
Optional: essential oils
To make these DIY sachets, first, pick out your choice of dried herbs or flowers. For a more floral scent, choose lavender or rose petals. If you prefer something more earthy, go for rosemary. Fill up your fabric sachets with your dried herbs or flowers and tie off the bag with ribbon. To intensify the smell, add a few drops of essential oils of your choice. Also, feel free to stick these sachets in your dresser drawers to keep those socks smelling fresh.
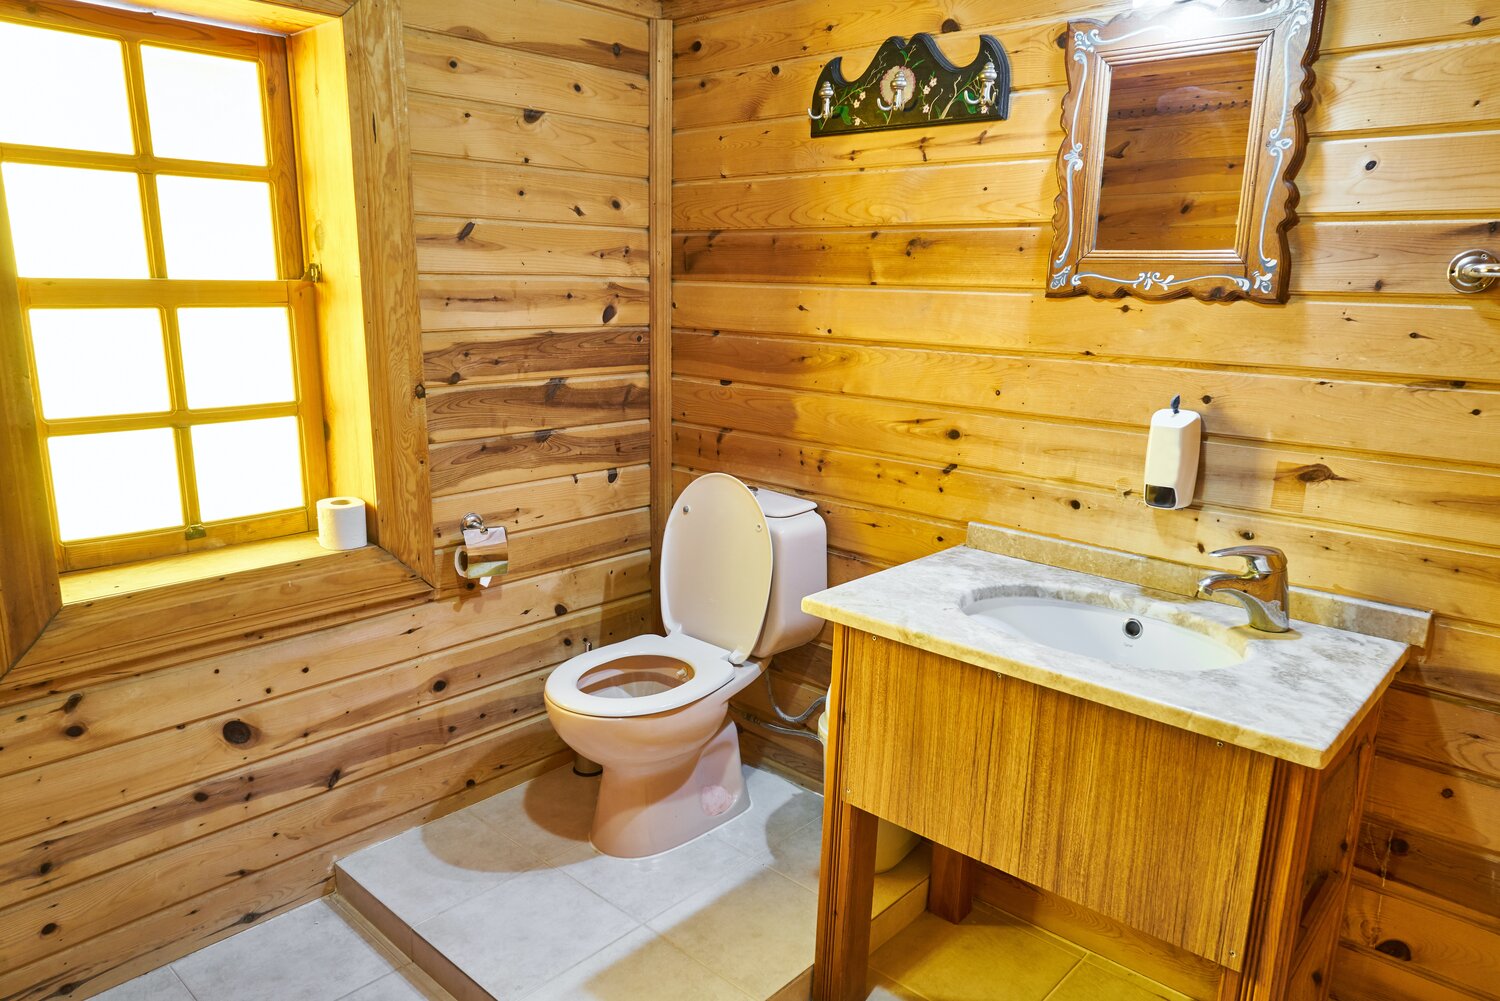
9. FRESHEN UP YOUR BATHROOM
A small bowl of baking soda on an upper shelf will absorb odors without adding any chemical smell. You can also put a few drops of essential oil on cotton balls and place inside a roll of toilet paper which will release the scent every time the roll is turned. Fresh eucalyptus leaves are also very effective at deodorizing — place these in a vase above the toilet or in your shower for some added aromatherapy.
10. GARBAGE DISPOSAL DEBRIS CLEANER
Are there bad smells creeping out of the sink? The source may be the garbage disposal. Little bits of food that got washed off past tenants’ dishes can get caught in the garbage disposal, creating a smelly odor that lingers long after they’ve moved out. Here’s a get hack to get rid of this problem:
To clean the blades: Put a large cup of ice cubes down into your disposal, turn it on, and then add about half a cup of salt. The ice and salt will combine to scrub the built-up off the inside of your disposal.
To freshen up the disposal: To get rid of any odors, turn on the faucet and drop sliced citrus peels down into the disposal. As you run the disposal, the citrus peels will leave a refreshing scent behind as they get ground up.
11. CIGARETTE SMOKE REMOVAL
Removing cigarette odors from an apartment can cause a headache for landlords or new tenants. Cigarette smells seem to cling on to any surface they come in contact with, like carpet, your new drapes, or a precious armchair. Instead of masking the smell with commercial air fresheners, try a DIY method to absorb or neutralize it:
To absorb: Sprinkle baking soda on surfaces that smell like cigarette smoke, or fill several small bowls with baking soda and place around your space to absorb the smoke particles. If you have it on hand, activated charcoal is also very effective at absorbing these stubborn odors.
To neutralize: White vinegar is a common nontoxic household staple that works to neutralize odors. Its low pH content targets the high pH content of smoke particles and alters them slightly to reduce the smell. For a quick fix, boil a pot of vinegar on the stove — the steam will waft through the air and work to remove the smell. You can also use vinegar as a wash: simply wash clothes with it or scrub it on upholstery and walls.
If the methods above don’t work, try washing your windows, window coverings, and carpets. To get your unit ready for new tenants, consider also repainting your walls with odor-blocking primers or replacing fixtures such as cabinets. Also, to help prevent this in the future, encourage renters to keep things fresh by implementing a no smoking policy.
BENEFITS OF USING NATURAL REMEDIES
In addition to these natural remedies being super easy to make, as well as effective, they’re also much less harmful than using chemical deodorizers. Over 20 percent of the general U.S. population has reported having adverse health effects from air fresheners.
Common household products like air fresheners can contribute significantly to indoor air pollution and can also stick to and be absorbed by furniture, walls and surfaces, carpets, and more. They can then be released and re-enter indoor air, even long after you’ve used the air freshener.
Although they may smell nice, cutting out chemical air fresheners from your cleaning routine will leave your home not only more pleasant for friends and family, but also safer for your health. As a landlord, using these natural remedies are great in case a future tenant may be sensitive to these chemical cleaners and can attract those that are eco-conscious.
HOW TENANTS CAN PREVENT ODORS
Even though there are plenty of natural remedies you can create to deodorize your home, there are a few precautions to help you avoid these bad smells in the first place:
Do laundry often: Letting piles of dirty clothes sit in your laundry bins can quickly contribute to bad odors. Don’t let laundry linger for extended periods — it might be the cause of the smells like must and mildew. Get those washed ASAP!
Toss expired food: It may be time to check out those expiration dates. Old food like meat and dairy products can give off bad odors that seem to stick to your fridge forever. Go through and toss any expired goods to make sure nothing stinks as you open the doors.
Wash your bedsheets: While we’re all getting our beauty sleep, our beds are collecting fungus, bacteria, and dead skin cells which won’t smell good after some time. To avoid this, wash all your linens at least once a week. According to Joshua Zeichner, M.D., microorganisms like bacteria and fungi tend to thrive in moist environments — including your dirty pillowcase. Get rid of funky smells in your bedding by adding a few cups of white vinegar to your washer.
No shoes allowed: If you can, enforce a no-shoes allowed policy in your home so bad odors can’t get dragged onto your sparkling clean floors or fresh carpet.
Keep the sink clean: Do those dishes! Keeping the kitchen clean right after you cook and eat will help avoid scary sink and garbage disposal smells.
Clean vents & replace air filters: If you’ve cleaned every room and have tried these natural remedies and things still smell a little stale, try wiping down air vents and replacing your HVAC filter — be sure to check with your landlord before making this change. This quick-fix can quickly ventilate your room and filter out those bad smells.
Open your windows: Nothing can get more natural than simply opening up your windows. On days with good outdoor air quality, open up the windows to bring in new air to freshen up your space.From essential oils and baking soda to citrus peels and cinnamon sticks, these natural remedies will be the first things that come to mind the next time you’re wondering how to deodorize your rental — they’ll come in handy if you’re getting ready to list your apartmentor looking to create a more environmentally friendly rental. If you’re a landlord looking to fill an apartment, visit our rental application and tenant screening services to help find the perfect tenants.
Guest Contributor: Sarah Stinson
Sarah is the Director of Content and SEO at TurboTenant where she leads a team of experts to provide valuable resources to help landlords and renters. With over 10 years of experience writing in various industries, she has been featured in many top tier publications and is an expert in the real estate tech space as well as the property management industry.
Your bathroom is probably the second most personal area in your house next to your own room. This is where most of your self-care routines take place, and it is also an area that is often considered when it comes to selling a house aside from the kitchen. That’s why it’s important to make it a space you actually like spending time in.
Upgrading your bathroom actually doesn’t necessarily mean that you have to have a major overhaul. You can also improve your bathroom yourself. All you need is to allot time to do it.
Do-it-yourself bathroom makeovers have an advantage because they cost less than typical remodeling, which normally involves tearing down and removing a lot of stuff. If you are interested in making this project happen, then this article can help you out. The following are easy and simple DIY tips to upgrade your bathroom.
UPDATE FIXTURES AND HARDWARE
In the grand scheme of things in your bathroom, something so disproportionately small as hardware and fixtures are so important for providing that chic finishing touch. And it will only cost you less for something that has a major impact.
You can start by replacing your bathroom faucet by installing something that’s sleeker and more functional and/or more contemporary. You may also swap shower fixtures if you’re planning to remodel your shower anyway. Another option is to install new wall hooks where you can keep your towel and clothes from falling to the bathroom floor.
There are plenty of options for these upgrades that can be found in a quality hardware store like Magnificent Marketing.
STYLISH BATHROOM LIGHTINGS
It may sound intimidating, but most people can switch out a light fixture safely and successfully by being careful and following instructions. Fresh lighting also makes a huge difference for your bathroom. This is another simple DIY bathroom upgrade that you can do in just under an hour or so.
For people who have large mirrors inside the bathroom, installing a light directly onto the bathroom mirror is a unique and useful idea. Since your mirror occupies space, most of the time you won’t be able to get lighting directed to your face. By installing a light directly onto your mirror, you will be able to see yourself clearly and do what you need to do in front of the mirror much quicker.
MAXIMIZE STORAGE SPACE
Maximizing storage space in your bathroom includes utilizing underutilized areas to store items. One area of your bathroom that you can use for storage is the wall. Take advantage of your wall space by mounting ledges, shelving, or racks to achieve this.
You can put your hygiene and vanity items such as your toothbrush, toothpaste, perfume bottles, and your comb on racks above your sink and below your mirror. Using the wall for storage space will help avoid clutter inside your bathroom.
MAXIMIZE THE MIRROR
Mirrors are beneficial particularly in upgrading small bathrooms. They reflect a lot of light and make the tiniest feel a bit more spacious than it actually is. Aside from ensuring that it is well-lit, your bathroom mirror should be large enough to see at least your entire head when you stand in front of it.
WRAP UP
These simple DIY tips are exactly what you need for your bathroom. Something simple, but will have a great overall effect on how it looks and how comfortable you feel when you use it.
Author’s Bio:
Rosette has a knack for anything DIY. She spent her younger years learning about the different hardware tools and equipment in the hopes of establishing a hardware business in the future. Her career options may have changed, but today, she continues to write so passionately about her first love.
When Summer rolls around, most of us like to spend it outside. You will want to have an outdoor area that is perfect for entertaining, or the perfect space for you to spend outdoors with your family. The last decade people have started to put a lot of effort in their backyards, or what we would rather call it, outdoor living space. When you live in or around Chicago, you’re use to having bipolar weather year round. That doesn’t mean you shouldn’t spend your time and money on your outdoor living area. The perfect outdoor area would be usable Spring, Summer and Fall. Let me show you some great ideas, that will make you want to run out and start working on your perfect outdoor living space.
Outdoor fire pit with sitting area in between the poolOutdoor kitchen with swim up barOutdoor kitchen with breakfast barOutdoor grill stationOutdoor bar and grill stationOutdoor fireplace and sitting areaOutdoor kitchen and dinning area
What did you learn? Your outdoor area should have good seating, fire pit, bar, kitchen, grill station, and cover. Start utilizing your backyard. Make it a living space. Not only will you enjoy it, it will bring up the value of your home.
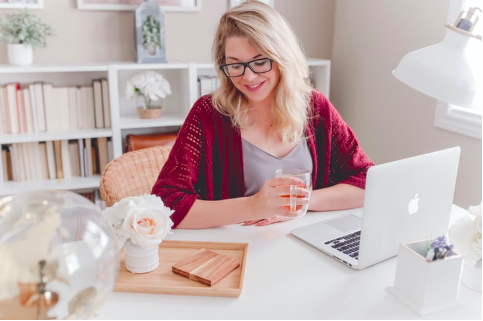
The idea of a home office may seem like a luxury but creating your own small and stylish workspace is easier than you think. A full-size home office can be a costly commitment, but for something smaller you only need a little bit of effort and creativity. Here are ten ways to create a small home office.
1. Use a Spare Room
If you have a spare room, consider whether you could convert it into a home office. A guest bedroom can be easily transformed by swapping out the bed for a fold-out sofa bed. This way you still have a place for guests to stay. A garage, basement or even a garden shed can also be turned into a suitable office space with a little refurbishment.
2. Use Another Space
If you don’t have a spare room, you can still create an office in another space. Look around your house and see if there are any unused areas. This could be the corner of a bedroom, living room or dining room. Sometimes all you need to do is move a sofa or table over by a few feet to create that extra space.
3 Use a Room Divider
If you set up your office in a shared area, you may be concerned about privacy. It can be hard to focus on work if you have kids playing nearby or you’re sitting across from the TV. A simple and creative solution is to use a room divider. Room dividers are relatively inexpensive and come in a variety of styles and sizes. Not only is this a practical solution, it also adds character to the space.
4. Use A Closet
A creative way to maximise space is to convert an unused closet, large enough to fit a desk in. By placing a desk inside and adding a little decoration, you’ll have your own private workspace. A walk-in closet is ideal for this, but even smaller closets can still be used for office space. If you can’t fit a desk in there you could use it for storing your work materials.
5. Home Extension
If none of the above are possible, consider adding an extension to your house. One eco-friendly and affordable way to do this is to use a recycled shipping container. You’ll need to refurbish the container to provide proper insulation, electricity and lighting. But this can still be cheaper than a traditionally constructed extension. You can alter the container to blend in with the rest of your home, or leave its original appearance intact for a unique industrial look.
6. Lighting
Good lighting is essential for any home office. While natural lighting is ideal, you’ll also want a source of light for working at night or if your office isn’t near a window. Don’t underestimate the effect a lamp can have on a space. Whether it’s a statement piece or something simple that complements the rest of the décor, a lamp is an effective way to add style.
7. Furniture
When choosing office furniture, it’s important to not only look for stylish pieces but ones with practical benefits too. You’ll want to find an ergonomic chair that supports your posture to avoid back pain from sitting too long. Or you could consider a standing desk. You could also try sitting on a Swiss exercise ball to engage your core muscles and help you keep fit while working.
8. Maximising Space
A clever way to get around limited space is with multi-purpose or convertible furniture. You could use a desk that folds up into the wall, or a coffee table that doubles as storage. Wall-mounted shelving is another effective way to add extra storage space. You could also refurbish an unused cupboard or cabinet.
9. Décor
Unlike a workplace office, a home office allows you to decorate however you want. You may want to decorate in a way that complements the rest of your house, or you could make it a unique space just for you. You can stick photos or paintings on the walls, place as many trinkets on your desk as you like. Pot plants and flowers can be used to liven up the space and add a pop of colour.
10. Wallpaper
Using wallpaper or paint helps add style to your home office regardless of where you choose to set it up. This is a great way to distinguish the space if it’s in a shared area. By choosing a unique colour or pattern for the walls of your office you’ll be making it your own and adding character to the space.
A home office isn’t just for large houses. With a little creativity you can create your own stylish and inspiring workspace at home. If you’re tired of trying to work on a cluttered kitchen counter or not having space to focus, try some of these ideas.
Author bio:
Spending long hours in front of the computer makes Harper hugely appreciative of any change in activity – from quick stretching exercises to yoga and meditation! Discover more about her work on her personal blog.
Ah, the famous age-old question: who’s responsible for plumbing maintenance? Landlords or tenants? Many generations have given their contribution to resolving this problem in the past. To quote an Allen Ginsberg poem: I saw the best minds of my generation… We’ll stop right there. This isn’t a boring poetry reading, and the question raised at the beginning certainly isn’t something great thinkers have struggled with for centuries. Although, since you’re reading this text, you might wonder: really, who’s responsible for plumbing maintenance? You might’ve encountered some problems in your new apartment, or maybe you’re checking out your options before you move in. Whatever’s the case – we’re here to help you out. Stay tuned for some helpful info.
FIRST THOUGHT – BEST THOUGHT (OR IS IT?)
Your first thought might be: well, the landlord is responsible for its tenants’ quality of living; therefore, he’s accountable for anything that goes wrong with plumbing. That could be the truth. But, there’s a catch. In most states, the landlord is responsible for hiring someone to take care of plumbing emergencies. Is a leaky tap an emergency? Probably not. What classifies as an emergency is a question to ponder (consider checking your state law). For example, if you notice there’s no running water, that’s undoubtedly an emergency. The landlord is definitely responsible for that one. In most cases, you’ll find these problems classified as emergencies:
Serious leaks in your bathroom or kitchen;
Damaged, non-working water heater;
Burst water pipes;
Toilet with an active overflow.
Landlords are definitely responsible for resolving a plumbing emergency. A leaking tap probably doesn’t fit into that category. Check your state law.
Can the landlord also be responsible for minor repairs?
There isn’t a straight answer to this one. You might want to check the lease agreement and see if you can find the solution there. If the problem you’ve encountered is somehow listed in the agreement, and if the landlord’s responsibility is evident, you have your answer. Otherwise, if the issue isn’t a subject of the lease agreement, you’ll need to check state real estate laws. Some of them have repair and deduct statutes. These rules make the landlord deduct the repair cost (paid by the tenant) from the monthly rent. A quick tip: there are some repairs (even though they look minor) you shouldn’t try to do by yourself. For example, low water pressure is an issue that pros should handle.
ADDITIONAL INFO THAT MIGHT COME IN HANDY
Let’s say you’ve made a deal with the landlord. He’ll deduct the repair costs from the rent for the next month. Now imagine this scenario: your landlord’s antique kitchen table gets damaged in the process. We guess you know who’s responsible for that. To ensure this doesn’t happen, consider hiring experts such as those at golansmoving.com and see if they can do something to help you store valuable items during the process.
It’s very important to store valuable things somewhere they can’t be damaged while the renovation process enfolds. The best way, of course, is to rent storage space.
DIPLOMACY IS KEY
It might be better if we mentioned this earlier, but before you quote the law and everything, see if talking to your landlord can seal the deal. Keeping a good relationship with your landlord is something that will guarantee you peace of mind when plumbing issues (or any other issues with the apartment you’re renting) occur. Also, it really isn’t pleasurable to stay in an apartment where the owner acts indifferent. There’s no need to be super-formal or something. Of course, if talking doesn’t get you what you think you legally deserve, then quoting the law is the way to go. But, as we’ve noted at the beginning, it shouldn’t be your first option.
AN EXAMPLE: WHAT’S IT LIKE IN CHICAGO?
In this paragraph, we’ll pinpoint some of the rights tenants have when renting in Chicago. For example, the landlord can’t evict you without a judge’s order and must take care of a pest infestation when it occurs. Also, you shouldn’t worry that he will come unannounced. What about plumbing maintenance? Suppose the tenants (or their guests) are not responsible for the damage done. In that case, landlords are obliged to take responsibility in accordance with the City of Chicago’s Residential Landlord and Tenant Ordinance (commonly known as CRLTO). Make sure you check that out. In other words: be familiar with your rights. A well-informed tenant is a good tenant. As if you already didn’t know that, right?
Know your rights! Being well-informed is a must nowadays. If you’re a Chicago resident, consult the CRLTO
SHOULD YOU SUE THE LANDLORD?
Hopefully, there won’t be a reason for that. Most landlords will quickly resolve the issue you’re dealing with. If, for some reason, the landlord ignores fixing the problem, you have all the rights in the world to mention a potential legal action (after you consult the lease agreement or the state law, of course). But, as we’ve already said, that scenario is really not so popular. You’ll rarely stumble upon a landlord who will make you want to take legal action.
FINAL WORDS
That’s all, folks! Hopefully, we’re closer than ever to find the answer to the question of who’s obliged to hire professionals for plumbing maintenance. The best way to sum up this article is: know your rights! Make sure to check the lease agreement, consult the state’s real estate law, and before you start thinking about taking legal action – talk to your landlord. As we’ve mentioned, there’s a slim chance you’ll need to go to court because your toilet is overflowing. Being diplomatic and, at the same time, well-informed is a recipe for success!
Moving to a new home can be an exciting time. However, it can also be stressful and exhausting, not to mention expensive to the point of draining your wallet dry. Depending on your new home state, there are some home improvements and repairs you must do before moving in.
Are improvements and repairs expensive?
Specific improvements will increase your property’s value, which is always good when the time to sell it comes. Repairs can help reduce maintenance costs you will be facing in the future, and it’s always good to save money. If you are smart, some of the work you do on your home will end up giving you a net benefit. Some renovations will increase your home insurance rates, so be sure to calculate this into your overall budget. Other types of work on your home simply can’t be avoided, especially for glaring issues that need to be fixed.
Can I do some of the repairs later?
The short answer is: yes, of course. On the other hand, dragging the repairs will involve you living in total chaos for a long time. You might think it will just be for a week or two, but old houses can have problems you weren’t expecting. Since you don’t know how the house was constructed, there could be hidden issues that you didn’t initially notice. These could end up causing unexpected delays, and you don’t want to be trapped in a house remodel limbo. And people promise themselves they will take care of minor repairs later when the relocation is over. But then those minor issues sit unaddressed for years because you never got around to it.
Re-polish the wood in your home to let it sit before moving in.
Renovating before you move in
Everyone has ideas of what their dream home should look like. Relocating to a new home is the perfect time to let your imagination run wild. And spring is a great time to do renovations on your home. You might think that doing everything at once is expensive, but doing multiple home improvements and repairs at the same time will probably be cheaper. Some renovations will require some touch-ups after the main work is over. We’re talking about small finishing touches like patching up walls or floors and painting the house. The best solution is to do the cleanup just once when you have done all the work.
Realistically your best bet is to schedule all of the home improvements and repairs you must do before moving in and living on the property. Once everything is finished, you can just relocate to your new home without worrying about doing more work. So, plan for how long the work will take but have backup options. Rent storage for your possessions, so they don’t get in the way of the repairs. Ensure you get a clean and mold-free unit for your items so they are safe and dry during the spring rain season. Even if the repairs last longer than expected, your possessions won’t clutter the workspace, and you will know they are secure.
Avoid water damage by fixing any leaks.
Here is a list of 8 home improvements and repairs you must do before moving in:
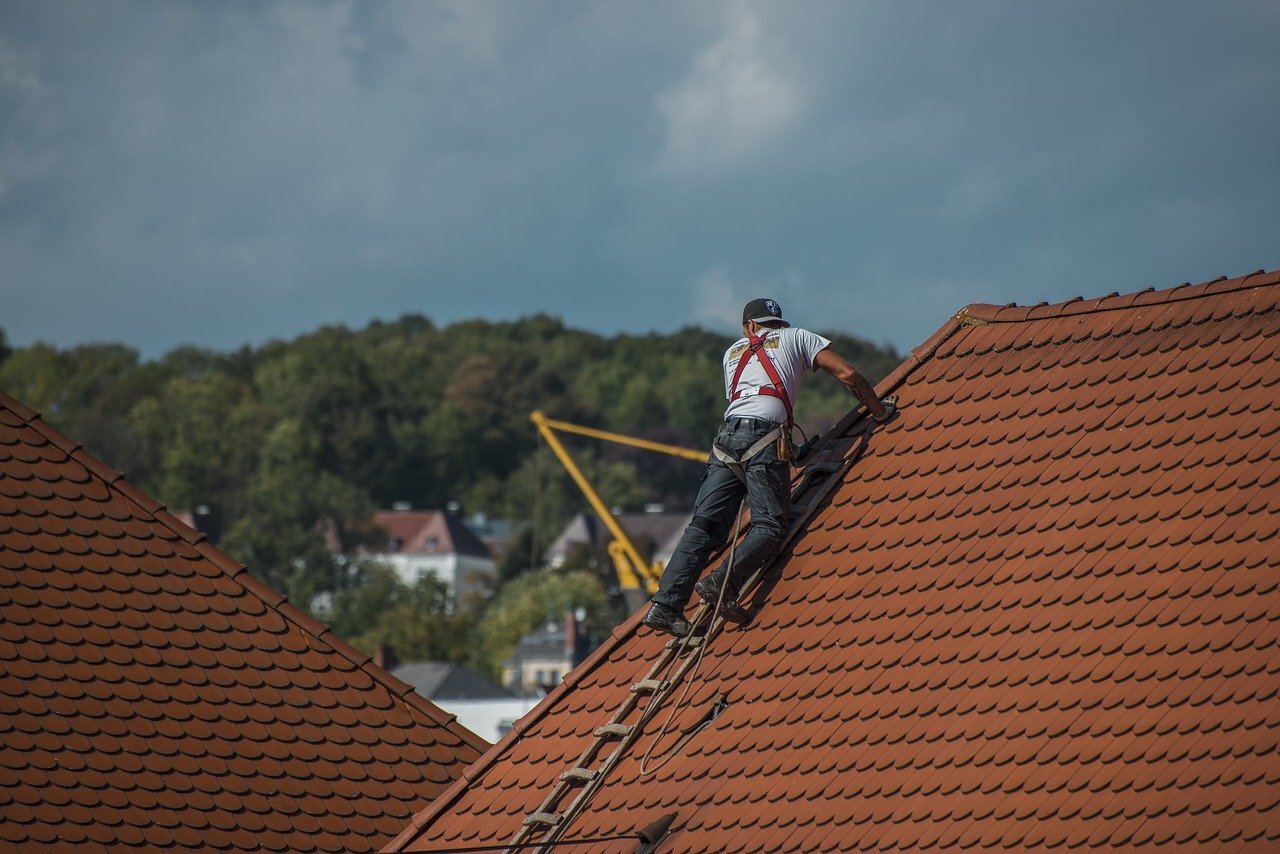
Check the roof – repair any cracks or leaks since water damage can wreak havoc on your home. Invest in roof repairs to avoid rotting wood and mold buildups.
Refloor – this is one of the repairs most people skip to save money. While fitting new floors can be expensive, it will be a lot cheaper and easier to do before moving in.
Improve the insulation – investing some money before moving in can save you a lot in the long run. Draft-proofing and insulating are great ways to save on heating and electricity bills.
Apply wood finish – it’s not just the floors that need to be re-done. It would be best to refinish all the wooden elements like panels, windows, or railings before you move in. This will give them a bit of time to sit and air out.
Popcorn ceilings and walls – they used to be standard in houses constructed before the ’90s. Besides being an eyesore, popcorn fixtures can contain asbestos or other toxic materials that can be harmful to your health.
Check the plumbing – leaks can cause some of the worst and most expensive damage to a home. Hire professional plumbers to take care of any problems before you move in. Mildew and mold will be much more costly to deal with later if water damage is left unchecked.
Replace locks – it shouldn’t take long and doesn’t cost much. With new locks, you can be sure that no one else has the keys to your home. Replace the exterior locks; it’s cheap and will give you peace of mind.
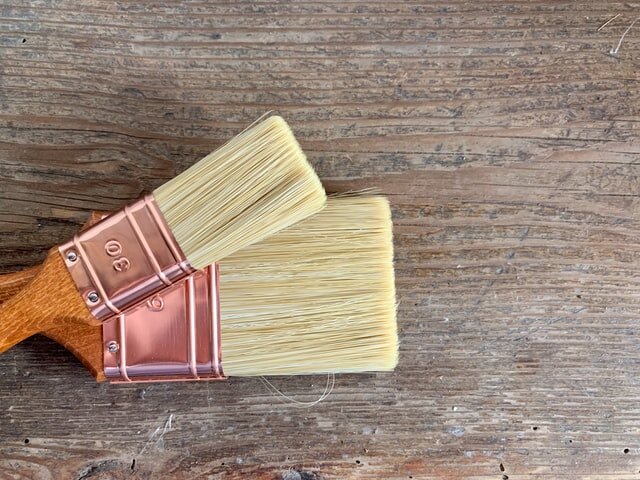
Exterior and interior painting – we recommend doing this last but before bringing in the furniture from storage. All of the other major work will already be done. Also, painting an empty home free from the clutter of furniture and boxes is a much simpler task.
Paint your home last after all of the other work is done.
One more thing we need to mention is that it is essential to pay attention to your health. People get so caught up in renovations, repairs, and moving that they can forget about their well-being. We all hope to see the end to the coronavirus pandemic, but the fight isn’t over yet. So, when the moving day finally arrives, you have to take all the necessary precautions in order to stay healthy during these hard times. Moving to a new home means that you will be interacting with many different people. Sometimes we all need reminders, even for the basics – so be smart and stay safe.
Taking care of home improvements and repairs you must do before moving in will end up saving you a lot of stress. Additionally, doing the repairs while you are not living on the property will mean they will be done faster – since nothing will be in the way of the work. And if the work is done faster, it usually means less added expenses. Taking care of everything while saving time and money – what’s not to love?
Meta description: Moving to a new home and need to renovate? Here is a list of 8 home improvements and repairs you must do before moving in.
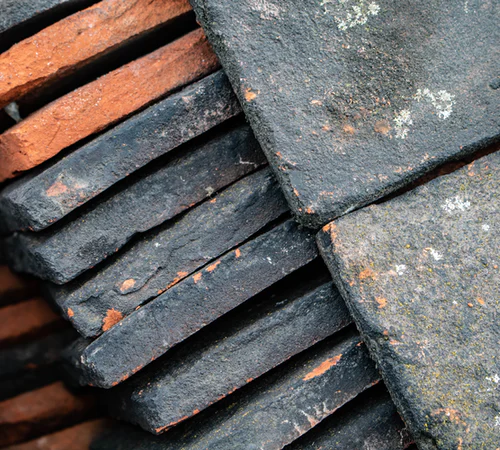
Buying a new roof? A slate roof is one of the materials you can consider as you explore your options. It is waterproof, resistant to mold, and can last more than 100 years. On the other hand, it is brittle and can easily break, and is also relatively expensive to purchase.
This extensive guide will help break down the important aspects of this material, its pros and cons, and its variants at your disposal. Follow through to make an informed roofing decision.
Types of Slate Roofs
1. Natural Slate
This is a natural quarried stone, and it’s the first thing that comes to most people’s minds when the term ‘slate’ is mentioned. It is resistant to ultraviolet rays and does not get destroyed by thermal expansion and contraction.
With proper care and adequate maintenance, this material can last over 100 years. It is among the most environment-friendly roofing materials because there is no manufacturing process involved in its production. Besides, it can be recycled and reused. You can find it in natural shades of blue, red, or gray depending on its source.
2. Synthetic Slate Roofing
Is used as an alternative to natural slate roofing. It is a reflection of the magnificence of its traditional counterpart devoid of the expense (synthetic roofing shingles are much cheaper) and the stressful installation process.
These roofs boast of being lighter than natural slate roofs, hence may not require additional support during installation. They would also present you with a wider range of colors compared to their natural counterparts.
The materials durability varies depending on their manufacturing process. Some are treated with ultraviolet inhibitors, reducing degradation from the sun. Others are not easily breakable. The durability of these roofs ranges from half the lifespan of natural slate- 50 years- to about 100 years.
Slate Roof Maintenance
If properly installed, it will require very little maintenance over its lifespan. This material is resistant to mold, fungus, and mildew, further minimizing the maintenance cost.
The greatest risk of installing slate roofs is their ease of cracking and breaking. However, this is easy to fix since you will just need to repair or replace the broken or missing shingles. Make sure this is done by a roofing professional such as Fortress Roofing.
Even though most of the maintenance and repair works are generally universal, there are some details you need to take into consideration with regard to the specific types of slate on your roof. For instance, replace broken shingles with those of the same pattern and color. Additionally, when you have to replace the entire roof, get to know the alternatives available in the market. They will still provide your home with the elegance of slate.
A slate roof can be designed to produce very beautiful roof designs. This is attributable to it being a natural product.
It is available in different shades depending on its chemical composition and its source. These natural colors give these roofs an allure that cannot be provided by any other material. Imagine you can still play around with colors to match your roof with the architecture of your home.
2. Recyclable
This natural roof will stay on your house for over a century if you want it to. It will lie dead, emitting no toxins at all. It is just stone after all!
If for some reason the roof has to be removed, the material can be reused on other roofs or for other purposes as may be deemed fit. If you are looking for an eco-friendly roofing material, we can proudly say that slate is the material for you!
3. Energy Efficiency
This material is dense and can help regulate the temperatures within your home. This can help you save money that would have otherwise been spent on footing energy bills.
Besides reducing energy bills, energy efficiency is enhanced by the reduced carbon footprint. The material occurs naturally, well apart from synthetic slate, and can be recycled, of course!
Cons of Slate Roofs
1. Fragility
This quality makes the roofing material easy to cut into different shapes and sizes, but it can be disadvantageous in some cases. If not handled with care or if a considerably large amount of pressure is exerted on it, it can easily be cracked or broken.
Inspecting the roofs can be challenging because if the roof inspector steps on the shingles, there is a possibility of them cracking. You need to be extra careful when handling these roofs.
2. Slate Is Heavy
Natural slate is very heavy. One tile of slate of about 100 sq. ft. can weigh between 800 pounds (ca. 363 kg) and 1,500 pounds (ca. 680 kg). Your roofing structure has to be reinforced to ensure it is able to carry this weight. This can be expensive.
If you’re installing a new roof, consider having your roofing structure assessed to see if it can bear the additional load.
Conclusion
Slate can tremendously improve your home’s curb appeal and, by extension, its value. It is a material that has a natural appearance and blends well with the environment. Despite being heavy and fragile, its durability is something to marvel at.
As you ponder over your choice of roofing material, have it in mind that you can never go wrong with slate roofing tiles if their cost is not a scare to you and your home’s structure can support the weight.
Floors often face a lot of wear and tear. People walk on them throughout the day, and they’re also vulnerable to dirt and other messes that can create stains. So, how do you know when it’s time to replace your floors? Here are some giveaways.
Common Flooring Options
Popular flooring options can be found in many homes because they are stylish, affordable and long-lasting.
Laminate Floors
This type of flooring provides the look of real wood, but at a more affordable price. It also requires less maintenance than other options since it is scratch-resistant and waterproof. In addition, it reduces noise. These factors have increased laminate’s popularity in homes.
Hardwood Floors
Hardwood floors are a classic option for various rooms. They are durable and easy to repair, and also provide good insulation. However, they can be on the pricey side. The higher cost may be worth it to get more return on investment when selling your home because it’s attractive to potential homeowners.
Vinyl Floors
Vinyl is also a very durable and cost-effective option. It is made from plastic and available in planks, sheets or tiles. It gives off a stylish vibe at a lower cost.
Tile Floors
Tile floors are most effective in rooms with large amounts of moisture, such as bathrooms or kitchens. They can be used in many ways and can last for several years. Some tile textures can mimic wood, stone or even fabric.
Alternative Flooring Options
Many options for flooring are available, including these lesser-known varieties.
Bamboo
Bamboo is a flooring option you may have not previously considered. It is less expensive than hardwood and usually more moisture-resistant. Its natural color can blend into a room well and enhance the overall design. This option is also a more environmentally friendly one.
Concrete
Concrete can add an industrial or modern feeling to any space. These floors are relatively inexpensive and provide a unique style. They are also long-lasting and easier to clean.
Pennies
Pennies aren’t just things you throw into a fountain to make a wish — they can also be used to create flooring material. This is a low-cost option that will definitely stand out. The coins’ copper tones will also add a pop of color to the space.
Cork
Cork is an alternative option that can be used in a variety of rooms. This material is durable, comfortable, and resistant to mold and mildew, making it the perfect choice for a bathroom or living room area. It is fairly inexpensive and unique.
Signs It’s Time to Replace Your Flooring
There are several indicators that it’s time to install new flooring. Here are some things to consider.
Scratches or Marks
One sign that your floors may need to be replaced is large scratches or marks. They can be damaged when furniture is moved around or if you have pets. While small scratches are OK, larger ones may be an issue. The deeper the scratch, the more likely water can seep into the floor and cause long-term damage.
Water Damage
Water damage can occur from spills, pipe leakages or flooding. It can cause warping or separating. These problems can’t be fixed with a simple refinish, so replacing the floors is your best option.
Nails Peeking Through the Floor
Nails sticking up from the ground can be a painful tripping hazard for your family and guests. This issue is more common in high-traffic areas, such as living rooms. Not addressing this issue could increase the chances of injury.
Discoloration of Wood
Long-term heat exposure or water damage can cause floors to change colors. At the beginning stage, you may be able to do a simple refinish. However, if left untreated, you will need to replace the wood.
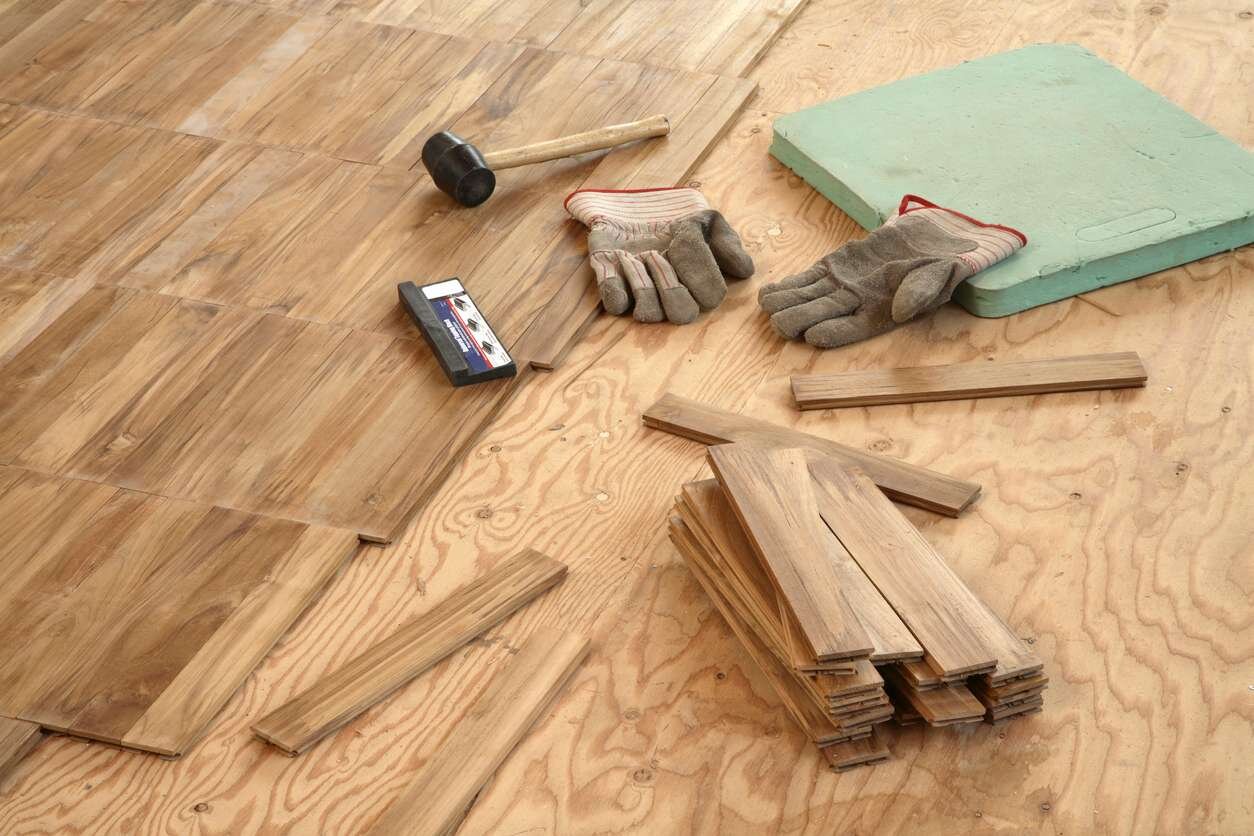
How to Replace Your Flooring
You will need to remove the adhesive of the subflooring with a floor buffer and abrasive disk. Once that step is complete, make sure to level the subfloor and add a moisture barrier to protect the floor covering. The last step is nailing or gluing it down and adding baseboards.
The Right Time to Replace Flooring
Your flooring is an important feature in your home, since it sees a lot of wear and tear throughout the years. It doesn’t last forever, though, so you need to know the right time to replace it. Doing so will give your house a whole new look and boost your ROI, so it’s well worth the effort.