WHY DOES YOUR BASEMENT FLOOD DURING THE WINTER?

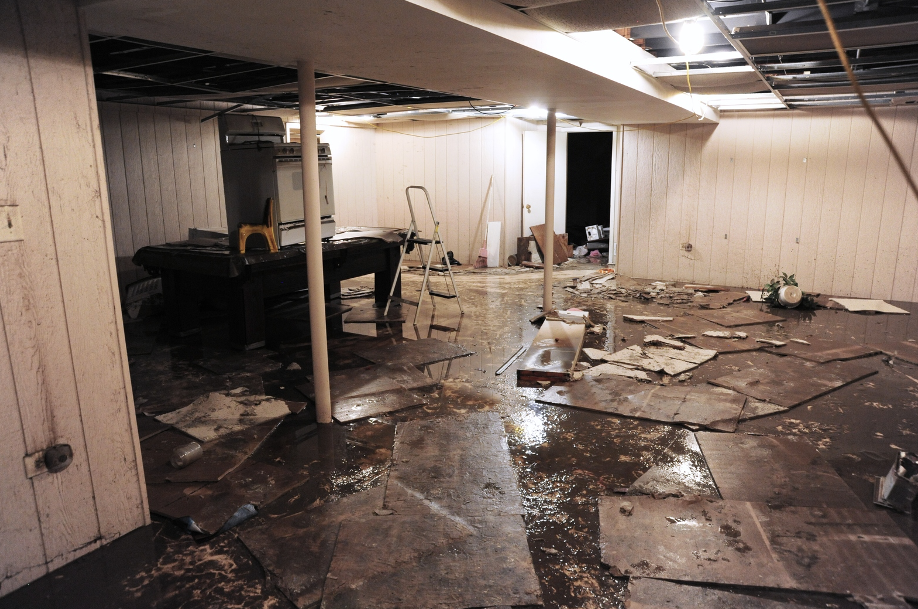
It’s the thing every homeowner worries about – a basement flood! Floods can be destructive as well as expensive to fix. They can weaken the foundation of your house and ruin valuable property. A flood can happen in any home with a basement. So, to prevent a soggy disaster you need to take action. 

 Floods are a really big concern during the ice and winter season. Water damage can cause a flood in the basement even in winter. During winter, all the water storage was kept as ice, underground. As spring arrives, the ice thaws almost suddenly and causes basement flooding. 

Water damage can be caused by a lot of reasons like ice dams melting and leaking into buildings and damaging the walls. Flooding can cause a huge risk to your homes. From water overflowing to your foundation damage to damage in your electricity wirings. 

Here are some of the major reasons why does your basement flood during the winter –

1. Basement wall and floor cracks

It is commonplace to find a leak in your basement walls and floorings. Excessive moisture needs a place to escape. The cracks in walls and flooring are the best place to hide and then the moisture flows through the soil. That leads to pressure in the walls and causes flooding in the basement.


2. Basement heat

During winter, there is snow almost everywhere near your home. But, in your basement, there is heat. Which causes the snow to melt around your home and keep the moisture intact. But, the moisture has nowhere to go, so it flows through the cracks of the wall and leads to flooding. 
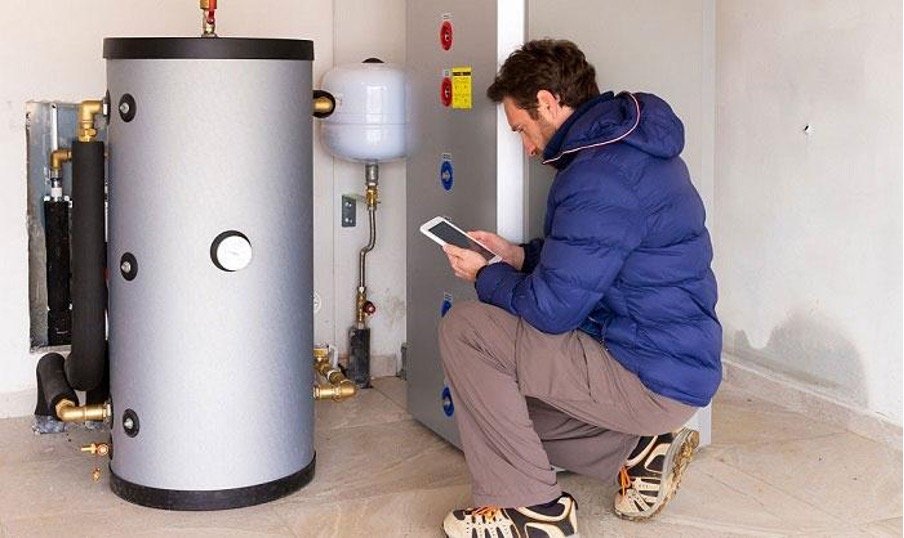
3. Sump Pump

Sump Pumps are designed to clear the water out in the basement and keep the basement dry. If your sump pump is not installed correctly, it will lead to storing damaged pipes and the water in the basement, and eventually, it will be flooded down there. 
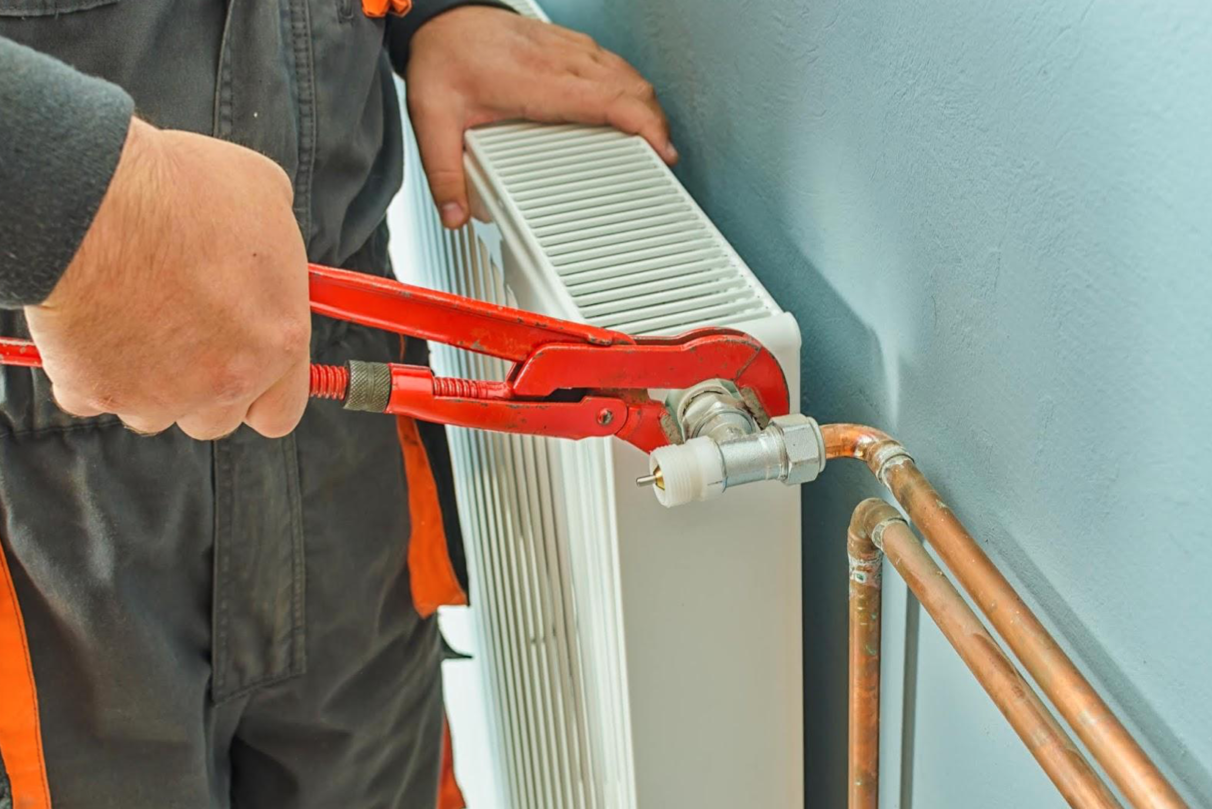
 

4. Damaged pipes

One of the common reasons for flooding during winter is damaged pipes or burst pipes. Now, pipes bursting is a common result of poor plumbing. But, during winter, when the water freezes, the pipes expand and burst. That causes immediate leaking and leads to flooding. 


5. Type of soil

The type of soil around your house plays a huge role when it comes to flooding. Make sure you have the right type of soil around your home. The wrong soil will lead to flooding 

These are the most common reasons for flooding during winter. You can always take precautions or take remedies afterward. Here are some tips that you should follow immediately after flooding 

●      Basement flooding not only causes property damage, but it also takes a risk toll on your family members. The main point is don’t let anyone go down the basement if your basement does not have a circuit breaker. If your circuit breaker is not in your basement, shut your power off, immediately. 

●      After shutting the power off, you need to get the water out immediately. The sump pump has obviously;y failed, so you need to purchase a new one. Try to get the water out carefully with a mop and bucket. You need to do it as soon as possible, otherwise, molds have a chance to grow.

●      After getting the water out, you should get out all the wet equipment. Whether it’s a couch or bookshelf or anything else. Place them in a place where they can dry. Rip up the carpet too. 

●      Then, dry the basement. You have to buy several fans or industrial blowers. You can hire professionals too at this point.

●      Call the professionals to prevent the growth of molds in the basement. Since dark and wet places are the suitable place for molds to grow, you have to take steps.

●      And lastly, to avoid future flooding, try to find out the cause and prevent it. Whether it’s because of the weather or any leakage. Take precautions beforehand. 

These are the primary steps you need to take care of right after the flooding. The next step should always be calling the professionals to clean up your basement after flood damage. They follow a several step process to clean the basement – 

●      Finding the cause

●      Informing the insurance company

●      Restoration beginning

●      Extraction of water

●      Restoration of the carpet

So, it’s quite clear that you will need flood damage repair professionals if you face the problem of flooding in your basement. If you need flood damage repair Santa Ana, you can find them by clicking the link below. 

CONCLUSION 

The above reasons are the primary causes why your basement floods during winter and the steps you should take to prevent you from any hassle. And, after the primary steps, you should hire professionals for the rest of the work, to make your basement more efficient, and repairing it will prevent you from future floods. 

To know more about the best flood repair in Orange County, follow the link. 


Author Bio:- Jacqueline Lewis

Jacqueline is a content marketing manager who formerly worked at Cali’s Choice Plumbing & Restoration. She is a writer, editor, and content strategist for plumbing services. Making her knowledge and skills a power, she amplifies the readers’ knowledge about the ways of water leak and slab leak detection and their reciprocation. 

Through her articles, she shares the most successful tactics and strategies of slab leak repair, mitigating blockages through Hydro Jetting, and AC & heater installation tips to the audience.

FaceBook: https://www.facebook.com/CalisChoicePlumbingRestoration

Twitter:https://twitter.com/CalisChoice

REPAIRING A LEAKING TANK IN A HOT WATER HEATER IN 2021:

You may have a water heater like most people. But neglecting a leaking tank in a water heater can be troublesome for you. If you consider it a minor inconvenience, it can turn into a vital issue. Hence repairing a leaking water heater tank is crucial. 

But you need to analyze the leakage in the tank. Water can pool or drip from the hot water tank. Try to assess the severity of the leakage. Afterwards, you can repair the leakage or call a professional according to your comfortability. Alongside, if you need top water heater repair services in San Diego, we are there for you 24/7. 

In this article, we will guide you through the process of repairing a leaking tank in a water heater in 2021. 

How Can You Identify The Water Heater Tank Leak?

Identifying the leaking tank in your water heater is the most significant step. You can save time and money by realizing the leakage in the initial phase. Try to comply with the following points to assess the tank leak. 

●      If you think you may have a water leak,  let your senses be your guide. Turn off all the external sources of sound. Stand beside the water heater. If you hear the sound of rushing or dripping water from the tank, search for visual confirmation. 

●      An insulating blanket wraps the heater. Hence, you may face difficulty finding the leakage. Look at the top and bottom of the water heater. 

●      If you observe the flooding of water beneath the water tank, it can be a potential sign of leakage within the water heater tank. 

●      If you still cannot recognise the leakage, you can put a paper or towel under the water heater. Check back after a few days. If it is wet, the chances of leaking water from the tank is high. 


PROCESS OF REPAIRING A LEAKING TANK:- 

After recognising the leakage, you can follow the points we will share now. 

Turn Off the Water Supply:- First, you need to turn off the water supply to your water heater. You can see the two pipes on the top of your water heater. One is to warm the water and another is to cool the water. Find the shutoff valve near the line to turn off the water supply.

There are only two types of valves. 

●      Ball Valve:- Ball valves look like a lever handle. Pulling or turning the handle down will help you to stop the water flow. 

●      Dial Valve:- Dial valve is a clock-like structure. You need to turn the wheel clockwise to turn off the water supply. 

Turn Off The Power:- In the second step, you have to turn off the power to your water heater. The ways of turning off the power are different for gas water heaters and electric water heaters. 

●      If you have a gas water heater, you can find the valve on the gas supply line. The valve supplies the gas to the water heater. Once you turn off the valve, it will stop supplying gas to the water heater. 

●      If you have an electric water heater, try to find the breaker in the electrical panel. Turn off the breaker. 

Know The Reason:- Three potential reasons can create leakage in the tank of your water heater. They are the air valve, the tank itself and the connection.  

●      The air valve is a significant part of the water heater tank. It creates a vacuum inside the tank to help enter only the water. The air valve creates more pressure when it is not working appropriately. 

●      The connection is also another significant element. A regular temperature pressure valve connects it with the heater. 

●      Check the tank itself. Minute licks and heartwater can be present around the tank. You may face several issues if the leaking is unnoticed in the initial phase. So using a standard water heater tank is necessary for you.

If you want a water heater at the riverside and surroundings, you can contact us. 


Main Procedure:- 

  1. First, you have to empty the tank. The hot interior tank will cool down in a while. You can then start working with the tank.
  2. Try to find the possible leaks around the tank and repair them with a thread.
  3. Now, you can re-install that tank again to the original position.
  4. If your water heater tank has issues, you can replace it with a new water heater.

 Repairing a leaking tank in your water heater can be challenging for you. We provide quality repair replacement and installation services throughout the entire San Diego and riverside

Conclusion:- In short, assessing and repairing your water heater leak is crucial to getting the most out of your geyser. You can fix up the leaking tank by following the above-mentioned steps. But, If you are looking for a water heater company in San Diego and riverside surroundings, we can be the best fit for you. 


Author Bio:-  Aimee Grace

Aimee is a marketing manager at EZ Plumbing & Restoration. She is very passionate in writing about discrete plumbing services and leakage detection as well as repair solutions. Her vision is to educate people about the consequences of water and slab leaks at home or office and what they should do to repair them to avoid further water damage as well as property damage. 

Innovations have paved a way for smart devices to lead a convenient life. Plumbing industry is no different but only few people know about various tools used to fix the leakages. Stay tuned with the recent articles to know all about how to find water damage, slab leak, clogging, and ways to repair them, installation of new HVAC appliances in San Diego.

6 THINGS TO CONSIDER WHEN INSTALLING A SMART HEATING SYSTEM

A smart heating system helps you save energy by controlling the heat in a very quick period. It will also help you to control the temperature in different rooms of your home at different times through any smart device, or even through your smartphone. 

Smart heating is a thermostat through which you can control and customize the heating of your home through any smart device. Smart heating is the fast becoming norm in the present time when it comes to developing your new home or redesigning an aged home. 

Benefits of a smart heating system –

●      Easy to handle

●      Convenient for holidays. You can stop the heating when you’re away.

●      Customizable.

A smart heating control can save you money more than other traditional heaters. Smart heating systems will let you stop the heating when you’re not home. Some heating systems even adapt to your routine, and according to that it turns up or turns off the heating by itself. In terms of saving your money, you need to choose the smart thermostat you want to invest in.

What to do if the heating system gets broken? Professional heating service comes in handy. They’ll keep your system effectively working and will save your money too. Since they have the expertise in this area, not only will they repair your system, if any other problem arises during or after the operation, they’ll fix it for you. So, that your heating system works properly. To find more about professional heating repair riverside, follow the link below.

So, which hearing system to choose? Well, there are many options available in the market from which you can choose. As of 2021, reviewers state the best smart thermostats are – 

  1. Nest Learning Thermostat
  2. Hive Active Heating 2
  3. Honeywell Evohome
  4. Tado Smart Thermostat
  5. Nest Thermostat E

After discussing all the benefits that you’ll get from a smart heating system, it is quite clear that every home needs a smart heating system. Installing a smart heating system in your home helps you set, control, and customize your temperatures through your smart devices. With that said, here are six things to consider while installing a smart heating system – 

 1. Wi-Fi Connection is a must!

Since smart thermostats can be controlled by any smart device that you own. To connect the thermostat with your devices, a wi-fi connection is a must in your home. Through a wi-fi connection, the owners will get all the benefits of the thermostat.  

2.    Right Models for your Existing Smart Devices

Smart heating not only controls and customize your heating, but they tend to integrate with your existing home devices like – Alexa, Google Home, Microsoft Cortana, Samsung Smart Devices, etc. So, when you’re considering buying a smart thermostat make sure you check if it’s compatible with the smart device systems that you own. 

If you think smart heating systems mean that they connect to a wi-fi network and control the temperature, you might be wrong. Smart thermostats can sense the condition of a room, whether there are many people, you’re not home. It senses the condition and sets the temperature according to it without doing anything. It can also keep up with your everyday routine. So, after a certain time, it’ll automatically control the heating when you’re home, or you’re returning from work, etc.

3.    Mobile Application

Thinking of buying a smart thermostat? A new thermostat not only needs an installation, but a mobile app to control it remotely is a must. Through the app, you can control your thermostat from anywhere, anytime. The smart thermostat can pair with anything with a wi-fi connection and has the respective app installed. The app is typically provided by the manufacturing company only. At the time of installation, the company will instruct you on the functions of the app and after installing the app on your device, you can use the thermostat seamlessly.  

4.    Low Voltage System

Before buying the thermostat, make sure your system is low voltage. This is a very important thing to consider if you’re purchasing a smart heating system. Most of the smart thermostats are only compatible with 24v HVAC systems. You should be certain about your system, whether it will work. In case of any difficulty, you can always contact a professional. Major brands even have tools to determine if you have a low voltage system or not. 

5.    Photos of the Wirings 

Before you ask why. Let’s say, while installing your new thermostat something goes wrong, and you have to undo the process quickly. How will you do it if you don’t have any photographs of the old wirings? Even the smart thermostat comes with a manual where they ask you to take sharp photographs of the old wirings. So, before installing the new one do yourself a favor and take at least 5-6 sharp and good photographs of your old wiring. It will help you from any future hassle. 

 CONCLUSION

So, these are some of the things you should consider while installing your smart heating system in your home. Of course, the company professionals will help you to install and run the whole thing, but you can always make sure of the things discussed above so that you won’t get into any difficulty later. If you’re looking for heating services for your home, you can refer to the link below. 

Some of the best heating services in San Diego are – Anderson Plumbing, Heating, and Air or Action. Want to know more? Click the link below. 


Author Bio:-  Michael Cabral 

Michael is a marketing manager at EZ Heat and Air. He loves writing about innovative and hybrid HVAC installation tips. His articles help readers to have valuable insights into the importance of duct cleaning, water heater maintenance and repair, optimum working of thermostat, Mini split and heat pump installation in Orange County. Read articles for more information on keeping your HVAC system in a tip-top condition and lead a hassle-free life.

4 PESTS THAT COME AROUND IN THE WINTER AND HOW TO KEEP THEM OUT

Wood Mouse Apodemus sylvaticus

One of the best things about a long winter is the lack of outdoor pests. Bees, spiders and other creepy-crawlies are nowhere to be seen, and you can spend as much time outside as you like without being bitten by mosquitoes. 

However, the cold doesn’t eliminate encounters with outdoor life. Some pests will migrate inside because your house is warm, hiding in your walls and crawl spaces over the winter. 

Here are four pests that might bother you this season and steps to keep them out of your house. 

1.   ANTS

Over the winter, most ants find shelter under logs or in the ground and then hibernate with their colonies. Their activity slows down with the cold weather and less food, but they are warm enough as a group to survive until spring. 

Seeing large numbers of ants in your home is always concerning. In the winter, however, it may mean there’s a colony inside your home. If ants are living in your house, they’ll likely be warm enough to continue their usual activities. 

The best way to prevent this is to keep your house well-sealed and its surroundings clear. Leaving decomposing wood propped against an external wall makes it easy for ants to transition inside. 

2.   LADYBUGS

 During the fall, you may notice many ladybugs and Asian beetles coming into your home. These insects secrete a pheromone that attracts other ladybugs to join them. This happens during mating season in the spring and again during hibernation over the winter.

 Ladybugs like to hibernate in warm, moist spaces and usually winter in groups. They often live in gardens over the summer and can be attracted to nearby homes because of light or heat. If your house is warm enough, some ladybugs may wake up from hibernation and visit you over the winter months.  

Unfortunately, there’s no effective method of dealing with ladybug infestation once winter has already begun. To prevent them from joining you for the winter, make sure your home is well-sealed from the outdoors. 

Check areas around windows and doors, your foundation, external walls and your roof. Because insects and pests are so small, they can slip in through tiny cracks. In addition to keeping out bugs, sealing your house will bring you the added benefit of saving on your heating bill this winter.

3.   SPIDERS

As the weather cools down, you may notice increased spider activity in your home. Unlike other insects, spiders don’t come inside seeking heat. However, fall is mating season for many species. 

During this time, spiders move around more than usual, looking for a mate. If you see a spider in your house, it’s likely a male seeking a female. After mating, female spiders spin egg sacs to protect their young until they’re ready to hatch. 

Egg sacks may show up externally around windows and door frames, where spiders have found nooks and crannies to place them. To keep your home web and spider-free, consider contacting a pest control service to remove these sacs. 

4.   MICE AND RATS

Rodents are another pest you may face in the winter. As the weather cools down, mice and rats may take refuge indoors, living in your walls, kitchen cabinets or basement. Rodents are more likely to move in if you have a readily available food supply for them to plunder. 

Rats and mice have a short gestation period, meaning that they have many babies a year. For instance, many species of mice can have a litter about every three weeks. In the wild, mice only live about one to two years, so reproducing quickly is important. However, multiplying mice can wreak havoc inside your home. 

 Keeping your house well-sealed against the elements is the best way to prevent mice and rats from taking up residence. It’s also a good idea to make sure food isn’t easy for mice to chew into in your basement, cabinets or pantry. If you notice evidence of mice, set out traps or call an exterminator. 

KEEP A CLEAN HOUSE

The most effective way to keep bugs and rodents out of your home is to take preventive measures. Keep your home well-maintained and sealed tight to prevent most pest problems. Cleanliness is another way to discourage pests from entering your home. 

However, if you notice signs of insects or rodents during the winter months, you can take steps to treat and eliminate the problem. Follow these tips to keep your home clean and comfortable over the winter.

Guest Contributor: Rose Morrison

GO GREEN: HOME IMPROVEMENTS IN YOUR KITCHEN AND BATHROOM​​

Your home is an important place where you spend most of your time. It should also be a comfortable place to live. When it comes to improving your home, there are many things you can do to make your home more environmentally friendly. Here are some tips on how to go green through kitchen and bathroom remodeling

1. USE ENERGY EFFICIENT APPLIANCES

There are so many energy-efficient appliances available today. They save money, help cut down on pollution, and reduce greenhouse gas emissions. Companies are coming out with new and improved appliances to become more eco-friendly. For example, you can opt for a dishwasher that uses less water than conventional options. Although you may think that these appliances are expensive upfront, the costs will eventually pay off and you will have huge savings in the long run. 

It’s also a good idea to replace old appliances as well, especially if they’re not working properly anymore. Older appliances tend to use more energy, making them less eco-friendly. In addition, they can consume more energy, resulting in higher energy bills. So when replacing your appliances, look for ones that are energy efficient.

One of the most popular energy-saving appliances today is the LED light bulb. LED light bulbs can significantly cut down your energy bills, and they even last longer than incandescent or fluorescent lights. This means you don’t have to constantly change out your light bulbs because you’re guaranteed that they’ll be working properly for a long time. 

2. INSTALL WATER-SAVING FIXTURES

Water-saving fixtures such as faucets and toilets use less water than conventional models. Installing water-saving fixtures not only saves money but also helps conserve natural resources. A good water-saving fixture you can install in your bathroom is a dual flush button for the toilet. This can help save water because it uses less water for liquid waste. Whenever there isn’t much waste that needs to be flushed, you can simply use the option that uses half the water needed for solid waste. 

Another water-saving fixture you can install at home is faucets that turn off automatically when the sink isn’t being used. This way, you don’t have to worry about wasting water whenever somebody forgets to turn off the faucet. Lastly, you can also purchase low-flow showerheads for your bathroom. These showerheads allow just enough water to run through them without wasting any excess.

3. HAVE A COMPOST PILE

Composting is a simple process that can help you lower your carbon footprint and work your way towards net-zero CO2 emissions. Having a compost pile at home can help you recycle organic materials into the soil. You can even add food scraps from your kitchen to this pile which will then produce fertilizer. This doesn’t only benefit you in the kitchen but provides you with a variety of advantages in the garden as well.

To start a compost pile, all you need is wood chips or sawdust, and a container. Make sure to continuously add fresh material to the pile. After a month or two, you can remove the top layer and start adding new stuff again. The best thing about having a compost pile is that you won’t have to buy fertilizer every year.  It also helps improve the quality of the soil in your garden and reduces the need for chemical fertilizers. 

4. INSTALL ECO-FRIENDLY TILES AND FLOORING

If you’re just starting to build your home, then it’s a great option to install eco-friendly tiles or flooring. There are lots of companies that offer eco-friendly products like bamboo flooring, cork flooring, and recycled plastic flooring. These types of floorings are made using renewable resources and therefore contribute towards reducing your carbon footprint. Not only do they last longer, but they are also cost-effective. 

Eco-friendly flooring doesn’t have to be boring either. They come in different colors and styles so you can choose what works best for you. For example, those who are leaning towards tiny kitchens or small bathroom designs can try installing reclaimed or vintage tiles on their walls. This type of is definitely an interesting choice when you want to make a statement in your house. 

5. MAKE IMPROVEMENTS FOR BETTER LIGHTING

Having windows that provide adequate lighting can help you save energy. There are many ways to increase the amount of natural light in your home. You can strategically place your windows in areas that receive a lot of sunlight to provide natural light. This way, you don’t have to open the lights all the time when you’re in the kitchen or the bathroom. The natural light from the sun is enough to brighten up the space and allow you to function. 

In addition, upgrading your windows to glazed windows can help save more energy. This kind of window can act as insulation to prevent significant losses of heat. Glazed windows keep the room at an optimal temperature so you don’t have to open appliances such as HVAC systems just to keep your home comfortable.


Guest Contributor: Kat Sarmiento

ASSESSING AND TREATING DIFFERENT TYPES OF DAMP IN YOUR HOME

More than 50% of houses in the USA have mold issues due to dampness. Exposure to dampness is a significant health risk and thus, knowing what needs to be done in order to prevent long-term damage to both your health and property is crucial. Unfortunately, 28% of people are genetically predisposed to dampness-related health issues. Furthermore, it has been estimated that an average of 84 days is needed to rectify the problem of dampness in most houses. There are three major types of damp: condensation, rising, and penetrating dampness. The treatment method for each category varies, so if you want to keep a healthy home environment, here’s how to assess and treat different types of damp in your home. 

Condensation damp: The most common type of damp

This type of damp originates from excessive humidity in one’s indoor air. Water is released into the air after bathing and cooking. If the windows are not opened up to allow the warm moist air to go outside, or if the extractor fan is missing, then the air soaks into the walls and ceiling. Condensation damp can also be found in places where there is no sufficient airflow, such as the walls behind large furniture.

In order to treat this type of damp, there are simple things homeowners can do. Using lids while cooking on the stove, opening the bathroom window while bathing or showering, and improving the overall ventilation in the house can help one get rid of dampness and prevent mold growth. During the cold winter months, it is also important to keep the temperature of your house as steady as possible. Damp happens when warm air hits the cold walls, so setting timers for the heating to turn on at different points throughout the day can help to keep your home warm and dry. 

Rising damp: Tidemarks and stains on the walls

Although the development of rising damp is quite rare, it can directly affect the structure of your house. This type of damp will normally be restricted to the ground floor of the house. One of the most recognizable signs of rising damp is the appearance of discolored marks on interior walls. The best way to fix rising damp is to create a damp-proofing course along the wall. In most cases, homeowners should remove contaminated plasterwork to expose the brick up to one meter.

Penetrating damp: Damaged brickwork or building defects

Penetrating damp can be found in different spots of a home. A broken pipe or building defects, in general, are the major causes of this type of damp. Correcting those defects as soon as possible is the best course of action. However, if penetrating damp occurs due to damaged masonry or porous bricks, other treatment options are also suitable. There are affordable masonry protection creams that can be applied to building materials, like brick and stone. Such treatments will not only protect your house from penetrating dampness, but will also improve the thermal performance of the walls.

When dealing with dampness, it is important to identify its signs as soon as possible. That will help you choose the best method to deal with this issue and protect both your property and health. Some people are more sensitive to mold than others. For this reason, it is really important to control humidity levels, ventilate showers and cooking areas, and fix leaking windows, pipes, or roofs as soon as possible.

Guest Contributor: Cindy Trillo

IS YOUR WATER HEATER LEAKING? HOW SHOULD YOU CHECK FOR IT?

There are times when homeowners find their water heater making sounds. Does that mean it’s leaking? Such sounds of water rushing and increasing water bills and water damage usually indicate leaks in the water heater. Here we will discuss the ways to identify the water heater leaks to reduce water waste and damage. 

Try to listen if the water heater is leaking

Are you suspecting that there is a water heater leak? If yes, you should turn off the external sound sources, such as the television or radio, and trust your ears. There are times when you can hear the leak before it becomes severe. If you stand near the water heater and hear water dripping and rushing, you need to follow it and trace the leak. If you hear the sound of water and can detect no leak, there might be a break within. 

Try to see the signs of the water heater leaking

The precise point from where water leaks can be challenging to determine. There can be multiple leaks that can go undetected. There are times when it is tough to see the leak as an insulating blanket covers the unit. For this, you should learn about the common areas of water leaks. 

Examine the top of the water heater

It would help if you looked at the top of the water heater, which is the point where water leaves and enters. There are chances of the water heater failing here as the tubes that enter the tank are vulnerable to leaks because of the high pressure. 

Examine the bottom of the water heater

Is your water heater leaking from bottom? At times, the drain valve at the bottom is a place from where the water heater leaks. 

The Electric Water Heater

Do you think that your electric water heater might be leaking? Are you not certain of the source? If yes, you need to switch off the power. After that, you should take away the access panel and the safety shield to check the elements to assess the signs of the water heater leaks and stains. If your tank is partially new and the leaks are evident, chances are you might have to tighten the bolts and nuts. And if this doesn’t work for you, then you might have to replace the element washers. 

What should you do when you have detected a leak in the water heater?

Once you have detected a leak in the water heater, you need to switch off the breaker which supplies power. You can also switch off the gas supply. After that, you can switch off the supply of water to your heater. If you don’t know where to find it, you can follow the pipe which enters the water heater till you reach the valve and close it after that. 

Other than that, you can also engage in minor repairs, such as making a loose connection tight or adjusting the pressure relief valve. Also, if you find a leak in the pressure relief valve, it could be because of the increased temperature. You should bring down the temperature to see if that solves the problem. At times, you can also replace the water heater and choose an energy-efficient model. 

 Guest Contributor: Sujain Thomas

RECIPE FOR CREATING A GOOD RELATIONSHIP WITH A PLUMBER IN YOUR NEW NEIGHBORHOOD

Once you move to a new neighborhood, there are a lot of things you ought to do. You need to familiarize yourself with the local area and get to know your neighbors, as they will have an impact on your life, whether you like it or not. But, the one thing that few people take the time to do is get on friendly terms with their plumber. Well, to help motivate you, we will govern the why and the how of creating a good relationship with a plumber.

Why is it helpful to be on friendly terms with your plumber

Plumbing is a service, just like any other. If you need help with a blown-out fuze, you call an electrician. Not sure how to trim drown old branches? You call a gardener. And if you suspect a leaky pipe, you call a plumber. Nothing to it, right? So, why should you go through the trouble of getting to know your plumber and staying on friendly terms? Well, there are a couple of reasons.

Price reduction

First off, it can be hard to deduce how much a plumbing repair will cost. Sure, you can put a price tag on spare parts. But, the work and the experience involved are not something that you can easily deduce. Unfortunately, most plumbing issues don’t give you much time to pick between different plumbers and get quotes. And usually, you will end up hiring the first one that comes around, no matter how much they charge.

Knowing a good plumber can save you a lot of money.

Well, here is the first instance where knowing your plumber can be helpful. If you are on friendly terms with them, you can rest easy knowing they won’t overcharge you.

Availability

The second thing to keep in mind is that plumbing issues are time-sensitive and you typically need plumbing services fast. Spending a day or two without water will soon show you just now often we rely on it. And if a pipe broke or a water cooler started to leak, you need to have someone that will give you a hand at a moment’s notice. This, again, is where being friendly with your plumber comes in handy. They will be much more inclined to rush to your aid if they feel that you are a decent person.

Friendly tips

There are plenty of instances where you don’t need the plumber’s help but their advice. Say that you want to redo your bathroom or your kitchen. The first thing to consider is whether your plumbing system can support your new ideas. If it cannot, you may be able to make modifications so that your remodeling can be put into practice. But, all of this requires expert knowledge and experience.

Not all plumbing systems can support all types of bathrooms.

Secondly, keep in mind that plumbing maintenance is not as straightforward as you might think. Once you move into a new home, you may believe that plumbing should stay as it is and that you should only call a plumber in case something goes wrong. But, there are dozens of little things you can do that will significantly improve the health of your plumbing system. A bit of extra insulation or a simple valve replacement can be all you need to avoid costly damages. Know that expert plumbers can usually notice issues in the making. And you’ll be much better off addressing those issues before they cause damage.

Creating a good relationship with a plumber

So, now that we have an idea of why it is important to create a good relationship with a plumber, let’s see how you are supposed to go about doing so.

Make sure that you find a good plumber

First, you need to make sure that you find a decent plumber. Even sub-par plumbers won’t shy away from being friendly. And you can hardly hope to reap the benefits of befriending your plumber if they are sub-par. So, do yourself a favor, and make sure that the plumber you are working with is worth befriending.

Connect with them on a personal level

Once you pick a plumber that you deem worthy, have them come over. If you have an issue to fix, great. If not,have them come over and perform an inspection. As you’ve just moved in, it is only reasonable that you want to have your plumbing inspected. Once they have completed the inspection, you can ask them about plumbing advice and whether you can incorporate some improvements.

If you manage to connect with them on a personal level, creating a good relationship with a plumber will be a breeze.

While discussing your home, don’t shy away from mentioning personal subjects like family, work issues, the fact that you’ve moved it, etc. If you’ve dealt with an interstate relocation, discuss how good organization is important and that adjusting to a new neighborhood is not easy. If you manage to start a friendly conversation, feel free to discuss it. If not, don’t push it. Keep in mind that friendliness is not something you can force.

Get their information

Once the visit is over, make sure that the plumber leaves their contact information. That way, you will be able to contact them quickly once you need their services. Explain that you’ve heard great stuff about them and that you are planning on calling them if something goes wrong.

Don’t shy away from tipping

And, finally, don’t forget to tip. Tipping your plumber at the first meet is a great way to make an excellent first impression. It shows that you value their craft and want them to feel appreciated while working for you. Even a small tip can go a long way in creating a good relationship with a plumber. So, even if it doesn’t seem cost-effective, you really ought to tip.

Guest Contributor: Sophia Perry

COMMON CAUSES BEHIND LEAKY WATER HEATERS AND HOW TO AVOID THEM?

Leaking water heaters are a problem for homeowners in Indianapolis, Indiana. Leaks can cause water damage, not to mention running out of hot water when you need it in some cases, and fixing it takes time and money. If owners don’t know where their equipment leaks are coming from, it is more difficult to deal with them. Several types of failure will pass through the water, and each type of failure will have different consequences for the water heater. It is important to understand the difference between each type of leak.


Top Water Heater Repair in Orange County to homeowners with important information about leaks. Our plumber explained in detail how water heater leaks occur so that homeowners can better understand how to stop them. Also, check where the leak is and what it means in the water heater.


CAUSES OF WATER HEATER LEAKS


Water heaters provide hot water to all the equipment in your home. A leaking water heater will make this more difficult to complete. There are many reasons for a leak, and all of them have different implications for the system. However, homeowners are often unaware of the reason for the leak, making repairs more difficult.

Some types of leaks require a new water heater. However, many other devices can be repaired. These are the most common causes of leaks.


ANODE ROD

The anode rod is an important part of a water heater because it attracts corrosive substances. This ensures that corrosion only occurs on the anode rod and not on the tank itself to prevent leakage. Over time, the anode rod becomes very corroded and no longer exists. In this case, water is leaking from where the anode rod is located. Replace the rods quickly to avoid this type of leakage.


COLLECTION OF SEDIMENT

As the water heater does its daily job, it builds up deposits at the bottom of the tank. Homeowners should remove these deposits to prevent cracks. If the sediment stays there for a long time, the water tank will eventually wear out. Then the water seeps through these openings. Drain the water from the water heater annually to clean up sediment and prevent leaks.


THE PRESSURE IS TOO MUCH. 

In a water heater, the pressure is natural and normal. However, if the pressure is too high, it will put pressure on the fuel tank and cause a leak. The pressure increases when the water temperature is too high or the water entering the house begins to become at high pressure. If the pressure in the water heater is too high, water will escape from cracks or openings in the appliance.


INPUT AND OUTPUT ARE CONNECTED.

Coldwater enters the water heater through the inlet fitting and hot water enters the appliance through the outlet fitting. These components loosen over time and allow water to enter or exit the water heater. Leaks in these water heaters usually require tightening the loose parts, but not many other parts.


OLD TANK

With regular maintenance and inspection, the tank water heater can be used for approximately 15 years. When the equipment approaches this mark, the system often begins to malfunction. The parts weaken and the parts do not fit together tightly, resulting in more frequent leaks. At the end of the water heater’s life, rust formation increases. If it rusts, the tank will leak and you will need to replace your water heater.


DRAIN VALVE

When a homeowner needs to clean and  wants a water heater repaired in San Diego, a drain valve can drain the water. This part will loosen over time and cause small leaks in the water heater. In rare cases, failure of the drain valve may also occur. If you think there is a problem with a part, consult a plumber. Plumbing unions will advise if the part has a real problem, will it be repaired, or if there is another problem causing the leak.


PREVENT WATER HEATER LEAKS IN YOUR HOME

As with most plumbing problems, your water heater is less likely to leak if you take the proper precautions. Homeowners have more control over water heater problems than they realize. This means that most leaks can be adequately prevented. In the event of an accidental leak, water damage can affect walls, floors, and important objects. Even if the leak is not repaired, 


flooding is likely.

Take these precautions to avoid damaging your home due to leaks. They ensure that the water heater remains waterproof as long as possible.


QUICK RESPONSE

It is important to react as quickly as possible to leaks in your water heater. This minimizes water damage. Find the leak and call a plumber. If you already know where the leak started, you can point the plumber in the right direction. This further reduces the time it takes for a leak to cause serious damage. In addition, since the fuel tank can only withstand such a high pressure, the longer the pressure leak, the more dangerous it is.


EMPTY AND CLEAN THE WATER TANK

Regularly empty the water tank and remove all sediment. The longer the sediment at the bottom of the tank, the more fragile it is. The drain valve drains the water, so you can clean it. Use an aqueous solution of bleach to kill mould. This will improve the quality of the water.


CHECK YOUR WATER HEATER OFTEN

Keep your eyes on the water heater. Knowing how your water heater looks and behaves when it is running can help you identify when the problem occurs. In most cases, a puddle of water will form under or around the water heater, causing a leak almost immediately.


CHECKING FOR LEAKS

If there is an active leak, the plumbing suit will fix it. If you learn that a leak is imminent in an area, he will notify homeowners and provide advice on how best to handle the situation.


TIGHTEN THE LOOSE PARTS

Finally, if you find any loose parts on the water heater, be sure to tighten them. It is important to check the connections frequently to reduce the possibility of leaks in the water heater. If you don’t have a wrench nearby, tighten the set by hand.


Author Bio:- Jacqueline Lewis

 Jacqueline is a content marketing manager who formerly worked at Cali’s Choice Plumbing & Restoration. She is a writer, editor, and content strategist for plumbing services. Making her knowledge and skills a power, she amplifies the readers’ knowledge about the ways of water leak and slab leak detection and their reciprocation. 

Through her articles, she shares the most successful tactics and strategies of slab leak repair, mitigating blockages through Hydro Jetting, and AC & heater installation tips to the audience.


Facebook: https://www.facebook.com/CalisChoicePlumbingRestoration


Twitter:https://twitter.com/CalisChoice

HOW MUCH DOES WATER DAMAGE RESTORATION COST IN 2021?

FLOOD REPAIR COST PER ROOM

The cost of irrigation is determined by the damaged part, as it affects the necessary repairs. Different areas of the house usually require emergency restoration service of water damage. Below you will see the average repair cost based on the damaged room in your home.

BATHROOM REPAIR PRICE

You can expect to pay an average is $ 2,500 to $ 4,500 to clean toilet stains. Bathrooms are a common place where this happens because there are a lot of pipes in the walls and several plumbing fixtures that can leak or overflow. For some reason, bathrooms tend to be inexpensive compared to other rooms in the house. First, they tend to be smaller areas. They usually have tile or vinyl floors and are easier to repair than wood and carpet. In most cases, bathroom repairs include air vents, small drywall, ceiling, and floor repairs.

FLOODED LAUNDRY ROOM REPAIR

If a laundry room is a Find Water Damage Restoration Area, the average cost is the same as a bathroom and should be between $ 2,500 and $ 5,500. Laundry areas tend to be slightly larger than bathrooms, but generally have less plumbing and fixtures in the space. The most common cause of such damage in laundry rooms is a washing machine overflow or a leaking washing machine hose. Floor repairs, drywall repairs, and, in certain circumstances, basic electrical work are common in this area.

FLOODED LIVING ROOM REPAIR 

The average cost of maintaining water in a salon is between $ 3,000 and $ 6,000. The main reason for the increase in costs is that living rooms tend to have a larger area, can cause overhead damage, and generally increase the cost of maintaining floors. The most common causes of such damage in living rooms are pipe damage and roof leaks. The most common repairs are repairs to ceilings, plasterboard, and floors. In some cases, floors or furniture need to be repaired or replaced.

KITCHEN FLOOD REPAIR

 The kitchen is one of the most expensive areas for flood repairs. The repairs will cost between $ 3,000 and $ 8,000. Kitchen repairs can be expensive because these types of accidents require multiple repairs. This type of damage in the kitchen can be caused by water infiltration, broken pipes on appliances, and air leaks. Kitchen repairs typically include floors, drywall, ceilings, and appliances.

BASEMENT WATER REPAIR COST

 The cost of repairing basements damaged by flooding ranges from low to high, but on average, most homeowners pay between $ 3,000 and $ 10,000. In most cases, this damage to your basement is caused by flooding, but it can also happen if overhead lines rupture or leak. The cost of cleaning the basement is high, and a small part of the unfinished basement has a concrete floor at the bottom of the scale, and the finished basement is used more in drywall, floors, and ceiling tiles. Maintenance ranges from a simple extraction to major structural and electrical maintenance.

COST OF WATER EXTRACTION BY TYPE OF WATER

The first step is to remove the moisture. This includes removing it from any water source as a flood defence or water source. It reduces the risk of damage to real estate structures. The extracted water can be used for irrigation as well as other possible uses. The source is a factor that affects the amount you can pay for the drawer service.

There are three types of flooding: clean, grey, and black. Gray, also called stain, occurs in tubs, sinks, washing machines, etc., and contains small amounts of contaminants but no faeces. Ingestion can cause health problems, but may not be fatal. The black water comes alternately from sewers and toilets and is contaminated with faeces. Its consumption can have serious health effects. Exposure can also cause structural Find Water Damage Restoration Area to buildings. Clean water does not contain chemicals or droppings, but exposure can cause structural damage to buildings. This is the easiest type to extract because it requires fewer security measures. 

The price of supply water per square foot ranges from $ 3.50 to $ 7.25, depending on the volume, equipment used, and the area affected.

FLOOD SIGNS

Not all flood damage is immediately apparent. While damage can be seen after a severe storm, some types of moisture problems can develop within months. Paying attention to the signs as early as possible is essential to reduce lasting effects. The longer the structure is exposed to a humid environment, the greater the extent of the damage.

Peeling and cracking of paint on walls and ceilings are significant signs of Looking For water damage in Anaheim. As moisture builds up on drywall, it expands and compresses the paint on the surface. You may also notice discolouration of the paint as water can contaminate the wall paint.

Another sign to watch out for is that the flooring will warp in contact with water. If the point hits a corner or a wall in the room, the damage to the floor can be ignored for a while. If you see warping in wood and vinyl floors, they may be exposed. Another common sign is to recognize wet areas in the carpet.

Significant deflection of walls and ceilings indicates the need for repair service. When saturated with water, drywall loosens. Mould visible on the walls is another sign, but not everyone is aware of mould in their home. Contact with mould before it is discovered can cause a distinct musty odor or cause allergies. This odor is particularly irritating in places like basements. The smell is similar to the smell of damp, mouldy clothes. Unfortunately, it’s not uncommon for homeowners to spot and confuse mould growth.

If your water bill goes up for no apparent reason, a leak can cause potential Looking For water damage in Anaheim. For reference, water companies typically provide graphs that show average usage over the past month. In addition, if you hear the sound of running water, if the water source is not found, serious leaks may occur, so measures should be taken immediately to prevent further damage.

Bad weather caused extensive damage to homes and often caused severe flooding. One of the hardest things about storm damage is losing control over nature. Natural disasters such as hurricanes and tornadoes can leave large amounts of water behind. 

Equipment that rests on pipes, plumbing, or gaskets can cause and look For water damage in Anaheim. Your refrigerator and dishwasher may start to leak and need repair. Other potential sources of leaks include air conditioners and water heaters. HVAC systems may need repairs to prevent leaks or flooding. 

Author Bio:- Walter Mealey

Walter is a marketing manager at EZ Flood Restoration USA. With extensive knowledge of water damage and flood restoration, he writes articles about the cause and remedy of Mold growth, remodeling Kitchen and Bathroom with latest plumbing innovation and technology, how to Crawl Space after flood, and tips to get rid of Fire and Smoke Damage. Stay updated with recent articles and grab comprehensive knowledge of common ways the flood damage affects your home and business and what proactive steps you take to overcome it as well as modern tools that can keep you alert about the happening of natural and accidental uncertainties.