10 STEPS TO KEEP YOUR PIPELINE DURABLE AT ALL TIMES

Bursting of pipes isn’t something you really want to get into, considering the severity of the effects that would follow. From floods or unpleasant and dangerous puddles to poisoning, these are risks you may not want to run into. Especially if there is something you can do about it.

Just like you’d take care of your gas to reduce risks of gas leakage in the house, it is also imperative that you take good care of your pipeline to make them stand the test of time. This guide explores ten common causes of pipeline problems that may make them burst and what to do about it.

1. Extreme Water Pressure

Water pressure is one of the most common factors linked to the bursting of water pipes. Ideally, if the pressure levels spike to levels that your pipe won’t contain, it will burst.

The bottom line here, therefore, is to keep checking your pipeline to ensure that the pressure levels are within the recommended ranges. This will help you avoid the risks of the sudden surge in water pressure that would cause your pipes to burst.

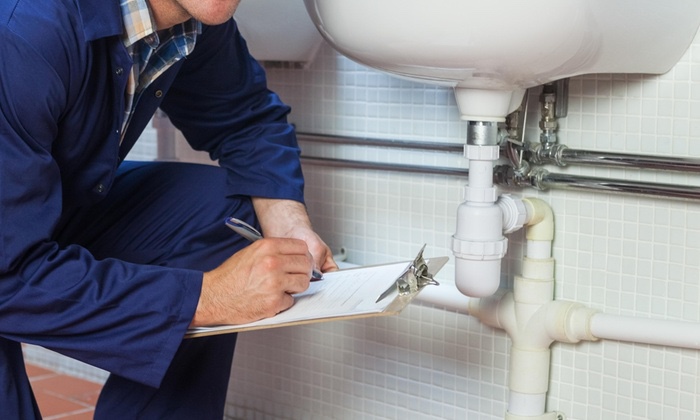
You can know for sure that your water pressure levels are within the ideal limits by monitoring them using a water pressure gauge. You will need to hook it up to your hose faucet to get accurate water pressure readings.

The ideal water pressure should average 30 to 50 psi and not go past 60 psi. If you notice that the pressure reading is 60 psi+, be sure to contact an experienced plumber to install a pressure valve that will help you keep the pressure levels at the ideal limits and avoid pipe bursts.

2. Freezing Temperatures

Cold temperatures are not really a concern until when the water in your pipes begins freezing. The freezing of water in the pipe increases the pressure in your pipes, thus increasing the pipes’ risks of bursting. You can manage this risk to prevent your pipes from bursting by turning your faucets on to release a steady water flow and prevent pressure buildup. 

3. Corrosion

Most pipes can give you a long-term service, but this does not mean that they will never get damaged. Corrosion is a relatively common cause of pipe bursting, especially for pipes that are used for long periods.

Ideally, the risks of your pipes bursting due to corrosion after long periods of use would be high if hard water passes through the pipes. Over time, the unfavorable pH balance of the water may cause corrosion, leading to a buildup of rust and ultimately bursting of the pipe when the rust blocks it completely.

You can slow down the rate of corrosion on your pipe by ensuring that your water is chlorinated. This will help clear away harmful bacteria like legionella, which thrive in corroded water pipes.

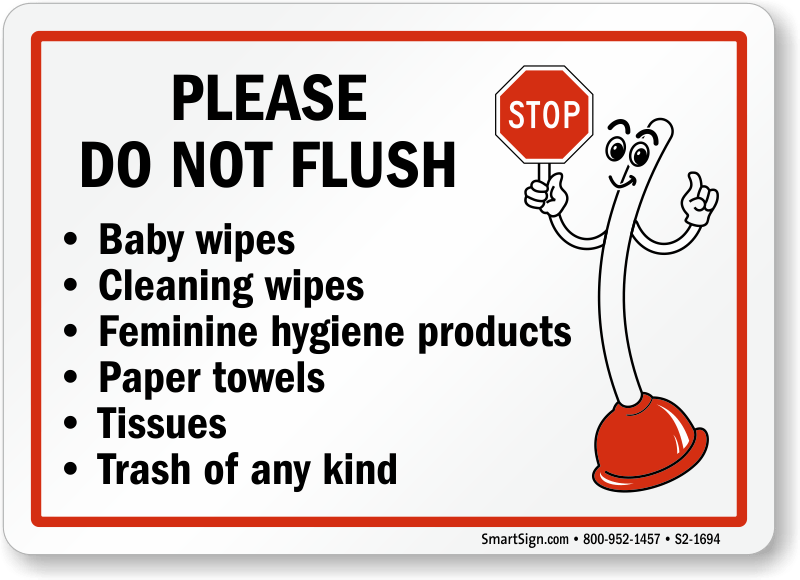
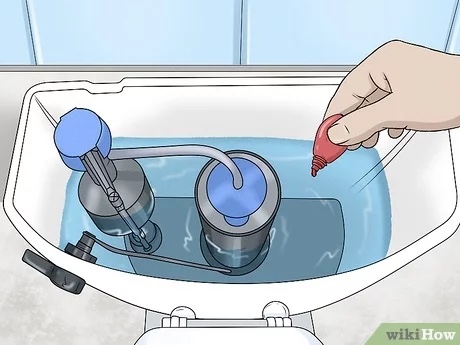
4. Flushing Big Items down the Toilet

Flushing big items down your toilet isn’t a wise idea as it increases the risks of your pipes clogged. Again clogging in your pipes would increase the pressure inside your pipes and increase the risks of bursting.

Managing this risk is pretty straightforward and would not need an expert intervention unless you’ve noticed a leak. Simply find a way of getting rid of items that may clog your pipes, like sanitary pads, instead of flushing them down the toilet.

5. Leaving Home During Winter

If you live in a cold area and you are just coming back home from a vacation and you suspect that your pipes could have burst, the number one culprit, in this case, is freezing of the water. Just as mentioned early, freezing of the water increases pressure in your pipes, and this may make them burst.

To avoid this risk, if you stay in a cold area, leave your heat on if you will stay away for quite some time. It would help if you keep the heat just above 10ºC or 50ºF, as this would do a good job preventing the freezing.

6. Cracks or Holes in the Pipes

Cracks or holes in pipes aren’t uncommon and are also notorious contributors to the sudden bursting of pipes. The cracks or holes in your pipes will let cold air inside.

As you probably already know, this would increase the pressure causing them to burst. To prevent the bursting of pipes due to cracks or holes in them, ensure that your pipeline is sealed both inside and outside to prevent cold air from getting into the pipes.

7. Water Hammer Damages

Water hammer damage happens when your pipes bang and rattle when you turn on the water. You can detect this just from the sound whenever you turn on the water.

If this water hammer isn’t managed promptly, it will weaken surrounding pipes and make them burst. Therefore, if you hear strange sounds, have a professional examine the pipes and repair them to prevent the looming problem.

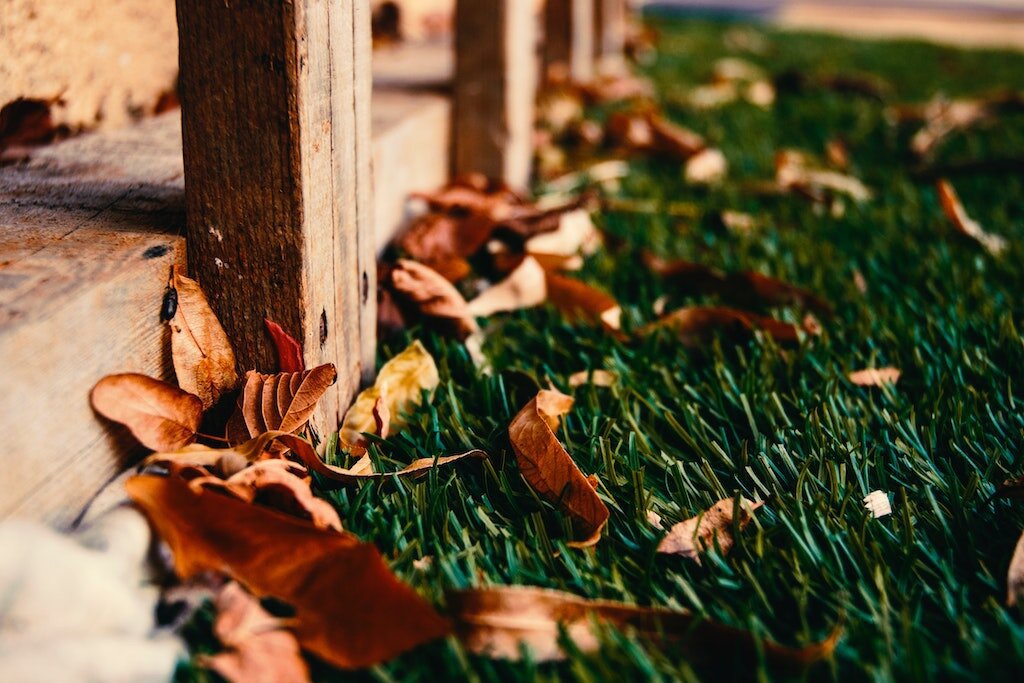
8. Frozen Garden Hose

Now, this is something that you really wouldn’t expect, but a frozen garden hose may also make your pipes burst. Ideally, when the ice in your frozen garden hose expands, it will increase pressure buildup in the pipes, something which may end up making them burst. You can prevent this problem by disconnecting your garden hoses from the pipes during cold weather.

9. Very Cold Temperatures in the Home

Very cold temperatures around the home may also be to blame if your pipes burst. If you leave in very cold temperatures, here’s what you can do to protect your pipeline.

Ensure the temperatures around the areas of your home where the lines pass through don’t drop below 32ºF. You can achieve this by directing warm air to cold areas in the home. You can also apply heating tapes to your pipes.

10. Poor Insulation

If your pipelines pass through areas like the attics or basements with poor insulation, they may also burst. A typical red flag of a frozen pipe is the molds that would form along the property’s exterior walls. 

To manage this risk, you will need to get in touch with a professional who will improve the insulation of your pipes. Any exposed water pipe will need to be properly insulated.

In Closing

You can make your pipeline stand the test of time by taking measures that reduce risks of damage to the pipes. Taking timely precautions will help you prevent damages that may not only be dangerous but also costly to repair.

Author Bio:

Leon Collier is an expert blogger and academic writer based in the UK. He has expansive experience working with experts offering assignment writing services at Write my dissertation. Leon is a go-getter who doesn’t mind taking on challenges thrown at him. He loves to read books and play tabletop games with friends in his free time. Connect with him on Twitter @ LeonCollier12

6 EASY ROOF MAINTENANCE TIPS TO MAKE IT LONG LASTING

Placing a new roof costs a lot and you’ve spent a lot on something, you have to protect it. A roof is something significant to deal with. Some people will ignore that their roofs might need maintenance, and the consequences come when they need to sell the house or roof problems such as leaking. Proper maintenance of the roof should be the best way to avoid unnecessary problems in the future, hence reducing your roof’s cost.

Roof maintenance can be successful by removing moss on the roof, removing leaves, roof coating, checking for shingle damage and prune overhanging branches, preventing ice dams, and checking the attic. Call this Baltimore roofing contractor for all your needs.

Removal of leaves

A simple peaked roof surrounded by a low landscape can probably stay clear, but if trees are nearby and the roofs are complicated, then the roofs are always filled with leaves. The leaves collect near chimneys or in roof valleys. If not removed, the leaves will trap moisture and decompose, then allow moisture to compile in your roof, creating a fertile ground for weeds to grow. If the house is a one-story house with a low-slope roof, then the leaves can be removed using a car washing brush placed on a telescoping pole. A unique tool is known as a leaf rake and a leaf blower can also be used, especially on dry leaves.

1. Removal of moss

Like leaves, moss also damages a roof, but you can remove them by using chemical substances. Roofs that are composed are mostly covered with black algae, and its growth does not hurt the roof. A detergent mixed with water or a little chlorine will finish it off, but it’s advised to leave it alone for the safety of both the roof and you. The moss needs to be killed first if there is a lot of build-ups. It’s then recommended to use products based on potassium salts of fatty acids instead of toxic formulas that zinc sulfate. It can also be removed by applying soap on where the moss is growing and try preventing the wash water from getting in the storm drains.

After the roof is cleaned and free from moss, you should install the zinc strips on the roof to prevent the moss from coming back. The runoff from the strips inhibits the growth of mosts when raining. Zinc strips are more eco-friendly and effective instead of treating the whole roof with pesticides.


2. Prevent Ice Dams

Ice dams are nasty any they cause damage to the roof and removing them from the roof might cause leaking into the house. It’s not advisable to pry off the ice formed already since that can damage the roof. Instead, use a roof rake to remove the snow within three feet of the gutters. One can also get a telescoping pole and work from the ground and if a ladder is necessary, work at an angle that the falling snow won’t push you down.

Air leaks and inadequate insulation into the attic the risk of ice dams, so after a great storm, check on the roofs.

3. Prune overhanging branches and check shingle damages

Tree trimming prevents damage to a roof by keeping moss and leaves off the roof. Friction from leaves and limbs that touch a roof can damage shingles, incredibly high wind. Overhanging branches also give other rodents and squirrels the chance to access your roof; thus, they can gnaw on the roof. The branches should be away from the roof, or if not possible, the tree trunk can be wrapped with a metal-sheet bank to prevent the rodents and squirrels from climbing the tree.

Check the shingle daily since you may never know if it’s damage from something striking the tree. If the shingles are buckled, curled, or missing, then the roof must be repaired immediately.

4. Check the attic

The attic is an indication that shows if a roof needs to be replaced or it’s still holding. If water stains are evident and daylight peeks pass through the boards, then the roofs need to be fixed earlier before any more damages. The attic also shows how well a roof can perform after a big storm.

5. Roof coating

Roof coating is the best method used if you want your roof to last for a long time. There are different types of roof coating that includes;

Acrylic coating: They are durable and inexpensive elastomeric coatings that have potent biocides and emulsion polymers that prevent dirt accumulation on the roof and provide superior resistance to mildew.

Silicone: Silicone coating is the best choice for providing UV protection and resisting pond water. They erode slowly without becoming hard and contain high solids content. You can use less material to achieve this film thickness.

Asphalt Emulsion: It has asphalt particles dispersed in water with clay as a bonding element. It is black or brown and contains inorganic and organic compounds that strengthen and durability of the roof.

Butyl Rubber: They are also the best due to their tensile strength and extreme elongation. It contains a solvent-based polymer that is fast drying, highly reflective, and suitable for roof maintenance and repair.

Importance of roof maintenance

Roof maintenance is essential since it reduces costs used to replace another roof and makes a roof last longer. If you want a long-lasting roof, then you should follow the above steps.

Author Bio

For the past 20 years, American High Tech Roof Coating has been owned by Javier Chavez who runs their company throughout the Los Angeles, California Area servicing commercial buildings that require new roofs but opt into silicone cool roofing instead.

PRACTICAL DESIGNS FOR YOUR BACKYARD PATIO

Your backyard is your family’s personal play space. You’ve got room for the animals and kids to run around, a space to grill out in the summers, and an area for you and your guests to sit and chat. In most cases, the backyard patio is the place a lot of people are looking to improve when they say “I’m going to sell my house.” A simple and practical looking patio can make your house pop before you put it on the market. Not only that, it’ll easily help add to your value and get a great return.

SIZE DOESN’T MATTER

A lot of people think that the size of the backyard and patio limit what you can do, and they’d be half right. But even a smaller space can be personalized to fill a family’s needs. There’s no shortage of ideas for smaller back patio designs. You can go as far as to add a fire pit, a grill, a seating area, and posted plants. Or you can just clean it up, fix some basics, add some decor and a few plants. The key to a small backyard patio is minimalism and efficiency of space.

BIGGER DOESN’T ALWAYS EQUAL BETTER

Assuming you have a good-sized backyard, you have a lot of canvas to work with. With a lot of area comes a lot of ideas. But when it comes to backyard patios, bigger isn’t always better. In some of the best-kept backyard areas, a patio is an accent to make space stand out from everyone else. Some outdoor furniture, a simple grill or fountain, and a few well-placed accents on the patio or even side of the house can change the entire look.

ORGANIZE

No amount of accents, grill tops, or chairs can make a backyard patio work if the whole thing keeps you from getting to it. We don’t mean to hire a feng shui master to make sure the elements align for good flow. But making sure you do not trip over a garden gnome when you try to sit in a chair would be a good start. The basics you want to stick with is to have enough room for two people to stand in between each piece of outdoor furniture or appliance.

We know that you have probably seen some picture-perfect patios with pergolas, a 57″ TV, and a hidden beer fridge that pops open with a key fob. That might be right for the millionaires, but keeping up with those might not be practical. Getting creative not only will help keep your space practical, but it’ll also save some money. Recycling old pallets to make border planters, or even just cleaning up the old grill can help add to your outdoor space. There’s really no limit when it comes to having a practical design for your backyard patio.


Alex Capozzolo is a partner of Henry Buys Homes, a real estate company in Jacksonville, FL. He has been writing for the real estate industry for several years. Henry is a licensed agent that operates in the Florida market.

YOU MUST AVOID THESE 4 AMATEUR UPHOLSTERY MISTAKES

The easiest way to transform the interiors of your house is to upgrade the furniture. But isn’t that a tad too expensive? 

What if I tell you that you can do exactly that but without carving a hole in your pocket? 

Reupholstery is an effective way to revamp your house and get rid of your old and worn out furniture. You can find professional upholsterers who can help you redesign the interiors of your house or take on a DIY project. While professionals bring you years of expertise and the right tools, DIY is somewhat a challenge. Either way, you will be able to get an upgrade at a fraction of the price you would have spent on purchasing new furniture. 

There are a number of Youtube videos that can help you but it is not as easy as it seems. While they can assist you gear up for the job, the techniques and suggestions shared are sometimes inconsistent which leads to mistakes. Don’t worry! We will help you. 

Here are some common amateur upholstery mistakes that you must avoid. 

USE THE RIGHT TOOLS

The first step to upholstery is getting the right tools for the job. The most common rookie mistake is using the wrong tools. While purchasing the necessary tools may seem an expense but it will be worth it. In other words, you need a staple remover to reupholster otherwise you will end up doing the job in double the time. So, prioritize – time is more important for you or a little money. 

To put things into perspective, just like any other DIY project, why do you want to use a sword when you have a gun?

COMPROMISING THE QUALITY

Restoring the interiors of the house is always exciting. We all want our house to look presentable. While reupholstery is an effective alternative to purchasing expensive furniture, there are several things you need to take when taking up this job. One of which is ensuring that you do not compromise the quality. 

Chiefly, the purpose of upholstering is to make your room and furniture look the best wherever it is placed. Most people fall into the trap of budgeting and end up compromising the quality of the fabric. In the end, you should understand that the whole purpose of upholstery is to renew your old furniture. And you do not want to do that with poor quality fabric. 

While being economical is something that we will not hold against you as in most circumstances it works best, it is not the best option in this case. In other words, when you are restoring your old furniture, you do not want low quality fabrics which will not hold their ground in a few years. Then what is even the point of upholstering? Low quality fabrics lose color and get worn out easily. That means for a little more money, you can purchase premium fabric which will make you design your dream furniture without any hassles. 

DO NOT FALL FOR TRENDS

In an attempt to remain updated with the latest trends in the world of furniture and interior design, do not go overboard with unwanted items. Simple is the new beautiful. Sober is the way forward, so do not overburden yourself with over the top items. Instead, reupholster your furniture and suit it with the style that suits you. 

Most people get overwhelmed with the trending designs and try to replicate it in their homes. That does not always work well. Rather it is best to go with what you like and what resonates with your personality. This will help you create a timeless decor that you always wanted. 

LIVING ON FALSE HOPE

There is one thing worse than losing good furniture is keeping it even after it has worned out a little too much. There is no point trying to prolong the life of already dying furniture. You are just wasting your time and effort on something that just won’t work. If not today, it will die tomorrow. You must realise that they have finally reached the end of their useful life. 

Also, avoid purchasing furniture from garage sales or thrift stores. There is a reason why they were being sold at those places in the first place. Which is precisely why you must avoid the upholstery mistake of trying to make them look presentable. But if you do want to purchase it from such places, begin by thoroughly inspecting the used piece before you invest too much in revitalizing it. 

Do not just skim through the surface of the furniture but take a hard look at its underside. If you see something wobbling and dangling, the best thing to do is to avoid putting down any money for the purchase. Instead, in that case it is better to invest and purchase new furniture

CONCLUSION

If you enjoy upholstery and want to practise restoring your old furniture, you must avoid the aforementioned mistakes. We do not want you to make such costly mistakes. Precisely why we drafted this guide. In case, if your DIY project seems too much, you can always have professionals help you with it. Rest assured, your house will look as elegant as you wanted it to be. Isn’t that all what you want? 

So, do not settle for factory grade material when you can make your own and that too at a fraction of the cost. 

Share with us your experience in the comment section below.

10 BEST ECO-FRIENDLY KITCHEN COUNTERTOP OPTIONS

If you’re renovating your house, start from the kitchen. You can have a non-toxic cabinet finish and other sustainable materials, but what about the countertop? Are you sure if that’s eco-friendly? 

Installing a stunning countertop makes it the room’s focal point, but not all countertops are eco-friendly. To illustrate: Granite is used for making countertops; granite is a non-renewable resource and often has to travel long distances, so if they are not sealed properly, it can off-gas radon, a colorless, odorless radioactive gas. 

Here are some eco-friendly countertop materials that can add a stunning look to your kitchen and also ensure you to be sustainable: 

PaperStone

This countertop material is made from recycled paper and petroleum-free resin. When it comes to durability, paperstone is as strong as steel. In addition, these materials are available in different sizes and thicknesses. Therefore they can be cut and optimized for your project. 

IceStone

Icestone is another excellent countertop material made from glass and concrete. Hundreds and thousands of wine bottles were dumped earlier. These glasses are diverted to icestone slabs by combining with concrete. 

Therefore, many glasses that were previously termed as garbage materials are now recycled into durable materials like icestone. Icestone is 75% recycled glass in weight. This makes an excellent sustainable option. 

Durat

Durat materials are made from 28% recycled plastic and over 200 tons of plastic have been converted from the waste and processed to make this countertop material. They are manufactured in Europe and the US. This is a sustainable option as this is made from recycled plastic. 

Lapitec Sintered Stone

Tired of stains and scratches on the countertop? Sintered stone is made by fusing the minerals into a completely impermeable surface by heat and pressure. Moreover, the integrated technology of sintered stone kills harmful bacteria on the surface. 

They are scratch and stain-resistant. But, most importantly, they also clean the air. This material has an integrated titanium dioxide technology that purifies the air and breaks down pollutants. 

Eco by Cosentino

If you prefer a quartz countertop, this is one of the excellent eco-friendly options. Eco by Cosentino is the company’s contribution to utilize waste. However, Cosentino still pushes the primary line on non-recycled quartz. 

Eco by Cosentino is 75% recycled material and contains materials like a mirror, glass, porcelain, earthenware and vitrified ash. Therefore, adding a quartz-like look to your kitchen can be a good option with a better background. 

GEOS

GEOS materials are made from recycled glass and resin surfaces and they sometimes offer a more durable surface than concrete options because they use petroleum-based or epoxy resins. At Least the glass is recycled in this process and not ended up in some landfill. 

TorZo

TorZo surfaces are appropriate for vanity tops or tabletops. They use wood fibers for manufacturing that would be left behind and use an acrylic technology that makes it ten times more durable. 

Reclaimed Wood

This is a great sustainable option if you don’t mind the counter ‘wearing in.’ But, again, if you accept the wood limitations, reclaimed wood can be a very suitable countertop option.  

Richlite Composite Surface

Richlite is an FSC certified product. How is it made? Post-consumer recycled paper is stacked up and saturated with a phenolic resin and brought under heat and pressure. Due to the effect of heat and pressure, the resin sets permanently with zero off-gassing. 

Moreover, Richlite is a popular option for interior and exterior applications of kitchen and other bathrooms. This is gorgeous and attracts your attention. 

Bamboo

Bamboo can be a great surface option for countertops as it is economical and durable. However, not all bamboo surfaces are reliable enough. If you find a viable supplier like Plyboo, ecoFusion or Kerei, bamboo can be a good fit. 

Bamboo surfaces make a great vanity top or tabletop material. Bamboo is harder than many hardwoods and they last for a longer period like the wood countertops. There are also a lot of color options for bamboo countertops according to your preferences. 

Conclusion 

Kitchen countertops play a great role in your journey to a sustainable home. Cabinets and other kitchen options are quite easy to replace, but most of us are unaware of the countertop surfaces. Eco-friendly countertop options are not dull at all. They are just like the other countertop options, but the plus point is that they are organic and do not impact the environment and last longer than any general surface. Therefore, be wise to choose the right countertop according to your needs. 

Author bio:

Jared McMillen

Jared spent most of his working life in financial markets. He observed corporations making decisions for profit regardless of the impact on the environment. As these decisions were outside of Jared’s control, he decided to make changes in his own life to help our planet. 

Since then, he’s been spreading the knowledge of how families and households can have a sustainable lifestyle and consume what’s best for them.

Website: www.theecofriend.net/ 

8 TILE DESIGN TIPS FOR BATHROOMS AND KITCHENS

Designing your bathroom usually revolves around heavy use of tiles. This is because both of these rooms produce a lot of backsplashes and the water-resistant properties of tiles make them perfect for these scenarios. Still, just knowing that you should use tiles and knowing how to actually use them are two completely dissimilar things. With that in mind and without further ado, here are the top eight ideas that you could use.

1. Not just for kitchen and bathroom

The first thing you need to understand about tile decoration is that it’s not just something for the bathroom and kitchen. Sure, its durability, ease of maintenance and water-resistance are the main reasons why in these two rooms tiles are an obvious choice. In the kitchen, a backsplash is a part of the iconic look, something that you expect to see in the kitchen, to begin with. However, you need to start thinking outside of the box. There’s no reason why you shouldn’t use it as a flooring option in your hallway or living room. After all, there are the areas with the most foot traffic.

2. Wall tiles

Wall covering tiles are an amazing idea for several reasons. First of all, they’re a natural extension of a tiled floor. This makes the entire area look much more natural and homogenous. It also leaves a lot of interesting decoration options. For instance, you can use various colors and patterns of tiles and make a wall mosaic. Keep in mind that some patterns may create an illusion of depth (thus adding a third dimension to the whole area). Remember that wall tiles may fit any setting that you have in mind.

3. Manipulating scale

Various tile patterns can be used to manipulate space so that they create the impression that your bathroom is either larger or smaller. The first is usually a more popular choice, seeing as how bathrooms are usually the smallest area of the home. By choosing the right size and type of tiles, you can create a scenario where the area gets visual depth, thus making the place feel a lot larger. Now, some ceramic tiles (especially in their base non-matte form) are quite reflective. This allows them to enhance the influence of natural light in the room

4. Mimicking natural materials

The majority of tiles are ceramic but they come in all styles, shapes and patterns. For starters, you need to figure out what kind of style you want in your home. You see, quality porcelain tiles have all the properties that you’re looking for when it comes to choosing a wall and flooring option. At the same time, they come in shapes, finished and patterns that resemble natural materials. So, what makes them superior to the original materials? Well, it’s cheaper than stone, more durable than wood, PVC or laminate and simpler to install than the majority of other alternatives. In other words, it’s a perfect combination of cost and value.

5. Consistency of colors and patterns

One of the best aspects of the versatility of tile decoration is the perfect ratio of colors and patterns that you can achieve this way. For starters, you have so many options to choose from that it will fit virtually any style. You see, when painting the room, you need to make sure that your strokes are evenly distributed. Otherwise, you have to hire a professional in order to ensure this quality of works (as well as the absence of mess). With tiles, the majority of these problems will be nonexistent. Also, each tile is of the same size, color and other properties.

6. Combining with the carpet

Tiles are clean, easy to maintain and great for those who suffer from allergies. Sure, because tiles are cold, people usually solve this issue by adding a carpet, which is a vast contrast when compared to tiles. This is a good thing, seeing as how carpets are there to make up for all the shortcomings of tiles. They are soft, warm and don’t produce much noise when threaded upon.

7. Playing with contrast

One of the best ways to create visual contrast is to use tiles in your bathroom design. You see, while it is customary for tiles to be of the same shape and color, this is by no means the rule. The traditional 50s kitchen look revolves around a checkered black and white ceramic tile floor. In reality, you can go with any color you want. You could also borrow some of these ideas during your next kitchen remodel. You don’t even have to stick to the same size of tiles. The key thing is that you learn how to play with contrast to suit your own style.

8. Accent wall

So, you want to go for a tiled wall but fear that you won’t be able to make it all the way? Well, the best solution for you would be to go for an accent wall. This is a more common technique when it comes to wall painting but even with tiles, there’s a way for you to get things done. Just pick a wall and go all-in with tiles. Picking a different color from the rest of the room will give a great effect, especially if you’re going for a monochrome design.

In conclusion

Of course, tiles have their downsides, as well. We’ve previously mentioned that they’re cold but they are also quite slippery. While these are issues that are relatively easy to solve, it is worth understanding what you’re getting into before proceeding. All in all, ceramic tiles are one of the most cost-effective and versatile solutions for both your floors and walls.

Author Bio:

Gabriel Hill is an Australian blogger interested in various spheres from home improvement to health and management. 

8 FALL DECOR CURB APPEALS

We all know curb appeal is important, everyone strives to have a nice looking front lawn. What happens when Fall rolls around and it’s time to decorate? It’s absolutely possible to have a gorgeous fall set up that will more than likely boost your curb appeal! Having people stop and admire your work is definitely the goal. Here are some inspiration pictures that are sure to leave you with a gorgeous front lawn.

Simple, but cute! The welcome sign can be seen from the street, and fits in perfectly with the oranges of the leaves and pumpkins. The little tree is a nice touch too!

Are you looking for bigger decorations that are easily visible? Big plants and pumpkins are your go-to! Staggering them going up the stairs is sure to add dimension and variety, and looks gorgeous!

This is a cute way to display your address for guests to see! Make sure it’s placed tall enough to be visible from the street.

If you want to jump right into mixing fall with halloween, this is the perfect little corner set up! Add a variety of jack-o-lanterns, along with some different styled pumpkins to add uniqueness!

Do you have a long walk up to your doorstep? Throw in pumpkins to create a trail on the way up with different shades of fall-colored flowers!

Do you have a little nook corner space on your front porch for sitting? This is the perfect opportunity to surround the seats with fall-related decorations! You can even throw in some fall throw pillows if that’s something you’re interested in. Nothing like getting cozy on your front porch in the September breeze with pumpkins surrounding you!

Another cute way to display your mailbox and address to visitors!

COMMON PLUMBING PROBLEMS PEOPLE TRY TO FIX, BUT THEY SHOULDN’T

A father and son cleaning the bathroom sink.

Sooner or later, everyone runs into plumbing issues. Regular checkups and constant maintenance can do a lot to alleviate problems and prolong the life of your home’s pipework. However, breakdowns will happen over time, and when they do, you should call a professional to repair them. This article will cover the five most common plumbing problems people try to fix, but they shouldn’t. People indeed learn from mistakes, but perhaps you could learn from someone else’s errors this time.

1. Clogged drains

Clogged drains may seem like a trivial issue that you can handle yourself. Most people make this mistake thinking they are up to the task and head to their local store. They end up pouring store-bought chemicals down the drain, hoping for the best. However, acids and soda-based chemicals can not only damage the tiles or the sink around your drain, but they can also cause wear and corrosion on the protective lining of the pipes.

Most importantly, applying chemicals yourself can lead to serious injury if you don’t handle them with care. You could spill some on your skin or inhale the toxic fumes. Even other alternatives, such as utilizing a plumbing snake yourself, can damage your pipes. Although plumbers use some of these techniques, they are trained in a whole range of drain cleaning methods, including airburst and hydro jetting. They also have the right tools for the job.

2. Low water pressure

Water pressure issues are often symptoms of more serious complications. Multiple things could affect your water pressure. Fiddling around without knowing what you are doing is just asking for trouble. This is one of the more common plumbing problems people try to fix, but they shouldn’t because they can cause a whole slew of problems. It could even turn out that the problem doesn’t stem from your home but is an issue with municipal water. Therefore, you shouldn’t try to fix or replace something yourself; just go ahead and call a plumber to find the root cause.

It will take a skilled plumber to find and diagnose the cause of the low water pressure. Usually, the guilty party is a cracked pipe, eroded water line, or a hidden leak. All of these causes are beyond the ability of a layman to accurately spot and repair.

Pipes often rust from leaks, so there could be more underlying issues.

3. Replacing pipes

Replacing even a few rusty pipes can quickly turn out to be a complex task and be more than you bargained for. You’ll need to shut down water to your home, and if done improperly, it can leave you without water for a prolonged time. Worst of all, you could cause a leak or burst, which can cause your entire home to be in a state of disarray. It’s best to store your possessions away before starting up a project like that. And it is all the more important if you have a collection of fragile items you don’t want to lose in the battle with your plumbing. So, pack these delicate pieces correctly and ensure safe transportation for breakables and get them to storage. Sometimes the entire plumbing system of a house needs to be replaced. Call a plumbing service and get their estimate on how long the project will take. Unfortunately, if you have pipes that need replacing, it’s often more than just one pipe that is faulty.

4. Broken toilet

Broken toilets are probably the number one plumbing problem people try to fix, but they shouldn’t. The mere thought of having to wait before they can use their toilet is enough to encourage people to look up various DIY solutions online. However, without the proper knowledge of how toilets are designed, you could easily make a mistake and improperly install a new one. 

Toilets use a siphon and rely on a water seal.

To ensure functional flushing, you will need a good connection to the pipework of your home. Water flow needs to be strong enough to get the job done, yet it needs to create a seal, isolating the toilet from the rest of the pipe network. A botched installation can cause water damage to your entire bathroom, and worst of all, you might not initially notice the problems. Keep in mind that if your toilet is frequently clogging, it might be preventable if you take the proper precautions. 

5. Frozen pipes

We’ve seen too many situations of people thinking they can defrost their frozen pipes with enough heat. Sadly, it’s not so easy, and we’ve replaced pipes whose owners damaged them with blowtorches or other improvised tools. The intense heat will cause your pipes to leak or break, and there have even been instances of frozen pipes bursting when they are heated too quickly. Honestly, if you want to do something about your frozen pipes, the best course of action you can take is preventing the pipes from freezing in the first place. Pipe thawing is a complex process that requires specialized gear.

Don’t try to thaw your frozen pipes by yourself.

The best time for plumbing work

Any seasoned professional will tell you that it’s best if you do a complete plumbing overhaul before you move in. The house will be empty, meaning that the work will be done faster and without any distractions or obstacles. Contractors may even give you a better rate if you aren’t on the property while they are performing the work. Additionally, it will be easier for you as well. You can then focus on the move, get several moving estimates, and plan all the costs with ease. When you move in, the works will be over, and the house cleaned up and looking fresh. What’s best is that you won’t have to worry about any plumbing problems for a long time. Everything was done by professionals well before you moved in, and you can rest with ease and enjoy your new home.

In summary

Be very careful before attempting any improvised DIY solutions you looked up online. Having a professional plumber on call will be the fastest and most reliable way to take care of any issues with the pipes and drains in your home. Be mindful of these five common plumbing problems people try to fix, but they shouldn’t, and avoid making those mistakes yourself. It’s usually cheaper and more efficient to leave the work to the professionals.

Meta description: Think twice before you do any DIY plumbing. Here are five common plumbing problems people try to fix, but they shouldn’t since that can only lead to trouble.

Guest Contributor: Sophia Perry

ANNUAL DRAIN CLEANING

Like everything else in your life, you need to maintain your plumbing drains. It’s recommended that you are constantly checking drains for clogs, back ups, broken pipes, anything that could lead to a back up in your pipes. We recommend if you have plumbing work done such as rodding your clean out, have it rodded yearly around the same time each year to prevent back ups from occurring. It’s always best to prevent a back-up than having a back-up and it turns into an emergency.

Although we suggest calling us back out again to take care of your potential stressful situation, there are a few different ways you can maintain your plumbing at home by yourself.

1. Watch What You Flush

Realistically, nothing is supposed to go down your toilet drain other than toilet paper and your own waste. You should never flush things down your drain that aren’t meant to be put down there. Over time, flushing things down your drain is going to cause build up and eventually lead to a clogged sewer line which is a stressful situation. Things like feminine hygiene products, Q-tips, plastic, wrappers, “flushable” wipes, baby wipes, food/grease, can all cause a back up and eventually they will cause one, whether it’s sooner or later, it’s not going to be good. Avoid having to call a plumber to rod your toilet by refraining from dumping things in the toilet and instead putting a trash can in the bathroom for all garbage you might have.

2. You Can Check With Food Coloring

If you’re worried your toilet is leaking, you can try to test it out with food coloring. Take red or blue food coloring and put it in the tank of the toilet. If it leaks into the bowl after about an hour, you know you have a leak. If after an hour it didn’t leak into the toilet you’re all set. The food color leaking suggests you replace the tank ball to prevent it from leaking. Changing out this tank ball can also save you money by lowering your water bill. A leaking toilet is definitely going to rack up your water bill, and you don’t always hear it running.

3. Clean Your Shower heads

All plumbing fixtures can be clogged with mineral deposits, your shower head included. These mineral deposits can cause your shower head to be so clogged it doesn’t work, or it won’t be as effective as it should be. To clean your shower heads, you should unscrew them and soak them in vinegar for 24 hours. Make sure the whole shower head is soaked in the vinegar to get the deposit off. Once the time is up you should be good to go to screw it back on, however, if the mineral buildup is too thick or the shower head isn’t in the best condition and it’s effectiveness isn’t as good as it used to be, you should consider getting a new shower head.

4. Mesh Covers

There are so many different types of covers out there to purchase that can protect your drains from getting clogged. You can find these almost anywhere in stores such as Target, Wal-Mart, Lowe’s, Menard’s, even online on Amazon. These mesh drain covers protect your drains from hair and soap, the number one thing that leaks to a clogged drain. Using these mesh drain covers allows the things that are too big to get stuck in the mesh which then after every use you can throw away and save your pipes from a blockage and needed to be snaked.

5. Make it a Habit to Inspect Your Plumbing

Like it was mentioned before, your pipes need maintenance. Although they’re not high maintenance usually, you should always be on the look out for any potential problems and address and fix the problem correctly before it escalates. Repairing plumbing before it turns into an emergency is going to cost you less money in the long run and you’ll be glad you fixed it sooner rather than later. If you notice any type of rust or corroded pipes, you should immediately call a plumber to discuss what options you have.

Don’t forget, we’re always here for you! Give us a call if you need any plumbing work done. 708-845-7922.

YOUR COMPLETE FALL HOME PREP AND MAINTENANCE PLAN

Autumn is a time of renewal and gives us a chance to start anew. Since we’ve had the opportunity to take care of our homes and ourselves both inside and out, it’s time to prepare for the fall season and do some home maintenance. This time of the year represents Harvest, which is a time to acknowledge growth and expansion as a natural part of our well-being. Just as our lives go through various cycles like growth and rebirth that we see in nature, we can do the same for our homes and ourselves. Read on for a list of fall maintenance tips that will help you get excited about the upcoming season.

INDOOR FALL MAINTENANCE TASKS

Consider these tips to help you prepare the inside of your home for the fall season:

Indoor maintenance. Now is the time to inspect things like your plumbing, electrical wiring, and panels. Ensure that all plumbing is properly insulated and that all outdoor faucets are covered and prepped for cooler weather. Look in the attic to confirm that the roof underlayment is intact and that you have adequate insulation to keep your home warm.

Heat. If you have a fireplace, fall is a perfect time to clean or sweep the chimney and have the fireplace inspected. Check your gas stove to ensure it’s working correctly, and ask for an HVAC system inspection to confirm that your heat is working correctly. It’s also an excellent time to change your air filter. If you have oil heating for your home, now is a good time to fill your tank up.

Home appliances. Do a quick inspection of all major appliances to ensure they work. If anything is broken, get them repaired or replaced, particularly your refrigerator, oven, washing machine, and dryer.

Declutter. Refresh your entire home by doing some thorough decluttering and organizing. Get rid of old electronics like unused cell phones, computers, and small appliances. It’s also a good time to dispose of expired medications. Shred all of your old bills and go through your home office to get rid of outdated paperwork. Fall is also a perfect time to declutter unworn clothing, shoes, bedding, towels, and summer items like hats and swimsuits.

Décor. Dust off your spring and summer décor and put it in storage. Now is the time to bring out the autumn and winter décor to celebrate this exciting time of year. Anything that doesn’t work or no longer brings you joy can be donated, sold, or recycled if possible.

Reorganize. This is a perfect time of year to reorganize and declutter the kitchen and pantry, your bathroom cabinets, and the shed or garage. Separate items into things you want to sell, give away or throw in the trash. Clean out your pantry and throw out expired food. Organize dry goods and place them in clear canisters, then label them so you can find them easily.

Recycle. Look for any items in your home that can go to recycling. You can also do some upcycling and repurpose items like old seasonal décor, discarded clothing, shoes, and even furniture. Get creative and come up with new ways to reuse these items in a whole new way. A simple coat of paint on an old chest or table can give it a brand-new look, for example. Clothing can be sewn into bags or pillows for a fun piece of fall décor.

OUTDOOR YARD AND PATIO FALL MAINTENANCE TASKS

Fall is also a great time to do a bit of outdoor maintenance. Here are a few things you can add to your list to prepare for the season ahead.

Outdoor maintenance. Clean your gutters and remove dead leaves, twigs, and debris. Check all the pipes going into and out of your homes, such as the waterline, gas line, and anything connected to your HVAC system. Look for signs of leaks, rust, or damage so you can get these items repaired now before winter arrives. Test your outdoor equipment like leaf blowers and lawnmowers to ensure that everything is working properly.

Insulate pipes. While you should insulate your plumbing indoors, it’s also time to insulate and protect those outdoor exposed pipes too.

Check for leaks in windows and doors. Do a “draft test” to confirm that there are no leaks in your doors and windows. Add new weatherstripping to keep all windows and doors properly sealed.

Inspect your roof. Look for possible signs of leaks in your roof and keep an eye out for missing shingles. Get all roof repairs done now before winter snow arrives to protect your home and property.

Take care of your garden. Rake leaves in your yard and put them in bags, cover any garden plants that need to be kept warm, and fertilize your plants so they will thrive through the season. Trim dead tree limbs and make sure that all of your plants are properly trimmed, and cover them with burlap (if required). You can also decrease the amount of outdoor watering you need to do during this time of year.

Do a yard and garden sweep. Some areas of the country aren’t impacted by autumn weather until later in the year. If this applies to you, just do a quick cleanup of the yard or garden and determine what you need to put away now and what you can put away later. Check on items that still work, like your outdoor lighting, and confirm if anything needs repair. It’s also a great time to declutter old outdoor items and either donate them or throw them away.

Upcycle garden items. This is also a wonderful time to see if anything outdoors can be recycled or upcycled and turned into something new. Take old wooden palettes and turn them into planters or furniture. Paint your outdoor planters in new fall colors or use some of your outdoor décor to make a cute birdhouse.

Create a schedule for outdoor tasks. Work on creating a schedule for a few outdoor activities you’ll need to tackle later when it gets closer to winter. Some items include checking the roof and gutters to prevent ice dams and a checklist to ensure you have everything you need, like snow boots, snow shovels, and deicers.

Make another maintenance list. Your home isn’t the only thing that needs a little bit of fall maintenance. Make a quick list of other items to check on, like your car, shed or garage, and driveway and walkway. Repair any cracks you see now before winter arrives to prevent them from growing and getting worse.

CELEBRATE THE BEGINNING OF AUTUMN

Since Autumn is a time to start anew, it’s also a perfect time to celebrate. Keep these tips in mind to help you celebrate the upcoming season.

Declutter your life. This is a wonderful time to declutter, clean, and toss out anything that brings you unhappy memories. Only keep the things in your home that bring you joy and happiness. Remember that is not about getting your act together.

Do some fall rituals. Fall is a perfect season to practice self-care with a few simple rituals like yoga or meditation. Play some soothing music, enjoy a long bubble bath, or read a good book to help your mind and body reset.

Light some candles. In addition to some fall rituals, it’s a perfect time to light some scented candles. Aromatherapy can uplift your mood and give your home a beautiful fall-like ambiance. An essential oil diffuser is another great way to fill your home with the fragrances of autumn.

Buy new décor. Decorating your home is a wonderful way to celebrate every season, including autumn. Add a faux autumn leaf garland to your fireplace mantel, hang some fall wreaths, or fill your home with fun Halloween décor. You can also upcycle and create new décor from some of the old stuff you have lying around. This is also a great way to have some fun arts and crafts time with the family.

Celebrate the harvest. Head out to a local farmer’s market and buy fresh produce to celebrate the autumn harvest. A fun hayride or a visit to a local pumpkin patch will get everyone excited about the changing season.

Make delicious fall treats. Get excited about autumn by trying out some new recipes. Make homemade apple cider, bake a pumpkin pie, or come up with your own delectable fall dinners and desserts.

Doing a few easy maintenance tasks for your home is an integral part of taking care of your property as the seasons change. It’s also essential to maintain all your material items and, of course, yourself, too. By decluttering, organizing, and even checking on your health, you can get ready to enjoy the fall season and embrace the growth of what this new season will bring. 

Guest Contributor: Adriana Lopez, porch.com