HOW TO CLEAN A MATTRESS: A STEP-BY-STEP GUIDE

Written by

Slumber Yard Team

A mattress is prone to soiling and needs regular care. Pet stains, food, perspiration, and dust mite accumulation are just a few things that can affect its life. Dust mites, particularly, can aggravate allergies and even cause asthma. The problem may be more common than you think — the American Lung Association says four out of five households have detectable levels of dust mite allergens. 

You spend a good part of each day on your mattress sleeping. Regardless of what is soiling it, maintenance is the key to keeping your investment clean and hygienic to minimize allergies and help you enjoy a restful night’s sleep.

BENEFITS OF CLEANING YOUR MATTRESS

Creating a maintenance routine to clean your mattress regularly comes with benefits. They include: 

  • Reduce allergens: As mentioned, dust mite allergens can cause or aggravate allergies and asthma. Getting rid of microscopic creatures can help reduce allergies.
  • Promote indoor air quality: A clean mattress is an odor-free one. Mattresses that are stained can develop foul odors and release contaminants that can affect your room’s air quality.
  • Extend mattress life: Keeping your mattress fresh and clean is likely to extend its life, saving you money in the long run.
  • Achieve a healthier night’s sleep: Knowing your mattress is clean and contaminant-free can bring you the peace of mind you need to sleep better. Not to mention, you won’t be breathing in allergy-inducing contaminants throughout the night.

How Often Should You Clean Your Mattress

A mattress has nooks and crannies where microbes, stains, and odors can hide. Moisture can be absorbed into the surface, providing the perfect environment for biological contaminants to thrive and multiply. 

Even if you don’t drink or eat on your mattress, your perspiration while you sleep can feed the microbes that live in the fabric and folds. Sheets and a quality mattress cover are a good front line to protect your mattress. You don’t have to clean a mattress as often as you would clean your bedding, but you should still thoroughly clean your mattress every three to six months, and more often if pets sleep with you or you occasionally eat in bed. 

CONSIDERATIONS FOR BABY MATTRESSES

Babies have sensitive respiratory systems. Maintaining a clean, dust-mite-free mattress is essential. However, avoiding harsh chemicals and cleaning products containing artificial fragrances would be a good idea. Give your baby’s mattress an inspection and light cleaning every month or two. Check the manufacturer label on the mattress for cleaning guidance. Simply vacuuming the mattress and giving it a quick wipe down with a damp cloth may be all you need to do. More importantly, wash baby’s bedding regularly and consider using a dye- and fragrance-free detergent.

TYPES OF MATTRESSES

Mattresses come in various types of materials that all have their own requirements for care and cleaning. Here is an overview of the different types of mattresses:

MEMORY FOAM

Memory foam mattresses are among the most popular today but require more care when cleaning than traditional innerspring beds. Memory foam is petroleum-based. The material can have adverse reactions to certain cleaning supplies, such as bleach and harsh store-bought cleaners, which can also yellow or stain the foam. Here’s more on how to clean a foam mattress

INNERSPRING

Innerspring mattresses are usually covered in polyester or cotton material. They may be more responsive to traditional cleaners. However, avoid overly wetting the mattress when cleaning, as mold and mildew can develop if it doesn’t dry properly.

Gel mattress

Gel mattresses are similar to memory foam. The foam is infused with a special gel to give the mattress a different feel or cooling sensation. As with memory foam mattresses, special care should be used to make sure chemicals don’t react with the mattress. 

LATEX MATTRESS

Latex mattresses are typically made of natural rubber. Most people who purchase one choose it for its eco-friendly qualities. To maintain its natural properties, avoid synthetic chemicals and fragrances when cleaning. A vacuum and a damp rag with some mild detergent can go a long way. 

HYBRID MATTRESS

A hybrid mattress can be a combination of innerspring, foam, and gel. Refer to the mattress label for help on how to properly clean and care for a hybrid bed. The top layer may be foam or gel and may need extra care.

HOW TO CLEAN A MATTRESS

If you are ready to start a regular mattress cleaning routine, consider following these steps to clean a mattress.

1. STRIP THE BED AND WASH ALL THE BEDDING

Remove all the bedding and any mattress pads and wash them. The layers over the mattress are the first line of defense against stains and moisture, so wash them regularly. 

2. ASSESS THE DAMAGE

While the bedding washes, look for stains and discolorations and take a moment to decide if any lingering odors need to be addressed. Depending on whether the odor or stains are strong, you can decide how lightly (or aggressively) you will need to clean the bed.

3. GATHER YOUR MATTRESS CLEANING SUPPLIES

Now that you have an idea of how stained the mattress is, you can gather what you’ll need. If the mattress is lightly stained, all you may need is a vacuum and wipe-down with a damp rag. Tougher odors or stains may need some extra TLC. Gather the following supplies as needed:

  • A vacuum fitted with an upholstery attachment
  • Enzyme cleaner or mild dish soap for stains
  • Baking soda to sprinkle on the bed to absorb odors before vacuuming out or to create a paste to spot clean with
  • Absorbent cleaning cloths that can soak up moisture
  • Water, preferably in a spray bottle to control how much you wet the mattress

WHAT NOT TO USE ON YOUR MATTRESS

Avoid harsh chemicals such as bleach or ammonia. Do not over-saturate the mattress, or it may not properly dry, causing bigger problems with mildew or mold later. Artificial perfumes and fragrance sprays may seem like a good idea to hide odors but could affect air quality.

4. VACUUM THE MATTRESS

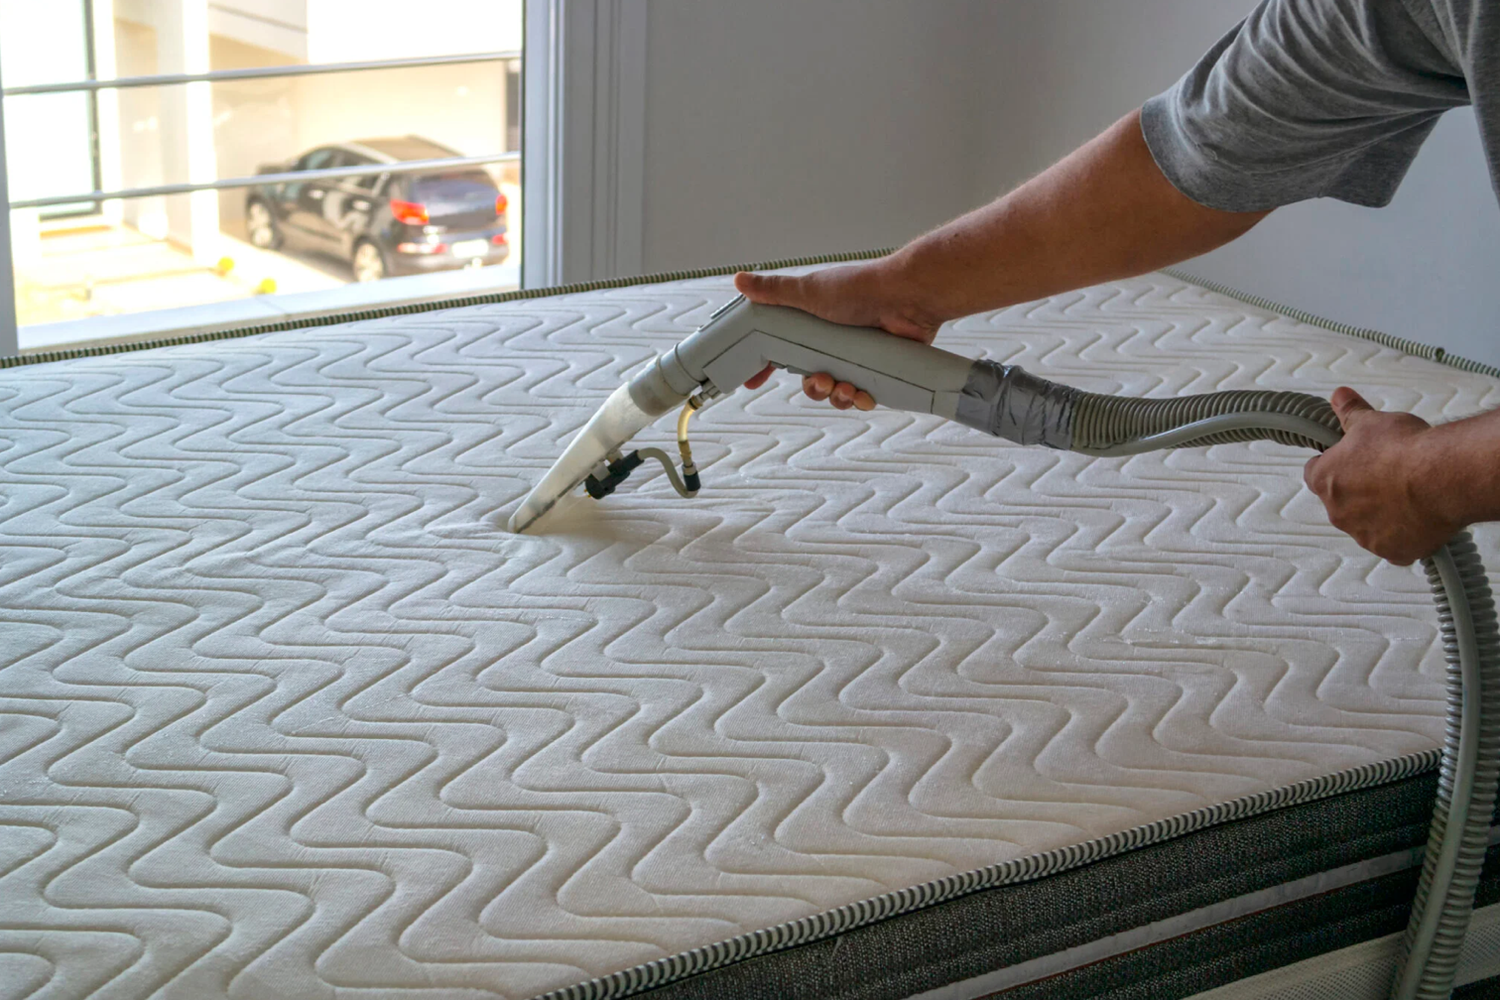
Take a good while to vacuum the mattress thoroughly. Vacuuming is one of the best ways to get rid of dust mites, dander, and other microbes. Get into all the bed’s nooks and crannies with the upholstery brush. If there are buttons, try and brush under them to loosen dust and debris and vacuum it up. 

5. SPOT CLEAN

You may need to target specific stains, odors, or discolorations by spot cleaning them. There are different stain removers and cleaners you could use that work for different types of stains. View our guides on how to clean a mattress based on the stain for more information.

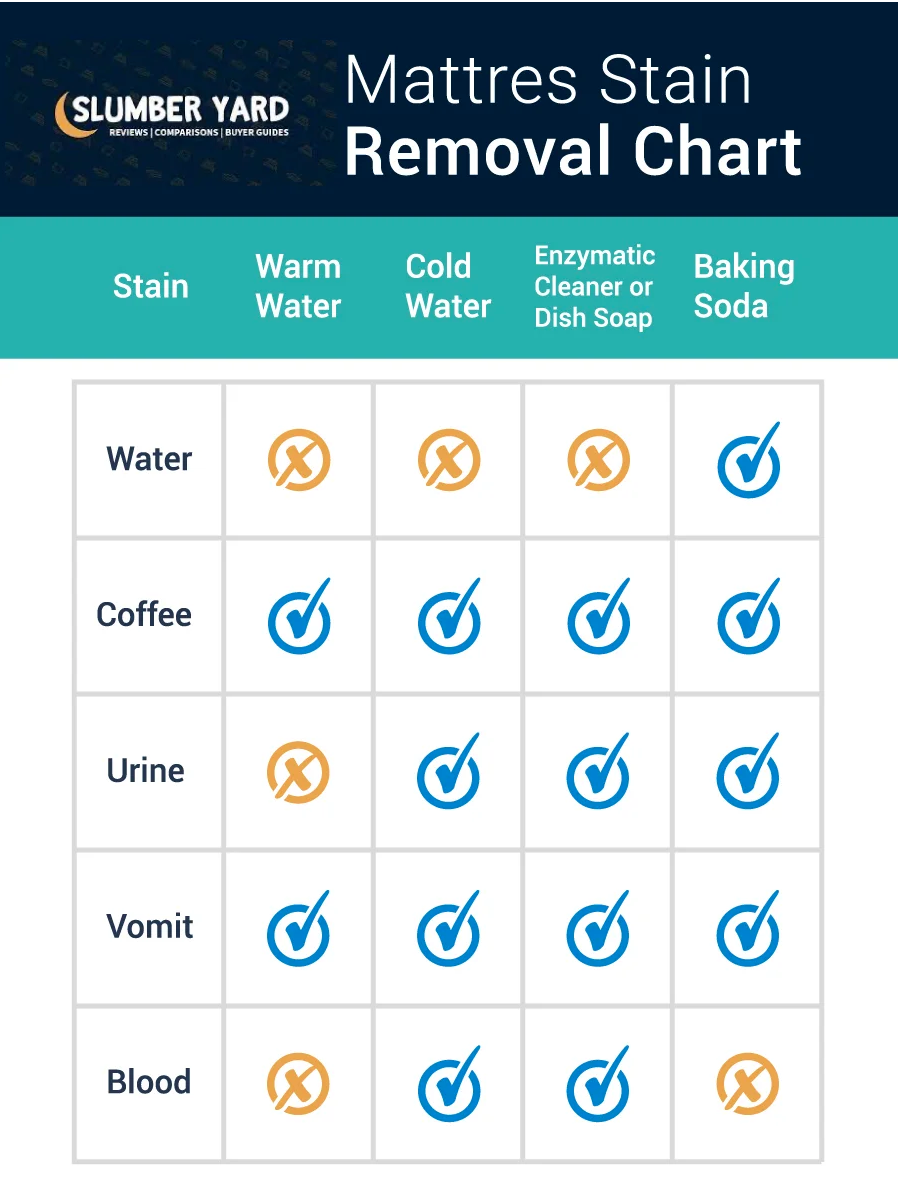
COMMON MATTRESS STAINS

  • Water: Push on the damp area with an absorbent cloth. Place the mattress in the sun (if possible) to dry out.
  • Coffee: Cold water may be all you need to remove the appearance of coffee stains. If the coffee contained cream or sugar, opt for a vinegar solution, enzyme cleaner, or mild soap.
  • Urine (pet and human): Enzyme cleaners, baking soda, or a vinegar solution can help remove the stain and associated odor.
  • Blood: One of the more stubborn stains to remove — avoid hot water. Clean the spot with an enzyme cleaner and cold water.
  • Vomit: You could use nearly any type of cleaner, from mild soap to a vinegar solution, to clean it up.
  • Sweat: Enzyme cleaners, mild soap, or a vinegar solution eliminates most sweat stains and odors.

Avoid soaking or over saturating a mattress, especially memory foam. Excess moisture can get absorbed and trapped deep into the mattress, providing a breeding ground for mites and other microbes, and causing issues with mold and mildew. When spot cleaning, use a dry, absorbent towel to push into the area and absorb any remaining moisture. If you can, allow the mattress to air out before you make the bed again.

How to create natural DIY stain removing solutions for stubborn stains

Avoiding harsh chemicals while you sleep can enhance your health and extend the life of your mattress. You can make your own effective cleaners using a few household supplies:

  • Baking soda paste: Creating a paste out of baking soda and water is an effective cleaner for a variety of stains, including dried blood, food, drinks, and more.
  • Vinegar solution: Vinegar is effective against odors. A 50-50 white vinegar solution can sanitize a mattress and even remove vomit or urine odors. You can always add a few drops of essential oil to your vinegar solution for a fresh fragrance.
  • Hydrogen peroxide: Hydrogen peroxide can lift blood and other stubborn stains. You can even mix it into a paste with baking soda and some mild detergent.
  • Lemon juice: A lemon juice and salt paste could help remove stains from wine, soda, or other discolorations.

6. REMOVE ODOR WITH BAKING SODA

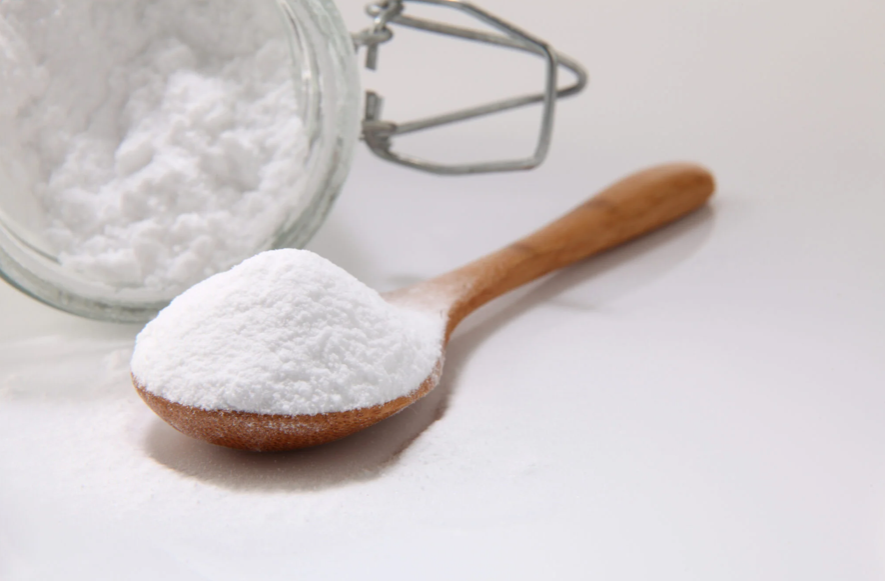
Once you’ve vacuumed and spot cleaned your mattress, you can remove any remaining odors using baking soda. Sprinkle baking soda on the entire surface of the mattress and let it sit for at least 30 minutes to an hour to give it time to absorb odors. Once the time is up, vacuum the mattress again. 

7. FLIP THE MATTRESS AND REPEAT

Just when you think you are done, it’s time to do the other side. Flip the mattress and repeat the process. The good news is, there are probably not as many stains on the bottom of the mattress as the top, making the process go faster.

HOW TO PROTECT YOUR MATTRESS AFTER CLEANING

Once your mattress is cleaned and sanitized, it’s important to protect it between cleanings. Doing so will also make cleaning the mattress much faster and easier. Consider protecting your mattress with these ideas: 

  • Avoid dust with a fitted sheet: A fitted sheet provides a barrier that keeps dust away and reduces the chances of mattress staining. It’s far easier to remove the sheet to wash than it is spot-cleaning the mattress.
  • Use a tightly woven allergen-proof mattress protector: A mattress protector is a heavier-duty version of a fitted sheet. It will protect your mattress from stains and odors and can prevent bed bugs and allergy-producing dust mites from taking hold in your mattress. A tightly woven fabric keeps tiny microbes and debris out from causing further trouble.
  • Add a mattress pad: Mattress pads can add an extra layer of comfort and protection to your mattress. There are a variety of mattress pads available, some waterproof, others featuring gel or memory foam for extra padding.
  • Flip and rotate regularly: If your mattress is double-sided, flipping and rotating it regularly can ensure more even wear. Even if you can’t flip the mattress, you could rotate the mattress.

WHEN TO OPT FOR A NEW MATTRESS

Regularly cleaning your mattress will revitalize and maintain the surface layer of your bed. However, the bed’s construction, such as the foam or innerspring, will eventually break down. You’ll need to eventually replace your mattress with a new one.  When considering whether it’s time to replace your bed, consider the following: 

AVERAGE LIFESPAN OF A MATTRESS 

The average mattress may last anywhere between five and ten years, depending on care, maintenance, and material. Latex foam beds may last the longest, with a span of eight to twelve years. Hybrid and innerspring mattresses may last the least, between five and seven years. A quality memory foam mattress could last between seven and ten years. 

SIGNS YOUR MATTRESS IS DETERIORATING

Although most mattresses come with suggested lifespans and warranties, a mattress could deteriorate sooner, especially if you don’t properly care for and maintain it. Some signs that your mattress is deteriorating include:

  • It has reached the average lifespan
  • You wake up with back pains, discomfort, or after sleeping poorly
  • The mattress squeaks
  • The bed appears sunken in some spots, saggy, and/or does not spring back
  • Foul odors cannot be removed
  • Your allergies have flared up at night and when you awake in the morning

CLOSING THOUGHTS

A quality mattress is one of the most important investments you’ll make for your health and well-being. Regular maintenance is essential to keep it sanitary and in the best condition possible. Taking some time every few months to inspect, clean, refresh, and rotate your mattress is well worth the effort — you’ll feel better knowing you’re sleeping on a fresh, hygienic bed.

6 TIPS TO FOLLOW AFTER RENOVATING YOUR HOUSE

Deciding to renovate your home is a huge step. It requires massive investment, it completely changes the value of your property, and it might even revolutionize the living conditions in the house. 

One of the biggest problems with the way in which this is portrayed lies in the fact that the majority of guides focus on the preparation stage or even the project itself. Thus, they completely ignore what comes after. In reality, the post-renovation stage may be just as important for the success of this story.

With that in mind and without further ado, here are the top six tips to follow after renovating your home.

1.    CLEAN IT UP

While the crew that performed the work is supposed to keep the place clean as they leave, even a single leftover nail can be quite dangerous. So, do the inspection yourself. Be thorough and even make a checklist. Now, one neat trick is to take a look at your checklist prior to the project. Then, try to figure out the types of waste/debris that can be caused by each of these projects. This will make your inspection more systemic and its results more consistent. 

2.    CHANGE THE KEY

Now, chances are that various craftsmen will have your house keys so that they can perform work when you are away. If that is the case, it would be safest to just replace the lock after the project is done. Now, don’t get us wrong, we’re not suggesting that any of the people performing these renovations are malicious. According to a veteran mobile locksmith, it’s best to just replace the lock, get new keys, and be done with it. It’s better to be safe than sorry.

3.    RENEGOTIATE YOUR INSURANCE

After a renovation, the total value of your home will increase drastically. So, you might want to revisit your insurance policy and renegotiate it. Now, depending on the type and the scope of the project, chances are that you’ll have to wait for a city assessor. If that’s the case, make sure that you submit the request as soon as possible. Keep in mind, nonetheless, that when minor updates are in question, this doesn’t have to be the case.

4.    SET UP/CHECK UTILITIES AND THE INTERNET

The next thing you need to understand is the importance of setting up your utilities and internet, in a scenario where they were temporarily turned off or put on hold. If cables go through walls and you did some work on the walls, you might have to change a thing or two. Moreover, it’s important to stress that while renovating an old home, this is an ideal chance to add more sockets. Extension cords (no matter how many sockets they have) are not quite the same. This means that you can also, finally, rearrange your appliances.

5.    FIGURE OUT THE MAINTENANCE SCHEDULE

Just because the place finally looks new doesn’t mean that things will remain this way indefinitely. The effects of your renovation will greatly depend on your maintenance schedule and now is the time to establish it. Also, remember that this is something that everyone will have to participate in. So, call a family/housemate meeting and discuss the situation. Everyone should have a say and everyone should take part in the subsequent maintenance. Getting a maintenance schedule app might also help get everyone on board.

6.    GET THE CAMERA ROLLING

Naturally, you’ll want to commemorate this gargantuan project, which is why you should get the camera rolling. With some basic editing skills and decent video editing software, you can really achieve quite a bit. It’s an interesting thought that is definitely worth your time and attention. Also, don’t forget to take before and after photos for the renovation. Other than being a nice touch, they also contribute to the overall experience of the project. 

IN CONCLUSION

The last thing you need to keep in mind is the importance of being systemic and taking these things as gradually as they go. Your main objective is to wrap things up and make your reintegration into this household as pleasant and smooth as possible. Naturally, this won’t come easy but as long as you stick to the plan it shouldn’t be too big of a problem either.

Guest Contributor: Tim Tylor

HOME RENOVATIONS WORTH INVESTING IN

So, you’re thinking of renovating your home? That’s great! Home renovations can be a lot of fun – but they can also be costly. It’s essential to make sure that you invest in the right renovations so that you can benefit from them in the long run. This article will discuss which home renovations are worth investing in and why. We’ll also provide some tips on how to stay within your budget while renovating your home. 

Some home renovations are worth investing in, while others may not be. Here are five home renovations that are definitely worth the money:

  • Upgrading your windows – Replacing your old windows with new, energy-efficient ones can help you save money on your energy bills. It’s also an excellent way to update the look of your home.
  • Replacing your roof – If your roof is old and needs to be replaced, it’s worth investing in a new one. A new roof will protect your home from the elements and help it last longer.
  • Adding Insulation – Adding insulation to your home is a great way to save money on energy bills. It’s also good for the environment.
  • A new furnace – If your furnace is old and needs to be replaced, it’s worth investing in a new one. A new furnace will save you money on your energy bills and keep your home warm in the winter.
  • New siding – If your home’s siding is in bad condition, it’s time to invest in some new siding. This will not only improve the look of your home, but it will also help protect it from the elements.
  • Kitchen renovation – A kitchen renovation can be a great way to add value to your home. It’s also a great way to make your kitchen more functional and stylish. You could also add an island or a breakfast nook to your kitchen. 
  • Bathroom renovation – Like a kitchen renovation, a bathroom renovation can also add value to your home. If you’re looking to upgrade your shower to a bathtub, or you’d like to add a new sink, it’s worth investing in a bathroom renovation.
  • Finishing your basementFinishing your basement can add extra living space to your home. It’s also a great way to increase the value of your home. You can make your basement into anything you like – a family room, a home office, a playroom, or anything else you can imagine.

THE BOTTOM LINE

There you have it – five home renovations worth the money. Remember to stay within your budget when renovating your home so that you can enjoy the benefits of your renovations for years to come. 

Some people may be hesitant to renovate their homes because they’re afraid of going over budget. There are a few ways to stay within your budget. One way to stay within your budget is to do some work yourself. If you’re handy, you can save money by doing some work yourself.
If you’re planning to rent your home out or sell it in the future, investing in some home renovations is a good idea. By renovating your home, you can make it more valuable and appealing to potential buyers. It will also keep your home in tip-top shape, making renting it out easier. The last thing you need is a damaged property which can affect your rental contract and make it challenging to find tenants.

Guest Contributor: Diana R.

PEST CONTROL SERVICES: HOW TO CHOOSE THE RIGHT ONE FOR YOUR NEEDS

When you have a pest problem, the last thing you want to do is deal with it yourself. You need to call a professional pest control company to take care of the issue for you. But how do you know which company is right for your needs? There are so many companies out there offering their services, it can be difficult to make a decision. In this blog post, we will give you some tips on how to choose the right pest control company for your needs.

ASK ABOUT THE QUALIFICATIONS

Finally, you should ask about the qualifications of the company’s employees. They should be properly trained and certified in order to provide you with the best possible service. You want to make sure that they have the necessary experience and training to deal with your specific pest problem. For example, if you need rat removal, you want to make sure that the company you’re considering has experience in removing rats. Asking these questions will help you to narrow down your choices and choose the right pest control company for your needs. Also, this will ensure that they are able to effectively solve your issue.

COMPANY’S PERMITS

One of the first things you should do when choosing a pest control company is to ask for the company’s permits. Permits show that the company is allowed to operate in your area and that they have the necessary qualifications to do so. Any reputable company will have the necessary permits to operate in a certain area. This will ensure that they are following all of the local regulations and laws.

READ THE COMPANY REVIEWS

Another important thing to consider when choosing a pest control company is reading the company reviews. You can find these online or from people you know who have used the company’s services before. Also, take a look at the company’s rating with the Better Business Bureau. This will give you an idea of how well the company treats its customers and how satisfied people are with their services, and it will provide you with information about the quality of their work.

CHECK THE COMPANY’S CUSTOMER RELATIONS

Another important factor to consider is the company’s customer relations. You should be able to get in touch with them easily and they should be available to answer any questions you have. You want to make sure that the company is friendly and helpful when you call them. This will give you an idea of how they will treat you if you have a problem with their service.

ASK ABOUT THE COMPANY’S SAFETY MEASURES

When you are dealing with pests, there is always a risk of exposure to harmful chemicals. You should ask the company about their safety measures to ensure that you and your family are protected. This is vital information that will help you make a decision about whether or not to use their services.

COMPARE AS MANY PEST CONTROL COMPANIES AS POSSIBLE

Once you have considered all of these factors, you should compare as many pest control companies as possible before making a decision. You can do this by getting quotes from several companies and comparing their prices, services, and qualifications. This will help you find the right company for your needs at the best possible price. 

DOES THE COMPANY PROVIDE ASSURANCES?

When you are looking for a pest control company, it is important to find one that offers some sort of assurance. This will give you peace of mind knowing that the company stands behind its work. If something goes wrong, you want to know that the company will make it right. A good company will offer a money-back guarantee or some other type of assurance so that you know they are confident in their abilities. 

Except for money-back guarantees, some other types of assurance are covered for damages and customer satisfaction guarantees. Coverage for damages means that the company will reimburse you for any damages that occur as a result of their work. Customer satisfaction guarantees mean that the company will refund your money if you are not satisfied with their work. 

These are just a few things to consider when choosing a pest control company. By taking the time to do your research, you can be sure that you are getting the best possible service for your needs. Do not hesitate to ask questions and compare as many companies as possible before making your final decision. 

If you follow these tips, you should be able to find a pest control company that is right for your needs. This will help you find the best company for your specific pest problem. Thanks for reading! We hope this was helpful.

10 WAYS TO DECLUTTER YOUR HOME THIS SPRING CLEANING SEASON

Spring cleaning is the perfect opportunity to make changes in your home and end the year on a fresh note. It is time for you to go through your house and make it easier to keep clean, decluttered, and organized. Decluttering your home can be a difficult task, and you might not feel up to taking on the challenge. If so, these 10 Spring cleaning tips will make it easier to declutter your home.

1. CLEANOUT THE PANTRY

Empty your pantry and throw away all the old food that is past its expiration date. Make it a point to keep the fresh food such as fruit, vegetables, and meat and take away the rest. Clear out those no longer usable things.

2. CLEAR YOUR BASEMENT

You will be surprised by the amount of junk that your basement has. Clear out the useless items such as old toys, old furniture, clothes, and other things. If there is something that you don’t use anymore, you can put them up for a yard sale. You can turn some of your clutter into extra cash while making your basement a comfortable living space.

3. DECLUTTER YOUR BATHROOM CABINETS

Go through your bathroom cabinets and throw away all the expired medication, old cosmetics, broken mugs, brushes, and other things that have been piling up on you. Be sure to clean your bathroom as well. Nothing is more tempting than a clean and fresh bathroom.

4. TIDY UP THE ATTIC

Most of the time, the attic is used to store things that you don’t use but are too good to throw away. Tend to every part of your attic and throw away all the junk that has not been used in a year or more. It is time for you to go through your attic, clean it out, and make it a suitable living space for anyone who comes to visit.

5. EMPTY THE CLOSETS

Sort out the clothes into categories of things you need to keep and items that are not necessary to keep with you. Donate the clothes that you no longer use or items that have been in use for a long time. After a good cleaning, you can organize the items in the closet to make it easier to find things that you need.

6. DECLUTTER THE KIDS ROOM

Keep the room of your kids tidy. Declutter their stuff, dump out their toys and clothes, and organize everything so that it will be easy for them to find. You can sell some of the toys they no longer use, like their barbie dolls or transformers g1 toys. You will keep their rooms clean and make some money out of it.

7. DONATE WHAT YOU DON’T NEED

See if you can donate the old and unused items in your house. You will be surprised to see how much you have accumulated over the years. Don’t just pile everything up in the attic or basement and expect it to disappear. Sort through everything and make use of what you can.

8. DECLUTTER YOUR GARAGE

It is time to clean out your garage. You will also be surprised to see what has been neglected for years on end. Clean out your junk drawer, toss anything that you have not used in a long time, and take care of any mechanical issues in the garage. It would be best to sort out all the things so you will know what to discard and what to keep in your garage.

9. FRESHEN UP YOUR FRIDGE

Clear out the refrigerator of all expired items and uneaten food. Throw away any old food that has been sitting in your fridge for a long time. It will make it easier for you to organize what is left in your fridge and keep everything fresh.

10. CLEAN YOUR CLEANING SUPPLIES

It may sound strange, but your cleaning supply can accumulate to a lot of stuff and can be a source of clutter if you don’t clean it at least three times a year. Clean the storage room in your basement, and clean out the kitchen cupboards. It will make it easy to organize your new and fresh cleaning supplies.

CONCLUSION

In conclusion, when Spring cleaning season comes, you will find that you can’t tolerate the clutter in the house. The clutter makes it hard for you to do simple tasks. You can try out one or more of these 10 spring cleaning tips and declutter your house more easily.

 Guest Contributor: Regina Thomas

DON’T LET THE DUCTS GO UNNOTICED THIS YEAR: HOME CLEANING TIPS

There is so much dust and debris that makes its way into our homes through the ducts in our vents. If you want quality air in your home, you might need to learn how to clean the ducts in your vents. Also, clean ducts reduce the chances of allergies getting triggered in the family. Cleaning ducts is not difficult. You will need a few items and an understanding of the HVAC system.

ITEMS YOU NEED WHEN GETTING READY TO CLEAN YOUR DUCTS

GLOVES

You will need gloves so that your hands remain protected when you are cleaning the ducts. Be sure to get heavy-duty gloves and a mask. If possible, get goggles to protect your eyes.

BUCKET

It might be necessary to get a bucket with a mop so that you can remove any dust and debris accumulated in your ducts. A wet mop will absorb much dust and ensure your ducts are thoroughly cleaned. Be careful not to damage the ducts with your mop.

VACUUM

Before using any mops, it is best to vacuum the ducts. The vacuum sucks much of the dust and dirt in the ducts. You can use your household vacuum hose. Point the nozzle towards the dusty duct areas and vacuum thoroughly. If your home vacuum is not strong enough, you can rent a commercial vacuum with a long hose.

BRUSH

Once you have vacuumed the ducts, you should clean them with a brush. You can use a small brush to remove any dust clinging to the wall of the ducts.

HOSE

You will need a long hose and an Air Blaster attachment. The attachment is used to spray water into the ducts and dislodge anything that has settled on the sides. Use this attachment when cleaning your ducts thoroughly after vacuuming or after using a mop.

POWER DRILL

Use it to remove screws from the vents. You could also use a screwdriver, but it will require a lot of energy and could take much time.

AIR DUSTER

Use an air duster or compressed air to dislodge dust in tight spots, particularly in areas hard to reach with a mop.

STEP BY STEP GUIDE TO CLEANING THE DUCTS

  1. Remove any screws that are holding the air duct covers.
  2. Make sure you cover your supply vents – It is important to cover these supply vents with paper towels. The vents that are not being cleaned or have already been cleaned are the ones to cover. The aim is to stop any dust from escaping into these open vents.
  3. check the thermostat and set it to “fan on” – Activating the fan allows you to move any dust in the vents. It will also loosen any dust stuck in the vents, making it easy for you to clean. Ensure the “heat and cool mode” is turned off as the fan turns on.
  4. Loosen the dust in the ducts – Gently knock the ducts to loosen any dust in the ductwork. You can use the handle of your brush to knock the duct. It will loosen any dust stuck on the sides of the ducts.
  5. Clean your supply registers – Use your brush to sweep out the dust from your supply registers. Then, use a vacuum to suck out the accumulated dust or debris. Take advantage of the vacuum hose to reach the furthest sections of the supply registers and vacuum thoroughly.
  6. Shut the fan and furnaces – Switch off the fan from the thermostat and power off the furnace using the service switch.
  7. Return the furnace filter.

Your ducts must be clean at this point. It will take a while before dust accumulates to excess levels. Also, you can conduct routine duct cleaning once or twice a month, especially during spring and summer. If you have read this and decided that this work is not for you, then you can look into services to help you. If you live near Canada, you can look for Toronto duct cleaning services and find a company to come clean them for you.

Regardless if you choose to clean them yourself, or get them taken care of by an outside company. Maintaining a clean air duct will help to keep dust and mites away from your home, and may even help lighten symptoms during allergy season. 

Guest Contributor: Hannah Boothe

7 TIPS TO REMODEL YOUR KITCHEN WHILE ON A BUDGET

 Kitchen remodeling may seem like an easy task, but it can be difficult if you don’t know where to start and if you are not prepared for it. Aside from the budget, you also have to know when to tell if you need to remodel something or not; otherwise, you might unnecessarily spend money on upgrading a part of the house that is still functioning well. 

Some home remodeling ideas can be costly, especially if you want to upgrade most parts, but if you’re tight on budget and want to remodel for a change, then there are also ways to do it the budget-friendly way.

When it comes to kitchen remodeling, you have to be smart and creative to make the best of it without spending much. You can get the design or function you want without buying a new appliance or new furniture. Sometimes all it takes is a simple repair and poof! You have a new and improved kitchen without spending a lot of money. If you’re here for that, then you’re in the right place.

Here are seven tips to remodel your kitchen while on a budget:

1. List Everything You Need

Remodeling is a costly task to do if you are not prepared. You’ll never be ready for the sudden costs if you do not plan it, so it’s always better to plan by listing everything you need to do. 

You can start by listing everything you need first. Decide which part of your kitchen you want to remodel, and list down the changes you want to do with it. Set a budget for every part of the kitchen you want to remodel so you would have a limit if you need to purchase something. 

After you’ve listed everything you need, you can start the process of remodeling.


2. Repaint Wooden Furniture With White

Nothing can defeat the color of bright white when it comes to retouching wooden furniture. No matter how outdated the wooden furniture is, as long as it still has a smooth surface, you can make it look new again with white paint. It will also be a good chance to change the ambiance of your kitchen if you’ve had other colors but white as your kitchen motif. White-colored wooden furniture can brighten your kitchen and give off a neat and relaxing mood. 

Aside from the purpose of retouching, old and rusty furniture can also look brand new with white paint. So if you want a new set of furniture but don’t want to spend a lot of money, use white paint to repaint old furniture so you won’t have to buy new ones. 


3. DIY Decorations

If your kitchen has been looking bland, add some DIY decorations. There are a lot of DIY decorations that are on the internet that you can easily search. Another easy one you can do is picture frames. You can make picture frames with some cardboard, paint, and resin. What makes them even more special is you can decorate them however you want, so get creative and start decorating.


4. Add More Greens

In the kitchen, when we say greens, the first thing that will come to people’s minds is vegetables. When it comes to remodeling and home decorations, we meant indoor plants. Having indoor plants can promote the quality of air inside your house. Some indoor plants, to some extent, also have health benefits. 

The kitchen is where most people cook, so expect that sometimes there are dishes that make your kitchen smell like someone puked in there. There are odor-neutralizing plants that help eliminate bad odors from food that smells when cooked. So if you want to have a fresh-smelling kitchen, add some indoor plants.


5. Replace The Cabinet Doors, But Leave The Cabinets

What’s the first thing that gets torn over time with cabinets? The doors. Cabinet doors are the ones that can get torn from too much use because it’s the only part of the kitchen cabinet that gets moved a lot. Most of the time, we change cabinets even when the body is still intact, so before doing this if ever you’re thinking of replacing your kitchen cabinets, check the body thoroughly. If it still looks okay and sturdy enough to store your kitchen items, then only replace the doors to save money. You can use several kitchen repair tools in doing this. You can even make your cabinet doors to design them how you want, making them look like you’ve just purchased a new kitchen cabinet.


6. Upgrade The Lighting With DIY Projects

It’s important to maintain the lights inside your kitchen because it’s where you prepare and cook food. The visibility must be 100% clear for you to work properly. When the light fixtures are already dim and dull, upgrade them with DIY kits. There are DIY kits for lights found online and even at a nearby hardware store, and you’ll find them more cheaper and convenient. 


7. Change The Walls With A New Paint Color or A Wallpaper

You can update the whole look of your kitchen by just changing how the walls look, so work on that. You can change the wall design by getting a new wallpaper, there are cheap wallpapers you can find on the internet. The fastest and cheapest way to upgrade the design of your kitchen walls is to repaint them with a color that you haven’t used before, so you’ll look at your kitchen in a new light. 

Conclusion

Kitchen remodeling is fun if you can save money while doing it, so make sure to be smart with your choices and decisions. There are so many ways you can remodel a part of your house without spending much, just remember to plan to avoid unnecessary purchases. It’s important to save money, especially in our time today when you can’t tell what will happen next. In everything you do, you have to work smarter, not harder.

Guest Contributor: Ksenija Meller

TOP 10 WALL CLOCK DECORATION IDEAS

Wall clocks are a widely overlooked essential in any home that can be functional as well as decorative. They encourage you to stay organized and on schedule at all times, whether you work from home or want to be able to glance up to see the time in the evening. 

Whatever style of decoration you choose, there are many ways that you can incorporate a wall clock into your home. These are the top ten wall clock decoration ideas that can complement your home’s themes or feature walls. 

DIY WHEEL CLOCK

Firstly, for the more crafty people who want to add their own spin to their wall clock, it could be worth making your own using materials that are available to you. Some people use old bicycle wheels, but you can use anything that you like. 

It could be fun to decorate your own clock face with numbers in your own writing, too. Depending on how skilled you are at DIY and technical work, it could be worth taking the mechanism from an old wall clock and fitting it onto your desired clock face. 

Other options include creating your own mechanical clock, which is a little more challenging. 

MAKE A STATEMENT

Another option that is certain to make an impact is to scale up your wall clock. Think about finding one that has an excessively large face so that you do not have to decorate the rest of the wall. Not only is this fun and unique, but it is functional as you will be able to read the time from further away. 

MULTIPLE TIME ZONES

Some people who have family, loved ones, or friends that live in other time zones feel more connected to them by displaying multiple clocks that have the same basic design in a line horizontally and changing them to show the time in different locations. You could also print or make your own tags to sit above each clock to say which country each clock is in time with.

SUBTLE SOPHISTICATION

Modern style usually features minimalism and stripping things back a little. If this is your style within the home, you could choose to add unadorned clock faces around the house which have simple backgrounds such as marbled surfaces or plain colors. 

NOT JUST TIME

Another functional and decorative idea that can give you more information than just the time is to find a clock which shows moon phases, expected weather patterns, and even estimated temperatures for the day. These can be seen with digital displays or following the format of traditional wall clocks. 

ABSTRACT CLOCKS

You can be bold with minimalism, and explore a huge selection of different shapes that simplistic clock faces demonstrate. You can find wall clocks that do not have a base per say, but that are fixed to the wall to create a minimalist finish to a room. 

DESIGNER BRANDS

For those who want to add a touch of luxury to their home while maintaining some level of functionality, you could find a wall clock that has been made by your favorite high-end brands. One of the most popular forms of this is a rolex wall clock, as it can be styled up or down depending on where it is hung in the home. 

GALLERY WALL

Another option to make your wall clock blend in with your decoration could be to create a gallery wall. Some people space their favorite pictures, artwork, and portraits and fit a wall clock within this. You could even find a wall clock that matches the color of your gallery wall, or even the color of the picture frames. 

VINTAGE FEEL

Cuckoo clocks are making a comeback, and they can be highly entertaining talking pieces in any home. If you want something that has a little more character and animation, you could search for a second hand cuckoo clock or even a grandfather clock to place against a wall in your home. 

FILL THE WALL WITH CLOCKS

Finally, you could decide that you want to collect different types of clocks and hang them in a pattern on the wall. Make a gallery wall entirely out of clocks for something a little different. The only downside to this is that you will have a lot of batteries to change if you install these clocks at the same time! 

SUMMARY

Wall clocks are decorative as well as functional, which is why there are so many different ways that people have added their own style to them. Think about how you want to add a touch of your own character to your decor, and what a wall clock can add to your home. 

Guest Contributor: Violette Butterworth

THINKING OF REMODELING? CHOOSE THESE SUSTAINABLE OPTIONS

Are you curious about sustainable options for remodeling your home? You’re not alone. More homeowners are beginning to realize the cost savings, quality, and environmental friendliness of choosing sustainable materials. One benefit of choosing a sustainable option is the increased value of your property. You will also reduce the amount of money you spend on your utilities. Below is a list of some viable options for remodeling your home

RECLAIMED WOOD

When carrying out your home remodeling project, you may need to replace your flooring or countertops. Instead of using the newest type of wood as your countertop and flooring material, you can use reclaimed wood. It is simply high-quality air-dried wood that reclaimed wood flooring companies have recycled. Such companies obtain it from old barns, retired ships, wine casts, and warehouses.

When you go for the option of reclaimed wood, you will play a part in conserving the environment. You will also get to enjoy its ageless beauty. On top of all this, you will not have to worry about replacing your flooring and countertops soon since this kind of wood is strong and durable.

VOC-FREE PAINT

Many homeowners use VOC paints during home remodeling projects. These paints usually contain volatile organic compounds. These compounds can be released into the air during paint application, polluting your indoor air. You may experience several unpleasant symptoms as a result of this. To ensure that this does not happen, you need to use VOC-free paints. Unlike VOC paints, VOC-free paints are not made using chemicals that pollute the environment. Therefore, you will not have to worry about indoor air pollution when you use them. You will also not have to worry about the dizzying chemical odor usually associated with paint. If you do not have any other option other than using VOC paint, look for a low VOC paint. However, you should ensure that your house is well-ventilated when applying this kind of paint.

FORMALDEHYDE-FREE CABINETS

According to the United States Environmental Protection Agency, formaldehyde is a hazardous air pollutant. It is a strong-smelling gas that can be quickly broken down when released into the air. People use it when making pressed-wood products like fiberboard, plywood, and particleboard.

When remodeling, you should go for the option of formaldehyde-free cabinets since formaldehyde is a volatile organic compound. Volatile organic compounds usually evaporate from their sources, polluting the air. That means if you do not invest in formaldehyde-free cabinets, formaldehyde will pollute your indoor air. That, in turn, will make you experience flu-like symptoms such as breathing difficulties, headaches, and dizziness.

METAL ROOFS

Metal roofs are roofs made of different materials, including aluminum, galvanized steel, and copper. These roofs have become quite common due to the benefits associated with them. According to Cenvar Roofing, metal is the only roofing material available on the market that remains 100% non-combustible throughout the entire lifespan of the roof. Also, this material can withstand many harsh weather conditions such as heavy rainstorms. On top of all this, metal roofs are eco-friendly. Metal roofs are energy efficient and can be recycled. In addition, they are durable. Therefore, you will not have to replace them frequently. If you are thinking of remodeling your roof, consider a metal roof replacement

LOW-FLUSH TOILETS

According to the EPA, the water used for flushing toilets makes up 30% of the water used in a home. That means if you want to reduce your indoor water consumption, you need to invest in toilets that do not consume too much water. Therefore, the next time you are carrying out a home remodeling project, you should upgrade your standard toilet into a low-flush toilet. Such toilets use 20% less water than standard toilets. Therefore, they can help you save gallons of water. Your water bills will also decrease, enabling you to save a substantial amount of money.

If you are thinking of carrying out a home renovation project, choose a sustainable option. Not only will this help the environment but it will also increase the value of your home. Happy Remodeling!

Guest Contributor: Sierra Powell