Cut the four 2×4 pieces into two 4-foot pieces and two 6-foot pieces each. Cut the 1×4 into two 4-foot pieces.
Use the 4-foot pieces of 2×4 lumber to make the frame of the swing. Screw the pieces together to form a rectangle.
Cut the 6-foot pieces of 2×4 lumber diagonally to form two triangles. These will serve as the sides of the swing.
Attach one triangle to each side of the frame using screws.
Cut the 1×4 pieces to fit inside the frame, perpendicular to the sides. Screw them into place.
Sand all the wood pieces to remove rough edges.
If desired, stain or paint the swing.
Attach the rope or chain to the sides of the swing using screws and knots. Make sure the swing hangs level.
Note: Make sure to consult with a professional before attempting any DIY project, especially if you are unsure about the materials, tools, or techniques involved.
Are you looking for ways to improve your home without investing a ton of money and time? Storage rooms are often neglected but when optimized correctly, they can be a great way to add value to your house. You don’t need expensive equipment or complex skills; in fact, there are several simple steps you can take today that will noticeably improve the look and feel of your storage room.
In this blog post, we’ll walk you through these steps so that you have better control over what goes in and out of your storage space while also protecting yourself against damages caused by any kind of pests or intrusions. Read on to learn how easy it is to maximize the potential of your storage area!
1. ASSESS YOUR HOME’S CURRENT CONDITION
As homeowners, it’s important to periodically assess the condition of our homes to ensure that they remain safe and functional. While some repairs may be obvious and require immediate attention, others may be less pressing and can be put on hold for a later time. By taking the time to evaluate your home’s current condition, you can make informed decisions about what repairs are a top priority and what can wait. Doing so not only ensures that your home remains in good shape but can also save you time and money in the long run. After all, a well-maintained home is a happy home!
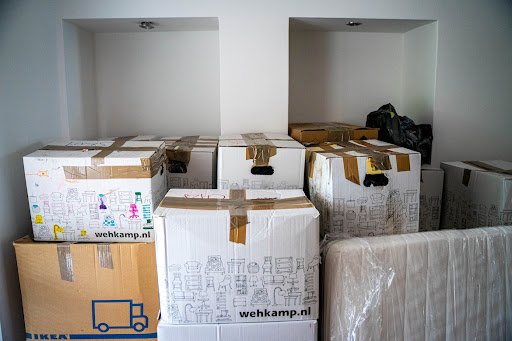
2. DECIDE WHAT CAN GO TO STORAGE
Deciding what items should go into storage can be a daunting task, but it doesn’t have to be a headache. It’s important to assess what you really need to keep and what you can live without for a while. Consider storing items that you don’t use regularly or that take up too much space in your house. It’s also a good idea to keep seasonal items such as holiday decorations or winter coats in storage to free up space when they’re not being used.
Before packing away your items, make sure to label them clearly so that you can easily find what you need when it’s time to retrieve them. With a little planning and organization, deciding what can go into storage can actually make your home feel more spacious and tidy.
3. FIND AN ONLINE SOLUTION FOR STORING YOUR STUFF
Whether you’re living in a small apartment or you’re just looking for a way to streamline your life, finding an online solution for storing your stuff can be a game-changer. When looking for a large number of storage rooms, there are many options available, so you can easily choose the one that suits your specific needs, whether you’re looking for something budget-friendly or highly sophisticated. Not only does online storage provide a secure and convenient way to keep your belongings safe, but it also allows you to free up valuable space in your home. Plus, with the added benefit of being able to access your stored items from anywhere, with an internet connection you’ll always have your important items at your fingertips.
4. INVEST IN ENERGY-EFFICIENT APPLIANCES FOR LOWER UTILITY BILLS
Investing in energy-efficient appliances is a smart move for homeowners who want lower utility bills. These appliances, from refrigerators to washing machines, use less energy than standard models, resulting in significant savings on monthly bills. Not only do they save you money, but they also reduce greenhouse gas emissions, making them a responsible choice for the environment. Plus, energy-efficient appliances often come with added features and benefits that standard models simply can’t match. So if you’re looking to cut costs, while also making a positive impact, investing in energy-efficient appliances is the way to go.
5.REPLACE WORN OUT FLOORING WITH LOW MAINTENANCE OPTIONS
Tired of constantly cleaning and repairing your old and worn flooring? It’s time for an upgrade! Durable and low-maintenance options are available, allowing you to finally say goodbye to scuffed-up floors and hello to long-lasting ones. From vinyl to laminate to ceramic tiles, there are plenty of viable choices to consider. Not only will your new flooring look great, but it will also save you time and money in the long run. Don’t settle for anything less than the best – replace your old flooring with a durable, low-maintenance option that will give you peace of mind for years to come.
6. ADD LANDSCAPING FEATURES AROUND THE PROPERTY FOR CURB APPEAL
If you want to boost the curb appeal of your property, adding some landscaping features is an excellent place to start. From lush greenery to eye-catching fountains and outdoor lighting, there are many options to enhance your outdoor space. Imagine your visitors walking up to your home, greeted by a beautiful garden and carefully placed pavers leading them to the door. These little touches can make a big difference in the way your home appears to others, and can even improve the value of your property. So, whether you’re looking for a serene outdoor space to relax and unwind, or want to impress potential buyers, landscaping upgrades are an excellent investment for your property.
Upgrading your home can seem overwhelming but there are a few simple tips to get started. First, assess the condition of your home and make plans for what repairs need to be done immediately and which can wait.
Secondly, decide what you’d like to keep but may not be used on a regular basis and move into storage. Thirdly, upgrade to energy-efficient appliances for lower utility bills in the long run. Fourthly, create some online resources for easily storing items like furniture or décor that don’t fit into smaller spaces. Fifthly, replace worn-out flooring with durable, low-maintenance options that last longer than high-end materials and require less upkeep down the line.
Inviting friends over to your home can be a daunting task if you don’t feel proud of its interior design. On the other hand, taking on an interior renovation project can quickly become overwhelming for those who have never done one before. So, what do those just starting off with their first interior makeover absolutely need to know? Read on for our top four tips for successful interior renovation projects that will leave any space looking and feeling brand new!
UNDERSTAND THE COSTS INVOLVED
Interior renovations can be a daunting undertaking, especially if you’re unsure of the costs involved. From material selection to labor costs, there are numerous expenses that you need to keep in mind. It’s important to have a clear understanding of each expense so that you’re not caught off guard during the renovation process. While it’s tempting to cut corners and choose less expensive materials, it’s crucial to remember that quality materials will provide a longer-lasting and better-looking finish.
Additionally, choosing the right contractor can help you save money in the long run by avoiding costly mistakes or unnecessary expenses. Understanding the costs involved is key to making informed decisions and ensuring that your interior renovation project stays within your budget. Additionally, Bustos Renovations offers clients interior renovation services. create a plan that fits your budget, and take time to choose the right materials. The key to any successful interior renovation project is selecting the right materials.
Materials like flooring, cabinetry, and paint can drastically affect the look and feel of your space. Make sure to consult with a professional designer or renovation specialist for help selecting materials that will best fit your desired style and budget. Interior renovations can be messy, time-consuming, and disruptive. It’s important to prepare yourself.
CHOOSE A STYLE THAT REFLECTS YOUR PERSONAL TASTES AND LIFESTYLE
When it comes to home decor and design, choosing a style that reflects your personal tastes and lifestyle is crucial. Whether you prefer a sleek and modern look, a cozy traditional atmosphere, or a bold eclectic mix of styles, your home should be a reflection of your unique personality. By carefully selecting colors, textures, and decor that complement your preferred style, you can create a living space that feels truly like home. So take the time to explore different styles and find the one that truly resonates with you – it’s worth the effort to create a space that you love coming back to every day.
WORK OUT A BUDGET AND STICK TO IT
Creating a budget and sticking to it can be a challenge, but it’s a crucial step in achieving financial stability. One essential aspect of a budget is setting aside money for unexpected purchases or complications. Whether it’s a surprise medical bill or a car repair, unexpected expenses can throw a wrench in even the most well-planned budget. That’s why it’s important to factor in some wiggle room when budgeting.
Setting aside a small amount each month can provide some much-needed relief when these unexpected expenses inevitably arise. So, take the time to create a budget that works for you, and don’t forget to leave some room for the unexpected. Your future financial self will thank you for it!
FACTOR IN FURNITURE AND ACCESSORIES INTO THE RENOVATION PLAN
Furniture and accessories are often overlooked when it comes to renovating a space, but they are an essential part of completing the look of a room. The right furniture pieces and accessories can transform a plain room into one that is stylish, functional, and comfortable. From statement pieces to subtle accents, furniture, and accessories can reflect your personal taste and add personality to your space.
It’s important to factor them into your renovation plan from the beginning so that you can create a cohesive and well-designed interior that feels like home. So whether you’re planning to redecorate your living room, bedroom, or study, don’t forget to include furniture and accessories in your design scheme.
CONSIDER HIRING A PROFESSIONAL TO HELP WITH THE DESIGN AND INSTALLATION
Designing and installing any project can be a daunting task, especially if you don’t have any experience or knowledge on the subject. In these situations, it’s highly recommended to consider hiring a professional. By seeking out the help of a professional, you’re able to tap into their knowledge, skills, and expertise, ensuring that your project is being executed to the highest standard. Professionals understand what works and what doesn’t, and they can provide valuable insights on design, layout, and functionality.
With their help, you can rest assured that your project will meet all your needs and more. So, if you’re undertaking a project and want to make the most of it, consider hiring a professional – experts’ experience will help you accomplish something that is uniquely yours.
CREATE A TIMELINE FOR WHEN YOUR RENOVATION SHOULD BE COMPLETED
Embarking on a renovation project is an exciting but daunting task. From selecting the right materials to hiring the perfect contractor, it can be challenging to stay on top of all the moving pieces. This is where a renovation timeline comes in handy. By incorporating all the necessary tasks and deadlines into a timeline, you can stay organized and ensure that your project is completed on time.
Not only does it provide a clear overview of the entire process, but it also helps you stay accountable and on track. With a renovation timeline, you can be confident that your dream home will become a reality in no time.
Interior renovations can be a daunting and expensive project but the end result is worth it. Knowing the costs and budgeting accordingly, deciding on a style, factoring in furniture and accessories, and creating a timeline are all important things to consider. Hiring a professional to help with design and installation can also be beneficial as they can provide valuable insights. Ultimately, interior renovations are a great way to give your space an updated look while still being true to your personal taste.
Make sure you do research prior to tackling any kind of renovation project so that you know what’s involved and how best to approach it. With proper planning and preparation, you’re sure to get the outcome you want!
If you’re looking for a way to bring some greenery into your home and enhance your living space, indoor herb gardening might be the perfect solution. Not only does it add aesthetic appeal to your home, but it also provides a host of health benefits and serves as a practical way to grow fresh herbs for cooking.
According to Market.us, the Indoor Farming Market is booming at a CAGR of 14.2%. This presents us with a vivid idea of herb gardening. Herb gardening is a great way to add a touch of nature to your home while improving your cooking. With the right selection of herbs and proper care, you can create a green oasis in any room of your house. Not only will your indoor herb garden be a visually appealing addition to your home decor, but you’ll also have access to fresh, flavorful herbs year-round.
CHOOSING THE RIGHT HERBS
Selecting the right herbs is crucial to the success of your indoor herb garden. Here are some tips to help you choose the best herbs for your space:
● Consider the amount of natural light in your home: Herbs require different amounts of sunlight, so choose herbs that will thrive in the amount of natural light your home receives.
● Choose herbs that are suitable for indoor growth: Some herbs are better suited to indoor growing than others. Look for herbs that are compact and don’t require a lot of space to grow.
● Select herbs that complement your cooking and personal preferences: Choose herbs that you’ll use in your cooking and that you enjoy the taste of.
● Here are some popular indoor herbs to consider: Basil, Mint, thyme, oregano, rosemary, and parsley.
SETTING UP YOUR INDOOR GARDEN
Once you’ve chosen your herbs, it’s time to set up your indoor garden. Here are some tips to get you started:
● Choose the right containers and soil for your herbs: Herbs need well-draining soil and a container that allows for proper drainage. Choose containers that are the right size for your herbs and that match your home decor.
● Position your garden in a location that receives the right amount of sunlight: Most herbs require at least six hours of sunlight per day. Position your garden near a window that receives ample natural light.
● Ensure proper drainage and watering: Herbs require moist soil but not too much water. Make sure your containers have drainage holes and water your herbs only when the top inch of soil feels dry to the touch.
MAINTAINING YOUR INDOOR HERB GARDEN
To keep your indoor herb garden healthy and thriving, follow these maintenance guidelines:
● Regularly prune your herbs to promote growth and prevent overcrowding: Herbs grow quickly, so it’s important to prune them regularly to prevent overcrowding and encourage new growth.
● Use organic fertilizers and pest control methods to avoid chemical exposure: Organic fertilizers and pest control methods are safer for your herbs and for you.
● Monitor soil moisture levels and adjust watering as needed: Check the moisture level of your soil regularly and adjust your watering schedule as needed.
INCORPORATING YOUR HERBS INTO YOUR HOME DECOR
Your indoor herb garden can be a beautiful addition to your home decor. Here are some ideas for incorporating your herbs into your space:
● Use decorative containers and planters to add a touch of style to your space: Choose containers that match your home decor or that add a pop of color to your room.
● Display your herbs on a windowsill or shelf for easy access and visual appeal: Arrange your herbs in a way that’s visually appealing and easy to access.
● Experiment with different arrangements and groupings to create a unique look: Get creative with your herb arrangements and groupings to create a unique look for your space.
COOKING WITH YOUR INDOOR HERBS
Cooking with your indoor herbs is a great way to add fresh, flavorful ingredients to your meals. Here are some tips for using your indoor herbs in cooking and recipes:
● Harvest your herbs at the right time: To ensure optimal flavor and freshness, harvest your herbs when they are fully grown but before they begin to flower.
● Experiment with different flavor combinations: Mix and match your herbs to create different flavor combinations that complement your dishes.
● Use herbs in a variety of dishes: From soups and salads to cocktails and desserts, herbs can add flavor and nutrition to a variety of dishes.
Indoor herb gardening is a great way to promote a healthy lifestyle, add to your home decor, and enhance your cooking. With some planning and preparation, you can create your own green oasis that provides fresh herbs all year round. So why not start your own indoor herb garden today and enjoy the benefits of this rewarding hobby?
The structure of a home is the foundation for everything built on it and within it. The structural components include the foundation and framework, as well as the shape and size of the home. A house structure has many benefits, including:
1. It provides stability and support
The house structure is a key factor in determining the safety and stability of the home. A structurally sound house will withstand the elements and remain standing for a long time. The framework of a home provides a strong foundation for other components, such as walls, floors, and roofs, to be built on top of.
2. It enables good design
A house structure will provide the basis from which a designer can add the aesthetic appeal of a home. It can help create different living spaces and support structural features such as stairs, balconies, and bay windows. A house structure can also accommodate different styles and materials of exterior walls, roofs, and porches.
3. It provides security
A house structure can protect from intruders and other disasters. Solid walls can block sound and provide a barrier against wind and flooding. Good locks and security systems can also be installed in homes with sturdy structures.
The structure of a home is essential to creating a safe and secure living space. A solid foundation and well-built framework can help ensure that a home will remain stable and energy efficient over the years. A house structure can also add to the design of a space and increase its resale value.
How To Make Sure The Structure Of Your House Is Stable
To ensure your home is structurally sound, there are a few things you can do:
1. Have a professional inspect it
The best way to ensure that your house’s structure is stable is to have a professional structural engineer evaluate your home. This kind of inspection can identify any problems and provide recommendations on how to fix them.
2. Make sure foundations are secure
Checking the foundation is an important step in ensuring your house’s structure is stable. Look for cracks, shifting, or settling of the foundation. Inspect the walls for signs of water damage or signs of wood rot.
3. Keep up with maintenance
Regular home maintenance is an important part of keeping it structurally sound. Check for any insect infestation or wood rot signs, and address any necessary repairs.
4. Address any problems
If any structural issues are identified, address them immediately. Have a professional repair any problem areas to ensure that the structure of your home remains safe and secure.
What To Do To Increase The Stability Of Your Home’s Structure
1. Roof support
Strengthen your home’s roof support by replacing or reinforcing existing joists, trusses, and rafters. Make sure your roof is adequately braced and supported from below as well as from above.
2. Anchor the house
Anchor your house to the foundation with heavy-duty anchor bolts or straps. This can help ensure the house is secure and prevent unintended movement.
3. Beam reinforcements
Install structural beams and columns to reinforce your home’s structure. Ensure these beams and columns are securely attached to the foundation using heavy-duty screws or bolts.
4. Improve drainage
Ensure your gutters and downspouts work properly to minimize water pooling around the foundation. If necessary, ensure your yard is graded away from your home to help reduce the amount of water that can accumulate.
5. Replace old wood
If you have wood framing or support beams over 15-20 years old, consider replacing them with newer, stronger materials such as steel or concrete.
What Can Hurt Your House’s Structure?
1. Pests
Pests such as termites and other wood-destroying insects can damage the structure of a home. Termites, carpenter ants, and other pests can chew through wooden support beams and weaken the foundations of a home.
2. Poor building materials
Using poor-quality building materials can result in a weakened structure. This is often a result of cost-cutting measures when building a home. Using lower-quality materials can lead to a weaker structure and more maintenance costs in the long run.
3. Poor foundation
A poorly constructed foundation can create structural problems for your home. Poor foundation work can lead to cracking which can weaken the house’s walls and roof and cause water damage.
4. Water damage
Water damage can be one of the most destructive forces on a home’s structure. If proper drainage is not in place, water can seep into the foundation and weaken the walls and other structural components. Water damage can also allow pests and mold to enter the home structure and cause further damage.
Ah, the great outdoors! It’s a space to unwind, entertain, and escape the daily grind. So picture this: a lush haven in your backyard tailored to your desires. Sounds dreamy, right? Well, it’s possible! Designing a garden oasis might seem like a Herculean task, but with careful planning and creative ideas, you can create a personalized retreat for relaxation and entertainment.
STEP 1: START ASSESSING YOUR SPACE
Before you begin, it’s crucial to assess the space you have to work with thoroughly. Take note of the size and shape of your available area, and consider how the natural elements like sunlight, wind, and water drainage may impact your design. Additionally, it’s essential to establish a realistic budget and determine which aspects of the project are the most important to you. By understanding your limitations and priorities, you can lay the groundwork for creating a garden oasis that is both functional and aesthetically pleasing.
STEP 2: THINK ABOUT YOUR GARDEN OASIS DESIGN
Developing a master plan is the next critical step in bringing your garden oasis to life. You may sketch your ideas on paper or utilize design software to create a digital blueprint. Regardless of the method, your plan should include a cohesive theme or style that reflects your personality and preferences. From Japanese Zen gardens to charming English cottages, the possibilities are endless.
With your style in mind, it’s time to divide your outdoor space into functional zones. These zones typically include relaxation, entertainment, dining, and play areas. The relaxation zone should evoke a sense of serenity and provide comfortable seating options like hammocks, lounge chairs, or a cozy reading nook. In contrast, the entertainment zone is ideal for social gatherings and should offer ample seating, tables, and space for games and activities. The dining and cooking zone is perfect for enjoying alfresco meals and may feature a dining table, outdoor kitchen, or barbeque grill. Lastly, the play and activity zone should accommodate the needs of children and pets, providing a safe area for them to roam and have fun.
STEP 3: CHOOSING THE RIGHT PLANTS IS ESSENTIAL
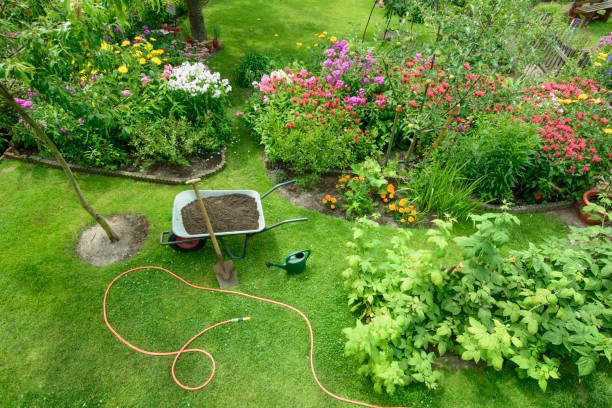
One of the most important aspects of designing a garden oasis is selecting the right plants. You should choose plants well-suited to your local climate and soil type while considering their aesthetic appeal and maintenance requirements. As you choose your plants, pay attention to the colors, fragrances, and textures they offer, and don’t hesitate to incorporate low-maintenance options for easy upkeep. Additionally, the strategic placement of plants can create privacy and block unwanted views.
STEP 4: DON’T FORGET HARDSCAPING
Incorporating hardscaping elements into your design adds structure, contrast, and functionality to your garden oasis. Inviting pathways and walkways can be designed using materials that complement your chosen style, such as gravel, flagstone, or brick. Patios and decks are ideal for extending your living space and providing a solid foundation for furniture and accessories. Garden walls and fences can help define zones and create privacy, while water features and sculptures serve as eye-catching focal points that enhance the overall aesthetic.
STEP 5: OUTDOOR FURNITURE MAKES THE SPACE
Selecting the right outdoor furniture and accessories is crucial for comfort and style. Look for pieces made from weather-resistant materials that offer the perfect balance of durability and design. Outdoor lighting is essential for creating ambiance and ensuring safety, so consider options like string lights, lanterns, and solar-powered fixtures. Finally, personalize your space with outdoor rugs, pillows, and decorations that complement your chosen theme and tie everything together.
STEP 6: TIME FOR ENTERTAINMENT
Elevate your outdoor entertainment game by incorporating features such as an outdoor kitchen or bar, which is perfect for grilling and chilling with loved ones. A fire pit or fireplace adds warmth and a cozy vibe on cool evenings, encouraging guests to linger and enjoy each other’s company. Additionally, installing an audio or video system can provide entertainment options like playing music or hosting movie nights under the stars.
STEP 7: MAINTAINING YOUR GARDEN OASIS
To keep your garden oasis looking its best, regular maintenance is essential. Stay on top of weeding, watering, and pruning to ensure your plants remain healthy and vibrant. Prepare your garden for seasonal changes by winterizing plants and furniture or taking steps to protect them from harsh weather conditions. When managing pests and diseases, opt for eco-friendly solutions to minimize any negative impact on your garden’s overall health and appearance.
FINAL THOUGHTS
As you embark on the journey to create your garden oasis, remember that the process is just as rewarding as a result. With careful planning, creative ideas, and some elbow grease, you’ll transform your outdoor space into a sanctuary for relaxation and entertainment. As you enjoy your new haven, you’ll appreciate the time and effort put into making it truly your own.
Years from now, as you bask in the sunlight, sipping a refreshing drink, or hosting a lively gathering, you’ll realize the true value of your garden oasis. Your outdoor space will become a cherished part of your daily life, a haven where memories are made and time is savored. So, embrace the journey and let your imagination soar as you create a garden oasis that reflects your unique taste, style, and vision. Your personalized retreat awaits, providing endless opportunities for relaxation, entertainment, and enjoyment for years to come.
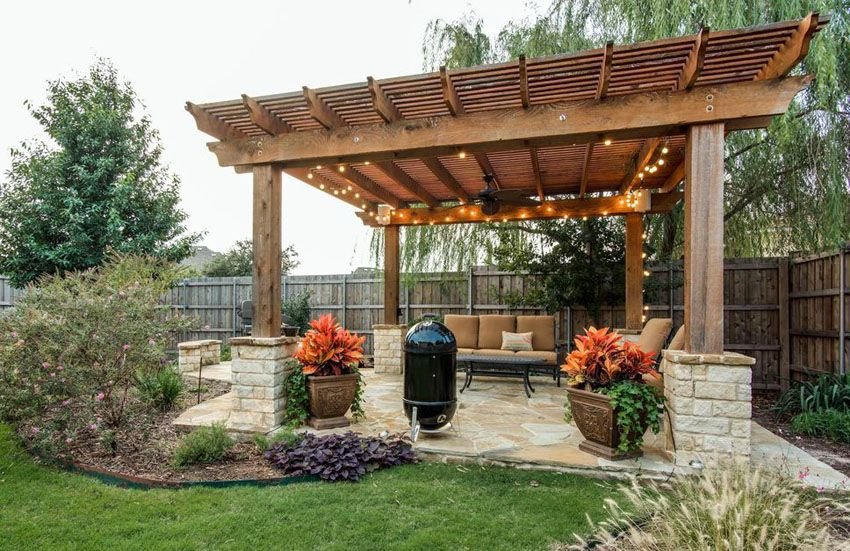
Backyard Pergola with climbing Wisteria vines. There is also an outdoor barbecue and table and chair set.
Pergolas are an excellent way to enhance the beauty of your outdoor space while providing shade and privacy. A pergola is a simple structure that typically consists of vertical pillars or posts that support cross-beams or lattice on the top. These structures can be built in different materials, including wood, vinyl, aluminum, or fiberglass, and can be customized in various designs to match the style of your home and landscape. If you’re looking to build a pergola, here are some pergola ideas to inspire you.
1. Classic Pergola Design: The classic pergola design consists of four posts supporting cross-beams on the top. The pergola can be left open or covered with vines or fabric to provide additional shade and privacy.
2. Modern Pergola Design: Modern pergolas have sleek and simple designs, often featuring clean lines and a minimalist look. They can be made from metal or wood and can be painted in bold colors or left natural. Modern pergolas can be a statement piece in your outdoor space
3. Rustic Pergola Design: If you prefer a more natural look, a rustic pergola can be a great option. Made from wood or rough-hewn timber, a rustic pergola can create a cozy and inviting atmosphere in your outdoor space. You can add hanging lanterns, candles, or string lights to create a warm and inviting ambiance.
4. Arbor Pergola Design: An arbor pergola is a smaller version of a classic pergola, often used as an entryway to a garden or as a decorative feature in a yard. An arbor pergola can be made from wood or metal and can be painted in any color to match your home’s style.
5. Attached Pergola Design: An attached pergola is built against the side of your home or attached to a deck or patio. This design can provide additional shade and privacy to your outdoor space, and can be customized to match the style of your home.
6. Freestanding Pergola Design: A freestanding pergola is not attached to any structure and can be placed anywhere in your yard. This design is versatile and can be used as a standalone feature.
In conclusion, pergolas are a great way to enhance your outdoor space and add value to your home. With various designs to choose from, you can customize your pergola to match the style of your home and landscape.
If you’re planning on becoming a landlord in the near future, or you’re already a landlord, then you’ll know that there are certain repairs that landlords are responsible for. One of them is plumbing. If your tenants report a problem with their plumbing, then you either need to fix it yourself or call someone out to do it for you.
But how can you save money and reduce the risk of needing to hire a plumber for your rental properties? There is one way, and it’s called plumbing maintenance.
In this post, we’re going to help potential landlords understand what the best plumbing maintenance is to avoid costly repairs down the line. So, before you start googling ‘how to get an online rental application’ we suggest reading below!
PLUMBING RESPONSIBILITIES OF A LANDLORD
So, what kind of plumbing is a landlord responsible for? Well, all of it! No matter where you are in the world, landlords tend to be responsible for providing a habitable home, and that means running water!
Though tenant rights and landlord regulations differ by state, you are generally expected to deal with any and all repairs that occur on your property. However, if you want to know the details of your state, you can look at local guidelines to ensure you’re not taking on more than you legally need to.
TOP 5 PLUMBING MAINTENANCE TIPS FOR LANDLORDS
If you’re looking to avoid costly repairs for your rental property, then there are a few things that you (and your tenants) should be doing to ensure that all is in working order with the plumbing. These are as follows.
1. CREATE A MAINTENANCE SCHEDULE
To begin with, we wholly recommend making a maintenance schedule. This means creating a list of things to check and when to check them. While some aspects of your plumbing will only need spot checks here and there, you may need to do other things more often.
If you stay on top of this schedule, you’ll likely catch any potential issues as early as possible and not have to worry about costly repairs in the long run.
We recommend adding maintenance checks to your calendar and conferring with your tenants to ensure you can access the property on the days when maintenance checks are necessary. Alternatively, you could ask tenants to do the checks if they would rather you weren’t on the property regularly.
2. CHECK FOR LEAKS
This probably seems like an obvious maintenance tip, but we don’t just mean obvious leaks. Check everything from pipes to radiators for leaks or signs of leakage.
Leaks can cost more money since they cause an increase in water use, and they can cause issues with the pressure of your plumbing system. If you notice a leak, fix it right away to ensure it doesn’t become a bigger problem down the line.
3. KEEP THE DRAINS CLEAR
If water has been going down the drain slowly, there could be an issue with clogging. If you or your tenants have noticed this, then unclogging them immediately can save you from bigger clogs and blockages later on.
While it can be tempting to throw a chemical unclogger down the drain immediately, consider using this as a last resort. Many chemical uncloggers actually have such harsh chemicals that they can cause damage to your pipes.
Instead, you could use a simple mix of water, vinegar, and baking soda or a physical unclogger, like an auger.
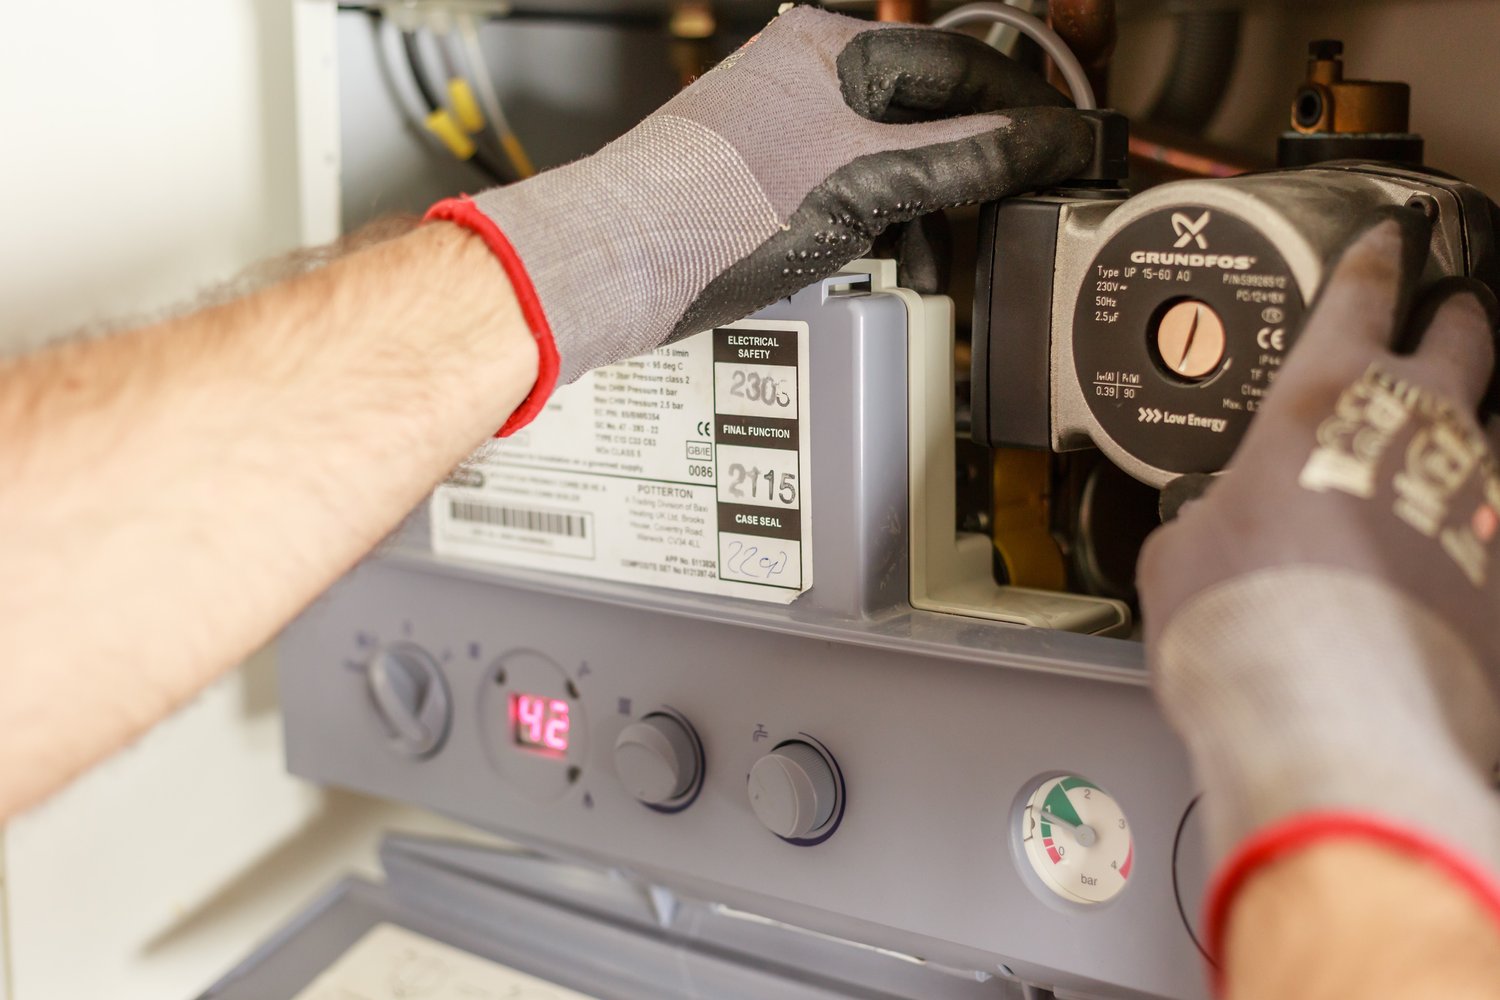
4. CHECK YOUR WATER PRESSURE
More often than not, issues with heating come from water pressure drops. It is important to ensure that your water pressure is at the right level at all times. Checking this will also give you a hint as to whether you have leaks or blockages in the system.
Standard water pressure is about 35 to 100 PSI, but you should be aiming for between 40 and 50 PSI in a home.
5. SCHEDULE AN INSPECTION
Though you can do many checks yourself, scheduling a plumber to come around and check everything from the water heater to the drains to the pipes can ensure that everything is in working order.
They can also give recommendations if they notice any plumbing needing replacing soon and help out tenants if they’re doing the checks themselves.
While you may want to avoid plumbing costs, an annual inspection will ensure you avoid higher costs further down the line!
WHO IS RESPONSIBLE FOR A PLUMBING BILL: THE TENANT OR THE LANDLORD?
Generally, a landlord will need to pay for repairs on their rental property if the issue is due to wear and tear. However, if a tenant damages the plumbing or it is caused by neglect, then there may be grounds for the tenant to pay for the repairs.
Legally, landlords have to provide habitable accommodation, which means the onus is usually on them to ensure everything is in good working condition when it comes to the plumbing. If your tenant won’t pay for the damage they caused, you may want to seek advice for the next steps you should take.
FINAL THOUGHTS
If you’re already a landlord or about to become one, getting to grips with some basic plumbing repairs can save you in the long run. Make sure to create a schedule and stay on top of any small problems to avoid bigger ones in the future.
Your home or commercial property should be an inviting place to visit. When the landscaping is not well kept, it’s not a very welcoming environment. Sometimes your landscaping may be perfect, but the utility boxes and other outdoor eyesores just stand out. This article will discuss how to strategically and creatively hide outdoor maintenance devices using landscaping.
HIDING OUTDOOR EYESORES
Air conditioning units, tangled hoses, protruding pipes, and clutter can all diminish your curb appeal and landscaping. Although these outdoor eyesores are needed, they can distract people from the best features of your landscape. There are several ways to hide these outdoor eyesores.
UNSIGHTLY GARBAGE AND RECYCLING BINS
Hiding your garbage and recycling bins can be done. Many houses have side gate entrances where people can tuck their bins behind the gate. An obvious option, if you have a garage, would be to put your garbage and recycling bins in the garage. You could also purchase a gate enclosure such as a Suncast Outdoor Screen Enclosure from Walmart, or the MCombo Outdoor Storage Cabinet on Amazon. Using a partial fence or plants in your yard to tuck your bins behind will camouflage them from the street.
UGLY ELECTRICAL BOXES AND METERS
Unfortunately, utility boxes can be an eyesore in your landscaping. It’s very important that you talk to your utility company and find out what coverage is permitted before you camouflage the box. As a starter suggestion, you could paint the box dark gray or a warm stone color. You could also wrap the box in vinyl bush print or a scenic mural. Another option would be to surround the box with tall plants or a row of bushes suited to your environment.
MESSY GARDEN HOSES
A sloppy, tangled garden hose is an unnecessary eyesore in your yard. You can reel in the chaos by getting a decorative wall mount or potted floor container. A Suncast Plastic 225-ft Hideaway Hose Reel from Lowe’s is one example of a floor container. Also, a Never Leak Steel 100-ft Wall-Mount Hose Reel from Lowe’s is a great wall-mount option for hiding messy garden hoses.
CLUTTER, TOOLS, AND KIDS’ TOYS
Personal clutter, tools, and kids’ toys are the easiest to hide. If you have a garage just store them there. You want your yard to be an inviting space. One option would be to donate or get rid of any tools or toys you’re no longer using. Another option would be to build a shed or purchase a Shelf-Welded Steel Garage Storage Shelving Unit from Home Depot. You could also purchase a FastTrack Garage Multipurpose Storage Railing System from Lowe’s.
IMPOSING UTILITY BOXES
Utilitarian utility boxes aren’t a helpful landscaping feature in your yard. A simple way to hide these eyesores is to paint them the same color as the wall they are mounted on. Additionally, you can hide the box by adding a Fusion Privacy Screen. This has built-in planters or a custom-built faux wooden cabinet. If you decide to conceal the utility box with flowers make sure the planters are still easily accessible.
UNINSPIRING GARAGE DOORS
Your garage door can be an eyesore even if it is a functional door. If your door is outdated it may be time to replace it with a newer model. If your garage door doesn’t need to be replaced, there are several other options to make it look more contemporary. One simple idea would be to paint the door. You can use colors that complement your house. You can also transform any garage door into a custom carriage door. To do this, you could purchase black magnetic hinges and handle accents on Amazon.
LANDSCAPING IDEAS TO HIDE UTILITY BOXES
Disguising utility boxes seem minor when it comes to landscaping. Using landscaping to hide a utility box, can improve your curb appeal. You want to have a beautiful exterior for your house or commercial property. Hiding utility boxes gives your landscape a more aesthetic look. You can use your own creativity or find many ideas online. Let’s take a look at a few ways to hide utility boxes.
ARRANGE POTTED PLANTS
A container garden is a great way to hide utility boxes. Potted plants do not require any digging which could potentially damage underground wires or cables which may need to be accessed by utility workers. Always keep in mind that the bigger the pot, the more difficult it will be to move. You could use larger pots to plant taller and more concealing plants. This could include bamboo, ornamental grasses, small shrubs, or hedge plants.
USE A SCREEN
Adding a screen at a safe distance is another way to hide a utility box. Be sure that the screen is easy to remove so the box is easily accessible. You could purchase a moveable screen or create a DIY screen from wood. You can also grow a small garden of flowers in front of a trellis or use a small statue as a way to hide the utility box. Again, it’s all about creativity and functionality.
USE A TRELLIS
Similar to using a screen, you can also use a trellis to hide a utility box. Adding a vine to your trellis will keep the box hidden. Keep in mind that you’ll want to hide the box year-round, so consider getting a decorative trellis. That way it still gets the job done even when the trellis isn’t covered in beautiful foliage.
PLANT SHRUBS
If you can safely plant shrubs around the utility box, this may be the perfect option. You can add a row of shrubs or small trees to your landscaping to hide a utility box. When choosing what to plant, make sure the root system of the shrubs has shallow, unobtrusive systems if they are near cables. Also, avoid planting directly over the top of cables. You can choose to use a variety of heights, colors, and flowering varieties to conceal the utility box.
Finally, hiding utility boxes and other outdoor eyesores doesn’t have to be a challenge. Whether you’re redoing your landscaping or sprucing up your landscaping, it’s worth it to make your outdoor space a nice place to be. Before you know it, you’ll have the nicest landscaped house in your neighborhood.
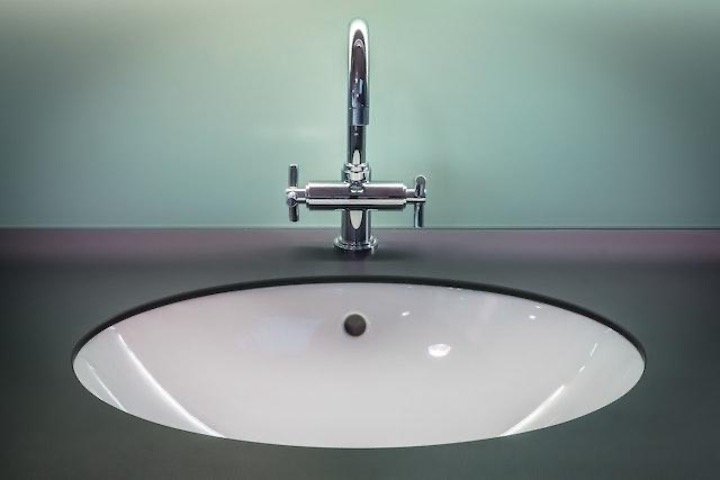
As a homeowner, taking care of your plumbing should be a priority in the long run. Water damage is often some of the most expensive to repair, and a lot of it comes from bad plumbing. And to be even more specific, drainage problems are a big part of this when looking at the details. As such, knowing how to spot the signs of drainage problems before they become serious is vital. Thankfully, you can spot an issue with your drainage well before it becomes an issue to fix. And to prevent these problems, you often just need to clean your drains. In order to help you out with this, we put together a list of six signs you need drain cleaning services.
1. WATER DRAINS SLOWLY
If you notice that your sink is starting to fill up while washing your hands or the shower is filling up while you’re using it, that’s a pretty good sign you need drain cleaning services. This happens because the drainage pipes are starting to get clogged but aren’t entirely blocked. This problem usually only shows up at one sink or drain, and this is a sign the blockage isn’t too deep. Either way, contacting professionals to clean the pipes properly is essential. If you’re moving into a new home, this is one of the first plumbing checks you should do. Remember, the sooner you spot problems, the easier they are to deal with. And the last thing you want after moving into your new home is plumbing issues to sneak up on you.
2. YOU HEAR GURGLING WHEN WATER IS DRAINING
If you can hear gurgling sounds while water is draining, that’s a dead giveaway. Your drains need cleaning. Blockages in your drainpipes cause this. However, thankfully, it means the pipes aren’t entirely blocked. Gurgling sounds, however, mean the pipe is very close to being wholly blocked. As such, as soon as you hear these sounds anywhere in your home, get in contact with professionals immediately. Additionally, professionals from Triple 7 Movers Las Vegas note that you should immediately check every drain when moving into a new home. Again, prevention is the best solution to these sorts of issues, so you want to catch them as early as possible.
3. YOU NOTICE CLOGS ARE BECOMING MORE AND MORE FREQUENT
Everyone has to deal with a clogged drain every now and again. However, if you unclog a drain very quickly after it starts to drain slowly, you should consider contacting professionals. This can indicate that a more serious blockage is present inside the system. As mentioned, these minor annoyances can escalate into severe issues. So, try to deal with them as quickly as possible to avoid costly repairs. In addition, keep an eye out for other home repairs that can’t wait. Certain problems might seem very small initially, but you shouldn’t risk them escalating into more significant issues.
4. YOU NOTICE A FOUL ODOR
Foul odors from your sinks or bathtubs clearly indicate you need drain cleaning services. These smells are typically a sign that food or grease has become stuck in the pipes and needs to be cleaned. It could even be caused by a rodent getting stuck in the pipe and dying. Besides posing the risk of a clog, this can be a significant risk to your and your family’s health. So, if you notice foul smells coming from your drains, don’t take the risk and contact professionals immediately. This is especially important if you’ve just moved into a new home, as pests tend to go through pipes that aren’t actively used more often. Additionally, consider how you can make your new place sparkle. After all, cleaning should be the top priority once you’re done checking for problems.
5. YOUR TOILETS ARE OVERFLOWING
Frequently overflowing toilets should be cause for serious concern for homeowners. This is an almost sure sign that the drainage pipes are clogged up, and you should take them very seriously. A backed-up toilet can seriously and extensively damage your subfloor, which isn’t a cheap fix. Thankfully, if you act quickly, you can fix it in time to avoid all damage. In addition to plumbing, however, homeowners should pay attention to other home maintenance. For example, cleaning your gutters is just as important as ensuring your plumbing is in good condition. A backed-up gutter can cause severe structural damage, so don’t ignore cleaning them on a regular basis.
6. YOU NOTICE WATER BACKING UP
Contact professionals immediately if you notice water backing up in your sinks or bathtub. This is a clear sign of a blockage; you should get it fixed immediately. If you ignore this problem, water will eventually back up through your drains and start flooding into your house. Besides the obvious issue of extensive water damage, the drain water is typically very dirty. So, on top of dealing with water damage, you’ll have to deal with a serious health risk to yourself and your family. So, before it gets to that point, contact professionals as soon as possible. Remember, prevention is the best solution, and you shouldn’t take any risks with your plumbing.
SIX SIGNS YOU NEED DRAIN CLEANING SERVICES – WRAP UP
Drainage problems are hazardous to your home and even to you. As such, contact professionals as soon as you spot one of the signs of these issues. It might seem like a hassle to treat every issue like this, but the fact is that even the tiniest problem can escalate dramatically. So, don’t take any chances, and keep an eye out for the early warning signs of drainage issues. We hope this list of six signs you need drain cleaning services helps you out, and we wish you a great rest of your day.