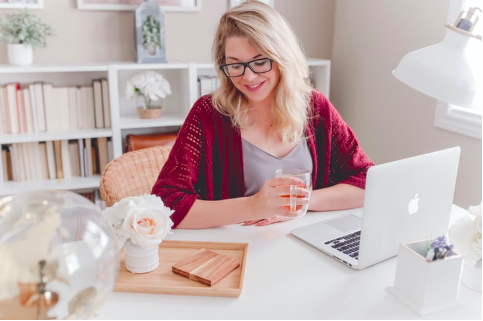
Many people keep themselves dependent on professional help to unclog a dishwasher because they don’t know the real trick to fix the draining problem. Few might possibly don’t want to take the risk to make DIY unclogging the dishwasher because they think the DIY unclogging could lead to a completely dysfunctional dishwasher. You should not need to be worried any further! Here, you will learn a simple way to get rid of your dishwasher draining problems. Just keep reading!
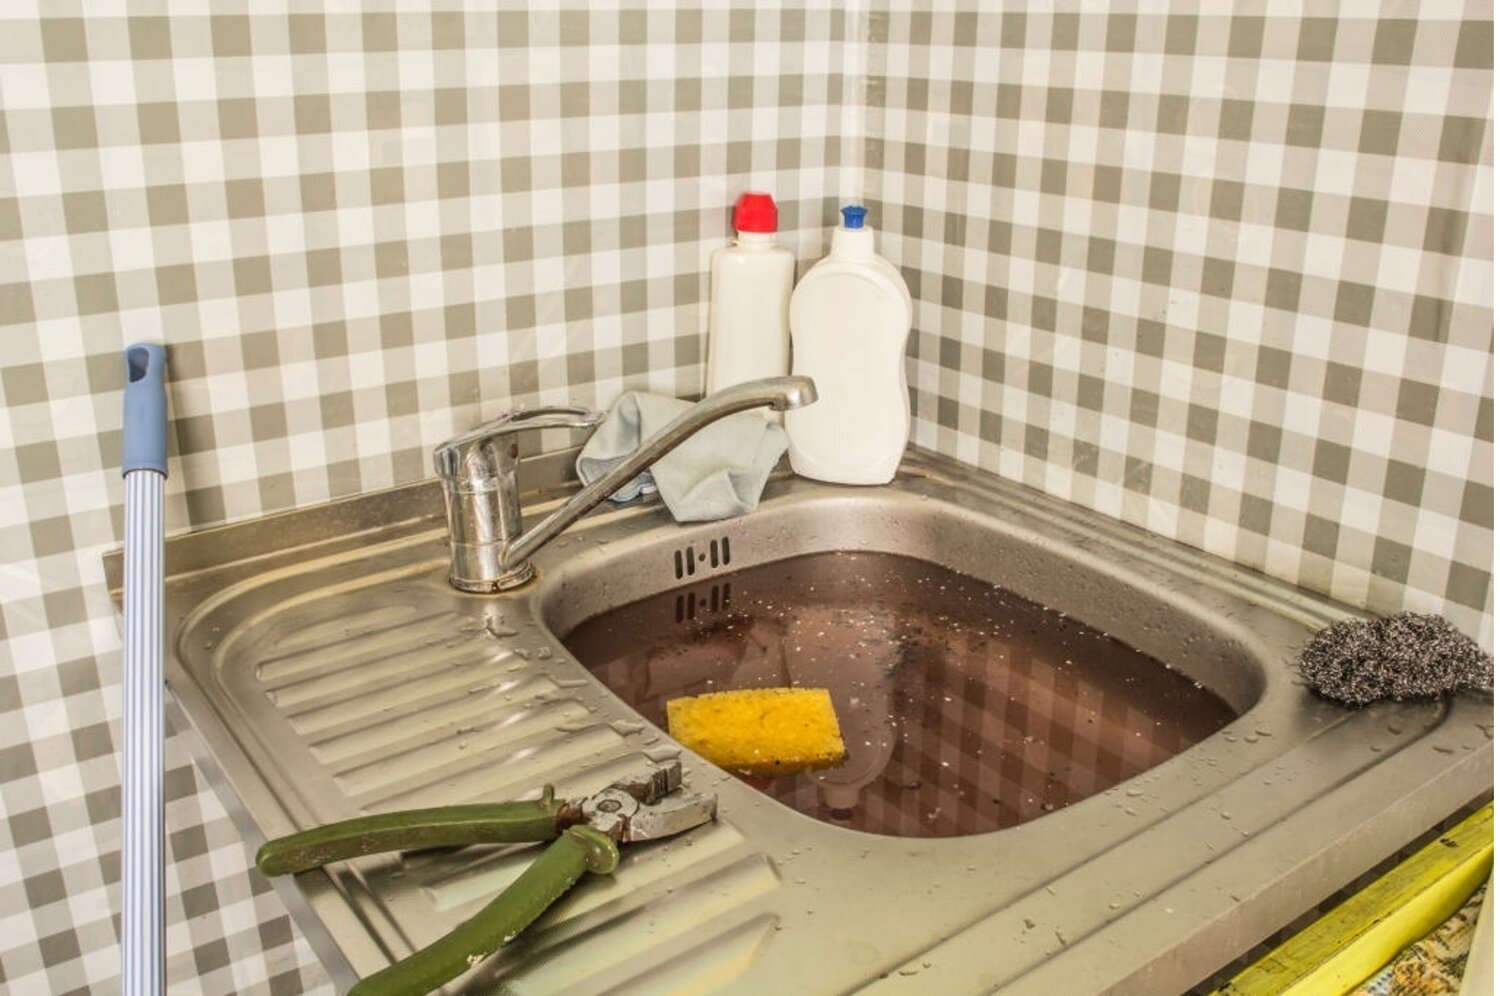
Have you experienced a situation when you open the dishwasher while aiming to auto clean your dishes but subsequently get shocked by looking at soapy water inside the machine? Hey, stop worrying about this! A clogged dishwasher does not necessarily require professional help. Mostly, this is much easier and everybody can do it. Before going ahead, let’s know the symptoms of a clogged dishwasher drain hose.
How do you know when your dishwasher drain hose is clogged?
Every disease shows some symptoms. Similarly, if you see any of the following symptoms in your dishwasher, it is a clear indication that your dishwasher drain is clogged:
● The dishwasher is not completing the full wash cycle – normally 2 to 4 hours. Instead of making a complete wash, it keeps shutting down.
● You kept seeing some water at the bottom, near the draining system.
● Some bits of food and garbage are stuck in the filter
As a result, the waster inside the machine is not draining properly due to a clog building in the drain hose.
Main Causes of Dishwasher Problems
Dysfunctional pump: The improper functioning of the pump may be due to the accumulation of debris. An appropriate replacement of the problem-causing part of the pump may solve your dishwasher problems.
Timer Issue: The timer triggers the response to complete the washing cycle at an appropriate time. However, the timer sometimes fails to trigger, and as a result, the machine keeps washing. Or sometimes, the timer triggers frequently and interrupts the washing. This rare instant may require some professional help to keep the timer working fine, or replace it to get rid of the fault functioning.
Fault in the Draining Motor: Check if the motor is not working properly, and then replace it. The motor companies sometimes provide their expert service services.
Valve need Replacement: Some dishwashers have a valve to drain out the water. If this causes some disturbance, then the valve needs replacement.
Prepare your Dishwasher for unclogging
● Remove all dishes and kitchenware, if any, from the machine.
● Double check your dishwasher is turned off.
● Remove the standing water with the towel or cotton fabric.
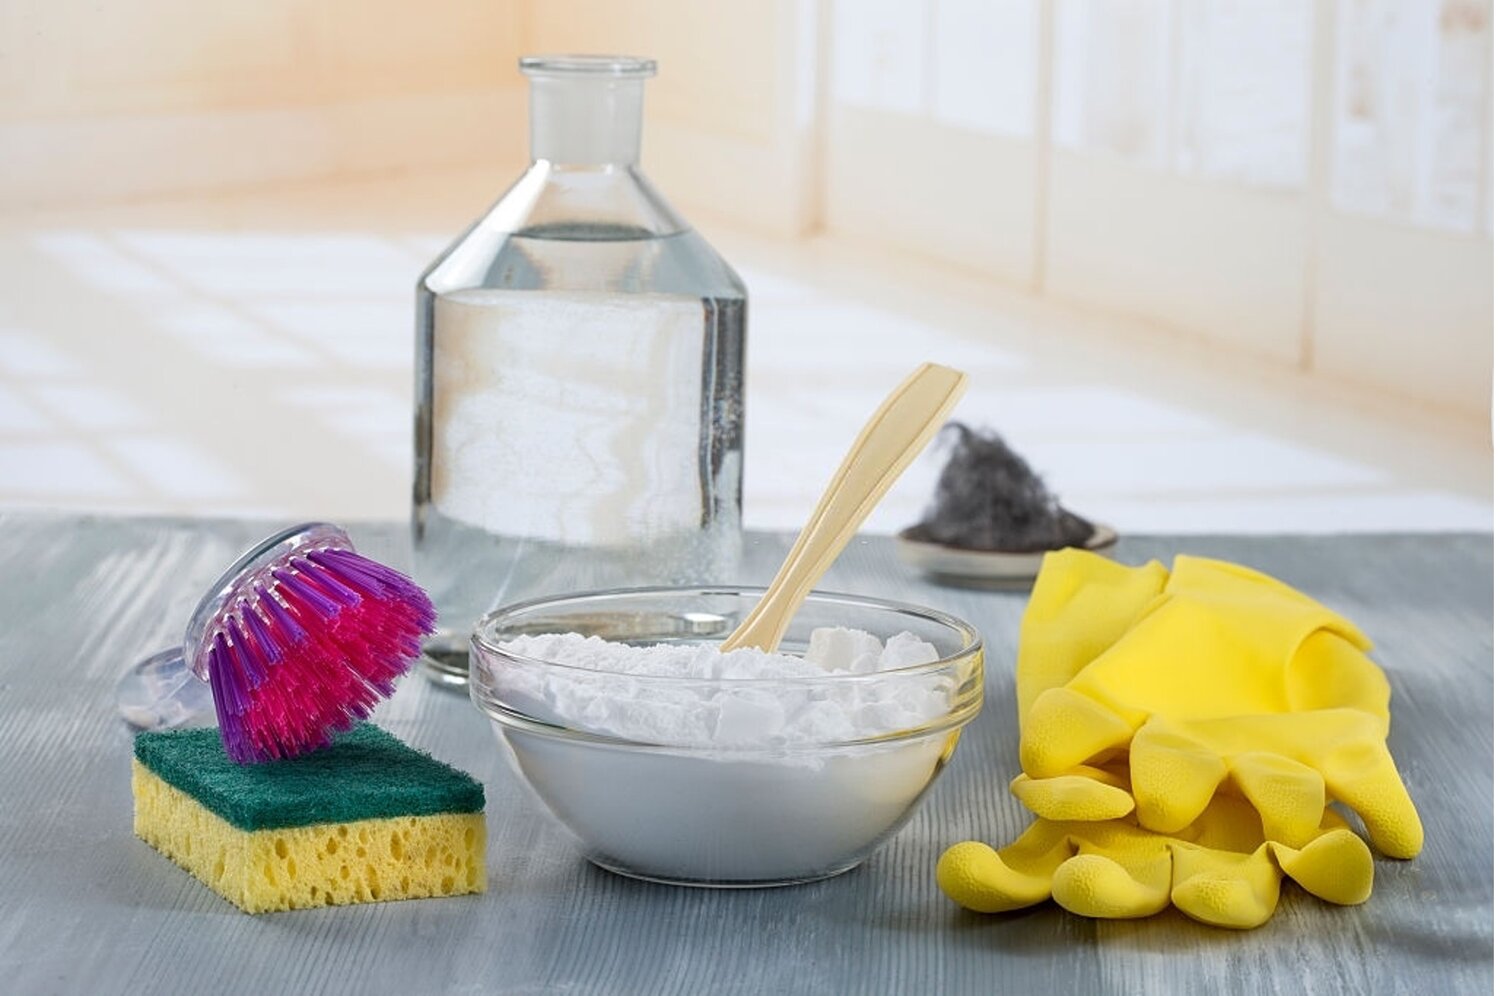
● Get all required tools such as towel/cotton fabric, vinegar, baking soda, boiling water, screwdriver etc.
Try Homemade Cleaner – Apply simple tricks before making a deep cleaning
First, try a simple homemade solution made of baking soda, vinegar, and hot water to unclog the drainage system of your dishwasher. Simply, put down the solution of vinegar and baking soda at the bottom of the dishwasher after removing the standing water with the cotton fabric, or towel. Apply it for at least 15 minutes, and then pour down the boiling hot water into the bottom of the dishwasher. Check whether this trick has solved your dishwasher issue or you need to make a deep cleaning by opening the dishwasher further.
How to Unclog Dishwasher
1. The drain hose is, basically, the tube that connects the dishwasher with the garbage disposal. You can spot the hose beneath your sink or on the back of your dishwasher. In the latter case, when the hose is behind the dishwasher, remove the lower spray arm with clips arm by hand. After that, remove the filter by pulling it up, and check whether the hose is clear.
2. Disconnect the hose from the machine. You can do so simply by removing the clamps with the help of the screwdriver. Once the hose is removed, check the accumulated food and particles if any, and wash it properly with some commercial declogger because this may prevent water from passing through.
3. In most dishwasher machines, the water draining from your dishwasher is done by garbage disposal. So, in this scenario, keeping garbage disposal clean all the time is crucial to get rid of most of the dishwasher problems. Basically, garbage disposal which is full can block the water from passing through the draining system and keep it standing in your dishwasher.
4. In some dishwashers, you have an air gap on top of the sink, next to your faucet that might look like a soft dispenser but it is not. Remove the cap and verify if there’s any food stuck in there. Clean it with the help of a screwdriver.
5. Do reverse engineering to place all the things back in the reverse order as these were removed. That’s it!
Who said, “You cannot solve dishwasher problems”? Isn’t it that simple how to unclog the dishwasher? Don’t rush to ask for professional help at the first instant. DIY problem solving is such a handy practice that makes you feel proud being a master of all!
My DIY Decor is your best problem-solving blog where you can read simple tips to make many of your home projects by yourself. You can save a huge amount of money by doing the same work as done by a professional who charges a huge fee. Be your own professional at home, and do it by yourself. Even if you ask for professional help, you should know the problem, and the root cause of that problem so the professional cannot charge more than an appropriate amount.
Gardening is one of the very few activities which engages all the senses and which can give a decent amount of exercise, the level of which can be varied to suit your physical condition. These days, very few people have large gardens at home, but those who have a craving to tend them can often join volunteer groups which manage communal gardens. These can be anything from designated areas in city parks to grounds in stately homes.
These days, however, many people focus on gardening in smaller space. These can be anything from a tiny outdoor space with proper soil, to a balcony or terrace or even a window box or hanging baskets. If you can find a space for a container of soil and you can access the container for watering, then you can have a garden for beauty, for food or to help out the local wildlife (especially the bees).
Even if you can’t, you can still have a garden, just bring it into your home. At the very least you can grow some of your favourite herbs for the kitchen.
Gardening for Physical Health
While a lot of the conversation around gardening revolves around its (many) benefits for mental health, there’s a lot to be said for its benefits for physical health. It’s also worth remembering that although good physical health does not guarantee good mental health, poor physical health can have a serious impact on your mental health. With that in mind, here are some ways gardening can help your physical health.
PROVIDES GENTLE CARDIO
Many times gardening can be as intensive or gentle as you want it to be. If you want it to be intensive, go for manual tools. If you want it to be gentle, use power tools, get help and/or design your garden so that it requires minimal effort to maintain.
KEEPS YOU (FAIRLY) FLEXIBLE
Gardening encourages you to keep using a wide range of movement, e.g. bending, stretching and turning, but lets you do so at your own pace, instead of having to keep up with a class.
GETS YOU OUTDOORS
If you can do your gardening outdoors, then you can benefit from being out in the fresh air and daylight. The latter is a useful source of vitamin D, which scientists have recognized as providing a number of health benefits, including helping to maintain calcium levels. This becomes increasingly important as we age and our bones become more brittle.
CAN HELP YOU SLEEP BETTER
After you’ve spent some time working in the garden, you’ll have burned off quite a bit of energy and also destressed. This combination is about as good as it gets when it comes to getting some decent sleep and scientists agree.
CAN IMPROVE YOUR DIET
If you can grow your own food not only do you not have to worry about needing to buy it but you know exactly what it is and under what conditions it was grown. You also get the ultimate in freshness, you can literally pick what you need, prepare it as you wish and eat it.
Gardening for mental health
Gardening is recognized as offering a wide range of mental-health benefits. Here are just a few of them.
HELPS TO REDUCE STRESS
Gardeners themselves have long reported that gardening helps relieve their stress, but up until recently, there was nothing in the way of scientific evidence to back that up. A recent study in the Netherlands, however, has finally provided experimental evidence to support the belief.
HELPS TO COMBAT LONELINESS
There’s a strong link between loneliness and poor health and so anything which reduces feelings of loneliness, isolation and exclusion generally has a health benefit. While communal gardening brings obvious socialization opportunities, even those who do their gardening by themselves increase their opportunities to chat with others, whether that’s over the fence or just going online to chat with other gardeners. It may not be as good as real-world interaction, but it can be a whole lot better than nothing.
HELPS TO REDUCE THE RISK OF DEMENTIA
Dementia is a very complicated disorder, but lifestyle is known to be a factor in it. Any form of exercise appears to be beneficial and according to a study in Australia, gardening is particularly beneficial.
The three fundamentals of gardening
There are three big differences between gardening and many other activities. The first is that it is super-important to familiarize yourself with the exact conditions in your garden before you make any changes to it. The second is that you may have very little control over the key factors which influence how your garden grows and the third is that gardening is a slow process. Let’s have a look at what this means in practice.
GETTING TO KNOW YOUR GARDEN
There are many factors which will influence what you can do with your garden, the most important ones include: soil type (pH and level of drainage), local climate, orientation and nature of landscape, local rules and safety considerations and size. Note how size is last on the list.
It’s important to go through this process even if you hate something about a garden (for example, you’ve taken it over from someone who had very different taste). This will help reduce the likelihood of you going through a lot of work to make a change only to discover that there was actually a reason why the previous homeowner did what they did and you will have to come to an alternative solution.
WORKING WITHIN YOUR GARDEN’S LIMITATIONS
With regular outdoor gardening, there’s a distinct limit as to how much control you will have over the key variables listed above. If you’ve set your heart on growing a plant which really isn’t intended for your local area, then it’s very likely that your only option would be to put it in a container and you might even have to create a special environment for it, such as a cold frame or greenhouse.
You could make a very strong case for arguing that, in some ways at least, indoor gardeners have more freedom of choice as they have a greater degree of control over the environment in which their plants grow.
LEARNING THE VALUE OF PATIENCE
A lot of gardening activities proceed at a slow pace. While the likes of mustard and cress grow at the sort of rate which can be easily seen and understood by children, plants grown from seed generally often take the better part of a year to show any meaningful results and some plants can take several years to reach their full glory.
Getting the most from your garden
With all that said, most gardeners will be able to create a garden they love, even if it’s only a small one, as long as they’re prepared to work at it (and be patient). Here are some tips.
GET ORGANIZED WITH A GARDEN PLANNER
Garden planners are far more than gimmicks. They are a great way to keep on top of everything to do with your garden. You could argue that they’re essential for managing larger gardens, and/or gardens which are meant for productivity, and they can be very handy for indoor gardeners. If nothing else, they can provide an easy reference for anyone who needs to take care of your plants if you go away for a while. You can buy them in paper and digital versions. The latter can be very handy as they can integrate with useful data sources, like weather sites, or you could just make your own.
DECIDE WHAT YOU PERSONALLY WANT FROM YOUR GARDEN
If you want an outdoor “living space”, then you’ll want to prioritize an open space, like a lawn, and you’ll probably want some garden furniture even if it’s only a (storage) bench and perhaps a table. If you add a bit of shelter, such as a canopy, plus a garden heater, you could potentially enjoy your living space at least from early spring to late autumn and possibly even in winter as well.
If you want a kitchen garden, then prioritize foods which are expensive and/or hard-to-find and learn how to preserve them effectively and healthily so you can avoid having to buy out-of-season foods, which are imported from overseas. This can help your wealth as much as your health. It’s good for the environment too.
If you want a garden purely for beauty and relaxation, then try prioritizing plants which are native to the UK and, ideally, found in your local area. These will not only have the best chance of success in your garden, but will also be non-invasive and are more likely to be appreciated by the local wildlife.
Whatever kind of garden you want, you can create it with the environment in mind. This can mean anything from choosing your plants with care to adding extra shelters for creatures in need, such as bee houses.
Think about your lifestyle now and in the future
Deciding what kind of garden you want is part one. Part two is being honest about your lifestyle, or, perhaps it would be more accurate to say, how much time and effort you can and will put into maintaining it. Here are some questions to ask.
Are you really going to mow a lawn or would astroturf be a better option? It’s not as good for the environment but you could take other steps to compensate for that.
How do you feel about bending? Would raised beds help to make your life easier? You don’t have to use them for everything, but it might help to use them for some parts of your garden.
Do you really have plenty of time for weeding? If not, you might want to use plenty of ground-cover plants to stifle weeds.
KEEP SAFETY IN MIND
This isn’t exactly the world’s most exciting tip, but it is important. Make sure people and animals can get around your garden safely. Even if you don’t have children or pets, your neighbours will and there will be local wildlife. You could say that none of the above should be in your garden, but, even so, it’s good to be a good neighbour (and also makes life easier).
Think about walkways and lighting in the key areas. Be very careful to ensure that water features are either raised well off the ground (e.g. fountains) or that there is an easy way to get out of them if a child or animal falls in. Sloped edges and netting is the usual approach for “natural looking” ponds. Steep edges are to be avoided at all costs, unless they are really high so they can’t be climbed. In the unlikely event you have a swimming pool, keep it covered out of use.
THINK ABOUT YOUR GARDEN’S SECURITY
As a minimum, you want to ensure that any tools are kept away from thieves and ideally you want to think about how your garden can actively contribute to your security. For example, motion-sensitive lighting can make intruders visible (as well as guide visitors) and gravel can make an audible crunch when someone is approaching.
Create a garden for all seasons
Gardens don’t have to look bare and sad in winter. You can use foliage plants and decorations to brighten them up. You can even get some winter-flowering plants. Being nice to nature can help too. Stick out a bird table (and maybe a squirrel feeder) and you can not just bring life to your garden (literally) but get all kinds of entertainment too and maybe get the chance to teach children about the importance of protecting wildlife.
MAKE THE MOST OF THE VERTICAL SPACE
This is particularly true of smaller gardens. In fact, in some cases, vertical space may be all you have. Remember to keep weight in mind, you absolutely must avoid overloading support structures, especially walls! Sometimes you can add strength by means of extra structures such as trellises, but again, be reasonable about this.
You can also use vertical space to create more visual interest, for example, by placing plants at different levels to force the eye to move around and hence create the impression of more space. This can be useful even in larger gardens, for example if you have a long wall and want to make it look more interesting.
THINK ABOUT HOW PLANTS WILL GROW
Check the expected size of your grown plant and work to that so everything stays in proportion over the long term. Over the short term, you might want to use visual tricks to compensate for your plant’s small size, for example you could buy a garden ornament to fill in the space while it grows.
Keep trees and bushes well away from any buildings, especially ones you value (like your home). Their roots can do horrendous damage to a property’s foundations and can lead to subsidence. Additionally, falling leaves can lead to drainage issues which can also lead to subsidence.
Last but by no means least, some spreading plants are only really safe to grow in containers. Put straight into soil they can quickly overpower every other plant in the garden and become a real nightmare to control. You can avoid this by doing thorough research before you do your planting.
REMEMBER A LOT OF INTERIOR-DESIGN TRICKS CAN WORK OUTDOORS TOO
There are lots of “interior design” tricks, which work perfectly well outdoors, especially in small gardens. For example, you can add mirrors to make the space look bigger and turn necessities (such as containers) into decor. You can also look for opportunities to “blend in” attractive features from outside your garden. For example, if your garden has a view of a landmark, try to use your planting to “frame” it.
APPRECIATE THE IMPORTANCE OF SCENT
Gardens used to be renowned for their scents, but for a while seed banks largely abandoned it in favour of showier blooms. Possibly this was connected with the development of mail-order sales and the need to produce gardening catalogues which were visually appealing. Rather ironically, the internet seems to have encouraged gardeners to move away from this.
Even though the internet can’t (yet) capture scent, it doesn’t suffer from the same space restrictions as paper catalogues and so it’s easier to describe scents and easier to promote the importance of incorporating them into your garden. There’s also been a move away from imported flowers and back to native ones, which, again, may have been helped by the internet promoting them (and their environmental significance).
IN SHORT – “A GARDEN IS A THING OF BEAUTY AND A JOB FOREVER.” RICHARD BRIERS
A gardener’s job is never done, even after they die, they’ll be “pushing up daisies” and that’s probably just how most gardeners would like it. If you really want to maximize both your garden’s productivity and the pleasure you get from it, then try keeping accurate records of how your garden grows. These can be anything from practical statistics (so you can see how your techniques worked in practice) to sentimental recollections, such as by keeping a journal or taking photographs to preserve your fondest memories of it.
Katie is the Editor here at Poshh Living and is a well-respected voice in the world of design and home improvement. Katie has a first-class Hons degree in Journalism and is proud to say that she has written many leading entries in the biggest media outlets including Ideal Home, and Good House Keeping. Lover of the great outdoors and mother of two, Katie is ‘down to earth’, knowledgable and a great asset to the team
Are you getting hit with bad smells as soon as you walk through your door? Whether you’re a landlord getting your unit ready for new tenants or a renter looking to freshen up your space, learn how to deodorize a room naturally to stop unpleasant odors in their tracks. If your former renters were messy, smoked, or had pets, there’s a chance they’ve left behind some unappealing smells.
Natural deodorizers are perfect for freshening up your space, plus they’re a perfect eco-friendly apartment hack. Ensure that future tenants won’t turn up their nose at your listing and try out these natural remedies.
Essential oils are biodegradable and all-natural. Many also can contain antibacterial, antiseptic, antifungal, and antiviral properties that can help freshen your rentals. Plus, various scents can help boost your mood.
Several studies have indicated that smells can have a positive effect on humans and can even encourage certain emotions — this is where essential oils come into play. Here are some of our favorite essential oils with both cleaning and mood-boosting properties:
Lavender: Lavender essential oils can help fight bacteria, viruses, and fungus. The scent can also help promote relaxation and sleep, which makes it the perfect deodorizer for bedding or clothing.
Peppermint: Essential oils containing peppermint have antiseptic properties which makes it a great cleaning agent. Plus, peppermint is known to revitalize and stimulate your mood — perfect motivation when preparing and cleaning an apartment for new tenants.
Orange: Orange essential oil has both antiseptic and antibacterial properties and is also a great degreaser for any stains previous tenants might have left behind on stubborn surfaces like countertops and stoves. Orange also has a very uplifting and refreshing scent — great for relaxing.
Tea tree: Tea tree essential oil is an all-around great cleaner and contains a number of antibiotic compounds, including terpinen-4-ol, that have been shown to kill certain bacteria, viruses, and fungi. Its herbaceous scent is also said to curb depressed thoughts and boost mental clarity.
Essential oils are great to have in your home and are a non-toxic alternative to traditional chemical cleaners. They also work well to deodorize your home when combined with other ingredients, like baking soda. As a landlord, you’re responsible for making sure your rental is safe and welcoming for future tenants. Using all-natural essential oil cleaners can help send the message that you care about your property.
11 NATURAL RECIPES TO DEODORIZE A ROOM
We all deal with home odors from time to time, and luckily there are simple and easy recipes you can make with ingredients that are probably already in your pantry. As a landlord, freshening up a unit space is equally important in attracting potential renters. Use the following recipes, tips, and tricks below to ensure your unit is ready for new tenants.
1. DIY BASIC ROOM SPRAY
Instead of purchasing an air freshener, create your own DIY room spray using your favorite essential oils. With this recipe, you’ll have an easy way to quickly freshen up any room:
Room spray recipe:
2 to 3 drops essential oils: for a seasonal twist, choose cinnamon or peppermint
1 tablespoon baking soda
Distilled water
Mix the essential oils, water, and baking soda. Add mixture to a spray bottle and shake well to create the perfect freshening spray for your space. You can even get into the holiday spirit by using cinnamon or peppermint essential oils.
To help the smell linger, feel free to add some witch hazel — this ingredient helps the oil and water combine better! This remedy is also great for cleaning units before a new tenant moves in.
2. EASY CARPET REFRESHER
Is the carpet in your rental smelling a little less than fresh? If you’re in the process of deep cleaning and getting your unit ready to rent out, reach for that baking soda in your pantry. Baking soda is a great non-toxic cleaner that does the job when it comes to busting bad odors. Here’s a simple and cheap recipe for an easy carpet refresher:
Carpet refresher recipe:
1 tablespoon ground cinnamon
1 cup baking soda
1 shaker container
Mix these ingredients and throw in a shaker container — a clean parmesan cheese container is ideal. Sprinkle into the carpet and let sit for about an hour or so. Then, vacuum it up. To make the space smell as if you just baked a batch of snickerdoodles, add some ground cinnamon to your mixture — with the holidays right around the corner, this is the perfect scent to welcome guests to an open house!
3. PET ODOR BUSTER
If a past tenant’s pet left behind stinky odors in your rental, make this recipe to spray on surfaces:
Fresh pet recipe:
3 tablespoons of rubbing alcohol
12 drops of lavender or spearmint essential oil
2 cups of water
1 spray bottle
Mix these ingredients and spritz liberally on areas of your house that need some freshening up! Consider choosing essential oils from lavender or spearmint — these are safe for pets, however, it’s always a good idea to check with your veterinarian before using.
Additionally, if your pet’s bedding requires some TLC, sprinkle it with some baking soda. Let this sit for a while and then vacuum.
4. FRIDGE SMELL ELIMINATOR
Did past tenants leave behind some odors in the fridge? If you get a funky whiff when you open the fridge, say goodbye with this natural remedy:
Fridge deodorizer recipe:
1 cup baking soda
12 drops of essential oils
1 jar
Place a cup of baking soda in a jar. Mix in 12 drops of your favorite essential oil fragrance — for the fridge we recommend using a citrus like lemon. Set the open jar of baking soda on a shelf and let the magic happen — baking soda is great for absorbing those bad fridge smells. Be careful not to add too much essential oil, though, you don’t want it to affect the taste of your fresh food.
5. DE-MILDEW THE WASHING MACHINE
If previous renters have let gunk build-up in the washing machine, you might be looking for a solution to get rid of that mildew smell. Washers are a humid environment prone to a build-up of dirt, hair, and soap. To get rid of this problem, a simple mixture of common household products and essential oils should do the trick:
Washing machine cleaner recipe:
3 to 4 cups of white vinegar
½ cup of baking soda
20 drops of essential oils
First, using vinegar, wipe down any debris that may be present, like in the rubber liner or gasket. Then, pour this mixture into the detergent tray and run a cycle on the hottest setting — without clothes! When the cycle is done, wipe down any remaining moisture with a cloth to prevent new mildew growth. To further prevent any funky smells, encourage the next tenant to leave the washer door open when they’re done to avoid trapping any moisture in the machine.
6. MICROWAVE OVEN DEODORIZER
Bad smells from old soup stains, burnt popcorn, and other greasy foods aren’t ideal in the microwave. However, you can deodorize it just as fast as you can heat up today’s lunch:
Microwave cleaner recipe:
2 tablespoons baking soda
1 cup of water
1 microwave-safe bowl
All you need to do is fill a microwave-safe bowl with baking soda and mix with a cup of water. Place the bowl in the microwave and heat for three minutes. The hot baking soda steam will loosen up any grime stuck to the side or ceiling of the microwave. Carefully remove the hot bowl from the microwave and wipe down the steamy oven with a paper towel. To leave a fresh scent, wipe the microwave down with a drop or two of lemon-scented essential oil.
7. SEASONAL SIMMER POT AIR FRESHENER
As the holidays get closer and the weather gets colder, try a seasonal simmer pot air freshener. This long-lasting aroma will instantly create a homey and warm ambiance that you and any touring potential tenants will love. Try out this easy recipe, but feel free to mix and match your favorite seasonal ingredients for a unique scent:
Simmer pot recipe:
2 cinnamon sticks
4 whole cloves
1 orange, sliced
1 lemon, sliced
1 bay leaf
Add all these items to a medium pot or a small slow cooker. Add water to fill about halfway. Turn the burner on to low and let this simmer all day. If you’re using a slow cooker, set on low and let it freshen the air. Periodically check the water level and add more as needed.
8. KEEP YOUR CLOSET CRISP
Closets are common culprits of stale smells as they’re often stuffed with piles of clothes, dirty laundry, and shoes. If you need to air out a closet from a previous tenant or you just want to keep the small space smelling fresh, use this simple scented sachets hack:
Scented sachet recipe:
Dried herbs or flowers of your choice
Small fabric sachets
Ribbon
Optional: essential oils
To make these DIY sachets, first, pick out your choice of dried herbs or flowers. For a more floral scent, choose lavender or rose petals. If you prefer something more earthy, go for rosemary. Fill up your fabric sachets with your dried herbs or flowers and tie off the bag with ribbon. To intensify the smell, add a few drops of essential oils of your choice. Also, feel free to stick these sachets in your dresser drawers to keep those socks smelling fresh.
9. FRESHEN UP YOUR BATHROOM
A small bowl of baking soda on an upper shelf will absorb odors without adding any chemical smell. You can also put a few drops of essential oil on cotton balls and place inside a roll of toilet paper which will release the scent every time the roll is turned. Fresh eucalyptus leaves are also very effective at deodorizing — place these in a vase above the toilet or in your shower for some added aromatherapy.
10. GARBAGE DISPOSAL DEBRIS CLEANER
Are there bad smells creeping out of the sink? The source may be the garbage disposal. Little bits of food that got washed off past tenants’ dishes can get caught in the garbage disposal, creating a smelly odor that lingers long after they’ve moved out. Here’s a get hack to get rid of this problem:
To clean the blades: Put a large cup of ice cubes down into your disposal, turn it on, and then add about half a cup of salt. The ice and salt will combine to scrub the built-up off the inside of your disposal.
To freshen up the disposal: To get rid of any odors, turn on the faucet and drop sliced citrus peels down into the disposal. As you run the disposal, the citrus peels will leave a refreshing scent behind as they get ground up.
11. CIGARETTE SMOKE REMOVAL
Removing cigarette odors from an apartment can cause a headache for landlords or new tenants. Cigarette smells seem to cling on to any surface they come in contact with, like carpet, your new drapes, or a precious armchair. Instead of masking the smell with commercial air fresheners, try a DIY method to absorb or neutralize it:
To absorb: Sprinkle baking soda on surfaces that smell like cigarette smoke, or fill several small bowls with baking soda and place around your space to absorb the smoke particles. If you have it on hand, activated charcoal is also very effective at absorbing these stubborn odors.
To neutralize: White vinegar is a common nontoxic household staple that works to neutralize odors. Its low pH content targets the high pH content of smoke particles and alters them slightly to reduce the smell. For a quick fix, boil a pot of vinegar on the stove — the steam will waft through the air and work to remove the smell. You can also use vinegar as a wash: simply wash clothes with it or scrub it on upholstery and walls.
If the methods above don’t work, try washing your windows, window coverings, and carpets. To get your unit ready for new tenants, consider also repainting your walls with odor-blocking primers or replacing fixtures such as cabinets. Also, to help prevent this in the future, encourage renters to keep things fresh by implementing a no smoking policy.
BENEFITS OF USING NATURAL REMEDIES
In addition to these natural remedies being super easy to make, as well as effective, they’re also much less harmful than using chemical deodorizers. Over 20 percent of the general U.S. population has reported having adverse health effects from air fresheners.
Common household products like air fresheners can contribute significantly to indoor air pollution and can also stick to and be absorbed by furniture, walls and surfaces, carpets, and more. They can then be released and re-enter indoor air, even long after you’ve used the air freshener.
Although they may smell nice, cutting out chemical air fresheners from your cleaning routine will leave your home not only more pleasant for friends and family, but also safer for your health. As a landlord, using these natural remedies are great in case a future tenant may be sensitive to these chemical cleaners and can attract those that are eco-conscious.
HOW TENANTS CAN PREVENT ODORS
Even though there are plenty of natural remedies you can create to deodorize your home, there are a few precautions to help you avoid these bad smells in the first place:
Do laundry often: Letting piles of dirty clothes sit in your laundry bins can quickly contribute to bad odors. Don’t let laundry linger for extended periods — it might be the cause of the smells like must and mildew. Get those washed ASAP!
Toss expired food: It may be time to check out those expiration dates. Old food like meat and dairy products can give off bad odors that seem to stick to your fridge forever. Go through and toss any expired goods to make sure nothing stinks as you open the doors.
Wash your bedsheets: While we’re all getting our beauty sleep, our beds are collecting fungus, bacteria, and dead skin cells which won’t smell good after some time. To avoid this, wash all your linens at least once a week. According to Joshua Zeichner, M.D., microorganisms like bacteria and fungi tend to thrive in moist environments — including your dirty pillowcase. Get rid of funky smells in your bedding by adding a few cups of white vinegar to your washer.
No shoes allowed: If you can, enforce a no-shoes allowed policy in your home so bad odors can’t get dragged onto your sparkling clean floors or fresh carpet.
Keep the sink clean: Do those dishes! Keeping the kitchen clean right after you cook and eat will help avoid scary sink and garbage disposal smells.
Clean vents & replace air filters: If you’ve cleaned every room and have tried these natural remedies and things still smell a little stale, try wiping down air vents and replacing your HVAC filter — be sure to check with your landlord before making this change. This quick-fix can quickly ventilate your room and filter out those bad smells.
Open your windows: Nothing can get more natural than simply opening up your windows. On days with good outdoor air quality, open up the windows to bring in new air to freshen up your space.From essential oils and baking soda to citrus peels and cinnamon sticks, these natural remedies will be the first things that come to mind the next time you’re wondering how to deodorize your rental — they’ll come in handy if you’re getting ready to list your apartmentor looking to create a more environmentally friendly rental. If you’re a landlord looking to fill an apartment, visit our rental application and tenant screening services to help find the perfect tenants.
Guest Contributor: Sarah Stinson
Sarah is the Director of Content and SEO at TurboTenant where she leads a team of experts to provide valuable resources to help landlords and renters. With over 10 years of experience writing in various industries, she has been featured in many top tier publications and is an expert in the real estate tech space as well as the property management industry.
A gorgeous, classy office furniture table is a must for any work area. But buying one can be pretty expensive! What if you are on a limited budget? Is it not possible to buy one without breaking the bank?
Fortunately, you can find an office furniture table that will help you improve your work productivity and won’t cost you a lot. Here are some tips to help you buy one for your office space.
5 Tips to Find a Fabulous Office Furniture Table on a Limited Budget
Tip #1: Consider the type of desk needed
There are various types of desks available in the market today. If you plan to set up a home office, it’s best to consider one with drawers so essential documents and records can be stored properly. You’ll also need to choose whether or not it should come with filing cabinets attached or if you should purchase separate ones instead. It would be to purchase with the table. If you’re setting up an office area at home for work and personal use, then the best option would be to buy a computer desk with ample space underneath to store papers or other items. You can also have this in combination with storage cabinets, so not only are you maximizing your workspace but that of your office furniture table as well. You can also check out some great office cubicles for sale.
Tip #2: Look for used office furniture tables
A great way to find high-quality yet affordable pieces is by looking for second-hand furniture. Sites like Craigslist or even eBay have many options where individuals or companies sell pre-owned items at discounted prices. It’s best to look through multiple listings, so it’s easier to compare prices and brands. The advantage of buying used is that if you opt for a good manufacturer, they’ll most likely still be available even years after purchase through their authorized resellers. It means the brands will continue to service and sell spare parts such as replacement glass tops, drawers, or locks.
Tip #3: Look for open box items
Another way you can save money is by looking out for open box items. These products have been returned and opened before but are still in excellent condition and perfect for office furniture tables. The advantage of buying them is that their prices usually cost less than those new ones despite only being once before. But make sure to examine the product before actually buying it carefully. Check for any damages or problems that the seller may have missed and establish if there’s a warranty before you commit to the purchase.
Tip #4: Shop during sales
Sale time is one of the best times to find a fabulous office furniture table on a limited budget. During this period, shops usually give away significant discounts to clear up their inventory, especially end-of-season sales. A great strategy is to shop online from home during sale time then use coupons when making your order. Some stores offer free shipping deals whenever they hold such promotional events, which adds to savings for consumers like you.
Tip #5 Shop online
A good number of online stores will let you rent their tables at low prices. If you do not want to keep it for long, consider renting the table only until your project gets over. Or else, lease with an option to buy later or return. You could go in for co-sharing, too, where others who need tables could share the space and costs instead of having individual rentals. Now you have several options to choose from when looking to rent an office furniture table.
As a bonus, you will be able to choose from several types of tables such as glass, metal, or wooden, depending upon the aesthetic appeal and comfort level. For example, the glass table reflects the light beautifully and provides a bright feel while it is cold to touch during hot summer months. The wood color fits perfectly with your décor and brings in warmth and sophistication. The metallic type is solid and sturdy for use every day without any problems.
When you buy a good office furniture table, not only will it help improve your work productivity, it can also add to the overall look of your home. And since the prices are usually much lower than regular items, finding one won’t break the bank at all. However, when buying one for commercial purposes, make sure to identify potential risks involved before committing to its purchase. You should be aware of safety hazards such as sharp edges and other dangers that could harm customers or even employees when used carelessly. Other considerations include durability and maintenance costs which you should carefully consider before actually making any purchases.
Your bathroom is probably the second most personal area in your house next to your own room. This is where most of your self-care routines take place, and it is also an area that is often considered when it comes to selling a house aside from the kitchen. That’s why it’s important to make it a space you actually like spending time in.
Upgrading your bathroom actually doesn’t necessarily mean that you have to have a major overhaul. You can also improve your bathroom yourself. All you need is to allot time to do it.
Do-it-yourself bathroom makeovers have an advantage because they cost less than typical remodeling, which normally involves tearing down and removing a lot of stuff. If you are interested in making this project happen, then this article can help you out. The following are easy and simple DIY tips to upgrade your bathroom.
UPDATE FIXTURES AND HARDWARE
In the grand scheme of things in your bathroom, something so disproportionately small as hardware and fixtures are so important for providing that chic finishing touch. And it will only cost you less for something that has a major impact.
You can start by replacing your bathroom faucet by installing something that’s sleeker and more functional and/or more contemporary. You may also swap shower fixtures if you’re planning to remodel your shower anyway. Another option is to install new wall hooks where you can keep your towel and clothes from falling to the bathroom floor.
There are plenty of options for these upgrades that can be found in a quality hardware store like Magnificent Marketing.
STYLISH BATHROOM LIGHTINGS
It may sound intimidating, but most people can switch out a light fixture safely and successfully by being careful and following instructions. Fresh lighting also makes a huge difference for your bathroom. This is another simple DIY bathroom upgrade that you can do in just under an hour or so.
For people who have large mirrors inside the bathroom, installing a light directly onto the bathroom mirror is a unique and useful idea. Since your mirror occupies space, most of the time you won’t be able to get lighting directed to your face. By installing a light directly onto your mirror, you will be able to see yourself clearly and do what you need to do in front of the mirror much quicker.
MAXIMIZE STORAGE SPACE
Maximizing storage space in your bathroom includes utilizing underutilized areas to store items. One area of your bathroom that you can use for storage is the wall. Take advantage of your wall space by mounting ledges, shelving, or racks to achieve this.
You can put your hygiene and vanity items such as your toothbrush, toothpaste, perfume bottles, and your comb on racks above your sink and below your mirror. Using the wall for storage space will help avoid clutter inside your bathroom.
MAXIMIZE THE MIRROR
Mirrors are beneficial particularly in upgrading small bathrooms. They reflect a lot of light and make the tiniest feel a bit more spacious than it actually is. Aside from ensuring that it is well-lit, your bathroom mirror should be large enough to see at least your entire head when you stand in front of it.
WRAP UP
These simple DIY tips are exactly what you need for your bathroom. Something simple, but will have a great overall effect on how it looks and how comfortable you feel when you use it.
Author’s Bio:
Rosette has a knack for anything DIY. She spent her younger years learning about the different hardware tools and equipment in the hopes of establishing a hardware business in the future. Her career options may have changed, but today, she continues to write so passionately about her first love.
When Summer rolls around, most of us like to spend it outside. You will want to have an outdoor area that is perfect for entertaining, or the perfect space for you to spend outdoors with your family. The last decade people have started to put a lot of effort in their backyards, or what we would rather call it, outdoor living space. When you live in or around Chicago, you’re use to having bipolar weather year round. That doesn’t mean you shouldn’t spend your time and money on your outdoor living area. The perfect outdoor area would be usable Spring, Summer and Fall. Let me show you some great ideas, that will make you want to run out and start working on your perfect outdoor living space.
Outdoor fire pit with sitting area in between the poolOutdoor kitchen with swim up barOutdoor kitchen with breakfast barOutdoor grill stationOutdoor bar and grill stationOutdoor fireplace and sitting areaOutdoor kitchen and dinning area
What did you learn? Your outdoor area should have good seating, fire pit, bar, kitchen, grill station, and cover. Start utilizing your backyard. Make it a living space. Not only will you enjoy it, it will bring up the value of your home.
Things You Need To Know About Asbestos and Its Exposure Risks
Are you living in a house that was built in the 20th century, especially during the middle to late part of that period?
If the answer is yes, then there’s a huge possibility that your residence has asbestos in its walls, floors, and even textured ceilings. That means your house will have to undergo proper asbestos abatement and removal at some point.
Manufacturers have heavily favored the use of asbestos in the production of cement, floor tiles, and other construction products during that period. Even products like hair dryers and car brakes contained a certain amount of asbestos back then. Asbestos, after all, is incredibly resistant to fire and heat, electricity, and corrosion, which makes them an ideal material for construction products and the like.
If asbestos is that useful, then why is it that the mere mention of the word now brings forth images of suffering and death?
WHAT IS ASBESTOS?
Asbestos is a naturally-occurring mineral made up of needle-like fibers that are soft, thin, and flexible.
It also happens to be a human carcinogen and has been considered as such since the 1980s. Many countries have promptly banned the use and importation of asbestos. Some nations, however, have chosen not to impose any such bans, and are still using asbestos in various products, albeit at a much smaller scale than before.
EFFECTS OF ASBESTOS EXPOSURE
Fire, electricity, and corrosion can’t do much to asbestos. Handling by humans, however, can break asbestos quite easily.
Something as simple as drilling into walls or taking a sledgehammer to a floor can send tiny asbestos fibers flying in the air. Without adequate protection, the people performing the tasks mentioned above are likely to inhale those fibers. And if that level of exposure is a regular thing, it would only be a matter of time before they develop any of the following illnesses:
MESOTHELIOMA
Mesothelioma is a type of cancer that is most closely associated with asbestos exposure. Every year, approximately 3,000 people are diagnosed with mesothelioma in the United States. From 1999 to 2015, eight per one million people in the U.S. have succumbed to the illness.
As with any type of cancer, there is no cure for mesothelioma, which affects the pleura and the peritoneum, which are the serous membranes that line the lungs and the abdominal cavity, respectively.
The symptoms of mesothelioma include:
chest or abdominal pain
shortness of breath
fever or night sweats
fatigue
muscle weakness
dry, wheezing cough
ASBESTOSIS
When a person inhales asbestos fibers over a long period, he or she will also likely develop asbestosis, a lung disease that causes severe respiratory problems and scars lung tissue. People with asbestosis will experience a variety of symptoms, the most common of which are:
swelling in the neck or face
swallowing difficulties
hypertension
breathing that crackles
blood in sputum
shortness of breath
weight loss
decreased appetite
finger deformity
Asbestosis may not be a cancer, but anyone suffering from this illness is at risk of developing mesothelioma.
LUNG CANCER
The leading cause of lung cancer may be smoking, but a small percentage of lung cancer cases have a direct link to asbestos exposure.
OVARIAN CANCER
In 2012, the International Agency for Research on Cancer had confirmed that there is a link between asbestos exposure and ovarian cancer.
OCCUPATIONS WITH HIGHEST ASBESTOS EXPOSURE RISK
Construction workers have a pretty high risk of asbestos exposure. The same goes for people who work in factories and shipyards.
At one point, men and women in uniform were very much at risk of asbestos exposure because the military used a lot of products containing the mineral. Navy ships, in particular, used a lot of asbestos for decades.
NO U.S. BAN
Many people don’t know that as deadly as asbestos has proven to be, the United States still didn’t see fit to ban asbestos. To this very day, fireproofing materials and gaskets manufactured in the U.S. contain asbestos.
Australia, Japan, Germany, the United Kingdom, France, and other European Union countries have banned the importation and use of asbestos. There is no sign, however, that the United States, Russia, China, and several other countries are going to follow suit anytime soon.
The idea of a home office may seem like a luxury but creating your own small and stylish workspace is easier than you think. A full-size home office can be a costly commitment, but for something smaller you only need a little bit of effort and creativity. Here are ten ways to create a small home office.
1. Use a Spare Room
If you have a spare room, consider whether you could convert it into a home office. A guest bedroom can be easily transformed by swapping out the bed for a fold-out sofa bed. This way you still have a place for guests to stay. A garage, basement or even a garden shed can also be turned into a suitable office space with a little refurbishment.
2. Use Another Space
If you don’t have a spare room, you can still create an office in another space. Look around your house and see if there are any unused areas. This could be the corner of a bedroom, living room or dining room. Sometimes all you need to do is move a sofa or table over by a few feet to create that extra space.
3 Use a Room Divider
If you set up your office in a shared area, you may be concerned about privacy. It can be hard to focus on work if you have kids playing nearby or you’re sitting across from the TV. A simple and creative solution is to use a room divider. Room dividers are relatively inexpensive and come in a variety of styles and sizes. Not only is this a practical solution, it also adds character to the space.
4. Use A Closet
A creative way to maximise space is to convert an unused closet, large enough to fit a desk in. By placing a desk inside and adding a little decoration, you’ll have your own private workspace. A walk-in closet is ideal for this, but even smaller closets can still be used for office space. If you can’t fit a desk in there you could use it for storing your work materials.
5. Home Extension
If none of the above are possible, consider adding an extension to your house. One eco-friendly and affordable way to do this is to use a recycled shipping container. You’ll need to refurbish the container to provide proper insulation, electricity and lighting. But this can still be cheaper than a traditionally constructed extension. You can alter the container to blend in with the rest of your home, or leave its original appearance intact for a unique industrial look.
6. Lighting
Good lighting is essential for any home office. While natural lighting is ideal, you’ll also want a source of light for working at night or if your office isn’t near a window. Don’t underestimate the effect a lamp can have on a space. Whether it’s a statement piece or something simple that complements the rest of the décor, a lamp is an effective way to add style.
7. Furniture
When choosing office furniture, it’s important to not only look for stylish pieces but ones with practical benefits too. You’ll want to find an ergonomic chair that supports your posture to avoid back pain from sitting too long. Or you could consider a standing desk. You could also try sitting on a Swiss exercise ball to engage your core muscles and help you keep fit while working.
8. Maximising Space
A clever way to get around limited space is with multi-purpose or convertible furniture. You could use a desk that folds up into the wall, or a coffee table that doubles as storage. Wall-mounted shelving is another effective way to add extra storage space. You could also refurbish an unused cupboard or cabinet.
9. Décor
Unlike a workplace office, a home office allows you to decorate however you want. You may want to decorate in a way that complements the rest of your house, or you could make it a unique space just for you. You can stick photos or paintings on the walls, place as many trinkets on your desk as you like. Pot plants and flowers can be used to liven up the space and add a pop of colour.
10. Wallpaper
Using wallpaper or paint helps add style to your home office regardless of where you choose to set it up. This is a great way to distinguish the space if it’s in a shared area. By choosing a unique colour or pattern for the walls of your office you’ll be making it your own and adding character to the space.
A home office isn’t just for large houses. With a little creativity you can create your own stylish and inspiring workspace at home. If you’re tired of trying to work on a cluttered kitchen counter or not having space to focus, try some of these ideas.
Author bio:
Spending long hours in front of the computer makes Harper hugely appreciative of any change in activity – from quick stretching exercises to yoga and meditation! Discover more about her work on her personal blog.
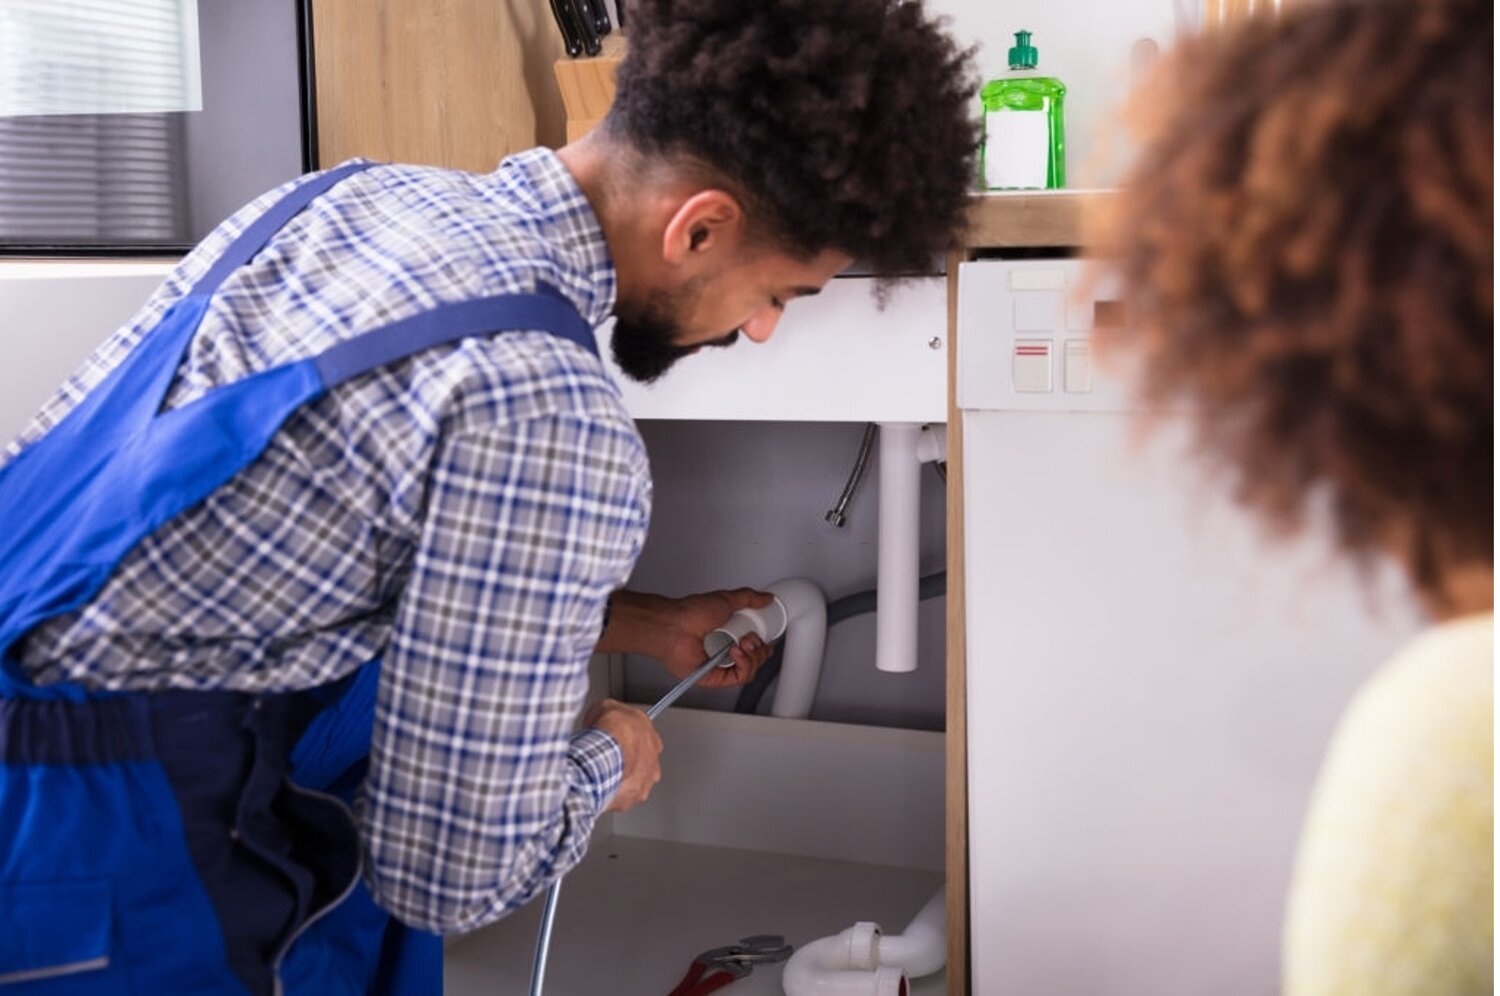
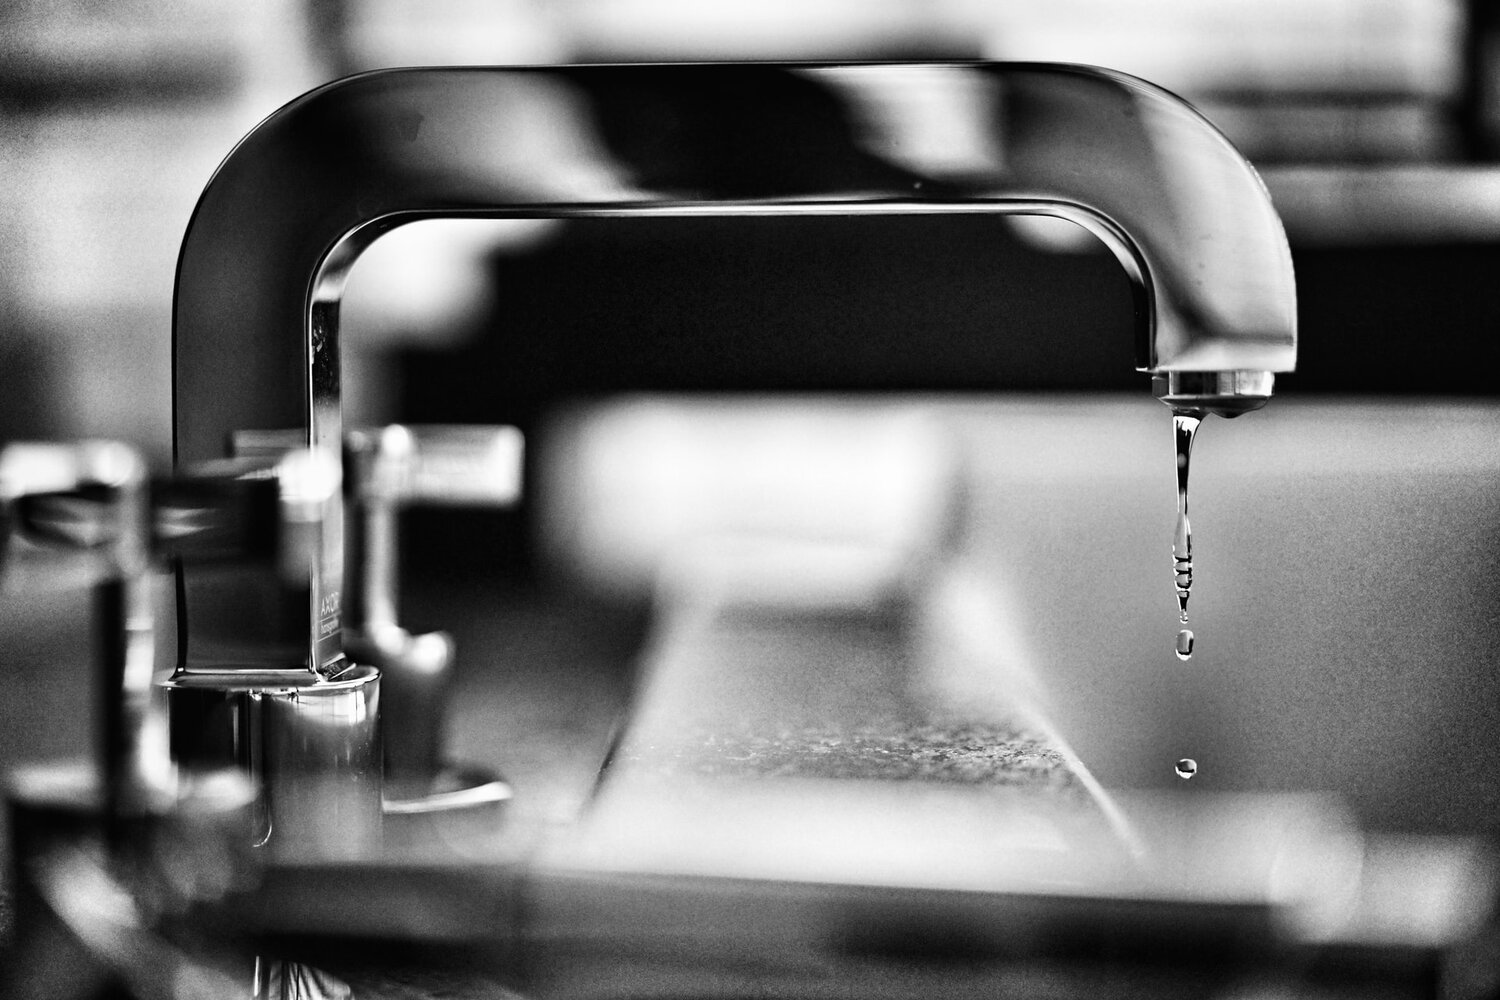
Ah, the famous age-old question: who’s responsible for plumbing maintenance? Landlords or tenants? Many generations have given their contribution to resolving this problem in the past. To quote an Allen Ginsberg poem: I saw the best minds of my generation… We’ll stop right there. This isn’t a boring poetry reading, and the question raised at the beginning certainly isn’t something great thinkers have struggled with for centuries. Although, since you’re reading this text, you might wonder: really, who’s responsible for plumbing maintenance? You might’ve encountered some problems in your new apartment, or maybe you’re checking out your options before you move in. Whatever’s the case – we’re here to help you out. Stay tuned for some helpful info.
FIRST THOUGHT – BEST THOUGHT (OR IS IT?)
Your first thought might be: well, the landlord is responsible for its tenants’ quality of living; therefore, he’s accountable for anything that goes wrong with plumbing. That could be the truth. But, there’s a catch. In most states, the landlord is responsible for hiring someone to take care of plumbing emergencies. Is a leaky tap an emergency? Probably not. What classifies as an emergency is a question to ponder (consider checking your state law). For example, if you notice there’s no running water, that’s undoubtedly an emergency. The landlord is definitely responsible for that one. In most cases, you’ll find these problems classified as emergencies:
Serious leaks in your bathroom or kitchen;
Damaged, non-working water heater;
Burst water pipes;
Toilet with an active overflow.
Landlords are definitely responsible for resolving a plumbing emergency. A leaking tap probably doesn’t fit into that category. Check your state law.
Can the landlord also be responsible for minor repairs?
There isn’t a straight answer to this one. You might want to check the lease agreement and see if you can find the solution there. If the problem you’ve encountered is somehow listed in the agreement, and if the landlord’s responsibility is evident, you have your answer. Otherwise, if the issue isn’t a subject of the lease agreement, you’ll need to check state real estate laws. Some of them have repair and deduct statutes. These rules make the landlord deduct the repair cost (paid by the tenant) from the monthly rent. A quick tip: there are some repairs (even though they look minor) you shouldn’t try to do by yourself. For example, low water pressure is an issue that pros should handle.
ADDITIONAL INFO THAT MIGHT COME IN HANDY
Let’s say you’ve made a deal with the landlord. He’ll deduct the repair costs from the rent for the next month. Now imagine this scenario: your landlord’s antique kitchen table gets damaged in the process. We guess you know who’s responsible for that. To ensure this doesn’t happen, consider hiring experts such as those at golansmoving.com and see if they can do something to help you store valuable items during the process.
It’s very important to store valuable things somewhere they can’t be damaged while the renovation process enfolds. The best way, of course, is to rent storage space.
DIPLOMACY IS KEY
It might be better if we mentioned this earlier, but before you quote the law and everything, see if talking to your landlord can seal the deal. Keeping a good relationship with your landlord is something that will guarantee you peace of mind when plumbing issues (or any other issues with the apartment you’re renting) occur. Also, it really isn’t pleasurable to stay in an apartment where the owner acts indifferent. There’s no need to be super-formal or something. Of course, if talking doesn’t get you what you think you legally deserve, then quoting the law is the way to go. But, as we’ve noted at the beginning, it shouldn’t be your first option.
AN EXAMPLE: WHAT’S IT LIKE IN CHICAGO?
In this paragraph, we’ll pinpoint some of the rights tenants have when renting in Chicago. For example, the landlord can’t evict you without a judge’s order and must take care of a pest infestation when it occurs. Also, you shouldn’t worry that he will come unannounced. What about plumbing maintenance? Suppose the tenants (or their guests) are not responsible for the damage done. In that case, landlords are obliged to take responsibility in accordance with the City of Chicago’s Residential Landlord and Tenant Ordinance (commonly known as CRLTO). Make sure you check that out. In other words: be familiar with your rights. A well-informed tenant is a good tenant. As if you already didn’t know that, right?
Know your rights! Being well-informed is a must nowadays. If you’re a Chicago resident, consult the CRLTO
SHOULD YOU SUE THE LANDLORD?
Hopefully, there won’t be a reason for that. Most landlords will quickly resolve the issue you’re dealing with. If, for some reason, the landlord ignores fixing the problem, you have all the rights in the world to mention a potential legal action (after you consult the lease agreement or the state law, of course). But, as we’ve already said, that scenario is really not so popular. You’ll rarely stumble upon a landlord who will make you want to take legal action.
FINAL WORDS
That’s all, folks! Hopefully, we’re closer than ever to find the answer to the question of who’s obliged to hire professionals for plumbing maintenance. The best way to sum up this article is: know your rights! Make sure to check the lease agreement, consult the state’s real estate law, and before you start thinking about taking legal action – talk to your landlord. As we’ve mentioned, there’s a slim chance you’ll need to go to court because your toilet is overflowing. Being diplomatic and, at the same time, well-informed is a recipe for success!
Moving to a new home can be an exciting time. However, it can also be stressful and exhausting, not to mention expensive to the point of draining your wallet dry. Depending on your new home state, there are some home improvements and repairs you must do before moving in.
Are improvements and repairs expensive?
Specific improvements will increase your property’s value, which is always good when the time to sell it comes. Repairs can help reduce maintenance costs you will be facing in the future, and it’s always good to save money. If you are smart, some of the work you do on your home will end up giving you a net benefit. Some renovations will increase your home insurance rates, so be sure to calculate this into your overall budget. Other types of work on your home simply can’t be avoided, especially for glaring issues that need to be fixed.
Can I do some of the repairs later?
The short answer is: yes, of course. On the other hand, dragging the repairs will involve you living in total chaos for a long time. You might think it will just be for a week or two, but old houses can have problems you weren’t expecting. Since you don’t know how the house was constructed, there could be hidden issues that you didn’t initially notice. These could end up causing unexpected delays, and you don’t want to be trapped in a house remodel limbo. And people promise themselves they will take care of minor repairs later when the relocation is over. But then those minor issues sit unaddressed for years because you never got around to it.
Re-polish the wood in your home to let it sit before moving in.
Renovating before you move in
Everyone has ideas of what their dream home should look like. Relocating to a new home is the perfect time to let your imagination run wild. And spring is a great time to do renovations on your home. You might think that doing everything at once is expensive, but doing multiple home improvements and repairs at the same time will probably be cheaper. Some renovations will require some touch-ups after the main work is over. We’re talking about small finishing touches like patching up walls or floors and painting the house. The best solution is to do the cleanup just once when you have done all the work.
Realistically your best bet is to schedule all of the home improvements and repairs you must do before moving in and living on the property. Once everything is finished, you can just relocate to your new home without worrying about doing more work. So, plan for how long the work will take but have backup options. Rent storage for your possessions, so they don’t get in the way of the repairs. Ensure you get a clean and mold-free unit for your items so they are safe and dry during the spring rain season. Even if the repairs last longer than expected, your possessions won’t clutter the workspace, and you will know they are secure.
Avoid water damage by fixing any leaks.
Here is a list of 8 home improvements and repairs you must do before moving in:
Check the roof – repair any cracks or leaks since water damage can wreak havoc on your home. Invest in roof repairs to avoid rotting wood and mold buildups.
Refloor – this is one of the repairs most people skip to save money. While fitting new floors can be expensive, it will be a lot cheaper and easier to do before moving in.
Improve the insulation – investing some money before moving in can save you a lot in the long run. Draft-proofing and insulating are great ways to save on heating and electricity bills.
Apply wood finish – it’s not just the floors that need to be re-done. It would be best to refinish all the wooden elements like panels, windows, or railings before you move in. This will give them a bit of time to sit and air out.
Popcorn ceilings and walls – they used to be standard in houses constructed before the ’90s. Besides being an eyesore, popcorn fixtures can contain asbestos or other toxic materials that can be harmful to your health.
Check the plumbing – leaks can cause some of the worst and most expensive damage to a home. Hire professional plumbers to take care of any problems before you move in. Mildew and mold will be much more costly to deal with later if water damage is left unchecked.
Replace locks – it shouldn’t take long and doesn’t cost much. With new locks, you can be sure that no one else has the keys to your home. Replace the exterior locks; it’s cheap and will give you peace of mind.
Exterior and interior painting – we recommend doing this last but before bringing in the furniture from storage. All of the other major work will already be done. Also, painting an empty home free from the clutter of furniture and boxes is a much simpler task.
Paint your home last after all of the other work is done.
One more thing we need to mention is that it is essential to pay attention to your health. People get so caught up in renovations, repairs, and moving that they can forget about their well-being. We all hope to see the end to the coronavirus pandemic, but the fight isn’t over yet. So, when the moving day finally arrives, you have to take all the necessary precautions in order to stay healthy during these hard times. Moving to a new home means that you will be interacting with many different people. Sometimes we all need reminders, even for the basics – so be smart and stay safe.
Taking care of home improvements and repairs you must do before moving in will end up saving you a lot of stress. Additionally, doing the repairs while you are not living on the property will mean they will be done faster – since nothing will be in the way of the work. And if the work is done faster, it usually means less added expenses. Taking care of everything while saving time and money – what’s not to love?
Meta description: Moving to a new home and need to renovate? Here is a list of 8 home improvements and repairs you must do before moving in.