5 FACTORS TO CONSIDER WHEN CHOOSING A COMMERCIAL ROOF

Roofer worker install new roof,Ceramic Roof Tiles Installation by Two Caucasian Roofers,Construction Industry,Roofing tools.

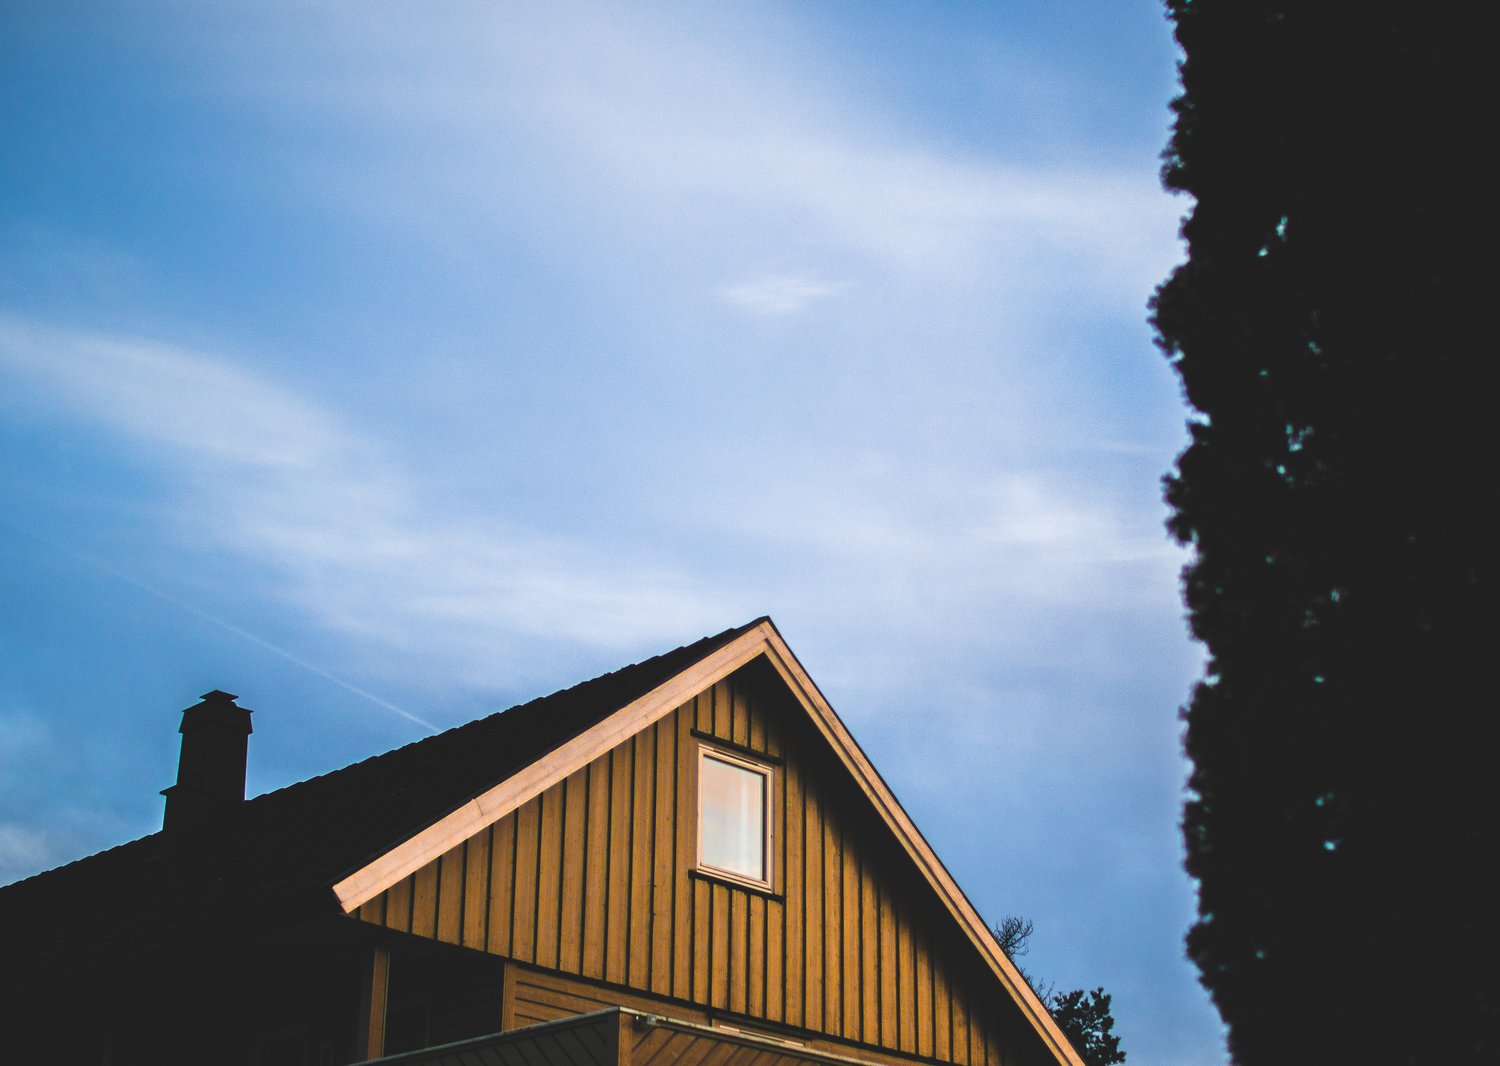
When you’re planning on replacing your old roof or commercial flat roof repair, there are several important factors to consider. These factors include the location of your building, the building code, the dimensions of the roof, and the physical make-up of the building. The materials and construction of your building are also important considerations. Ultimately, these factors will determine the durability and performance of your roofing system. But what other factors should you consider before flat roof repair in Colorado?

BUILDING MATERIAL

The building materials to consider when choosing a commercial roof will depend on the structure of your building, foot traffic, and climatic conditions. Traditional membranes and metal roofing are some of the most common commercial roofing materials. Polyvinyl chloride (PVC) is an excellent choice for commercial roofing, but it is more expensive than other options.

If your business is in an area with hot temperatures, consider a breathable, watertight, and flexible material. Consider a metal or reflective system if your business is in a place with high wind speeds or snowfall. If you’re building in a humid climate, you should consider a flexible material, such as EPDM. EPDM, or ethylene propylene diene monomer, is a synthetic rubber that is relatively cheap and easy to apply. The downside to this type of roof is that it will last between 10 to 15 years, so be sure to plan ahead.

INSTALLATION & MAINTENANCE COSTS

The cost of commercial flat roof repair, replacement, or maintenance varies from building to building and is affected by a number of factors. Because commercial buildings are often larger and lower-sloped than residential homes, the need for a roof differs. Choosing the right material can influence the overall costs.

Before you purchase a new roof, make sure to take a moment to weigh the costs and benefits of different materials. Metals, waterproofing, and other components are common choices. While some may cost less upfront, others can last for decades, and some may even pay for themselves in energy savings.

Consider the longevity of your roof and how easily it can be maintained, and keep in mind that you don’t have to replace the roof every few years. Several factors can affect the cost of a membrane roof, including the ease of installation and the accessibility of the roof. If access is an issue, the installation can take longer than expected. Also, older buildings may have multiple layers of roofing. This makes removing the old roof or commercial roof leak repair more complex and more expensive.

The labor to install a new roof can vary significantly depending on the materials and complexity of the project. For example, asphalt and tile shingles are less expensive to install than metal roofing sheets. Then again, the materials used in pitched roofs will be more costly than those used in a commercial flat roof repair. It may be cheaper to install a flat roof than a pitched one, but a complex design will likely cost more in the long run. A flat roof is also easier to maintain and will cost less than a complex gable or hip roof.

YOUR FUTURE PLANS & NEEDS

You must choose the roofing system of a commercial building with future plans in mind. For example, the material of your commercial roof depends on your company’s needs, future goals, and customer expectations. Some materials, like mastic asphalt, can last up to 50 years, while others have shorter lifespans. A commercial roof repair companyshould meet these needs while being cost-effective.

ENVIRONMENTAL IMPACT

While all construction has an ecological cost, the environmental impact of your commercial roof is particularly important when you choose a new roofing solution. For example, when considering the cost of removing and replacing the roof, the environmental impact of a new roof replacement is significant. Therefore, it’s important to consider the environmental impact of your commercial roofs before making a decision.

An uncoated black roof will absorb approximately 70 percent of solar energy, whereas a reflective roof will reduce this to just twenty or thirty percent. Without a reflective coating, the surface temperature will rise by 15 to twenty degrees higher than the ambient temperature. The same uncoated roof can cause a temperature increase of sixty to one hundred degrees. This is one of the main reasons why reflective roofing is an excellent choice for commercial buildings.

Eco-friendly roofs will minimize waste by reducing the material used in their manufacture. Most roofs are not energy-efficient, require large amounts of energy to manufacture, and are oil-dependent. They also cannot be recycled and typically end up in landfills. As a result, a commercial flat roof repair can contribute as much as 5.5 million tons of waste annually.

A green roof is an excellent way to reduce air pollution and greenhouse gas emissions. Vegetation can filter pollutants and reduce greenhouse gas emissions through carbon sequestration. Green roofs also help lower indoor comfort and reduce heat stress associated with heatwaves. By minimizing heat transfer, green roofs can also reduce the use of electricity.

A green roof can reduce the amount of energy a commercial building consumes during peak usage periods. In addition, a cool roof can reduce cooling costs in summer. This is an excellent benefit for both the environment and the business. Further, the added benefits of green roofs can lead to more sustainable buildings and a healthier planet.

The benefits of environmentally-friendly roofing are clear. While a green roof is more expensive than a conventional one, the energy savings associated with the material can quickly offset the additional cost. When selecting a new roof, it’s essential to consider how the material and its installation affect the environment.
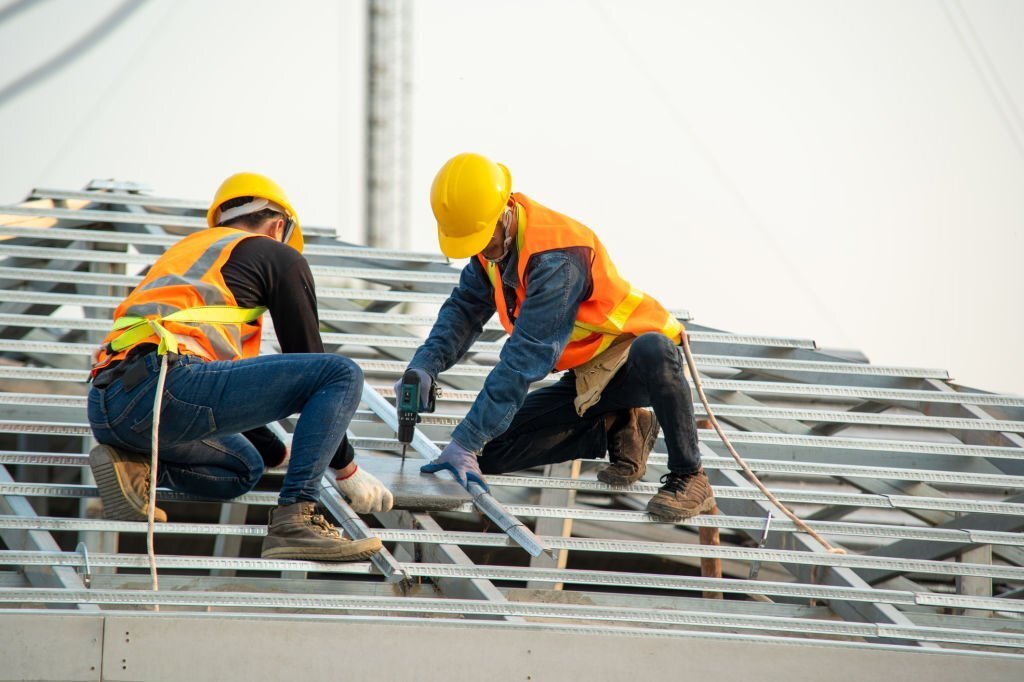
ROOFING CONTRACTORS

Many factors need to be considered in choosing a commercial roofing system, including building code requirements, location, and design. Other factors include the physical make-up of the building, materials used, and construction. A flat roof repair company should also consider the direction and shade provided by surrounding trees.

There are also warranties that need to be considered, such as the amount of time a project will take. Roofing contractors should also have insurance coverage in the event of a lawsuit. It’s important to plan for inflation and possible labor and material shortages and be sure to include financing costs. If you are unsure about how much money you can spend, get a quote from several companies to get an idea of the cost.

KEY TAKEAWAYS

When choosing a commercial roofing system, consider the existing roof structure and material as your current roof will dictate the type of material to use. Also, consider your building’s lifespan and future plans. Factors that affect roof longevity include climatic conditions and foot traffic, and while some roofing systems are more environmentally friendly than others, there are advantages and disadvantages to each. 

Before choosing a new roof, you should take building code regulations and dimensions into account. Additionally, factors such as the number of trees on the property can affect the performance of your roofing system. Other important factors to consider when selecting a commercial roof include the physical make-up of the building and the materials used to construct the building. You should weigh a flat roof repair company’s recommendation heavily.


AUTHOR BIO

John Dillard works as a Marketing Manager for JeffCo & Beyond, a commercial roof repair company in Colorado that specializes in flat roof repair options and roof coatings. He also offers no-obligation roof damage assessment and estimates for commercial roof repair costs in Winter Park.

HOW HEAT AND HUMIDITY IMPACTS YOUR HOME’S ROOF

Those who live in high-humidity locations should anticipate an even more difficult summer. Condensation may accumulate under a roofing system due to hot and humid air, often in shingles. This will eventually result in water damage.

The intense heat and humidity may impact your roof; while residential roofing is built to endure the weather, prolonged exposure to intense sunshine and moisture may result in cracks and leaks. To assist you in caring for your house, here is how heat and humidity may cause roof damage and how to avoid these problems.


●    ROOF DAMAGE SIGNS

There are more symptoms that your roof has been damaged by excessive heat and dampness. For instance, aged roofs’ roofing materials may bend, peel, or degrade. Additionally, your shingles are prone to fade or discolor.

Contrary to popular belief, this is not only an aesthetic problem. While faded shingles detract from the external attractiveness of your property, they may also raise your energy expenses. Manufacturers of faded shingles do not account for heat and humidity. The color of your roof affects the amount of heat it deflects. If the color of the shingles fades, the temperature in your house may rise.

Additionally, roofs that regularly contract and expand due to temperature variations may suffer from thermal stress. It may deteriorate and develop cracks if your roof is older, enabling moisture, water, and debris to enter.


●    HEAT DAMAGE TO THE ROOF

The deterioration of a roof is caused by prolonged exposure to direct sunlight. This may wreak havoc on your roofing material, resulting in buckling, eroding, and peeling shingles. This exposes the timber behind the shingles, exposing it to the elements. What types of roofs are prone to roof degradation? Older roofs. When should your roof be replaced? Fifteen years and above, Replace as soon as possible before the summer heat sets in.

The expansion of roofing materials is caused by heat. Shingles may contract, bend, or curl, and flashing may fracture, allowing moisture and water to penetrate. Along with the physical harm caused by the sun, you must consider the heat that will rise throughout your property.

When there is not enough ventilation, heat will go to the attic, posing further concerns. Asphalt roofing shingles may blister and fracture when heated air is trapped in an attic due to inadequate ventilation.


●    HOW HUMIDITY AFFECTS YOUR ROOF

When moisture and high heat mix, you are likely to have water damage even if it does not rain. Moisture may wreak havoc on your roof’s shingles, decking, and wooden components. Steam may also enter your crawl area or attic via the outside roofing components. There is the formation of mold, which weakens the plywood and jeopardizes the health of you and your family. Additionally, an excessively damp attic might affect the construction and stability of the whole roof.

Contact commercial roof contractors in austin tx, immediately if you discover or suspect a problem with your roof.

By correctly ventilating your roof, you may minimize damage caused by high heat and humidity. Sufficient ventilation and a dehumidifier may help decrease moisture in your attic, which often results in mold growth. Before recommending the optimal ventilation system for your house, your contractor will need to analyze your environment and other considerations.


●    ROOF SECURITY

While you cannot control the environment or weather, you can protect your roof from excessive heat and humidity. Ensure That your roof is adequately ventilated. When air can circulate freely in the attic, the temperature in both the attic and the top will be more evenly distributed. Additionally, your air conditioner will work less complicated to cool your house.

While you can do a basic check from the ground, you should still have a professional come up and take a deeper look at least once a year. In this manner, issues may be discovered and corrected early on. The longer you delay roof damage repair, the more expensive it will be.

●    VENTILATION OF THE ROOF

Roofs may be equipped with intake and exhaust vents. These are used to safeguard dwellings from the damaging effects of trapped heat, moisture, and mildew. Without vents, the summer months may cause a home’s air conditioner to work overtime, which can be detrimental to shingles in particular.

 Guest Contributor: Maggie Bloom

EVERYTHING YOU NEED TO KNOW ABOUT THE WORKING OF LINE PUMPING BRISBANE

Whether putting concrete in a backyard patio, a garden path or a driveway for your car, choosing the right concrete pump is essential. Fortunately, it doesn’t have to be too complex. There are two main types of concrete pumps: boom pumps and line pumps (also called trailer-mounted). Once you know what you need, check out suppliers offering concrete equipment hire services. They should be able to provide a list of materials required for pumping and other material-related information to help complete your project. You can vouch for their experience and expertise to reduce your construction cost and save time. Anyway, let’s focus on line pumps first.

Exploring concrete line pumps

The concrete line pump is a great way of dispensing concrete. It’s simple to set up – all you need is a hose and a truck or trailer-mounted long pump. The long hose allows for great control when pouring the concrete, and its versatility means that it can extend indefinitely. So if you’re working in large areas, the line pump could be what you might need. You can look at line pumping fastconcretepumpingbrisbane.com to understand this option better.

Using line pumps

You probably knew that line pumps come in handy for resurfacing a driveway, building a swimming pool, or other smaller instalments. You may not have known that the boring equipment handles fewer materials than boom pumping and bucket trucks, which are sometimes typical for large-scale operations. In some cases, line pumping can even save clients money on construction because it doesn’t pour large volumes of concrete at a time. These are a reasonable investment as boom pumps or other types of machines. However, as you know, the selection of the equipment has to be perfect. So, if you have small-scale building projects, you can rely on this method and expect to reap the following benefits:

·      Affordability

·      Smooth handling of tricky areas

·      Flexible hose length for different requirements

·      Completion of small residential projects hassle-free

·      Easy horizontal pumping

·      Small or no wastage of concrete

·      Quick installation

Factors to consider to determine the choice of line pumps

You need to know how much distance the truck or trailer needs to cover to deliver concrete onsite. Then, the aggregate size capacity of the machine is another angle. Line pumps can be the perfect option if it requires mixing low-volume concrete. As a builder, you also need to understand how much space you can allot to your equipment. If you construct something in a busy urban area, something with a smaller footprint can be handier. At the same time, you must be familiar with safety standards, emission levels, maintenance costs, and others.

In Brisbane, you get many rental service providers for construction equipment. Some offer staff support also for operating the machine. You can opt for them where you get the flexibility of choice and top-notch equipment. Don’t forget to examine their condition before hiring the service, though. Since line pumps are excellent for smaller projects and offer money-saving experiences, you may depend on them without worries.

Guest Contributor: Sujain Thomas

CONVERTING A STORAGE INTO YOUR TINY HOME TO SAVE TIME AND MONEY

The cost of renovating or converting the main house is costly and time-consuming. On the other hand, the idle sitting storage shed can be renovated or converted to something else at a lower price and much more quickly. 

Out of a storage shed, one can renovate it and transform it into a study room, music room, art room, or even a smaller living home. The main house could be converted into a commercial or a personal gym with Best Used Gym Equipment for personal training or a hired trainer. With the gym outside the main house, one can efficiently work out with friends.

Acquiring quality gym equipment can be costly in purchasing, shipping, and installation. To cut down on the overall cost, one needs to understand the gym’s needs and match them with the required equipment. Wholesale Gym Equipment will guarantee discounted prices and competitive shipping fees, saving money.

In the following article, we shall discuss some of the essential tips for converting a storage shed into a tiny home to save time and money.

Seal All Cracks in the Tiny Home

Most storages are usually stand-alone and used for storing rarely used equipment. Cracks have become an inevitable phenomenon. Before moving in, the first step is to examine and correctly fix the cracks. Cracks on the wall can be a path for bugs and insects coming into the house. Fixing the wall cracks will also stabilize the Home.

Paint the Tiny Home

Many times, we neglect the storage shed, especially the panting part. Painting is not the only application of paint on the wall, but there are benefits of painting.  It adds a glamorous look to the tiny home; it is advisable to add vibrant colors. The painting should be done on the inside and the outside. Or better use of wallpapers on the interior. The vibrancy of the interior makes it appear livable.

Increase Lighting in the Tiny House

A storage shed mainly uses a single bulb or a long fluorescent tube to illuminate it. After conversion to a tiny home, lighting becomes an essential part. The light lighting needs to be reconnected to cater to the small chambers cut out like the bedroom, living room, and bathroom.

Change the Tiny House Flooring

The original function of the shed requires a hard floor type that can withstand the pressure from the equipment stored there. Once converted to a tiny home, the flooring may be uncomfortable to bear. It’s okay to add better and more comfortable flooring like rubber flooring. Choose the type of flooring that can be added on top of an existing floor. It will reduce the cost associated with the flooring.

A Skylight Window for the Tiny Home

A skylight window is a window on the roof meant to provide natural lighting; sunlight during the day and moonlight during the nights. It also plays an essential role in ventilating the tiny Home, especially when one needs to close the door for some private time. People install the skylight for different reasons.

Create Subdivisions in the Tiny Home

 The original state of a shed is hall-like to access all the needed equipment easily. Like a tiny house, subdivisions will be inevitable to create separate rooms. Some essential subdivisions may include a bedroom section, living room, kitchen, toilet, and bathroom connected to the sewer line. It will help in keeping the tiny Home well organized.

Build Shelves in the tiny Home

Modern and classy shelves will add glamour to the tiny house. They make the rooms look more arranged and organized. The rooms that most need the shelves are the kitchen to efficiently set the cookware, cooking ingredients, and cutlery. Also, the bedroom can use some shelves to arrange clothes and shoes. Bookshelves in the living room will accessorize the interior décor.

Change the Windows and Doors of the Tiny Home

The exterior of the tiny Home should resonate in attractiveness as the interior. Changing the door from a warehouse-like door to something more fashionable will make the former storage shed look like the current home and appear welcoming. The windows should also be easy to open and close and attractive. Security should never be given second priority when considering favorable doors and windows.

Installation of Ventilation in the Tiny Home

The benefits of ventilation at home are on an endless list. Since a tiny Home may experience high temperatures and aeration, installing sufficient ventilations. They help in keeping the tiny Home with enough fresh and clean air. Also, the installation of exhaust fun ensures that the tiny house’s kitchen does not get smoky. The generated smoke during cooking is taken out through the exhaust fan. 

Have an Eco-friendly Tiny House

The main agenda of renovating and converting a storage shed to a tiny home is to downscale. Cutting the total home managing cost is intertwined with downscaling. Adopting an eco-friendly power source can go a long way in cutting the electricity bill and increasing savings. A kitchen garden can go a long way in cutting the cost of vegetable purchases.

In conclusion

Converting a storage shed into a tiny home may pose the challenge of bugs and other insects invading the tiny Home. It mainly happened because the shed did not have an active residence. To be safe, ensure the shed gets well and professionally fumigated before renovations and after. Creating flower gardens around the tiny Home will add elegance and create a buffer for rodents accessing the tiny home.

Guest Contributor: Peter Yordanov

SETTING UP A TRUCK FOR YOUR PLUMBING BUSINESS

When setting up a truck for your plumbing business, there are a few key things to keep in mind. It’s important to have everything you need on hand so that you can be efficient and effective while on the job. Here are some tips for setting up your truck

1. TRUCK TARPS

A truck tarp is an essential piece of equipment for any plumbing business. It’s important to have a quality tarp that will protect your truck and its contents from the elements.  Choose a tarp that is made of high-quality materials and is weatherproof. This will ensure that your truck and tools are protected from the elements. You can get custom mesh tarps that have a high level of water and wind resistance. Make sure the tarp is large enough to cover your entire truck. This will keep moisture and dirt from getting into your truck bed and causing damage. Look for a tarp with grommets along the edges. This will make it easier to attach the tarp to your truck. Choose a tarp that is flame resistant. This will help protect your truck in the event of a fire.

2. LADDER RACK

A ladder rack is a must-have for any plumbing business. It’s important to have a safe place to store your ladders while you’re on the job. A ladder rack will keep your ladders safe and secure while you’re driving. It’s also a great way to organize your truck. You can store all of your tools and supplies in one place. This will make it easier for you to find what you need when you’re on the job. Look for a ladder rack that is made of heavy-duty materials. This will ensure that it can withstand the wear and tear of everyday use. Its durable construction will help keep your ladders safe and secure.

3. TOOLBOX

A toolbox is another essential piece of equipment for any plumbing business. It’s important to have a place to store your tools and supplies while you’re on the job. A toolbox will keep your tools organized and safe. It’s also a great way to keep your truck clean. You can store all of your tools and supplies in one place. This will make it easier for you to find what you need when you’re on the job. Look for a toolbox that is made of heavy-duty materials. This will ensure that it can withstand the wear and tear of everyday use. It’s also important to choose a toolbox that is waterproof. This will help protect your tools from the elements.

4. SHELVING

Shelving is another essential piece of equipment for any plumbing business. It’s important to have a place to store your tools and supplies while you’re on the job. Shelving will keep your tools organized and safe. It’s also a great way to keep your truck clean. You can store all of your tools and supplies in one place. This will make it easier for you to find what you need when you’re on the job. Look for shelving that is made of heavy-duty materials. This will ensure that it can withstand the wear and tear of everyday use.

Setting up a truck for your plumbing business is essential for being efficient and effective while on the job. These were some of the most important and essential things to keep in mind when setting up your truck. Make sure you have a quality tarp, ladder rack, toolbox, and shelving to help you keep your truck organized and safe.

8 ESSENTIAL GADGETS AND TOOLS FOR EVERY HOME DIY NEEDS

Having the right tools and gadgets around your home makes DIY projects and repairs much easier and can even save you time and money. If you are a home DIY enthusiast, there are several tools and gadgets that are essential in your toolbox. Whether you are a beginner or an experienced builder, these eight essential gadgets will help make your home improvement projects easier and less time-consuming.


1. HAMMER

A hammer is one of the most versatile tools around and can be used for a variety of tasks, from fixing things to pounding nails. It is a good tool to have around the house in case of a home repair emergency. In addition to being useful in DIY projects, a hammer can be used as a weapon for self-defense.

2. DRILL

A Drill is an essential tool for any DIY enthusiast. A drill is useful when making repairs, installing new hardware, and more. A drill can be powered by a battery or an electric motor. Moreover, drill bits come in various shapes and sizes, and you can choose the one that fits your needs depending on the task at hand.

3. SCREWDRIVER

A screwdriver is essential for tightening screws and installing door hinges and locks. You can also use it for removing screws from boards and panels. It can also be used as a stabbing tool when repairing furniture. Moreover, a screwdriver will come in handy when repairing electronics and automobiles. Some screwdrivers also have interchangeable heads that can be used for various tasks.

4. TAPE MEASURE

A tape measure is essential for any DIY project because it allows you to measure distances and widths accurately. You can use it to check the size of furniture pieces before you start assembling them or to mark the location of holes on walls or ceilings for later installation of plumbing or wires.

5. WRENCH

A wrench is used to tighten or loosen screws, bolts, and other objects. It is also used to pry open objects. A wrench can be made from many different materials, including metal, plastic, or wood. Wrenches are generally divided into three categories based on the shape of their handle: straight-handled wrenches, ratchet-handled wrenches, and socket wrenches. Their versatility makes them a must-have tool for any home DIY project.

6. CORDLESS DRILL

If you’re a DIYer, then you definitely need a cordless drill. A good cordless drill can do everything from drilling holes in wood to screwing screws into boards. It comes in handy for smaller jobs, and it saves wear and tear on your hands and arms when doing projects that require repetitive use.


7. LUBE SHUTTLE ELECTRIC GREASE GUN

lube shuttle electric grease gun is a handheld tool that is used to apply lubrication to machinery, equipment, or other objects. It consists of a gun-shaped body that is fitted with a trigger and a nozzle. Lubricant is stored in the body of the gun and is released when the trigger is pulled. This type of grease gun is powered by electricity and is, therefore, suitable for use in areas where there is no access to a power supply. If you need to apply lubrication quickly and efficiently, this tool will come in handy.

8. JIGSAW

A jigsaw is useful when cutting wood into different shapes and sizes. It also has a blade that you can use to remove wood filler or other materials. This tool is helpful for creating a precise finish on projects. Additionally, you can also use a jigsaw to make cuts in metal or other hard materials. Moreover, the blade on a jigsaw can also be sharpened to create precision cuts. As such, a jigsaw can offer many benefits when it comes to crafting and repairing items to add value to your home.


CLOSING THOUGHTS

When it comes to DIY projects, having the right tools is essential. These eight items will help you get started on your project and make it easier and faster. If you have any questions about any of these tools, be sure to ask a professional before beginning a project. They can provide guidance and instruction that will help you complete your task successfully. Home improvement projects can be fun, but they’re not easy—be sure to use the right tools to make the process easier.

Guest Contributor: Tracie Johnson

8 REASONS YOU SHOULD APPLY FOR A VA LOAN

Finding an affordable mortgage that you’re eligible for can be challenging, especially in the current home buying market. Despite so many different loan options available, it can be difficult to find the one that’s right for you.

If you’re a veteran or an active-duty military member, then you likely qualify for a VA loan! Even if you qualify for other loan types, if you can apply for and benefit from a VA cash-out refinance loan, then it’s definitely worth your time. In many situations, VA loans are the best option available and if you glance at the eight reasons below, you’ll quickly understand why.

8 REASONS YOU SHOULD APPLY FOR A VA LOAN

#1. NO DOWN PAYMENT

While other mortgages will require a down payment of anywhere between 3.5% to 20%, a VA loan does not require a down payment. For many people, providing a down payment is one of the biggest obstacles in buying a house. You need to come up with a large sum of money before you can benefit from the loan and in many cases, this is very difficult.

With a VA loan, you won’t have to scrounge up every last penny you’ve saved in order to put down a down payment. Instead, you can benefit from the loan without this obstacle.

#2. NO MINIMUM CREDIT SCORE

Another major challenge for potential homeowners is having a high enough credit score to be approved for a loan. While conventional mortgage loans have a minimum score of 620, FHA loans set their minimum to 580. Many lenders raise their minimum score requirement to avoid risky investments.

In many cases, you may be asked to show a credit score of 680 or higher which makes it difficult for buyers.

When it comes to VA loans there is no minimum score requirement. This being said, some lenders may still request a copy of your credit score in order to assess how much of a risk you are. Because of this, it’s recommended you have a score of 580 or more, though it is not an eligibility requirement.

The VA program will look at your credit history for the last year, so it’s important you haven’t filed for bankruptcy or had a collection marked on your credit score. As long as you have relatively good payback standings and haven’t had any problems, you’ll be good.

#3. RELAXED DEBT TO INCOME RATIO

Your debt to income (DTI) ratio often plays a huge role in the determining of your mortgage. For most conventional loans, this ratio is capped at 36%. For VA loans, however, it’s around 41%. Depending on the lender you contact, they may permit a higher ratio, though you shouldn’t always rely on this. 

#4. NO MORTGAGE INSURANCE REQUIREMENT

Most mortgages will require you to get private mortgage insurance. The cost for this is added on top of your mortgage payment and is often raised if you’re unable to provide a 20% down payment. This makes paying for a mortgage much more expensive. 

While not all conventional loans require private mortgage insurance, all FHA mortgages require it. When it comes to VA loans, however, private mortgage insurance is never required!

As VA loans are backed by the government, lenders don’t require you to pay for private mortgage insurance in addition to your regular mortgage payments. All the money you would have otherwise spent on insurance can go directly into paying off your loan, saving you thousands of dollars.

#5. LOWER INTEREST RATES

Mortgages typically have fairly high interest rates, especially if you don’t have an excellent credit score. While refinancing may help you switch to a loan with a lower interest rate, you won’t be able to do this right away and you’ll still lose quite a bit of money simply by having to pay so much in interest.

VA loans normally have lower interest rates than other mortgage types. This is again due to the loan being backed by the federal government.

While the average interest rate for conventional loans is anywhere between 3.5% to 4.5%, a high VA loan interest will hover around 3.5%. Of course, this will vary from lender to lender, but on average, you’ll have lower interest rates with a VA loan than you would with another type of loan.

#6. NO PREPAYMENT PENALTY

In some cases, lenders will require you to pay an extra fee if you are able or willing to pay off your mortgage before the term ends. This can be discouraging for those who want to either refinance or pay in full for their loan.

If you are able or willing to pay off your mortgage in full, a VA loan will not penalize you.

#7. EASIER QUALIFICATION

Qualifying for a mortgage can be a difficult and long process. You’ll be asked to provide multiple documents and even if you do, you may still be denied. Even pre approval may be revoked and you’ll find yourself back at square one.

VA loans are much easier to qualify for. Eligibility requirements can be found on the VA website along with more helpful information about applying for a certificate of eligibility and what to do if you don’t meet the requirements. There’s also a phone number provided at the bottom if you have any additional questions or need some extra assistance.

#8. EASY REFINANCE

If you’ve previously taken out another type of loan, VA loans can be used to refinance your current loans. When you refinance a previous loan into a VA loan, you’ll benefit from all the advantages mentioned above and won’t have to worry about managing multiple loan types.

CONCLUSION

VA loans are there to help former and active-duty military members. If you qualify, it’s certainly worthwhile to look into the option and take advantage of it. Even if you could easily qualify for a conventional loan, VA loans come with so many other benefits that it makes the most sense for you to take advantage of it anyway.

HOW TO PROPERLY MAINTAIN YOUR TANKLESS WATER HEATER

It’s always a good idea to learn how to maintain everyday appliances. Not only will you be able to get your appliance up and working quickly, but you’ll also save the money you would otherwise spend on hiring a professional. Of course, you will likely need help with major issues – but understanding your appliances means that when it comes to easy-to-fix problems, you’ll be able to handle them yourself.

This theory is also true for your tankless water heater. While water heaters may seem like a step too far when it comes to doing your own maintenance work, they’re not all that complicated to handle. 

If you’re wondering how you should go about maintaining your tankless water heater, you’re in the right place. Here are some tips you should keep in mind. 

CLEAN THE FAN AND MOTOR

The fan and motor of your tankless water heater should be clear of dust and dirt. You can clean these parts using pressurized or compressed air, which also allows you to get the dirt out of all the tiny crevices. This is one of the easiest parts of maintaining your water heater and should ideally be done every few months. 

However, depending on where you live and where your water heater is installed, you may have to clean it more often – it all depends on how much debris your water heater is exposed to. 

FLUSH YOUR HEATER

You will need to flush your water heater at least once a year. Flushing the heater essentially means removing the mineral build-up from the inside of your appliance. If left unattended, this build-up can damage the walls of your heater and affect its lifespan and ability to function. 

Though flushing (also known as descaling) your water heater may seem complicated, it’s actually pretty straightforward. As explained by Sacramento-based plumbers, the tankless descaling procedure should be handled properly, so it’s best to have professionals inspect your heater before problems escalate. However, if you’re up for it, you can attempt to flush your heater yourself with the  steps below:

  • Turn off the power, whether that means turning off the gas or the circuit breaker.
  • Close all the water valves so that no water will enter or exit your heater during the procedure. There will usually be three valves for you to turn off. 
  • Remove the purge port valve caps. The purge valves help control the pressure in your heater, and their handles are T-shaped. When removing these valve caps, make sure to do so slowly and carefully so that the pressure can be relieved gradually without the hot water burning you. 
  • Attach hosing lines to each of the valves (as mentioned above, there are generally 3 valves to a tankless water heater)
  • Open the purge valves. 
  • Add descaling solution into your water heater. Alternatively, if you don’t want to use chemicals inside your water heater, you can use pure white vinegar as a natural alternative instead. You’ll need about 2.5 gallons of vinegar for a standard water heater, though this amount will change depending on the size of your appliance. 
  • Check the water heater manual for instructions on how to flush your appliance. Once you’re done flushing it, you will also need to drain it properly, and the procedure for this step will also be included in the manual. If you cannot find your manual, check to see if there’s a digital version you can reference instead. 
  • Once flushing and draining are complete, close the port valves, disconnect the hosing lines, and reseal the purge valves using the port caps you removed. 
  • Restart your water heater by turning the water valves back on and turning on the power. Don’t be alarmed if it takes a few moments before water starts flowing through your heater – the pipes will first expel the air within them before the water starts flowing properly once again. However, your water heater should be back to normal within a couple of minutes. 

CLEAN THE FILTERS

Aside from the fan and motors, you will also need to regularly clean both your water heater’s air and water filters.

For the air filter, you will first need to detach it from the water heater. Once it’s removed, you can then use a soap and water cleaning solution and a soft brush to clean the filter. Clean it thoroughly to ensure there is no dirt or debris obstructing airflow, then rinse it well and let it dry before reattaching it to the water filter. 

The water filter in your water heater is essentially a screen that is meant to trap any sediment in the water so that the water you use is as clean as possible. However, this sediment will need to be cleaned from the filter regularly – a built-up will prevent the filter from doing its job and will prevent it from working correctly. 

To clean the filter in your tankless heater, you will first need to remove the filter. However, make sure the water is turned off before you remove it to reduce the risk of being singed by the hot water. Once it’s removed, clean the filter using the same water and soap solution you use for the air filter. 

Once clean, wipe down the water filter and let it dry before returning it to your water heater. 

CLEAN THE BURNERS AND OTHER KEY ELEMENTS OF YOUR GAS HEATER

If you’ve got a gas tankless water heater, you’ll need to ensure that all the “control” components are working properly. This means ensuring there’s no dust or dirt around the burners and also making sure that the control compartments and air passages are completely clean. 

If these elements are not clean, you risk your water heater suffering from a major failure. Ideally, you should do this at least once a year. 

When maintaining your tankless water heater, you should also consider just giving the outside of your tank a quick wipe. This will make sure that the outside looks just as good as the inside does – and as an added advantage, you’ll have a visual confirmation that you’ve finished cleaning (and you can also use the external appearance of the tank to decide when it needs to be maintained again).

That said, keep in mind that not everyone should or is comfortable handling their tankless water heater maintenance themselves. If you’re worried about your handyman skills, a bit concerned about your safety, or simply have a major water heater issue to deal with, you should always be open to contacting a professional. After all, a professional will know exactly what they’re doing, and there’s a lower chance you’ll lose time and money over a mistake, which is always a positive!

BUILDING A POLE BARN TO EXPAND LIVING SPACE: A HOW-TO GUIDE

Building a pole barn can be a great way to expand your living space. Whether you need more storage for your car or extra space for a home office, a pole barn can provide you with the extra room you need. But before you start construction, there are a few things you need to know. This how-to guide will walk you through the process of building a pole barn, from choosing the right location to selecting the materials you’ll need. By the end, you’ll be ready to start construction on your own pole barn expansion project.

PLAN THE SIZE, SHAPE, AND STYLE OF YOUR BARN

The size, shape, and style of your barn are important factors to consider when expanding your living space. The size will determine how much space you have to work with, the shape will affect the overall look and feel of the barn, and the style will dictate the functionality of the barn.

When deciding on the size of your barn, you should first consider what you plan to use it for. If you only need extra storage space, then a smaller barn may be sufficient. However, if you plan on using it as a workshop or a place to house animals, then you’ll need a larger barn. Once you know what you need the barn for, you can start planning the dimensions.

The shape of your barn is just as important as the size. The most common barn shapes are gable, gambrel, and hip. Each shape has its own unique look and feel, so it’s important to choose one that fits your personal style.

The last factor to consider is the style of your barn. Do you want a traditional-looking barn or something more modern? Barns are now easy to assemble thanks to customizable pole barn kits. There are modular, prefabricated, and DIY kits available. With many different styles of barns available, you should be able to find one that fits your taste.

CHOOSE THE RIGHT LOCATION

Building a pole barn is a great way to expand your living space. But before you start construction, it’s important to choose the right location for your new home addition. Here are some things to keep in mind when selecting a spot for your pole barn:

  • Make sure the ground is level. This will help ensure that your pole barn is stable and won’t be at risk of collapsing.
  • Avoid flood zones. If your property is located in a flood zone, it’s best to choose another spot for your pole barn. This is because flooding can damage or even destroy pole barns.
  • Pick a sunny spot. If possible, try to choose a location for your pole barn that gets plenty of sunlight. This will help keep the inside of your pole barn warm and comfortable.
  • Consider the wind. When selecting a location for your pole barn, make sure to take the wind into account. If your property is located in an area with high winds, it’s important to choose a spot for your pole barn that will be sheltered from the wind.

SELECT THE RIGHT MATERIALS

Building a pole barn is a great way to expand your living space. But before you start construction, it’s important to select the right materials. There are many factors to consider when choosing the materials for your pole barn. The climate in your area will dictate the type of material you’ll need for the walls and roof. The size and style of the barn will also impact the material choices.

Here’s a look at some of the most popular materials used in pole barn construction:

  • Wood: Wood is a classic choice for pole barns. It’s strong and durable and can be easily customized to match the look of your home. If you live in an area with severe weather conditions, however, you’ll need to take extra care to protect your wood barn from the elements.
  • Metal: Metal pole barns are becoming increasingly popular. They’re durable and low-maintenance and can withstand even the most extreme weather conditions. If you choose a metal barn, be sure to select a high-quality material that won’t rust or corrode over time.
  • Vinyl: Vinyl is another popular choice for pole barns. It’s affordable and easy to work with, and it comes in a variety of colors and styles. However, vinyl can be damaged by UV rays, so it’s important to choose a color that won’t fade in the sun.

These are just a few of the most popular materials used in pole barn construction. When selecting the materials for your barn, it’s important to consider the climate, the style of the barn, and your budget. With careful planning, you can build the perfect pole barn for your needs.

Building a pole barn is a big project, but it’s one that you can do yourself with the right planning and materials. By following this how-to guide, you’ll be able to build a pole barn that meets your needs and looks great, too.

6 BENEFITS OF USING FIELD MANAGEMENT SOFTWARE FOR HVAC BUSINESSES

Do you own a business in the HVAC field? Here are some of the benefits of using field management software. 


1.      AUTOMATED PROCESSING

Field service management software will streamline operations and help you carry out field activities in a planned and orderly manner. HVAC software is flexible and can adapt to changes throughout the day. Such behavior helps to reduce the cost of energy wastage as well as inefficient activities incurred because of the confusion and frustration of a busy day.


2.      BOOSTING PRODUCTIVITY

Field service management software is used for automating all processes, which means that the hassle of filling forms, collecting data, as well as updating the logs at the office will be taken care of. That way, technicians and employees are free to do their jobs better by spending more time on their actual job profile. Such utilization of time frees up your crew to perform their daily tasks optimally, thereby boosting productivity and improving the dispatch cycle.


3.      INCREASED COST EFFICIENCY

Field service management software not only helps you save money, but can actually help you earn more money. Digitizing all the paperwork and aligning forms in a single network helps save time and increases the number of jobs that your crew can handle. That means, you can take on more work, perform more jobs, and increase the daily profits.


4.      FIELD EMPLOYEES FUNCTION MORE EFFICIENTLY

Since each technician has a connected app on his/her smart devices, he/she can gather information from the main field service management software anywhere, anytime. This includes connecting to tech support, queries, as well as accessing tools required to perform a particular job.

Backend staff can also provide real-time communication to technicians thus improving the efficiency of the job thus translating to improved customer satisfaction. On the other hand, technicians can request replacement parts, update the job status, and even access the inventory on the go without ever having to visit the office.

It provides technicians with freedom and allows them to stay on the field to do their jobs not only quickly but also optimally. Thanks to GPS tracking, their ability to perform jobs requiring precise geographic location is enhanced. It can also help track their arrival time and even notify supervisors if technicians travel outside the prescribed zone.


5.      ACCURACY IMPROVEMENT

The accuracy of the job also increases because the tracking of inventory in the service supply chain is not only very precise but also recorded at the root level. It can decide what parts field workers will require for assigned tasks of the week and list them down. Those can be loaded on the truck together so that field workers don’t need to return for additional parts or equipment for the whole week.


6.      BETTER RESPONSIVENESS

Intelligent field service management software is flexible enough to work through the dynamics of field work, which changes rapidly. The jobs to be done may require a special set of skills or require additional crew members. 

The software can identify these beforehand as opposed to sending a technician and detecting such issues. In situations where the technicians are unavailable, the software smartly diverts resources towards the high-priority jobs automatically, thereby allowing the company to stay on its toes without human intervention.