HOW TO BECOME A LICENSED PLUMBER? 5 STEPS FOR YOU

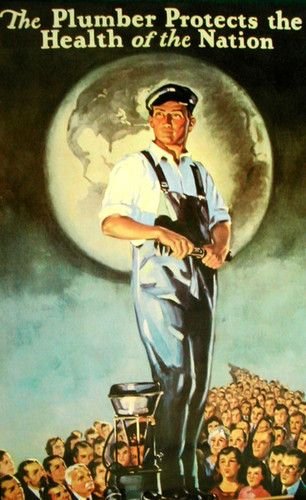
Plumbing is a career that is high in demand and sorely lacking in numbers. Almost every modern home and even whole corporate buildings need plumbing issues fixed regularly. An up-and-coming plumber won’t be lacking in jobs to do. Plumbers get a lot of interesting and consistent work. Today, let’s discuss what steps you need to take to become a plumber, and what you should expect in your career.

WHAT DO PLUMBERS DO?

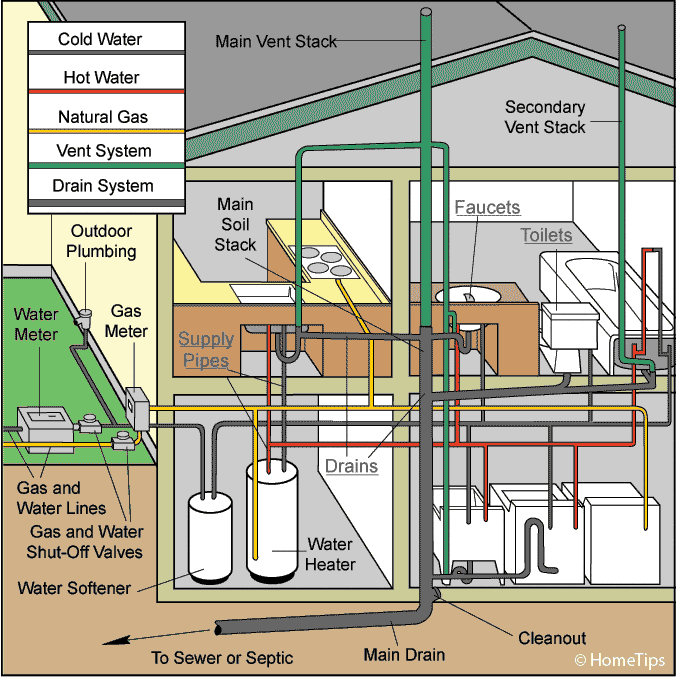
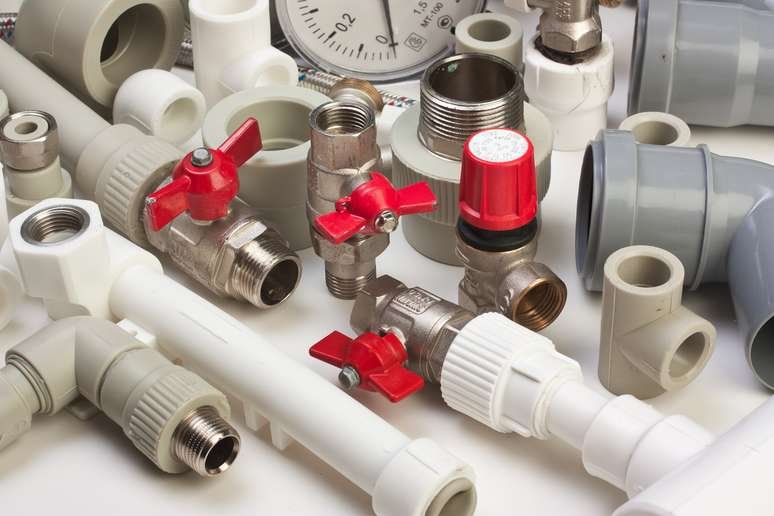
Plumbing is a trade where you are expected to fix all manner of plumbing problems such as unclogging pipes, setting up new pipe systems, and inspecting existing piping systems to see if they are up to code. The work requires a lot of know-how with piping systems, blueprints as well as basic carpentry skills.

WHAT KIND OF PLUMBERS ARE OUT THERE?

There are three levels of experience that plumbers are classified into.

APPRENTICE

These are aspiring plumbers without experience. As an apprentice, you study under journeymen or master plumbers that have significant knowledge and experience in the field. 

Apprenticeships usually take a total of 2 to 5 years to complete. To get an apprenticeship, ask your local plumbing unions or organizations if they are willing to take you under their wing. Alternatively, just find a licensed plumber willing to teach you.

You will be expected to assist them in on-hand assignments such as home repairs. Additionally, you will also have to read up on coursework for your trade school.

Trade schools will often cost you $3000 to $10000 annually, depending on your trade school and course program. Only those who meet the minimum age of 18 are eligible for apprenticeship.

JOURNEYMAN

Journeymen are plumbers who have completed their apprenticeship and once they are licensed, will be allowed to work as a professional plumbers. Journeyman plumbers need to maintain their education and pass regular licensing exams to see if they are still fit for a plumber job. 

Most states require this annually, but some only need a renewal every three to five years. There is no national plumbing license, so you have to take licensing exams in other states in case you move.

MASTER PLUMBER

Master plumbers stand at the top of their trade and are often the end goal of all plumbers. To become a master plumber, they must have two years of total experience as a Journeyman. They need to pass a master plumber’s exam, both in written and practical tests. 

Once you become a master plumber, you are now able to work supervisory roles and train younger plumbers. Only master plumbers can start a plumbing business. They are also the only plumbers qualified to design blueprints for plumbing systems of major projects.

HOW TO BECOME A LICENSED PLUMBER 

There are a lot of things you need to do to upskill and become a licensed plumber.

1. MEET THE BARE MINIMUM REQUIREMENTS

All plumbers should have at least finished high school or achieved a GED. In addition, they must be able to have basic knowledge of computers, math, and pass a drug test. Lastly, you need to be the age of 18 to start an apprenticeship.

2. ENROLL IN A TRADE SCHOOL

Enrolling in a trade school will often cost you $3000 to $1000 depending on the school and provide you with coursework and a certificate at the end of your 1 or 2 years. 

Look for a local trade school to enroll in for convenience, as you will likely be doing your apprenticeship at the same time.

3. START YOUR APPRENTICESHIP

Usually, a trade school assigns you to a professional plumber for your apprenticeship. However, if you know a professional plumber, you could ask your school to consent to an apprenticeship with them. 
Apprenticeships will take 2 to 5 years, and you can start as soon as you start trade school.

4. PICK A SPECIALIZATION

Once you are training, you have the choice of specializing even further past the handyman approach of regularly licensed plumbers. While it’s possible to dabble in different specializations, you should focus on only one of these during yourapprenticeship.

Pipelayers are the most common type of specialization. They install the pipes for major plumbing systems such as storm drains or water mains. It involves a lot of hard labor due to the digging and demolishing needed to set the pipes in place. They are most common in residential areas.

Pipefitters are in charge of indoor industrial projects such as the heating and cooling systems of massive factories. They are responsible for all piping systems in an industrial setting. A variant of these pipefitters, called steamfitters, do much the same tasks as pipefitters only they work with steam in high-pressure pipe systems.

5. GET LICENSED

The requirements vary by state, but it’s important to get a license in your state so you can start working as a professional immediately. Regular compliance checks are expected. For Ilinois,  you are required to renew your apprentice or plumber license every year.  You can check the requirements on their official website. Remember, residential and commercial owners will only hire licensed plumbers.

CONCLUSION

Plumbing is a great career prospect. It’s a trade that will always be in demand for as long as people live in homes with running water. That said, while it is significantly shorter to get through than most courses, it’s a job that values caution and creativity. You need to prove yourself constantly to become a successful plumber, and it all starts with learning.

Guest Contributor: Kat Sarmiento

THE IMPORTANCE OF PLUMBERS

One of the most overlooked trades is plumbing. Most people think that plumbers only deal with clogged sinks or clogged toilets, but that’s far from the truth. If we didn’t have plumbers around, the lifestyle we live, the privilege we have of having hot and cold water – wouldn’t be possible without plumbers.

WHAT DO PLUMBERS DO?

  • Plumbers have numerous jobs they do on a daily basis, and that includes more than unclogging toilets.
  • Install pipes, fittings, valves
  • Install appliances such as dishwashers, water heaters, sinks, toilets, bidets, etc.
  • Locate water and gas leaks in pipes
  • Replace broken pipes
  • Opening clogged drains
  • Install clean outs
  • Water softeners And so much more.

PLUMBING IS IMPORTANT

Did you know that the WHO (World Health Organization) declared plumbers as the most important frontline workers? Plumbers help to ensure the world has clean and sanitary water to drink and bathe in, it’s proven that without sanitary water, sustainable health is not possible. Clean and sanitary conditions allow many people to live healthy and it extends life expectancy.

Plumbers also make sure waste ends up in the correct spot. Plumbers make sure that the waste is disposed in a safe manner by separating your clean water from harmful contaminants. If your plumbing is done bad, or not up to plumbing code, it is possible that those waste contaminants could leak into areas it shouldn’t be, and can create a danger to those nearby.

CONSERVATION

One of plumbers main priorities is the conservation of water. Water is a finite resource, which means we don’t have an endless supply, which means we need to be cautious with the way we use it, and find ways to get the most out of it. With appliances in today’s technology, they focus on appliances that are water saving. If you’d like to reuse water and conserve your water a step further, a plumber can help you harvest rainwater.

By using appliances that are water saving, it will actually help you save money in the long run. When you waste water, you still need to pay for it. This is why we suggest ideas to help save water, because water isn’t free and it adds up when it’s being wasted.

There are numerous ways you can conserve your water. The most common appliances that are normally changed to water conservation models are:

  • Toilets
  • Shower heads
  • Bathroom faucet
  • Kitchen faucet

If you’re interested in becoming a plumber, send us your resumes to kevinszabojrplumbing@yahoo.com. Plumbers save the world, don’t you want to be a part of that?


Guest Contributor: Tiffany Powell

CONSTRUCTING PLUMBING SYSTEMS IN MODULAR HOMES AND BUILDINGS

Modular buildings are becoming increasingly popular due to the speed of their construction. The reduced time in construction has a significant impact on the cost of the overall project, which makes it enticing. Contractors can build structures rapidly with a design that takes less space than traditional ones.

People typically think that modular buildings have challenges when it comes to fitting all of their plumbings, but this instance is far from reality. The pipes and other plumbing fixtures are easier to install in a modular setting than in traditional buildings. With proper planning and execution, the plumbings in modular buildings will be functional with a substantial reduction in cost and installation time. 

How Do You Install Plumbing in a Modular Building?

A complete plumbing system, including vent stacks, water supply, and waste lines, are requirements for modular buildings. The connection, installation, and pressure test are necessary for these lines. The modular facility’s supply and waste pipes go through the first floor. The waste and water supply lines on the second level, on the other hand, connect to the water lines that were already existent at the construction phase.

Whether you plan to use city sewage and water or a private septic tank and well, your building will require the appropriate plumbing. Depending on the plan you choose, it will have waste lines, water supply lines, and venting stacks. It is necessary to have all connections tied in and pressure checked to the requisite 35 PSI for waste lines and 95 and 100 PSI for water lines to prevent leakage.

The pipes for waste and water supply are in the kitchen and bathroom parts of the manufacturing facility while they are under construction. Plumbing gets stubbed through on the first level, and if the structure has a second story, it may run up chase walls. After the delivery and setting of the building, your builder will need to hook up the second-story waste and water lines on-site. 

The builder is responsible for linking your well or public water to your building, determining what type of plumbing connections you need. It would be best to install general-purpose access doors with access cover to protect the entry points of the utility areas that you will use to access your plumbing.

Misconceptions About Plumbing in Modular Buildings

Plumbers and professionals typically avoid working on the modular buildings’ plumbing systems. Certain beliefs about it, on the other hand, are untrue. One assumption is that the drain lines have no venting mechanism, which is ludicrous because all drain lines require vents to function correctly; otherwise, pressure will build up, and nothing will move. 

Another common misconception regarding modular buildings is that they come with low-quality pipes that deteriorate over time, which is not the case.

Installing Public Water Pipes

Your modular building’s water source will determine the plumbing connections. Furthermore, installing the pipes’ entrance should be during the foundation, regardless of where the water supply originates. You’ll need to hook up your building to the city’s water supply.

Water Supply

You’ll need to connect the water supply lines to the first-floor plumbing lines stubbed into the modular building’s floor. The water feeds for the second floor must be from the connection between the first and second floors in access panels, typically located near the waste lines for the modular building. It is always preferable to have the access panels on the floor rather than the second-story ceiling.

Sewer System Installation

In terms of technique and setup, connecting sewer pipes is comparable to linking water sources in modular buildings. However, keep in mind that the septic system’s installation should only be after the construction of the entire building.

Waste Lines and Vent Stacks

The water lines on the first floor must connect to the waste pipes in the foundation space of the modular building. However, if you have a two-story building, the waste lines need a connection to the first-floor box, which will be present between the two stories. Placing the box on the second-floor floor is usually tricky since it necessitates the use of additional materials. 

The vent stacks in the attic space, perforated in the roof, can connect to offer an easy exhaust system.

Hot Water Heater Installation

This job will require an electrician to operate the water heater system, either an on-demand system or a storage tank. For the water heating system, there are two possibilities. One option is installing the water heater in the building’s foundation base, while the other is installing it in the conditioned space. Furthermore, it can use both electric and natural gas for water heating.

Plumbing Leaks

Because the plumbing supply lines in these buildings are rarely inside the walls, you won’t have to worry about any wall damages. Additionally, you can find pipe leaks frequently in the insulation, floors, subfloors, or HVAC ducts. If your flooring is composite wood material, it will absorb liquid like a sponge and deteriorate. 

When it happens, it’s usually better and less stressful to bring in new supply lines while shutting down the existing ones rather than repairing them. The last deciding factor in which material to employ will be local plumbing codes.

Takeaway

Prefab buildings will have more variations in the foreseeable future due to the advancement in various construction technologies and methodologies. Driven by the need for a more sustainable approach, more experimental structures will become the foundation for other projects. Make sure to consult with a professional when making decisions about your project and only purchase high-quality products from reputable companies.


Guest Contributor: Chris Jackson

HOW TO CHOOSE THE RIGHT KIND OF PLUMBING FITTINGS AND FIXTURES

When it comes to plumbing systems, many people tend to prioritize inward pipe installation and disregard pipe fittings and pipelines, which are fundamental to ensure that your plumbing is fully-operational and working as it should. Understanding the significance of having a solid pipe framework is critical because if these fittings are not working correctly, it gives room for leakage. 

Plumbing fittings integrate several pieces of plumbing equipment, including lines, fixtures, and the joints that interface these installations. Installing quality pipe fittings and fixtures are essential for a continuous water flow and reliable plumbing framework.

Tips on Choosing the Right Plumbing Fittings And Fixtures

Whether building your property or renovating, you will eventually need to purchase plumbing fittings and fixtures based on your needs. Although these parts are small and appear optional, they help maintain the main plumbing framework. When looking for the ideal pipe fittings and fixtures, you can consider some factors here.

  • Cost – Finding the right fittings and fixtures also means staying within budget without sacrificing quality. Choosing to purchase branded plumbing accessories is expensive, to say the least, since you may end up spending more than you have intended. Asking for recommendations and checking for cheaper options is better before settling on your purchase to avoid exhausting your budget before the project is complete.
  • Quality – When looking for plumbing fittings and fixtures, you must always consider the quality of your purchase item. Installing inexpensive yet low-quality accessories will ultimately lead to a budget disaster since they can easily break and cause leakages. The leakage can also occur through an ingrained pipe that is hard to locate and isolate, making repairs especially expensive. Consider purchasing an item that can benefit you in the long run, just like fire-rated access doors and panels.
  • Material – Identifying your needs will lead you to choose the suitable material for your plumbing fittings and fixtures. Your contractor can give you recommendations if you are clueless about purchasing. Some of the materials used in fittings and fixtures are stainless steel, plastic, aluminum, concrete, copper, and glass, to name a few. 
  • Size – To ensure the stability of your plumbing system, you need to install the fittings and fixtures of the right size to hold the structure in place properly. When shopping for these accessories, do not forget to take the measurements along with you. Purchasing the accessories in the wrong size may delay the construction project and keep you off track when it comes to your budget range.
  • Aesthetic – Fitting and fixtures are considered as plumbing accessories. Therefore, it would be best to purchase items that can blend in perfectly with the overall aesthetic of your home or business. Thankfully, you can choose from several colors and designs.

When choosing the right plumbing fittings and fixtures, you must be extremely careful in deliberating what you need. Taking these buying factors into consideration will assure you that your plumbing system will work properly and last longer.

Types of Plumbing Pipe Fittings

There are various types of plumbing fittings available that have different functions. Plumbers use fittings to connect multiple pipes to regulate or measure the water flow regardless of size. Here are the various fittings used in residential or commercial plumbing systems.

  • Elbow – Elbow fittings usually have 90 degrees and 45 degrees turn and are installed to change the pipe flow direction. The sweep of the elbow fitting shows how fast it can make a transition or change in leadership.
  • Reducer – Reducers are installed to connect pipes with different diameters as it gradually changes in diameter to reduce flow.
  • Tee Type – This fitting is shaped like the letter T and has two inlets arranged at 90 degrees in the main pipeline. 
  • Street Elbows – Street elbows are composed of male and female threads. They are commonly used with galvanized steel and copper pipe, ideally in tight spaces.
  • Cross-Type – This fitting accessory is designed with four openings in four different directions and is commonly used for fire sprinkler systems.
  • Couplings – Couplings are used to connect pipes of the same diameter. It has two types available: compression and regular coupling.
  • Unions – Union fittings have similar functions to couplings. However, union fittings are not fixed and can be removed when needed. 
  • Adaptors – Commonly used in copper or PVC plumbing applications, adaptors are installed to change the end of a non-threaded pipe to male or female ends. 
  • Olet – Plumbers use olet fittings when the inlet pipe size is larger than the outlet pipes in a T-section. Several types of olets are available, such as butt-weldolet, socket weld, threaded, elbow, nipple, lateral, and flange olet.
  • Bushings – Bushing fittings may have a similar function as reducers, but they are different in making an abrupt change in diameter.
  • Plug – Plug is a plumbing accessory used in closing pipe openings during repairs and inspections. 
  • Caps – Caps have similar functions as plug fittings but consist of male and female threads. It is available in rubber, copper, steel, plastic, etc.
  • Valves – Valve fittings regulate water or gas flow through a pipe. There are different types of valves such as gate valves, globe valves, check valves, butterfly valves, and diaphragm valves. 


Types of Plumbing Fixtures

Since fixtures are for extended usage, they are often made with durable materials that resist corrosion, erosion, and water stains. Plumbing fixtures are manufactured with different materials, including PVC, fiberglass, tile, marble, glass, and stainless steel or copper. Here are the different types of plumbing fixtures.

  • Toilets – Toilets may look simple, but they have ingenious systems and designs. It mainly consists of a water tank mounted above the bowl with a large curved drain in the bottom. The toilet is then mounted to the floor with its drain pipe connected and positioned over the sewer pipe. Toilets also vary in some parts of the world and have different types: flush toilets, dry toilets, urinals, and high-tech toilets. 
  • Bathtubs – Commonly found in bathrooms, bathtubs usually have a shower attachment that provides the user versatility. Modern tubs have overflows, drains, and faucets that help in regulating water flow and water drain. Some of the most common bathtubs are Western-style bathtubs, Eastern-style bathtubs, Claw-foot tubs, Whirlpool tubs, and Hot tubs.
  • Sinks – Plumbing sinks are bowls or basins used to hold water in kitchens, bathrooms, and other utility rooms. Many sinks have cold and hot water options depending on users’ needs. The different types of sinks include self-rimming sinks, bottom-mount sinks, solid surface sinks, butler sinks, and stand-alone sinks.
  • Showers – Showers are plumbing fixtures that use a nozzle to stream hot or cold water over a tub or a shower space. There are several variations in the nozzle, but they all have the same function. Standard showers include water showers, electric showers, air showers, steam showers, bucket showers, beach showers.

Each plumbing fixture comes in various styles, colors, and designs. Depending on the fixture, they offer practicality and are often aesthetically pleasing.

Your plumbing system is considered an integral component since it deals with water flow and easter disposal. With this in mind, an effective maintenance program and regular upkeep are crucial to ensure its stability. In addition, it is imperative to equip your water system with necessary parts such as plumbing fittings and fixtures.

Guest Contributor: Chris Jackson

8 PROJECTS BEGINNER FLIPPERS SHOULDN’T DIY

Home improvement has the potential to be fun, affordable, and extremely rewarding. But that doesn’t mean every DIY project is worth attempting. In fact, a recent report suggests that 4 in 10 Americans suffer from more DIY fails than successes, and that it takes an average of 5 hours of trial and error before calling in the professionals.

The bathroom is the most common room of the house to suffer at the hands of inexperienced DIY-ers, followed closely by the kitchen and yard. Even though the idea of hauling out your drill and cutting some home improvement costs is tempting, it’s important to remember that some tasks are simply best left to the professionals. 

It doesn’t mean you can never go for DIY projects that are within your range of expertise. It just means knowing when to hand the baton over to an experienced contractor. 

Here are eight DIY projects that beginners (and most intermediates) should never try. 

1.     Electrical Installation 

Aside from the odd light bulb change, almost all electrical installations should be reserved exclusively for professional electricians. The dangers surrounding electrical installations are vast and recurrent, making this form of DIY a very unsafe process to execute, no matter how confident you feel. 

Whether you want to install a new light fixture, replace your electrical panel, or perform a demolition of electrical components, these are all jobs that you should never attempt alone. 

The US Electrical Safety Foundation found that improperly handled electricity is annually responsible for 400 deaths, 4,000 injuries, and up to $1.6 billion in damages to property. So, next time you catch yourself gazing wistfully at the electrical box, promptly identify a good distraction. 

2.     Window Replacement 

Window replacements are tricky to execute because of how precise every component needs to be. Even the tiniest crack or mismeasurement around the walls, framing, and window in question can result in long-term water leaks and mold damage. 

Even though window installation may seem like a straightforward job, it’s the kind of project that requires a meticulous, experienced hand. 

Furthermore, any damage repair needed will not be cheap. And you may wind up spending more money fixing damages than it would have cost for a contractor to do a proper job the first time around. 

3.     Wall Removal 

The demolition or removal of a wall is a highly ambitious home improvement project that amateur DIY-ers should steer well clear of. This is due to the fact that only a professional will be able to tell whether or not a wall is load-bearing, meaning it is an integral support structure of the house. 

If you attempt to remove a wall without having performed the proper load-bearing analysis procedure, you could place yourself, your home, and everyone in it at risk. Having your ceiling cave in is not worth the time or energy it takes to attempt this project. Rather, get a professional to do the work for you. 

4.     Removing Chipped Paint 

Removing old paint from a wall might seem like child’s play. But in reality, it can result in serious health consequencesif you’re not careful. Buildings erected before 1978 (yes, even if they have been remodeled), are likely to contain lead-based paint, which is extremely toxic to humans. 

If you just decide to go for it and strip away the newer layers of paint, you could uncover the lead-based paint chips which lay beneath. In doing so, you put yourself at risk for lead poisoning, which can cause anemia, brain damage, and kidney damage. 

5.     Roof Leak Repair

 Your roof is an integral part of your house, and tampering with it when you don’t have professional experience can cause a lot of damage—while costing you an arm and a leg. If your roof has a leak, doing a simple patch-up job might seem like the best option. But in reality, it’s far more complicated than that.

To repair a roof leak, you have to identify the weak spot and replace the individual shingles (or other roof components) without causing more damage to the surface. A solid roof job should last anywhere between 13-18 years, but amateur repairs could just mean more problems in the long run. 

6.     Painting Kitchen Cabinets 

When it comes to painting the kitchen cabinets, choosing the perfect color is the least of your concerns. The job may seem simple, but there is far more to it than taking a foam roller and applying the latest shade of periwinkle. 

Particularly if the kitchen itself is old, there is likely to be a thick build-up of grease, finger oils, and cooking stains embedded in the surface of the wood. This means that an extensive preparation process is needed before fresh paint can go anywhere near the cabinets. Failing to prep the surfaces properly can lead to flaking paint, bubbles, and unsightly, hard to hide streaks.

7.     Repairing Drywall

If you think you’ve got what it takes to repair broken drywall, think again. This brittle material is finicky enough to deal with when it’s new. But there is so much more to repairing old drywall than what meets the eye. Even a small crack can reveal a huge issue with the joints or fastenings, and a simple patch job can cause more issues in the not-too-distant future.

Whether you are installing, repairing, or removing drywall in your home, there is a substantial amount of expertise needed to accomplish the job properly. Rather, get a quote or estimate from a professional and work the job into your budget than trying to tackle it yourself. 

8.     Adding A Skylight 

Adding a skylight to your ceiling might sound like a whimsical, fun DIY home project. However, the reality of the installation process is far more complex than what you might like to believe. 

The main challenge is around the installation, which is especially tricky when mounting onto a ceiling. The potential for gaps and leakage points becomes even greater with a skylight than with a normal wall window—which, as we’ve already covered, comes with its own set of troubles. 

Wrapping Up

When it comes down to it, just about any major infrastructure repair or installation to your home is best left to the pros. But don’t let that stop you from experimenting with some lower-stakes projects!

Guest Contributor: Nina Sharpe

AN EFFECTIVE GUIDE ON HOW TO MAINTAIN A GOOD INDOOR AIR QUALITY

Poor indoor air quality can have a serious impact on your health and well-being. According to the Environmental Protection Agency, indoor pollutants may be up to 10 times greater than outdoor pollutants. Fortunately, there are steps we can take to improve our home’s air quality such as using a humidifier or installing better insulation. In this blog post, we’ll explore some of the best ways to maintain the good indoor air quality in your home.

1 – HAVE AN AIR PURIFIER INSTALLED

An air purifier can have a huge impact on your home’s indoor air quality. If you’re looking to remove pollutants from the air, such as dust and pet dander, a Rainmate air purifier could be just what you need. There are all sorts of different types, such as HEPA filters or ionic filters, that vary in price and effectiveness. Make sure to research different types so you can be confident that you’re selecting the right one for your home. With the right air purifier installed, you can easily remove bacteria and impurities from your home’s air. Getting an air purifier can be an excellent first step to take for better indoor air quality.

2 – KEEP YOUR HOME WELL INSULATED

In addition to an air purifier, keeping your home well insulated is essential for maintaining good indoor air quality. If the atmosphere lacks insulation, it leaves more room for cold air to escape during the winter, which means warm air escapes as well. This can result in higher electric bills, not to mention a chilly home. There are a few different types of insulation that you can use, such as cellulose insulation or spray foam. If you’re looking to save money on your energy bills, consider having an insulation contractor come to your home to help you find the best insulation for your space.

3 – MAINTAIN YOUR HOME’S HUMIDITY

Maintaining good humidity levels throughout your house is another way to maintain healthy indoor air quality. A humidifier might be necessary if you live in an area with low humidity during the winter. On the other hand, maintaining high humidity levels might be necessary if you live in an area with high humidity. Either way, humidifiers, and dehumidifiers can help maintain a healthy level of indoor air quality. Your humidity levels should be at around 40-50%. If you’re using a humidifier, make sure it’s cleaned regularly so that bacteria doesn’t build up.

4 – VENTILATE YOUR HOME

Ventilation is incredibly important when it comes to maintaining good indoor air quality. Ventilation is a key component in circulating the air throughout your home so that everything stays fresh and clean. During the winter, your windows may be closed up to keep out cold weather and warm air inside. However, this means that pollutants won’t be able to escape. Consider opening your windows for at least 30 minutes every day so that fresh air can come in and pollutants can be exchanged. Proper ventilation can seriously help improve your home’s indoor air quality. Why not consider installing ceiling fans throughout your whole house as this can help promote air movement in your home when necessary. Make sure your home is properly ventilated, especially during the summer months. You don’t want to allow the atmosphere to get stuffy and stagnant that can also lead to poor indoor air quality.

5 – USE THE RIGHT CLEANING PRODUCTS

It’s important to use appropriate cleaning products when you clean your home. Many common household cleaners can be extremely toxic, which is bad for your health and can also impact the indoor air quality of your home. On the other hand, using natural cleaning products – such as a vinegar/water mixture – will improve the atmosphere of your home and help maintain healthy indoor air quality.

6 – USE NATURAL DEODORIZERS

On the same note, you should try to avoid using harsh chemicals and artificial materials for deodorizing your home. Burning incense, using natural deodorizer atmosphere, baking soda, or other such products can add a pleasant aroma to your home without compromising the. It’s a safe and healthy way to maintain good indoor air quality.

Maintaining good indoor air quality is important for our health and well-being. Fortunately, there are many things we can do to achieve this goal, such as using an air purifier, keeping our home well insulated, maintaining humidity levels, ventilating our home properly, and using the right cleaning products. By following these tips, you can keep your home healthy and free from harmful pollutants.

WHAT SHOULD I DO IF MY WATER HEATER ISN’T WORKING?

Unlike household appliances like dishwashers and washing machines, your water heater will be used daily. This device is used to provide hot water for everyday purposes such as washing dishes, bathing, washing clothes, and making toilets. Your family uses water heaters every day, so it is not uncommon for problems to arise. Fortunately, tank water heaters are designed with minimal parts. You don’t have to hire a professional to fix your water heater. We’ve compiled a list of common problems and solutions if your water heater isn’t working.

PROBLEMS AND SOLUTIONS OF WATER HEATERS

LOOSE OR DAMAGED DRAIN VALVE

Unlike leaks near the bottom of the tank, leaks at the top of the system can be easily repaired. The most common cause of tank leaks is a loose tube valve. It’s the top handle of a tank designed to turn the water flow on or off. To solve this problem, you need to hold the nut on the ball or globe valve. If the leak worsens after you tighten it, go to your local hardware store and get a new water heater valve.


OVERPRESSURE VALVE DEFECTIVE

Most types of water heaters are equipped with a pressure relief valve that reduces tank pressure when the tank pressure is too high. If there is a valve leaking on the top of your water heater, we recommend purchasing the new one online or from a local store. Removing and replacing the regulator is not difficult.


THERE IS NO HOT WATER

If you have an electric water heater in your home, the number one cause of water shortage is a broken heater. The water heater has two heaters that heat the water entering the tank. When the heating element begins to fail, there is little or no hot water for showering, washing, and rinsing.

On the other hand, various problems can prevent hot water from being generated in a gas heater. This could be because the lights are off or the gas valve is defective. If the thermocouple is damaged, your home will run out of hot water. Any of these components can be easily replaced by purchasing a new component. If your water heater is not working properly, you will need to purchase new parts or contact a licensed plumber to repair the water heater.


LACK OF HOT WATER

Do you often run out of hot water? This problem can be a by-product of a bad hose. These pipes are designed to push and heat cold water at the bottom of the tank. If the dip tube begins to crack or leak, the cold water supply line may be at the top or center of the tank. This will send cold water to your home faucet and shower at the top of the tank. This water heater problem can be solved by replacing the immersion tube in the system. Since installing new piping is complex, we recommend that you seek the help of a qualified technician.

A lack of hot water can also be a sign of excess sediment in the tank. When the water heater reaches mid-life, water minerals such as magnesium and calcium begin to build up at the bottom of the tank. If the pain continues to increase, there will be less space to store hot water in the tank. To solve this problem, clean the water heater to remove excess minerals.


The temperature of the water is either too hot or too chilly.

If the shower water is too hot or too cold, you can adjust the water temperature by changing the thermostat setting. Setting the temperature to 120 degrees Fahrenheit will save you energy costs. This temperature is suitable if you are concerned about burns or rashes. Is this temperature too cold? You can set the thermostat to 140 degrees Fahrenheit to make the bathroom more comfortable. If the Want Water heater repair San Diego does not move after the temperature change, the thermostat may be defective. Find a qualified plumbing or heating company near you to repair or replace your thermostat.


LOW WATER PRESSURE

The breakdown of a water heater is not always the cause of low water pressure. If you live in an older home with little plumbing, the water flow will be restricted before it reaches kitchen or bathroom surfaces. The only way to fix this water heater problem is to connect a new 3/4 inch water line to the system. Another problem that can negatively affect water pressure is limescale deposits in the water pipes. If the pain continues to increase, there will be less space to store hot water in the tank. To solve this problem, clean the water heater to remove excess minerals.

As magnesium and calcium build up in the pipe, the diameter of the water pipe decreases. As a result, hot water from the water heater will not flow efficiently to the sink or electronics. The process of replacing plumbing involves removing drywall so the average unlicensed owner cannot fix this water heating problem.

Colored water

The water that comes out of your sink needs to be clean. Have you ever noticed that the water in your house is colored? This is a sign of aging at the anode start of the tank or water heater. Fortunately, if the problem is identified early, it can be fixed. If your home’s water heater is not working properly, contact your local plumber for repairs and adjustments. A licensed HVAC plumber or Want Water heater repair san Diego can easily remove and replace the anode rod system.

If the rust spreads in the tank, small cracks can form. This can cause water to spill on the floor or furniture. Unfortunately, most tank leaks are irreparable. Instead, to fix this water heater issue, you’ll need to buy a new system. To save money, it is a good idea to report the first signs of corrosion to a professional to make sure they have been fixed.

It took a long time to make hot water.

Once the tank is empty, it only takes a few minutes to recycle the hot water. If the water heater is taking an hour to get hot water, this indicates a dirty burner opening. On the other hand, increasing the pressure of the gas water heater can solve the problem of insufficient hot water supply. To clean the burner openings and adjust the gas pressure, contact your local licensed technician for immediate help with this water heater issue.

Call our team at  or make an appointment on our website in the event of malfunctions with the gas valve, the heating element, or the immersion tube. Our experienced team of technicians offers you repair and installation service for water heaters in your area. Want Water heater repair san Diego also provides repair and installation services for water softeners, drains, central air conditioning, ovens, and plumbing. Find Water heater repair San Diego offers upfront pricing for all types of HVAC and plumbing projects. Our team is billed for work, not hourly. In addition, every project we work on guarantees your satisfaction.

WHAT TO KNOW BEFORE INSTALLING METAL BUILDING

Metal buildings are very practical, economical, and incredibly solid structures. They can keep warm and cold to extremes, so they are practical for all kinds of purposes. Metal structures can be used for different things like a garage, warehouse, or even a place to live.

Depending on the purpose, you also need to choose the best insulation for your metal building. There is no person in the world who doesn’t want to save money, and choosing good insulation is the main thing in this case.

Good insulation will reduce the electricity costs you need for heating or cooling and do that for you. However, there are many things to know before installing a metal building that will help to make a choice.

KNOWING YOUR NEEDS

Before engaging in the installation of a metal building, you must ask yourself what your needs and expectations are. First of all, do you need just a temporary object or a building you want to use in years ahead? If it’s just a temporary object, you can easily do it yourself. But if you need it for something more lasting, it is better to contact some experienced contractors. It is good to know that experienced contractors will save you from poor insulation quality and structural damage. 

INSTALLATION ON YOUR OWN

Installation of your own metal building can be very interesting and simple if you have even a little construction knowledge. But if that’s not the case, it’s better to find someone with experience to help you. Before you embark on the installation process, take a good look at the instructions manual. In order to do this job properly, you must follow every step of the instructions manual and do it to the end. In order to do that keep your instruction manual near you every step of the way.

INSULATING 

Maybe you’re one of those people who choose to build a building without any insulation to save money. In that case, depending on what you need for a metal building, insulation can be crucial. If it’s located in an area with extreme climate or temperature change, then you need to think of properly insulating a metal building if you want it to last. With good insulation, you can prevent corrosion and rust, most of them absorb moisture. In any case, think of it as something that will protect your investment, and keep you cozy during the coldest or warmest days.

THE FOUNDATION

One of the most important steps involves preparing the ground surface for pouring the foundation slab. The surface where your slab of cement will go must be completely flat. This is important so that the anchor bolts will be easily found. Make sure to see instructions to find out where your anchor bolts go.

Don’t forget that during this phase, you need to install the I-beams, support columns, and secondary framing. It is good to install purlins at two-foot centers to give your building additional strength. Make the frame for openings, such as doors and windows, during this step as well.

ROOF 

When we talk about the roof, what’s very important is knowing that there’s a formula for determining the steepness of the roof compared to its horizontal length. Here’s how to calculate it, if the roof gradient value of 1:12 means the roof rises 1 inch for every 12 inches of roof’s length. Roof pitches of 3:12, 4:12, 5:12, or 6:12 work best for metal buildings if you live in a snowy climate country. Anything over a 6:12 pitch tends to make huge amounts of snow slide off the roof. Standing seam metal roofs, which permit snow to slide more easily, might do better with a 2:12 or 3:12 pitch. The other benefit of this formula is that insulation can be firmly pressed against the structures, without creating cracks. 


Guest Contributor: Mike

WHY IS DRANO BAD FOR YOUR PIPES?

It happens to everyone, a clog in one of your drains. Most people panic, and run straight to Google to find DIY solutions on how to unclog the drain. We’ve all heard the phrase, “you can’t trust everything you see on the internet,” and this is one of those times where you can’t trust what the internet says.

The main thing you’ll probably see is the drain cleaner, Drano. We urge you to not use Drano in your pipes for many reasons. Sure, it’ll get rid of the problem. But, it only fixes the problem temporarily, and when it comes to clogs, you want to get to the main issue sooner rather than later. The repairs that it could cause could be very expensive and avoided if Drano is not used.

So, what is Drano? According to Drano.com, “they contain ingredients chemicals that quickly dissolve hair, soap scum and gunk. You can use Drano® Clog Removers to unclog a kitchen sink, bathroom sink, shower or clogged bathtub, but DO NOT use them in toilets.” When pouring Drano in your drains, almost instantly you will see the issue go through a reaction.

That doesn’t seem like a problem, right?

Wrong!

Drano has corrosive abilities because of its strong ability to break down even the toughest clogs. Since it is corrosive, it can ruin PVC, eat at pipes or cause toilet bowls to crack (even though Drano has advertised it is NOT meant for toilets).

Since there is a build up of multiple things in your drain causing the clog, you can create a chemical reaction between the gunk in the drain and the chemicals from Drano. This can emit fumes that shouldn’t be inhaled, and if you were using a plunger with the assistance of Drano and it splashes you, it can burn your skin, eyes, or mouth. If you have tried any other remedies that involve chemicals before going to Drano, you can create a toxic chemical fume from combining those products.

Once Drano unclogs your mess, it can still contaminate water and continue to ruin your pipes without you knowing it. Drano is a temporary fix that usually will end up causing other issues in the long run.

Guest Contributor: Tiffany Powell

THESE CLEVER TIPS WILL MAKE YOUR GARAGE EVEN MORE USEABLE

Most people think of a garage as nothing more than a storage area. But garages can be so much more! In fact, it doesn’t take much to make your garage an efficient workspace and pleasant place to spend time. It starts with clearing out the clutter, which you should do every year or two, and applying a coat of paint or giving the ceiling a fresh look. After that, all you need are some shelving units for tools and other supplies to keep them tidy but accessible. Pretty soon your garage will feel like an extension of your home – comfortable and convenient!

1 – PLACING STORAGE ON THE CEILING

Garages are rarely finished to the same standard as homes and it is sometimes difficult to find a surface where you can place shelves or storage units. This is not the case for those with high ceilings, however. If there’s extra space up there, consider placing storage on the ceiling of your garage. You can use a hook, and bracket system. These don’t have to be anything fancy just a few planks of wood or strips of metal will work. Hang them so they are about 6″ below the ceiling, but not touching it. This way you can store things on them without worrying about them getting wet or too dirty. You can attach the shelves yourself with screws, nails, or even magnets if you don’t want to put holes in the ceiling. Or, you can go for something a little more complicated. The choice is yours.

2 – CLEAR OUT THE CLUTTER

The next step to making your garage more functional – and habitable – is clearing out the clutter. Every time you open your garage door, your first instinct should be to clear it all away. So go through everything stored in here and get rid of what you don’t need or use anymore. If that isn’t motivation enough, remember that having a tidy space will make it much easier for you to find tools if you need them in a hurry. Every few months, sort all the supplies and equipment you have down there, checking for broken or dated tools. Toss things that are useless or in poor condition and take the rest to a local thrift shop or donate them to charity. You’ll be surprised by how much extra room you have!

3 – INVEST IN SOME GOOD SHELVING UNITS

In most homes, the garage is where everyone throws whatever they don’t want to deal with, from old toys and tools to boxes of who knows what. The trick to making this space work for you is taking a few minutes every so often to sort through the mess and store things in a place where you can easily find them. Shelving units are a great way to do this, as they’ll not only hold everything neatly, they’ll also allow you to see what you have. When choosing a set for your garage, look for one with rolling tracks that can hold a variety of different items. There are many affordable options available at your local home improvement store that you can build yourself or have assembled professionally, or you can hire a carpenter to do the job for you. The sky is really the limit when it comes to what you can use these for, and how you can customize your garage for comfort and functionality.

4 – PLUS IF YOU HAVE EXTRA LAWN EQUIPMENT…

Lawn equipment takes up a lot of space and it’s usually not stored in garages for long periods because it might get ruined by water, ice, snow, etc. If this problem sounds familiar (or if you want to utilize your garage while still enjoying some outdoor leisure), invest in an outdoor shed. These weather-tight structures are the best way to protect your lawn equipment from the elements.

5 – PAINTING CAN BRIGHTEN UP ANY SPACE

Why not think about giving your garage a fresh coat of paint or adding some stenciling on the ceiling. This is especially important if you don’t plan on having the space finished with drywall or wood paneling. Painting is an inexpensive way to spruce your garage and make it look like a brand new room!

6 – DON’T FORGET THE FLOOR!

Garages are typically made of concrete or asphalt, which can become very dirty and slippery over time. If you want your garage to be safe for all its users (including pets), consider investing in rubber floor mats that absorb moisture and help to keep the space clean.

7 – ADD SOME FINISHING TOUCHES

If you’re going to go through the trouble of making your garage more habitable, why not make it more pleasant? Many people choose to install ceiling fans in the ceilings. Not only do they keep the air circulating, but they also help to keep your appliances from overheating during the summer.

8 – CREATE A WORKBENCH FOR CONVENIENCE

If you do a lot of home improvement, installing a workbench will be useful. This doesn’t have to be complicated – just a couple of simple shelves will do. Not only will you have somewhere to place all your tools, but putting them within sight will make it much easier to find what you need.

9 – INSTALL WALL-MOUNTED CABINETS

Installing your storage off the ground and onto the walls is a great way to free up garage space. You can find specially designed cabinets and units that attach directly to your walls. If you have a lot of stuff to put away, installing these sorts of cabinets might be the best option. In addition to being space savers, they can look very stylish and modern.

Garages are often neglected in favor of the living space. But garages can be so much more! Your garage is a great place to store all your tools, supplies, and equipment that you may need for an outside project or just running errands. And it doesn’t have to look like clutter either–clearing out the clutter every year or two will make sure everything stays organized while being easy to find when needed.