When a parent, unfortunately, passes away, many will often leave their home and property to their children. If they have more than one child, each child will be given a percentage of the estate and property.
But how can one property or home be split up amongst multiple people? Ultimately, the choice that many siblings take is to put up the inherited property for sale. However, before you go ahead and do this, it’s a good idea to make a couple of important considerations. These can help ensure the entire process goes smoothly, and help you see if it is even the right choice for you.
Keep reading to learn about some important considerations to make before selling an inherited property with your siblings.
STRUCTURING A BUYOUT
One common option siblings will take is that one person will take possession of the home, and buy the others out. Three or four adults, who may have families of their own, all can’t live under the same roof.
This idea will allow one person to own the house solely and do what they want with it, while the other siblings are simply paid out in cash. If they don’t have enough cash or liquid assets, a home equity loan or some other type of financing could be taken out.
Of course, be sure the amount is fair, and no one is being taken advantage of here. It is a good idea to get multiple valuations done on the home, to keep everyone happy and make sure the arrangement is fair for everyone.
SELLING TOGETHER AND SPLITTING PROFITS
Another common choice is to simply sell the home on the open market, and split the amount it sells for. This gives everyone fair value, and no one has to worry about upkeep or moving into a new home if they don’t want to.
Take time to find a way around disagreements, as they can often ruin a deal and hold back any significant progress being made. Ensure you can all agree on how much you want to get for it, and how much everyone is comfortable moving off of that number. If you don’t do this, disagreements and miscommunications will surely arise, and these have the potential to ruin a relationship.
KEEPING IT
While selling the property is an option, you also need to entertain the idea of keeping it. You could treat it as a vacation home for all of you to split, or can allow other family members to live or spend time there.
But in addition to living in it, you could also make some updates and rent it out to the public. Depending on where it is and its condition, it could fetch thousands of dollars every year, which you and your siblings could split. Of course, be sure to designate one of you to be the landlord or manager, so hire someone to do the job.
The space could even be rented out as a vacation rental if it is located in a place where people frequently travel to. Of course, if you are going to set it up as a vacation rental, there are some expert tips to check out to give yourself the best chance of success.
CREATING A FORMAL AGREEMENT
Before you do anything official, it is a good idea to craft a formal agreement. This will establish the plan you are going to take, and all the rules that need to be abided by. Whether you keep it, sell it or perform a buyout, a formal agreement is always a good idea.
This will prevent anyone from changing their mind, lying about things, or incorrectly remembering the terms of the agreement. Decide who is responsible for what costs, and the various other terms. Creating this can take some time, and you may want an expert or lawyer to assist, but it is very important to ensure no arguments take place and everyone is content with the outcome.
In conclusion, be sure to consider these four things before selling an inherited property with your siblings.
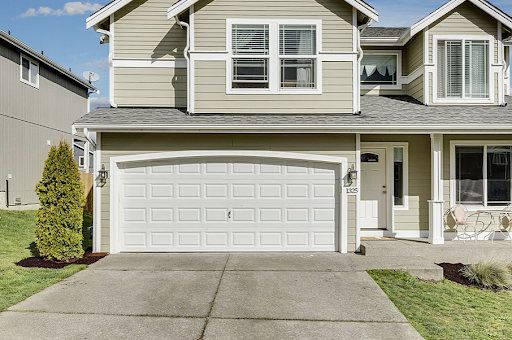
When it comes to having the right drainage around your home, you need to make sure you are choosing the right one. There are many options out there and it will depend on what fits your home the best, what will provide the best value, and which one you like.
There are several types of drainage choices and you may need to work with a professional to help get this done. Some of the different systems that you can consider for your home includes:
FRENCH DRAINS
A French drain is another name that you may hear for a perimeter and a foundation drain. This drain is known by its inventor, Henry French, who worked hard to popularize this method during the 1800s.
This type of drain is going to be a type of plastic pipe that is perforated and buried under the ground. It is able to effectively collect and relocate the water to make sure that it does not sit near the home and cause any kind of damage that you may see around other homes.
FOOTING DRAINS
Another option that you can use for your home is a footing drain. This is going to be a type of drainage system for the outside of your home that is placed outside the wall of the foundation. These footing drains will exist both in residential and commercial buildings.
The drain that is used here is going to be covered up so that no one is able to see it, but the covering is done with gravel. This allows the water to seep right into the tile. Then this drain will work to divert all of the water and put it into a basin, which will then be pumped into the storm drain as well.
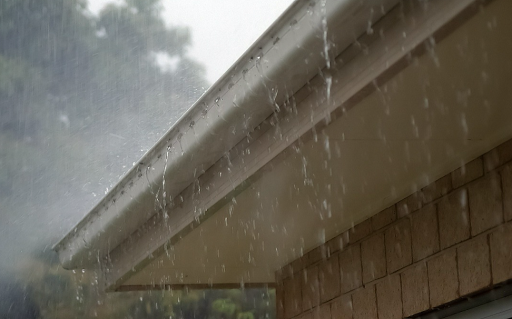
GUTTER DRAINAGE SYSTEM
The water that comes from your roof is sometimes going to cause the most damage to your home, especially if it is not drained out well. You need to have the right gutter drainage system in place to make sure the water is diverted away from the home, ensuring that you are not going to get damage to the foundation of your home.
Having a good downspout or gutter system in place is going to help make sure that all of the water that is draining off the roof will move somewhere else, away from the walls of your home. You and a professional will need to determine exactly how far these are going to go from the home.
When choosing a downspout drain, you will need to get it to extend away from the walls. It is preferable if it is able to go to a storm sewer or a water catch basin. If this is not possible because of where your home is located, you will be able to place the downspout as far away from the home as possible to avoid any problems.
GRADING DRAINAGE
The next thing that you can try to help with the drainage around your home is a grading drainage. This is going to be a really simple technique, which is why so many professionals will recommend it to their homeowners to keep things safe.
The grading technique is going to involve reworking the grading around the home, creating a slope that will go away from your home. This is going to use gravity to your advantage so that the water will go down the slope and not sit near the home. And the landscaping will look natural when it is done.
This is going to require a little bit of new landscaping around the home to get it done. If you already have some slopes in your home, that can help, as long as they do not slope towards the home. This can cause some of its own problems and a professional will be able to help you out. There may be some work to get done on the yard, but this is a simple way to help.
A contractor will be able to come to your home and take a look to see whether this is possible. Depending on the yard, they may be able to add in the slopes and that is all the work that needs to get done. Other times they may need to combine it with some of the other choices above to make sure you get the best drainage system possible.
DRIVEWAY DRAINS
A driveway drain makes a lot of sense for many homeowners. These will help to collect the water that is near your home and force it away. Often these will go near the street when it collects the water, allowing it to go to the drains in the street and not collect near your home any longer. It can all just drain as far from your home as possible to keep the home safe.
These are a great option and will often use some of the sloping that is already found in your driveway. Putting one in yourself can be hard and most homeowners may not know how to do it properly or where to put all of the components. Having a contractor help you figure out where to put everything and how to get it installed will help make this easier.
Installing one is simple and things are even easier if you already have a bit of a hill in your yard away from the home. Choose a driveway drain that is high-quality and meant to last and consider having a professional put the drain in to make sure that it is placed properly and will last a long time.
CHOOSING THE RIGHT EXTERIOR DRAINAGE SYSTEM
Each home is different and unique and you need to choose the right drainage system that is going to work for your needs. With the help of some of the suggestions above, you will be able to take care of your home and make sure that you never have standing water around your home, causing all that destruction, again.
When transferring to a new apartment, house, or establishment, you will often encounter exposed radiators or plumbing lines. It is easier and less costly to incorporate them into your interior design instead of knocking them down and reconstructing your walls to cover these exposed pipes. But first, you need to check out the quality of the lines if they require repairs or replacements.
After the initial inspection, then it’s time for you to exercise your creativity. Here are some tips you can follow on how to turn your boring and eyesore plumbing into one of the major attractions of your establishment.
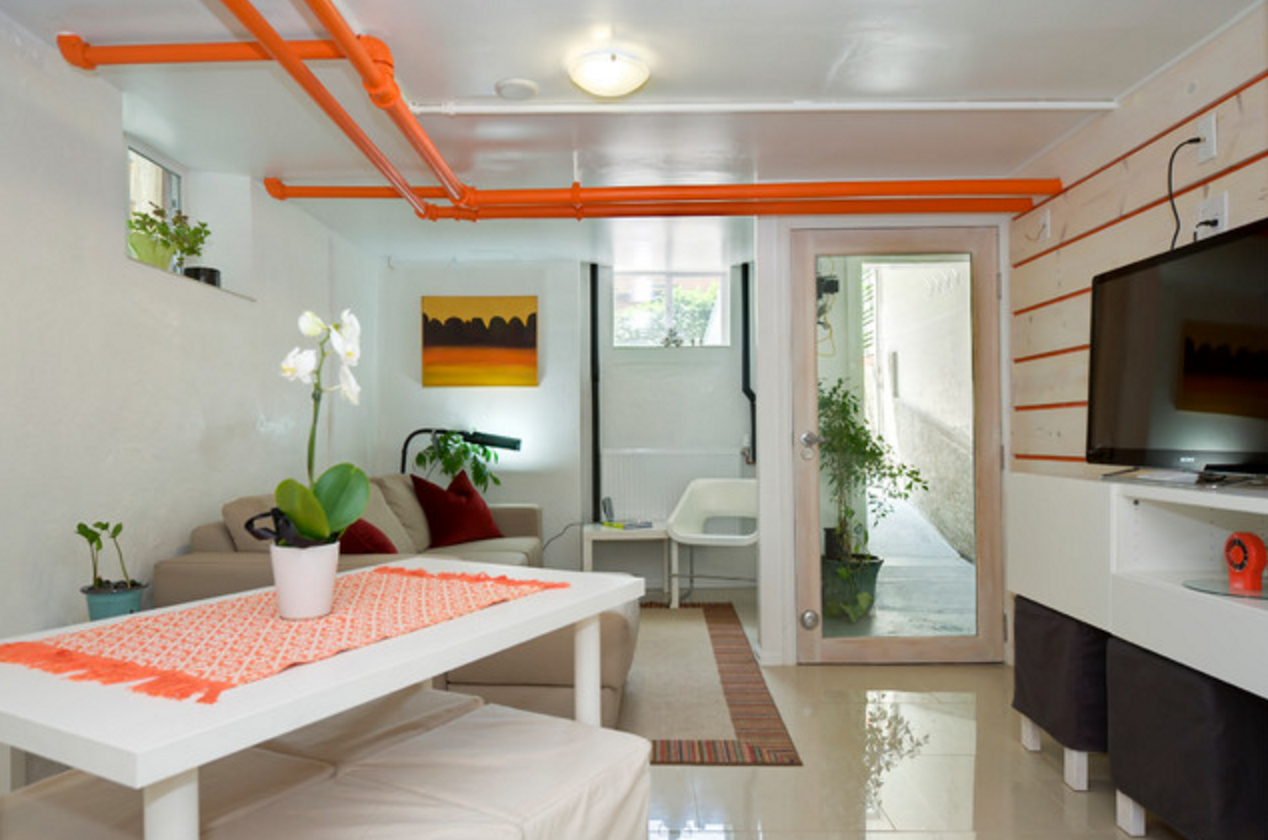
1. Paint-over Exposed Pipes
This tip is guaranteed to give your establishment a unique appearance. You can paint your pipelines with a color that matches the rest of your interior style. If you have already finished painting the walls of your establishment to a color that you prefer, you can try incorporating this color into your pipelines. You can also try experimenting with different hues and pallets if you want a more dramatic touch to the area. If your establishment has wood flooring and cabinets, paint your line fixtures with similar colors as to what they are to match them together and make the room look synchronized.
2. Hide the Exposed Plumbing Pipes
Many establishments have plumbing pipes exposed to the naked eye, which usually run down the exterior walls. The exposed plumbing pipes can be an eyesore for you and your guests. In addition, it is such a hassle to have disorganized, exposed plumbing pipes if the room is well-designed and aesthetically on point. Fortunately, there are many ways to conceal these exposed pipes to make your room look more beautiful.
You may consider installing a drywall access door panel exposed flange so you can keep your plumbings behind your walls. With this access door, repairs and inspections for your plumbing lines will be hassle-free, and at the same time, this can also keep the aesthetic design of the room.
3. Install Cabinets Below the Sink
Many establishments and even homes have exposed plumbing pipes under the sink, which reduces the room’s neatness. If you want to improve this, you may consider installing cabinets below these sinks to hide the exposed pipes. The lines will be under the cupboard whenever you open them, but they will not be directly visible. Another advantage is that you can even select the type of cabinet you want. It is wise to choose a wardrobe that fits well with the interior design and the interior aesthetic. You can also try painting and decorating the cabinet based on your preference.
4. Use Plants to Conceal Exterior Plumbings You can purchase any plant you want and use it as a cover-up for your pipelines. Any size, shape, and color will do the trick! You can also use vines to either decorate or fully conceal.
5. Wrap Your Bathroom Pipes with Rope
If a rustic design is your go-to, then list this trick on your must have’s. You can use different types of rope with different thicknesses, materials, and colors that will match the room’s aesthetic. This technique creates a design that is great to look at and is also very relaxing.
There are still many options and tricks to incorporate your plumbings into your interior design seamlessly. All you need is a little research and creative spirit to brainstorm any new and unique ideas. You can also contact your local plumber to consult whether or not your ideas are practical and safe for your plumbing system.
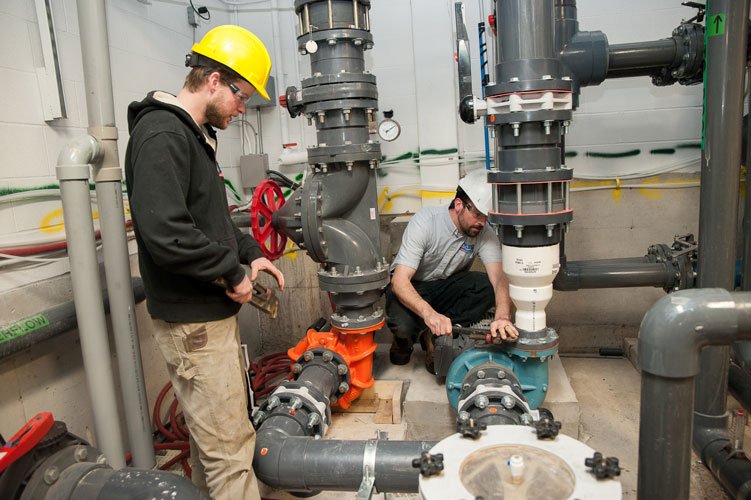
Plumbing systems, in general, consist of a complex network of pipes and fixtures designed to distribute water supplies and wastewater systematically. Plumbing channels essentially have the same primary function regardless of the property. However, there are significant distinctions between residential and industrial plumbing.
Commercial plumbing involves the preservation and distribution of large-scale waste removal and water supplies for buildings and other establishments such as hospitals, schools, offices, etc. Unlike residential water systems, commercial pipes can accommodate constant and several uses at almost the same time.
Responsibilities of a Commercial Plumber
Due to the complexity of the drainage system involved, commercial plumbers must have a general understanding of building regulations, follow structural plans and designs, and systematically maintain and distribute water supplies and wastewater management. Industrial plumbers also rely on specialized tools and panels such as steel insulated exterior access panels since most pipes and fixtures are behind walls and floors.
To further elaborate on the tasks of a commercial plumber, here are some of their primary responsibilities when doing plumbing maintenance and installation.
Installation tasks include:
Fitting toilet and kitchen fixtures
Drinking fountains
Sprinkler systems
Laying water and sewer lines
Boiler systems
Maintenance tasks include:
Check for active leaks
Signs of corrosion
Measure water pressure
Check valves and drains
Backflow testing
Perform preventive maintenance and inspections
Meeting with property owners to discuss potential plumbing issues
Pipe assembly
Being a commercial plumber means having more responsibilities than residential plumbers; that is why most businesses and building owners ultimately hire seasoned experts with years of experience and industry knowledge to meet their needs and demands.
Since commercial systems are more extensive, it would benefit your business if you only hire a reputable plumber with a proven track record. They also need to be licensed and insured with enough confidence to provide warranties for equipment and labor.
Key Differences of Commercial and Residential Plumbing
Although there are similarities in the scope of work, there is a significantly massive gap between commercial and residential plumbing. To further elaborate, here are some of the fundamental differences between commercial and residential.
Size and Scope – Commercial plumbing in large-scale commercial buildings, offices, and recreational facilities is more complex than residential systems. For instance, hotel facilities require efficient plumbing systems that can support multiple usages at the same time. However, due to the higher demand and multitude of users, commercial pipes and fixtures tend to wear out faster, thus requiring regular preventive maintenance and inspection now and then.
Multiple Storeys – Commercial plumbing systems encompass several pipes and fixtures for each floor for buildings and other multi-level structures. Commercial plumbers need to account for gravity and ensure that the whole system is functioning adequately. In addition, water pressure is often a critical concern for high-risk establishments. The plumber must be able to efficiently ensure that the water pressure is standard on all floors.
Working Hours and Inspection Frequency – Residential owners are more lenient in scheduling maintenance and repair than the high demands of the commercial industry. Annual checks are sufficient for residential houses, but commercial pipes need to be frequently checked due to constant usage as minor damages can quickly evolve into something more severe and inconvenient.
Industry Knowledge – Since commercial installations involve industrial-grade pipes and equipment, many business owners only hire licensed plumbers with the relevant experience and knowledge required to perform the necessary plumbing tasks successfully. The problems in commercial systems are more diverse and encompassing; therefore, industrial plumbers must efficiently resolve multiple issues when called.
Commercial plumbing involves more than just a simple faucet and pipe installation, maintenance, and repair. Despite having the exact scope of work, commercial plumbing is more demanding and intricate than residential systems mainly because of the business aspect and how a simple leak can have devastating effects if not immediately resolved. Understanding the primary differences between a commercial and domestic plumber is vital in ensuring that everything functions as it should.
In the home, mold is unwelcome. It darkens the bathroom corners, stains the walls, and develops between the tiles. It’s an obnoxious sight that feeds on and rots moist wood. Mold can grow and become difficult to eradicate over time. Mold causes respiratory ailments and is generally harmful to human health, in addition to being a horrible sight.
Infestation with mold is a big issue in any home. You might be tempted to clean it up on your own once you’ve found the presence of this health-threatening fungus. Mold clean-up is a job that should be left to the pros. However, if the infestation is minor, you may be able to handle it on your own. But in case of major issues, find a mold inspection specialist.
But first, read on to learn about the fundamentals of mold remediation, as well as the right methods and procedures for properly removing it without jeopardising your health and safety.
Determine the type of mold
Mold infestation can be found in almost every home. The best solution is to collect them before they gather and become large chunks. These molds are hazardous to your family’s health, and as they grow larger, they become more difficult to remove. The elimination of black mold can be done with common cleaning supplies found in the supermarket. Molds are easily distinguished by their little black patches that quickly grow into enormous colonies.
The secret to identifying mold is to use bleach to test it. Mildew can be easily identified by a few drops of home bleach applied to the mold. This is generally seen in moist places. Mildew-mold and dirt mold are the two types of black molds. Mildew mold is easily removed with bleach, however dirt mold does not. Other types of mold are hazardous, so if you have respiratory issues or are prone to allergies, it’s best to find a mold inspection San Diego specialist.
Once you’ve determined what kind of mold you’re dealing with, it’s time to prepare for safety.
Protect yourself and follow safety procedures
When dealing with mold, it’s more crucial than anything else to protect oneself from its damaging consequences. A thin mask isn’t going to help. You’ll need to wear clothes that you can wash right away or, better yet, throw away after each use. Remember that mold has a distinct stench, especially if it is thick and crowded.
If you wash your clothes alongside other garments in the washing machine, mold can attach to them and spread to other clothes. Wear clothes that you can throw away after you soil them instead of washing them. Goggles and gloves will be required. These particles must be protected from your eyes. They can get into your eyes, and if you don’t wear protective gloves when cleaning, mold can go into other regions of your body. If you haven’t showered after general black mold removal, we recommend that you don’t eat.
Because spores can rapidly move through the air, it’s essential to keep the space well ventilated when cleaning. These spores can also stick to the blade, so to save time cleaning the fans you’ve used, get the cheap ones that you can just throw away afterward.
When it comes to the mask you’re wearing, if you have a thin mask, you can layer it to avoid having to buy the N-95, which can be quite expensive. Wearing the mask in multiple layers should suffice.
This should not be removed during the cleaning process. When you’re dealing with mold, turn off your furnace and air conditioner. We don’t want those spores to spread throughout the room, if not the entire house, creating breathing and respiratory issues. To prevent particles from moving to the adjacent room, you can also block the door gaps.
Mold remediation process
Now that you’re prepared for mold removal or black mold removal, we may begin the cleaning process. To begin, look for symptoms of mold. Examine the moldy walls and pry them open with a screwdriver. Don’t be afraid to cut through the drywall because you’ll be replacing it anyhow, or you can get someone to do it for you. Make sure you discover the source of the molds and open up the walls to do so.
Scrub the surfaces with a mold cleaner, making sure to get all of them. Allow the solution to soak in for a few minutes after scrubbing to allow it to penetrate the wood or wall. You can now clear up the wall debris while the mold cleaner is working. To remove the moldy wall, use a vacuum cleaner.
Place the larger components in a strong rubbish bag. You can now wipe the mold cleaners after a few minutes. They should not be washed. You can wipe them off and then use a wood primer to seal the wood surfaces. This will improve the condition of the wood or the surface. After that, you can install negative air machines to get rid of any leftover mold cleaning and mold odours.
Get the right cleaning product
First and foremost, gather your supplies. In order to clean mold, you’ll need a dependable product. Many homeowners believe that bleach is a good mold treatment. However, bleach is a powerful chemical that can be harmful to your health. It also does not remove the mold. Its colour simply shifts from black to white or grey. There’s still a chance that the mold will return after a few weeks of bleaching.
Borax, a white powder that can be found in the grocery, detergent, or laundry area, is a common DIY mold treatment tool recommended by mold professionals. To clean mold using borax, mix one gallon of hot water with the powder. Apply the solution to the moldy surface and scrub it away with a rug or brush until the mold is gone. It’s not necessary to rinse it because the borax will prevent the mold from returning. This cleaning should not be used on porous surfaces like drywall. These materials readily absorb water. This could exacerbate the problem because mold thrives in wet settings. You can also call a professional to remove mold in San Diego.
Dress appropriately
Before you begin your DIY mold removal, make sure you are adequately equipped. If you’re utilising a chemical, wear gloves, goggles, and loose clothing. Dispose of or thoroughly wash your clothing and gear after cleaning the mold. Mold spores fly through the air and can readily spread throughout your home.
When it comes to black mold eradication, it’s best to leave it to the specialists. Black mold is a toxic type of mold that can be harmful to your health.
The surface should be completely dry
The final and most crucial step in removing mold is to dry the affected area. Keep in mind that moisture is the primary source of mold growth. These fungus thrive in a moist, humid environment. The surface will be damp for a while because you will be cleaning mold with water. By ventilating the area, you can hasten the drying process. If feasible, open doors and windows and use a dehumidifier. Air movers can also be used to swiftly dry the surface.
Conclusion
You, like the majority of homeowners, want to learn how to remove mold on your own. It’s a good thing, and knowing the must-dos and must-haves for cleaning mold is essential to your project’s success.
However, it is recommended that you engage with the best mold specialist San Diego if you are unsure about the entire mold mitigation process or if the mold infestation in your home is too large to handle. They are the best people to work on it since they have not only the necessary expertise and training, but also the necessary tools and equipment to properly remove mold.
Author Bio:- Aimee Grace
Aimee is a marketing manager at EZ Plumbing & Restoration. She is very passionate in writing about discrete plumbing services and leakage detection as well as repair solutions. Her vision is to educate people about the consequences of water and slab leaks at home or office and what they should do to repair them to avoid further water damage as well as property damage.
Innovations have paved a way for smart devices to lead a convenient life. Plumbing industry is no different but only few people know about various tools used to fix the leakages. Stay tuned with the recent articles to know all about how to find water damage, slab leak, clogging, and ways to repair them, installation of new HVAC appliances in San Diego.
Different variables might cause a leak in a swimming pool. The pipelines could be harmed and have breaks or cracks on them, which causes a leak as water is siphoned into the pool. A leak in your pool presents the main pressing issues to your property and waste of water volume utilization. Pool leaks and spills are not easy to find, but they are conceivable with specific accommodating techniques and a little tolerance. This article will explain those techniques to find cracks on pipes and fix them to avoid swimming pool leaks.
LOCATING THE LEAK OR CRACK ON PIPES
Make sure that the pump system of your swimming pool is switched off and it is empty before you begin finding the cracks on pipes in your swimming pool. Locating the leak or crack on lines might seem apparent and an easy step. However, determining the exact location of your leak or which pipe is damaged is crucial to know where to apply the resin or the epoxy.
Also, it’s important to have the necessary pool supplies by the time you’ve discovered the crack. By wrapping the pipes with a paper towel and pushing hard afterward, searching for wet spots can be one of the methods to employ if you are having difficulty identifying the leak. The damaged pipes responsible for leakage are those with wet areas on the paper towel.
DAMAGED PIPE PREPARATION
The next step after locating the leak or identifying which pipes have cracks is to prepare them. The epoxy might not stick properly if the tube is too wet, so cleaning the line fully is included in the preparation of the damaged pipe. Get rid of all the debris and dirt that can mess up the mending operation by using sandpaper around the region of the leak.
EPOXY PREPARATION
After preparing the damaged pipe is to prepare the epoxy that will be used for fixing the pipe. The epoxy is classified as an adhesive and used as a resin to firmly fill a crack on pipes. In preparing the epoxy for fixing the tube, you are blending the epoxy with the adhesive. For this step, snip off the right amount of your epoxy stick, and using your fingers, knead that piece of epoxy until it shows one consistent color.
APPLYING THE EPOXY OVER THE CRACK
After preparing the epoxy, it is time to apply it over the crack responsible for leakage in your swimming pool. This step involves and spreads the right epoxy over the crack until the region is entirely covered. It is recommended that you apply the right amount of epoxy over the crack because it won’t work if the epoxy is too thin. Take note that you are calm and do not take too much time applying the epoxy as it hardens as time passes.
CHECKING AND FINISHING TOUCHES
After applying the epoxy over the crack, it is recommended to make sure that the epoxy is fully hardened, and you check if the pipe is completely fine before running water through it. It is also advised that you perform covering the damaged pipe again using the paper towel to identify if there are still wet spots on the region of crack on the pipes.