3 SIGNIFICANT FACTORS TO CONSIDER WHILE CHOOSING THE RIGHT ROOF SHINGLES FOR YOUR HOME

Picking the accurate roof shingles for your home is an important decision that requires careful consideration of several factors. The roof is one of the most visible parts of a home’s exterior, so the look and quality of the shingles will have a significant impact on your home’s curb appeal. Beyond aesthetics, your roof shingles also serve the critical functions of protecting your home from the elements and insulating your living space.

Picking shingles suited for your home’s design, climate, and budget will help ensure your roof performs well and looks great for years to come. Here are 3 of the most significant factors to weigh when selecting roof shingles:

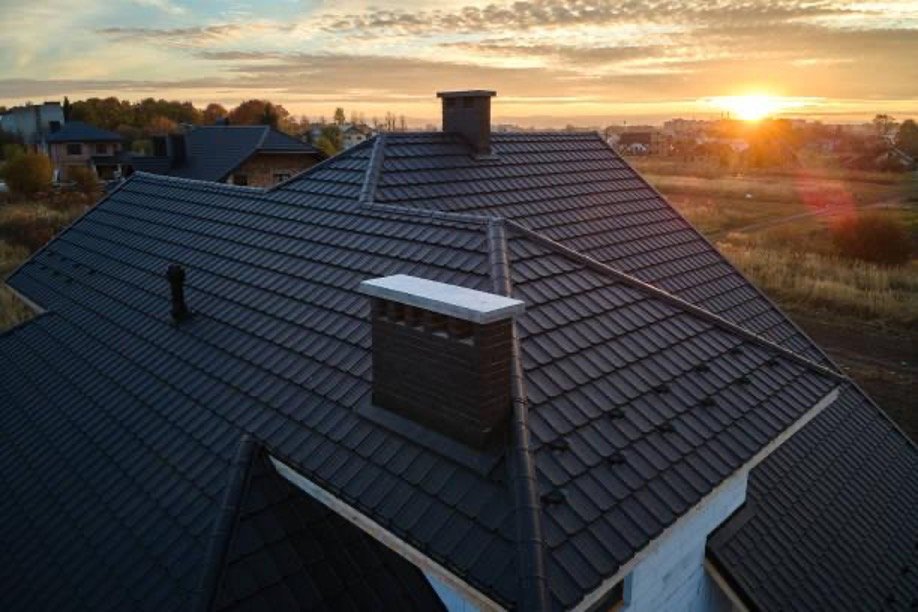
1. CLIMATE AND WEATHER CONDITIONS IN YOUR AREA

The climate you live in should be one of the foremost considerations when choosing types of roof shingles to use. Your shingles must withstand the particular temperature extremes, precipitation, wind, and storms common where you live.

In colder climates with heavy snow and ice, look for shingles with a high impact resistance rating. Options like slate, clay tiles, concrete tiles, or laminated asphalt shingles are good choices to withstand cold, moisture, and the weight of snow accumulation. Metal shingles are also very durable in cold climates.

In hot climates, consider shingles rated for high heat resistance to avoid damage at high temperatures. Look for synthetic or clay tile shingles or metal shingles, which reflect more heat. Lighter shingle colors can also help. Proper ventilation is critical to prevent heat damage as well.

For stormy climates, select shingles with a high water resistance rating and enhanced sealing to prevent leaks. Laminated or architectural-style asphalt shingles are a good option. Concrete or clay tiles also repel water well.

Make sure the shingles meet the wind resistance rating recommended for your area, and consider using unique nails or fasteners to withstand high winds better.

Factor in relative humidity levels in your location, too. In humid climates, mold and mildew growth can be an issue, so choosing shingles formulated to inhibit this growth is wise.

2. PITCH OR SLOPE OF YOUR ROOF

The steepness of your roof’s pitch or slope has a direct bearing on the shingle options suitable for your home. Shingles are designed for use on particular roof slopes, and failing to follow the manufacturer’s instructions can negatively impact performance or even void warranties.

On steeply pitched roofs more significant than 21 degrees, laminated architectural shingles are difficult to install properly. The tabs often will need to align correctly. The aesthetic of three-tab asphalt shingles also suffers on steep pitches. Slate, clay, concrete, or flat single-panel synthetic shingles are better options for steep roofing.

On lower slope roofs less than 4 degrees, the selection needs to focus on shingles rated for low slopes to avoid leakage. Self-adhering modified bitumen rolled roofing material, TPO or EPDM rubber membrane roofing, or foam roof coating systems are suitable low-slope options.

When evaluating roof slopes, a good rule of thumb is to measure the rise over the run. The run is the horizontal distance between the top edge and bottom edge of the roof. The rise is the vertical height between those same two points. To determine the percentage slope of the roof, divide the elevation by the run and multiply the result by 100. A qualified roofer can also determine the pitch.

For steeply pitched roofs, extra safety precautions need to be taken if doing work on the roof, given the risk of falling. Anti-slip roofing underlayment, toe boards, roof jacks, and full body harnesses are essential safety equipment. Steep roofs also often require the use of scaffolding for access. Removing snow on steep roofs is best left to professionals to avoid hazardous avalanches.

Proper ventilation is critical for any roof pitch, particularly on steep slopes where heat and moisture can more easily become trapped. Roof-specific ridge and soffit ventilation systems help air flow freely from the peaks to eaves to preserve roof integrity. Insufficient ventilation can cause moisture or rot and shorten roof life. Professional roofers know how to address ventilation needs during the shingle installation process adequately.

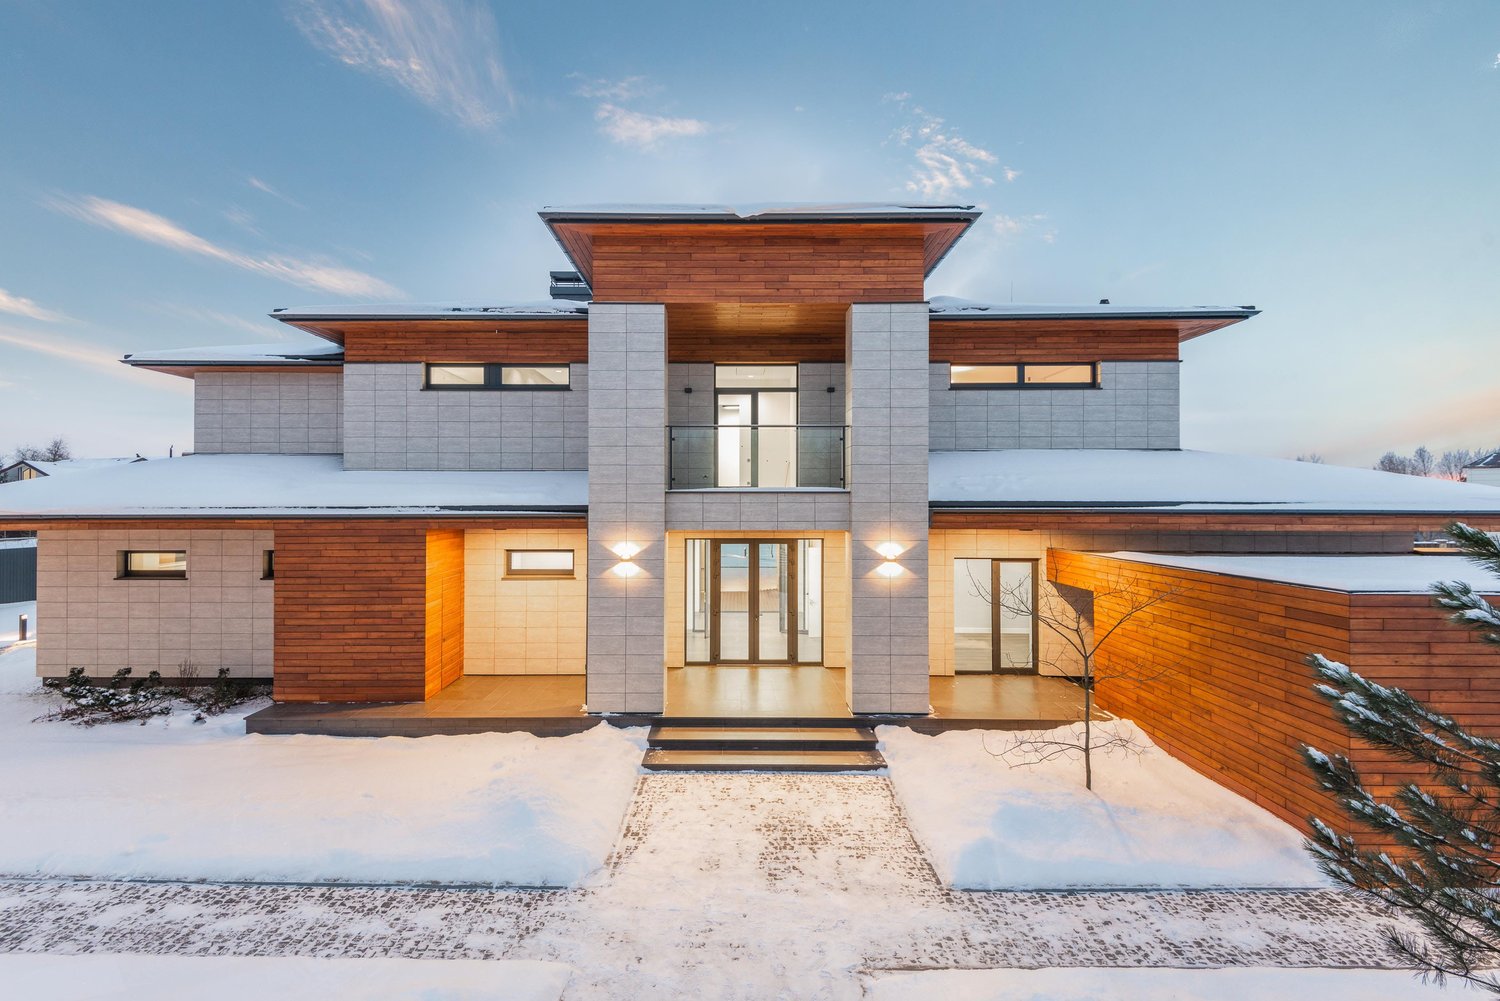
3. OVERALL ARCHITECTURAL STYLE AND AESTHETICS

Beyond technical performance, you’ll want to pick shingle styles and colors that complement your home’s architecture and aesthetic goals.

For traditional home styles like craftsman, Victorian, farmhouse, or colonial designs, laminated asphalt shingles are a fitting choice. Consider multi-layer laminates with architectural styling for more dimension. Complement with metal roof accents. Stick with subdued, neutral shingle colors like black, grays, browns, and earth tones.

Contemporary homes look best with clean-lined shingles like flat profile slate or synthetic alternatives. Metal shingles in gray, silver, or other modern hues also suit contemporary architecture.

Spanish-style homes, Tuscan villas, and other Mediterranean designs are handsomely matched with the look of clay barrel tiles or cement tile shingles. Terracotta red and different warm earth tones enhance the style.

For cottage or bungalow styles, a classic three-tab asphalt shingle gets the point across. Go for brighter whites or eye-catching hues like navy blue, brick red, or sage green to play up the cheerful charm.

Remember to check if your neighborhood has any guidelines about roofing color or style. You’ll want your new roof to complement nearby homes.

CONCLUSION

Picking the perfect roof shingles involves researching options compatible with your climate, roof slope, and home style. A roofing contractor can be invaluable in walking you through the ideal shingle selections. With proper shingles in place, your roof will enjoy a long service life and boost your home’s curb appeal.

WINTERIZING YOUR HOME AND LAWN

As the days grow shorter and the temperatures drop, it’s time to prepare your home for the winter months. Winterizing your home is not only essential for your comfort and well-being but also for energy efficiency and cost savings. In this comprehensive guide, we’ll walk you through the steps to effectively winterize your home, ensuring you stay warm, save on heating costs, protect your property from the harsh winter elements, and even take care of your lawn.

SEAL DRAFTS AND LEAKS

One of the first steps in winterizing your home is to seal any drafts and leaks. These small gaps around doors and windows can let in cold air and cause your heating system to work harder. Here’s what you can do:

– Check for drafts: On a windy day, use a lit candle or an incense stick to detect drafts around doors and windows.

– Replace weatherstripping: Install or replace weatherstripping around doors and windows to create an airtight seal.

– Caulk gaps: Use caulk to seal gaps and cracks in walls, foundations, and window frames.

– Install draft stoppers: Place draft stoppers or door sweeps at the bottom of exterior doors to prevent cold air from entering.

INSULATE YOUR HOME

Proper insulation is crucial for maintaining a warm and energy-efficient home during the winter months. Make sure your home is well-insulated in the following areas:

– Attic insulation: Check your attic insulation and add more if needed to prevent heat loss through the roof.

– Wall insulation: If your walls are not adequately insulated, consider adding insulation or using blown-in insulation.

– Basement and crawl spaces: Insulate these areas to prevent cold air from infiltrating your home.

MAINTAIN YOUR HEATING SYSTEM

Your heating system will work overtime during the winter, so it’s essential to ensure it’s in top condition:

– Schedule a professional inspection: Have a qualified technician inspect your heating system for any issues and make necessary repairs.

– Replace air filters: Change or clean air filters regularly to keep your heating system running efficiently.

– Consider a programmable thermostat: A programmable thermostat can help you regulate your home’s temperature and save on heating costs.

PREPARE YOUR PLUMBING

Frozen pipes can lead to costly damage, so it’s essential to take precautions:

– Insulate pipes: Use pipe insulation or heat tape to protect exposed pipes in cold areas like basements, attics, and crawl spaces.

– Drip faucets: Allow a small amount of water to trickle from faucets during extremely cold nights to prevent frozen pipes.

– Shut off exterior faucets: Disconnect and drain garden hoses, and shut off outdoor water sources to prevent frozen pipes.

PREPARE FOR WINTER STORMS

Winter storms can bring power outages and other challenges. Here’s how to prepare:

– Stock up on essentials: Ensure you have an adequate supply of non-perishable food, water, and necessary medications.

– Equip an emergency kit: Assemble an emergency kit with flashlights, batteries, blankets, and first-aid supplies.

– Invest in a generator: Consider a backup generator to maintain essential power during outages.

MAINTAIN YOUR FIREPLAC

If you have a fireplace, it can be a cozy addition to your home during the winter. Ensure it’s ready for use:

– Schedule a chimney inspection and cleaning: Have a professional inspect and clean your chimney to prevent chimney fires and carbon monoxide issues.

– Stock up on firewood: Make sure you have enough dry, well-seasoned firewood to last throughout the season.

– Install a chimney cap: A chimney cap will keep out critters and debris while also preventing downdrafts.

CHECK YOUR INSULATION AND DOORS

Don’t forget about your doors and windows. Proper insulation and energy-efficient doors can make a significant difference in your home’s winter comfort and energy bills:

– Upgrade to energy-efficient doors: Consider installing energy-efficient doors or adding storm doors for extra insulation.

– Check windows: If your windows are old or single-pane, consider upgrading to double-pane or energy-efficient windows.

WINTERIZE YOUR LAWN

In addition to preparing your home, don’t neglect your lawn. Proper winterizing for your lawn can help it survive the cold months and thrive when spring arrives:

– Remove debris: Clear your lawn of leaves, sticks, and other debris to prevent mold and disease.

– Aerate the soil: Aerating your lawn allows air, water, and nutrients to penetrate the soil, promoting root health.

– Fertilize: Apply a winterizing fertilizer to provide essential nutrients for your lawn during the dormant season.

– Mow and water: Trim your grass to the recommended height for your type of grass, and continue to water as needed until the ground freezes.

– Protect sensitive plants: Cover or move sensitive plants to protect them from the cold.

CONCLUSION

Winterizing your home and lawn is a proactive and essential process to ensure comfort, energy efficiency, and the protection of your property during the cold winter months. By following the steps to seal drafts, insulate your home, maintain your heating system, and take care of your lawn, you can enjoy a cozy and worry-free winter season while ensuring a lush, healthy lawn when spring returns. Start early, stay prepared, and you’ll be able to weather any winter storm with confidence.

BATHROOM RENOVATION IDEAS TO TRANSFORM YOUR SPACE

Renovating your bathroom can transform it into a more functional, stylish, and relaxing space. Here are some ideas to consider when planning a bathroom renovation:

  1. Upgrade Fixtures and Fittings:
    • Replace old faucets, showerheads, and cabinet hardware with modern, energy-efficient, and stylish options. Choose finishes that complement your bathroom’s aesthetic.
  2. New Vanity and Countertop:
    • Installing a new vanity with a sleek countertop can give your bathroom a fresh look. Consider options like granite, marble, or quartz for a durable and elegant finish.
  3. Tile Selection:
    • Upgrade your bathroom with new tiles for the floor and walls. Consider large-format tiles for a clean and contemporary look. Subway tiles, mosaic patterns, or unique designs can add personality.
  4. Walk-in Shower:
    • Eliminate the traditional shower curtain or doors and opt for a walk-in shower with a frameless glass enclosure. This can create a more open and spacious feel.
  5. Soaking Tub or Jetted Tub:
    • If space allows, consider adding a luxurious soaking tub or a jetted tub for a spa-like experience.
  6. Underfloor Heating:
    • Installing radiant floor heating can add comfort and warmth to your bathroom, especially during colder months.
  7. Smart Technology:
    • Incorporate smart technology into your bathroom, such as motion-sensor faucets, LED mirrors, and smart toilets with heated seats and bidet functions.
  8. Storage Solutions:
    • Maximize storage with built-in shelves, medicine cabinets, or vanity drawers. Consider floating vanities for a modern touch and more floor space.
  9. Lighting Design:
    • Adequate lighting is crucial in a bathroom. Use a combination of ambient, task, and accent lighting. Consider adding dimmer switches for versatility.
  10. Color Palette:
    • Choose a color scheme that suits your style and desired ambiance. Neutral colors create a timeless look, while bold and contrasting colors can make a statement.
  11. Accessibility Features:
    • If you plan for the long term, consider adding accessible features like grab bars, a curbless shower, and a comfort-height toilet.
  12. Natural Elements:
    • Incorporate natural materials like wood, stone, and plants to bring a sense of nature into your bathroom design.
  13. Mirror Design:
    • Experiment with unique mirror shapes and frames to add visual interest and reflect more light.
  14. Open Shelving:
    • Open shelves can provide a trendy and accessible storage solution for towels and decorative items.
  15. Wallpaper or Accent Wall:
    • Introduce a striking wallpaper or an accent wall with a different tile pattern to create a focal point.
  16. Art and Decor:
    • Personalize your bathroom with art, decorative elements, and soft furnishings like towels and rugs.
  17. Green Design:
    • Consider energy-efficient fixtures and water-saving toilets and faucets to reduce your environmental footprint.
  18. Ventilation:
    • Ensure proper ventilation to prevent mold and humidity issues. Consider installing an exhaust fan.
  19. Custom Cabinetry:
    • If you have unique storage needs or design preferences, consider custom-built cabinets for a tailored look.
  20. Spa Retreat:
    • Transform your bathroom into a spa-like retreat with features like a rain showerhead, a steam shower, or a dedicated area for relaxation.

Emergency electricians are professionals who specialize in addressing electrical problems promptly and efficiently, especially during urgent situations. Whether it’s a sudden power outage, a wiring malfunction, or any other electrical emergency, these skilled technicians are ready to provide immediate assistance. In this guide, we will explore the vital role of emergency electricians, the types of issues they can resolve, and why having their contact information at your fingertips is essential for maintaining the safety and functionality of your home.

CONCLUSION

In conclusion, a bathroom renovation is an exciting opportunity to revamp one of the most important spaces in your home. By incorporating some of the ideas mentioned above, you can transform your bathroom into a functional, stylish, and relaxing retreat that suits your preferences and needs.

It’s essential to carefully plan your renovation, work with skilled professionals, and pay attention to details to ensure the success of your project. Whether you opt for a modern, traditional, or spa-like design, a well-executed bathroom renovation can enhance your daily routine and the overall value of your home.

Additionally, while planning your renovation, it’s wise to consider potential emergency situations. That’s where services like “Emergency-Plumber.org” and “emergency electricians” come into play. Having access to reliable emergency plumbers and electricians is essential for addressing unexpected issues that may arise in your bathroom or any other part of your home. These professionals can provide timely assistance, ensuring your peace of mind and safety during urgent situations.

POST-PLUMBING CLEANUP TIPS

Plumbing emergencies can cause a lot of damage to your home. Whether it is a burst pipe, a clogged drain, or a leaky faucet, you need to act fast and fix the problem. But that’s not all. You also need to clean up the mess and restore your home to its original condition.

Cleaning up after a plumbing emergency is not an easy task. It requires a comprehensive approach, attention to detail, and professional techniques. If you neglect the cleanup process, you may end up with mold, mildew, odors, anytime and causstains, and other problems that can affect your health and safety.

That’s why I have created this ultimate guide to post-plumbing cleanup. By following this guide, you will be able to handle any post-plumbing cleanup situation with confidence and ease. Let’s get started!

MODERN TECHNIQUES FOR DAMAGE EVALUATION

The first step in post-plumbing cleanup is to assess the extent of the damage and identify the potential risks. Depending on the type and severity of the plumbing problem, you may have water damage, mold growth, structural damage, or electrical hazards.

To evaluate the damage, you need to use the latest tools and techniques that can help you detect hidden problems and measure the moisture level. Some of these tools are:

MOISTURE METER:

This device can measure the moisture content of different materials, such as wood, drywall, carpet, and concrete. It can help you determine if there is any water damage or mold growth in your home.

THERMAL IMAGING CAMERA:

This device can capture infrared images that show the temperature difference of different surfaces. It can help you locate hot spots, cold spots, water leaks, and plumbing leaks in your home.

BORESCOPE:

This device consists of a flexible tube with a camera at the end that can be inserted into small spaces, such as crawl spaces, walls, ceilings, and pipes. It can help you inspect hard-to-reach areas and find hidden damage or defects.

By using these tools, you can evaluate the damage more accurately and plan your cleanup strategy accordingly. You can also hire a professional plumber or a water damage restoration company to perform a thorough inspection and assessment of your home.

THE ULTIMATE CLEANING TOOLKIT

Once you have evaluated the damage, you need to gather the necessary tools and equipment for the cleanup process. Cleaning up after a plumbing emergency requires more than just a mop and a bucket. You need high-end tools that can remove dirt, debris, bacteria, and odors from your home.

Some of the ultimate cleaning tools you need are:

HEPA VACUUM CLEANER:

This is a special type of vacuum cleaner that has a high-efficiency particulate air (HEPA) filter that can trap 99.97% of particles as small as 0.3 microns. It can help you remove dust, dirt, allergens, mold spores, and other contaminants from your home.

MICROFIBER CLOTH:

This is a soft cloth made of very fine fibers that can attract and hold dirt, grease, and moisture. It can help you clean hard surfaces without scratching or leaving streaks.

FILTERS:

These are devices that can filter out impurities from water or air. You may need to replace or clean the filters in your HVAC system, water heater, faucet, showerhead, or other appliances after a plumbing emergency.

CHEMICAL DRAIN CLEANERS:

These are products that can dissolve clogs in your drains using chemicals such as sodium hydroxide or sulfuric acid. They can help you clear out any blockages or residues in your pipes after a drain cleaning.

These are some of the latest cleaning equipment that can make your post-plumbing cleanup easier and more effective. However, you should always follow the manufacturer’s instructions and safety precautions when using these tools.

DETAILED CLEANUP TECHNIQUES

After gathering the necessary tools, you need to apply detailed cleanup techniques for different surfaces in your home. Depending on the type of surface and the level of contamination, you may need to use different methods and products.

Here are some of the detailed cleanup techniques for common surfaces:

FLOORS:

Floors are one of the most affected surfaces after a plumbing emergency. You need to clean them thoroughly to remove any dirt, stains, odors, or mold. The best way to clean floors is to use a HEPA vacuum cleaner first, then a microfiber cloth with a mild detergent or vinegar solution. You should also dry the floors completely using a dehumidifier or a fan to prevent mold growth.

WALLS:

Walls can also suffer from water damage, stains, or mold after a plumbing emergency. You need to clean them carefully to avoid damaging the paint or the drywall. The best way to clean walls is to use a sponge or a cloth with a mild detergent or bleach solution. You should also check for any cracks, holes, or peeling paint and repair them as soon as possible.

FURNITURE:

Furniture can also get wet, dirty, or moldy after a plumbing emergency. You need to clean them properly to restore their appearance and functionality. The best way to clean furniture is to use a vacuum cleaner with an upholstery attachment first, then a cloth with a mild detergent or vinegar solution. You should also dry the furniture completely using a dehumidifier or a fan to prevent mold growth.

These are some of the specialized cleaning methods that can help you handle complex plumbing cleanup situations. You should always wear personal protective equipment, such as gloves, goggles, and masks, when cleaning contaminated surfaces.

While many homeowners might feel comfortable taking on post-plumbing cleanup themselves, for those who don’t have the time or are unsure about the process, it might be a wise decision to hire a professional cleaning service provider. These experts possess the necessary tools and expertise to ensure that every corner of your home is cleaned thoroughly, and potential hazards like mold and mildew are completely eradicated.

PREVENTIVE MEASURES & MAINTENANCE

After completing the cleanup process, you need to take preventive measures and maintain your plumbing system to avoid future problems. Plumbing emergencies can be costly, stressful, and dangerous, so it is better to prevent them than to deal with them.

Some of the preventive measures and maintenance tips are:

  • Check your pipes regularly for any leaks, cracks, corrosion, or wear and tear. If you find any signs of damage, repair or replace them as soon as possible.
  • Install water leak detectors in your home that can alert you of any water leaks or floods. These devices can help you prevent water damage and save money on water bills.
  •  Inspect your water heater regularly for any signs of malfunction, such as rust, sediment, noise, or leaks. If you notice any problems, flush the tank, replace the anode rod, or call a professional plumber for service.
  • Clean your drains regularly using chemical drain cleaners or natural remedies, such as baking soda and vinegar. This can help you prevent clogs, backups, and odors in your pipes.
  • Schedule regular plumbing checkups with a professional plumber who can inspect your plumbing system and perform any necessary repairs or maintenance.

By following these tips, you can keep your plumbing system in good condition and avoid plumbing emergencies.

CONCLUSION:

In conclusion, dealing with plumbing mishaps requires a multifaceted approach that includes evaluating damage using modern tools such as moisture meters and thermal imaging cameras. In addition, it requires employing a comprehensive cleaning toolkit containing HEPA vacuum cleaners, microfiber cloths, and chemical drain cleaners. Various cleanup techniques cater to various surfaces such as floors, walls, and furniture, ensuring thorough restoration following plumbing emergencies.

However, cleanup is not the end of the task. To avoid future issues with your plumbing system, it is important to implement preventative measures and conduct regular maintenance. Remember, a proactive approach not only ensures your home’s safety but also ensures a healthy living environment for each family member.

FREQUENTLY ASKED QUESTIONS

WHAT ARE THE IMMEDIATE STEPS TO TAKE FOLLOWING A PLUMBING DISASTER?

Answer: Immediately shut off the main water valve, assess the affected area, and remove excess water to prevent further damage.

WHY IS TIMELY CLEANUP CRUCIAL AFTER PLUMBING MISHAPS?

Answer: Timely cleanup prevents mold growth, structural damage, and potential health hazards.

HOW CAN HOMEOWNERS ENSURE SAFETY DURING POST-PLUMBING CLEANUP?

Answer: Homeowners should wear protective gear, ensure good ventilation, and avoid contact with contaminated water.

5 EVIDENCE-BACKED WAYS TO GET MOTIVATED TO WORK OUT AT YOUR NEW HOME

It is becoming common knowledge that regular exercise is essential to ensure good health. This is because it comes with innumerable health benefits ranging from improving your mood and better sleep quality to helping you achieve a healthier body weight.

These benefits have informed the WHO’s minimum recommendation of 150 to 300 minutes of exercise weekly for adults and 60 minutes for children and adolescents. 

Despite an increasing knowledge of its benefits, working out and doing it consistently can be hard. While it’s easy to include working out as one of your New Year’s resolutions, following through is the problem. health benefits ranging from improving your mood and better sleep quality to helping you achieve a healthier body weight.  

This is not for a lack of will but because it can be hard to keep yourself constantly motivated. The discipline and tenacity it requires can sometimes pose a stumbling block.

If you’re looking for ways to keep your fitness motivation up, here are a few evidence-backed tips:

1. SET PROCESS GOALS

Goals refer to the expected results of your efforts and ambitions. They provide a roadmap to where you want to be and serve as fuel for motivation. Goals provide the focus you need to get where you’re going, the drive to keep going, and a mechanism to track your progress. Goals can either be outcome or process-oriented.

For example, an outcome goal will be you saying you want to lose about 70 pounds by the end of the year. For process goals, an example would be if you say you want to work out for 3 hours daily on Mondays, Wednesdays, and Fridays.

Studies have shown that having process goals significantly improves motivation. This is because they force you to face the reality of your goals and how to achieve them. Hence, you set feasible goals while outlining how to meet these goals.

2. RESTRUCTURE YOUR HOME ENVIRONMENT

Your environment has an undeniable impact on how motivated you’ll be. Hence, using your environment to set yourself up for success is one of the essential elements of effective behavior change. 

It has been reported that restructuring your environment can provide the motivation you need to cause a change in your behavior. New habits are formed from consistent behavioral patterns, and your environment plays a huge part. Therefore, you must set it up to keep you motivated.  

Restructuring your environment can mean finding a gym you enjoy visiting or designating specific times for working out. It would help to consider setting out your workout clothes the night before. 

You can also set multiple reminders for your gym sessions. These ensure that all you need for success at working out more is more accessible. Keeping yourself motivated can be as straightforward as this.

3. BUILD A COMMUNITY

Building a solid community is essential for motivation. Honestly, it’s almost impossible to be motivated every day, and it is perfectly natural to have days when you don’t feel up to working out. This is where your community comes in.

A robust and encouraging community will ultimately motivate you to get up and start moving, especially on days when it’s hard. The positive impact of a strong community on motivation has been reported. Money can’t buy the smiles, high fives, and encouraging remarks from the bonds people form. 

There is a fitness team out there for everyone, regardless of what workout plan you’re working with. Find an exercise that makes you feel good, and spend time with individuals who will help you develop your strength and confidence while keeping you motivated. These people will constantly hold you accountable, which is essential for motivation.

4. REWARD SYSTEM

Working out can be challenging to keep up with, but rewarding yourself can make it easier to bear. Of course, you’ll do something more often if you’re getting some form of gratification from it. You can gift yourself a healthy meal or watch a movie after a gym session. You should also remember intrinsic rewards like accomplishment and relief after a workout.

Part of having a reward system can include having fun while working out. Making the entire process of working out more enjoyable is a great way to keep yourself motivated. Greater physical activity enjoyment influences individuals’ capacity to engage in regular physical activity. 

Simply put, you are much more likely to repeat a gym session if you enjoy yourself. Switch things up occasionally; have your favorite music playing in the background as you work out or with your favorite person. These are steps to keep you motivated.

5. POSITIVE AFFIRMATION

Evidence suggests that repeating positive fitness affirmations changes your brain, increasing your likelihood of exercising. This is because, naturally, working out can be perceived as uncomfortable and met with opposition mentally and physically. Positive self-affirmations encourage you to engage in more physical exercise by removing that mental barrier, causing an aversion to working out.

However, beyond these positive self-affirmations, you should constantly evaluate the challenges and obstacles you face regarding working out and plan ways to solve them.

CONCLUSION

Working out can be challenging to start and keep up with. Therefore, finding evidence-backed ways to keep yourself motivated is essential. You should remember to build a strong community around yourself while having simple goals and rewarding yourself occasionally. With these in your arsenal, you can get that gym subscription.

BRAND NEW RESIDENTIAL PROJECTS IN DUBAI FOR APRIL 2022

Are you looking for brand-new residential projects in Dubai? Want to know the key details of these projects? How are these projects beneficial for investors? What are the payment plans and do they offer flexibility in payments? What amenities do they offer to the residents and what are the factors that make them distinguished, most attractive and force the investors to invest in these new projects in Dubai? If you have all these questions in your mind and are looking for better options for residency then you are in the right place.

This blog is all about new residential projects in Dubai, we have discussed the major and most profitable projects in famous communities of Dubai. After reading this blog, you will be able to find the appropriate answer to all the above-mentioned questions related to new projects in Dubai.

NEW PROJECTS LAUNCHED IN DUBAI

Since the beginning of the current decade, Dubai has become one of the most appreciated cities in the world because of its continual development of the real estate industry. The city has become a hotspot for new residential projects and by launching them Dubai is providing impressive investment opportunities.

CANAL FRONT RESIDENCES

An amazing new residential project developed by Meydan – Canal Front is a new addition to Dubai’s hot new properties that play a pivotal role in making Dubai an international center of real estate properties.  

Canal Front is a waterfront residential project located in Dubai Water Canal at Al Safa. This new high-end residency consists of two towers, Tower West and Tower East, and each tower has 1,2, and 3-bedroom apartments with refined finishing, state-of-the-art infrastructure, and contemporary interiors that mesmerize the residents of the dynamic project with stunning scenic views of Dubai Canal.

This family-friendly community is full of life offering world-class amenities to enjoy life including a swimming pool, restaurants, shopping malls within walking distance, a gymnasium, fitness centers to keep your body active, playgrounds for kids to take part in healthy sports activities, cycling track and lush green landscape to make your life refreshing in every way.

The rough cost for apartments for sale in Canal Front residences is AED 1.7M for 1-bedroom apartments, AED  2.1M for 2-bedroom apartments, and for 3-bedroom apartments, it costs AED 4.6M.

AVA AT PALM JUMEIRAH

Ava is another new unique residential masterpiece at Palm Jumeirah – a palm-shaped community renowned as the 8th wonder on earth. Ava at Palm Jumeirah is a development by Omniyat, a famous developer who is committed to delivering exceptional architecture, state-of-the-art infrastructure and providing luxurious residential projects in Dubai.

The development offers expensive apartments and penthouses with private terraces for residents to have a breathtaking view of the canal by sitting on the floor. The building of this project consists of 3-4 bedroom apartments and 5-6 bedroom penthouses having fully furnished kitchens with appliances, airy and spacious bedrooms with floor-to-ceiling windows and built-in wardrobes, and a private swimming pool.

The ultra-luxurious community, Ava is situated at a prime location from where the residents have easy and quick access to the rest of the city and connectivity with popular neighborhoods of Dubai is also appreciable. JBR Beach, Dubai International Airport, Al Makhdoom International Airport and EXPO 2020 are 20 to 30 minutes away from this brand-new residential project by the most creative developer, Omniyat.

If you want to buy apartments or a penthouse in the Ava community at Palm Jumeirah, the price range for apartments or penthouses is different and you can choose according to your affordability. AED 45M is the starting price of 3-bedroom apartments and 4-bedroom apartments cost AED 140M to 150M — similarly, the price range for penthouses to buy starts from AED 250M.

NAD AL SHEBA GARDEN

The Meraas Group is one of the most reputed and creative developers in the Gulf region contributing significantly to making Dubai a hub for international real estate development. Meraas has contributed a lot to real estate development and launched major projects with an amazing infrastructure, modern architecture, and amenities that set the rich standards of your life.

NAD Al Sheba Garden is one of the mega residential projects launched by Meraas developers located directly close to Al Khail Road and Sheikh Bin Zayed Road.

This exciting project offers many types of properties including townhouses, villas, and apartments elegantly designed, and embellished with modern decorative ideas making them more attractive for residents.

NAD Al Sheba Garden is a hotspot for nature lovers as there are a lot of green spaces around the buildings. Falcon Museum, Tennis 360, The Track-Meydan Golf, Dubai International Convention Center, and Botanic Garden are the nearby places to enjoy.

Here are the roughly estimated prices of different complexes in NAD Al Sheba Gardens, allowing investors and home buyers to get an idea of which unit might be suitable for them:

The 3-bedroom villa costs between AED 3.2M to 4 M

The 4-bedroom villa costs AED 8.6 M

The 5-bedroom villa costs AED 13.2 M

The rough price for a 3-bedroom townhouse is AED 3.2 M

The rough price for a 4-bedroom townhouse is AED 4.5 M

In this family-friendly community, high-wealth investors can buy a plot with an estimated price of AED 2.5 M to 23.5 M. According to the real estate brokerage firm totally home real estate Dubai this project is going to be one of the best projects in Nad Al Sheba with highest ROI recorded in this area.

MYRTLE- CENTRAL PARK AT CITY WALK

Another newly launched residential project in Dubai we are going to discuss is MYRTLE in Central Park At City Walk. This stunning project at City Walk was developed by the leading real estate developer in Dubai, The Meraas.  

Central Park is a lush community and a great combination of modern architecture and natural greenery. An attractive place for the residents who prefer to live in a natural environment with the modernity of the technology era.

The fantastic and attractive neighborhood consists of a tall building of 8 floors and each floor offers luxurious 1-2 bedroom apartments. Apartments are the finest examples of high-end finishing, and sleek design and feature airy and spacious rooms with built-in wardrobes and a large dressing area. These apartments also have balconies and terraces to enjoy the beautiful view of the central park, after spending a tiring day a man can relax here.

Along with lush apartments surrounded by greenery, this neighborhood also offers amenities and state-of-the-art facilities to live a comfortable and imaginative life. Swimming pools, water play areas, tennis, squash, and different sports courts,  gymnasiums, fitness centers, a spa, dog parks, nurseries, running tracks, specified areas or events, and BBQs, are facilities that attract most residents to decide to live here.

The residential new project is under development and expected to be completed in June 2025, the developers of this amazing project also offer an easy and flexible payment plan to the investors so that investors don’t hesitate to invest in the green land spaces.

THE FINAL VERDICT

The exciting residential real estate market in Dubai is evolving frequently and new residential projects with a focus on modern amenities, stunning architecture, sleek designs, high-end finishing, and diverse property options are setting standards for a luxurious lifestyle in Dubai.

The new residential projects Canal Front Residences, Ava at Palm Jumeirah, NAD Al Sheba Garden, and MYRTLE at Central Park developed by renowned developers like Meraas, Omniyat, and Meydan with unbeatable payment plans are the best opportunities for investors to invest in this real estate hub.

10 SIMPLE WAYS TO LOWER YOUR WATER BILL THIS YEAR

Water is a precious resource, and reducing your water usage not only benefits the environment but also your wallet. Lowering your water bill doesn’t have to involve drastic lifestyle changes; small adjustments in your daily routines and home can make a significant difference. This article will explore ten simple ways to lower your water bill this year while also contributing to water conservation efforts.

1. FIX LEAKS PROMPTLY

A critical step in reducing your water bill is to address leaks promptly. Even seemingly minor leaks can result in substantial water wastage over time. Regularly inspect your home for dripping faucets, running toilets, and hidden pipe leaks. Swiftly repairing these issues can lead to significant water and cost savings. Additionally, conducting leaking detection in the pool, if you have a swimming pool, is essential to prevent water loss and maintain your pool’s water level efficiently.

2. UPGRADE TO WATER-EFFICIENT FIXTURES

Outdated plumbing fixtures can be significant contributors to excessive water consumption, ultimately driving up your water bill. To combat this, consider upgrading to water-efficient fixtures. These include low-flow toilets, aerated faucets, and high-efficiency showerheads. These fixtures offer optimal performance while substantially reducing water usage, resulting in a noticeable reduction in your water bills.

3. COLLECT RAINWATER

Harnessing rainwater is an eco-friendly and cost-effective approach to lower your water bills. Installing rain barrels or tanks to capture rainwater from your roof’s downspouts is a simple yet highly effective method. This harvested rainwater can be utilized for various purposes such as garden irrigation, car washing, and even flushing toilets, reducing your dependence on municipal water and, in turn, lowering your water expenses.

4. BE MINDFUL OF YOUR LAWN, GARDEN, AND SWIMMING POOL

A beautifully landscaped garden, a well-maintained lawn, and an outdoor swimming pool can all significantly increase your water bills. To mitigate this, consider xeriscaping, a landscaping approach that prioritizes drought-tolerant plants. Additionally, adjusting your watering schedule for the garden and lawn to early mornings or late evenings minimizes water loss through evaporation, resulting in substantial savings. Using pool leak detection services can also help you identify and fix leaks promptly, further reducing water waste and water-related expenses.

5. OPT FOR SHORTER SHOWERS

Long, leisurely showers can substantially increase your water consumption and, consequently, your water bills. Implementing a reduction in your shower time and favoring shorter, more efficient showers can make a notable difference in your overall water usage. You can also employ timers or create a playlist of your favorite songs to monitor your shower time and stay within your desired limits.

6. ONLY RUN FULL LOADS

Dishwashers and washing machines are notorious for being water-intensive appliances. To reduce water consumption, make it a practice to operate these appliances only when you have full loads. By doing so, you maximize the efficiency of each cycle and decrease the frequency of usage, resulting in both water and energy savings.

7. INSTALL A DUAL-FLUSH TOILET

Consider upgrading your toilet to a dual-flush model, a prudent choice for lowering your water bills. Dual-flush toilets offer two flush options: a low-volume flush for liquid waste and a higher-volume flush for solid waste. This design allows you to use less water for appropriate situations, contributing to significant water bill reductions.

8. COLLECT SHOWER WARM-UP WATER

Before your shower reaches the desired temperature, it often releases cold water down the drain. To prevent this wastage, place a bucket or container in your shower to collect the cold water that runs before the hot water arrives. This collected water can be repurposed for various tasks such as watering plants or filling pet bowls, resulting in both water conservation and cost savings.

9. INSULATE YOUR PIPES

Insulating your hot water pipes is a simple yet effective way to minimize heat loss and ensure rapid access to hot water at your faucets and showers. By preventing heat dissipation, you not only conserve energy but also reduce the need to run the tap for extended periods, which translates to substantial water and energy savings. Insulating your pipes is a cost-efficient measure that not only benefits your wallet but also promotes a more eco-friendly and sustainable approach to water usage.

10. SCHEDULE REGULAR MAINTENANCE

Regular maintenance of your plumbing system is essential for avoiding water wastage. Consistent inspections of your pipes, fixtures, and appliances can help detect potential issues early, ensuring they are resolved promptly. This proactive approach minimizes the risk of water leaks and reduces unnecessary water consumption. By staying vigilant and addressing any plumbing problems as they arise, you not only maintain the integrity of your water supply but also contribute to more responsible water usage and lower water bills in the long run.

CONCLUSION

Reducing your water bill doesn’t have to be a complicated or expensive endeavor. By implementing these ten simple strategies, you can significantly lower your water consumption while also saving money. Additionally, practicing water conservation is an essential step towards preserving this precious resource for future generations and promoting a more sustainable environment. So, start making these changes today, and enjoy the benefits of both a lower water bill and a healthier planet.

Guest Contributor: Stephanie Snyder

HOW TO MODERNIZE YOUR HOME’S INTERIOR

Your home is where you spend a significant portion of your life. Modernizing your home’s interior can breathe new life into your living space, making it more comfortable, functional, and visually appealing. Whether you’re looking for a complete overhaul or just a few subtle changes, this article will guide you through the process of modernizing your home to create a stylish and welcoming atmosphere.

DEFINE YOUR VISION

Before embarking on any interior modernization project, it’s essential to have a clear vision of what you want to achieve. Take some time to envision the final look and feel of your home. Consider your personal style, preferences, and the functionality you desire. Do you want a minimalistic, Scandinavian-inspired design, a more industrial, urban look, or something entirely unique? Defining your vision will serve as your roadmap throughout the modernization process.

DECLUTTER

One of the fundamental principles of modern interior design is minimalism. Start by decluttering your space. Rid your home of unnecessary items and create a more open, airy atmosphere. Clutter-free spaces look more modern and promote a sense of calm and tranquility. Consider donating or selling items you no longer need, and be selective in what you choose to keep. Remember, less is often more in modern design.

NEUTRAL COLOR PALETTE

A modern interior typically features a neutral color palette as its foundation. Whites, grays, and muted earth tones create a clean, timeless look that can easily be accented with bold, colorful accessories. This approach allows versatility and makes updating your home’s look easier over time. If you want to add a pop of color, opt for a single accent wall or colorful furniture pieces. Before you start painting, you must prepare your walls properly. This might include removing existing paint, wallpaper, or woodchip wallpaper, which can be found in a lot of older properties. Learn how to remove woodchip wallpaper in this guide.

UPGRADE FLOORING

Replacing outdated flooring is a significant step in modernizing your home’s interior. Hardwood floors, laminate, or polished concrete are popular choices in modern design. These options are not only aesthetically pleasing but also easy to maintain. If a complete floor replacement isn’t in your budget, consider refinishing or adding stylish area rugs to give your space a fresh, modern feel.

EMBRACE NATURAL LIGHT

Ample natural light is a key element of modern interior design. Maximize the natural light in your home by using sheer curtains or blinds that allow sunlight to filter through. Consider installing larger windows or strategically placed mirrors to reflect and amplify natural light. Well-lit spaces appear more open, inviting, and, ultimately, more modern.

UPDATE FIXTURES

Outdated fixtures and hardware can significantly detract from the modernity of your home’s interior. Swap out old light fixtures, doorknobs, handles, and faucets for sleek, contemporary alternatives. Chrome, stainless steel, and matte black finishes are popular choices that instantly modernize your space and add a touch of sophistication.

INVEST IN FURNITURE

Clean lines, simplicity, and functionality characterize modern furniture designs. Investing in contemporary furniture pieces can transform your interior. Look for sofas, tables, and chairs with minimalistic designs and neutral upholstery. Modular and multifunctional furniture can be particularly useful, especially in smaller spaces. Don’t forget to add some statement pieces to infuse character into your home.

OPEN YOUR SPACE

If you have the flexibility to do so, consider knocking down walls to create an open floor plan. Modern homes often feature connected living, dining, and kitchen areas. This design not only enhances the flow of your home but also makes it feel more spacious and contemporary. Consult with a professional if you’re planning structural changes to ensure they’re executed safely and in accordance with local building codes.

ADD TECHNOLOGY

Modernizing your home isn’t just about how it looks; it’s also about integrating technology. Smart home devices can make your life more convenient and enhance the overall modern feel of your space. Invest in a home automation system that allows you to control lighting, climate, security, and entertainment with your smartphone or voice commands. Additionally, consider upgrading to energy-efficient appliances and home systems to save money and reduce your environmental footprint.

CREATE A FOCAL POINT

A focal point draws the eye and adds depth and character to your space. This can be accomplished through a statement piece of artwork, a stunning piece of furniture, or a unique architectural element like a fireplace or feature wall. Having a focal point anchors the room and gives it a sense of purpose and style.

8 HELPFUL TIPS FOR PREPARING YOUR PLUMBING BEFORE HOME RENOVATION

Renovating your home can be exciting and transformative, but your plumbing system often takes a back seat amidst the anticipation of new decor and layouts. Yet, neglecting your plumbing can lead to unexpected issues and costly repairs.  

This comprehensive guide will walk you through 11 invaluable tips for preparing your plumbing before starting a home renovation, ensuring your project goes off without a hitch.

1. TAKE CARE OF ANY EXISTING PLUMBING ISSUES

Whether you are doing a bathroom renovation project or a home renovation, addressing any existing plumbing problems is essential. Leaks, clogs, or other issues can escalate during renovation, causing damage and disruptions. Tackle these concerns head-on to avoid complications down the line.

2. LOCATE YOUR EXISTING PLUMBING SYSTEM

Understanding the layout of your current plumbing system is crucial. It lets you plan your renovation effectively, avoiding accidental damage and ensuring the new design aligns seamlessly with the existing plumbing.

3. GATHER PLUMBING TOOLS AND MATERIALS

Preparation requires having the right tools and materials at your disposal, making your renovation journey smoother.

Ensure you have the necessary materials for potential repairs or replacements as part of your preparations. These may include pipes, connectors, gaskets, and sealants, making it easier to address unexpected issues promptly.

Don’t overlook safety. Safety glasses and gloves are your allies, protecting you from potential accidents and injuries while working on your plumbing system.

4. TURN OFF THE WATER SUPPLY

Mastery of controlling the water supply is fundamental to plumbing preparation for a renovation.

It’s crucial to know the location of your main water shutoff valve. This knowledge is invaluable in emergencies and when interrupting the water supply during your renovation.

You may only need to turn off the water supply in certain situations. Using shutoff valves to isolate water to specific areas or fixtures allows you to work on one section of the plumbing system without affecting water access elsewhere.

5. CLEARING THE WORK AREAFAN

Establishing a clean and safe workspace is essential for a successful renovation. 

Before you begin, clear the renovation area from obstacles to safeguard your belongings and streamline your work, making it more efficient and safer.

Shield valuables and furniture near the renovation site from dust and debris. These protective measures ensure that your possessions remain unharmed during the renovation process.

6. PIPE INSULATION AND PROTECTION

Preventive measures and protection for your plumbing system are vital to avoid potential issues.

Construction activities can inadvertently harm plumbing pipes. Taking precautions to protect them from physical damage is essential to prevent leaks or other issues in the future.

In cold climates, insulation is vital to prevent pipes from freezing, leading to costly repairs and water supply interruptions.

Choose suitable insulation materials to safeguard your plumbing. Pipe insulation sleeves or tape can easily protect vulnerable sections and ensure protection against extreme temperatures and potential impacts.

7. FIXING MINOR LEAKS AND ISSUES

Addressing minor plumbing issues is vital to prevent them from escalating into major problems during renovation.

Having a basic understanding of DIY repair techniques can benefit minor leaks. Simple tasks like replacing a washer or tightening a connection can save time and money.

Replacing old and malfunctioning faucets and fixtures is a good start for DIY projects.

8. REPLACING OUTDATED PLUMBING

Consider upgrading your plumbing system during the renovation to improve its efficiency and longevity.

A renovation is ideal for replacing old, outdated pipes with newer, more durable materials. It enhances the performance of your plumbing system and reduces the risk of future problems.

Opt for modern plumbing fixtures during your renovation. High-efficiency toilets, sleek faucets, and energy-saving showerheads can significantly improve functionality and enhance the overall appearance of your space.

9. HIRING A PROFESSIONAL PLUMBER

Sometimes, the wisest choice is to entrust plumbing work to the experts. By letting the experts do the work, you can get the best result from your budget.

Recognize when it’s time to enlist the services of a professional plumber. Complex issues, major installations, or tasks beyond your expertise should prompt you to seek the knowledge and skills of a qualified plumber.

When hiring a professional, research and select a reputable plumbing contractor. Seek recommendations, check references, and verify licenses to ensure you partner with a qualified professional capable of handling the unique needs of your renovation project.

10. DIY VS. PROFESSIONAL PLUMBING RENOVATION

Deliberate the pros and cons of managing plumbing work yourself or engaging a professional.

While DIY renovations can be fulfilling, they come with potential pitfalls. Consider your skill level, the project’s complexity, and the time you can commit before deciding on a DIY approach.

Professional plumbers bring experience and expertise to your project. Their knowledge ensures the work is completed efficiently and complies with local codes and regulations. Discover the numerous benefits of enlisting a pro for your plumbing needs.

11. MAINTAINING YOUR PLUMBING AFTER RENOVATION

After renovating, continue caring for your plumbing system to enjoy a trouble-free and efficient home.

Schedule regular plumbing inspections after your renovation. This proactive approach can identify issues early, preventing extensive damage and costly repairs in the future.

Implement preventative maintenance practices, such as periodic flushing of water heaters, cleaning drains, and checking for leaks. These steps will help you maintain the integrity of your plumbing system and extend its lifespan.

CONCLUSION

In conclusion, preparing your plumbing for a home renovation is an essential step in ensuring a successful and hassle-free project. By assessing your plumbing system, gathering the necessary tools, and understanding the importance of shutting off water when needed, you set the stage for a smooth renovation process.

Additionally, addressing issues like drainage, insulation, and minor leaks, as well as considering the replacement of outdated plumbing, can substantially enhance the functionality and efficiency of your plumbing system.

The decision of whether to embark on a DIY plumbing renovation or to hire a professional plumber should be made thoughtfully, weighing the complexity of the project and your skill level. Regardless of your path, understanding local regulations and obtaining the necessary permits is crucial to avoid complications during your renovation.

IOWA LANDLORD RESPONSIBILITIES: YOUR ULTIMATE GUIDE

Navigating the world of landlord responsibilities in Iowa doesn’t have to be a daunting task. In this ultimate guide, we’re here to streamline the process and make it easy for you. Whether you’re a new landlord or a seasoned property owner, understanding and fulfilling your obligations is key to a successful and hassle-free rental experience. Iowa’s rental laws have their nuances, but we’ve got you covered with a simplified breakdown of everything you need to know. So, let’s dive right into the essential responsibilities that come with being a landlord in the Hawkeye State.


Providing a Safe and Habitable Rental Property

Your first and foremost responsibility as an Iowa landlord is to offer a safe and habitable rental property. This means ensuring that the property is in good repair, free from hazards, and compliant with all building and safety codes. Some essential steps include:


●      Regular maintenance and repairs

●      Adequate heating and cooling systems

●      Proper sanitation and plumbing

●      Safe electrical systems

●      Compliance with local building codes


Fair Housing Laws

It’s crucial to familiarize yourself with the federal and state fair housing laws. These laws prohibit discrimination based on race, color, religion, sex, national origin, disability, or familial status. When advertising your rental property, screening tenants, and drafting leases, you must adhere to fair housing regulations.


Security Deposits

Iowa law allows landlords to collect security deposits from tenants. The security deposit serves to cover unpaid rent or damages beyond normal wear and tear.

●      You must provide a written notice stating the amount of the deposit and the conditions under which it may be withheld.

●      After a tenant moves out, you must return the security deposit within 30 days, along with an itemized list of deductions if any.


Lease Agreements

A well-drafted lease agreement is essential for a successful landlord-tenant relationship. Your lease agreement should include:

●      Rental terms and conditions

●      Rent amount and due date

●      Security deposit details

●      Maintenance and repair responsibilities

●      Rules and policies for the property

Make sure your lease agreement complies with Iowa rental laws and is clear and fair to both parties.


Inspections and Notice Requirements

Iowa law allows landlords to inspect their rental properties with proper notice. Typically, you must provide a 24-hour written notice to the tenant before entering the premises for non-emergency purposes.


Evictions

While no landlord wants to evict a tenant, it’s essential to know the legal process if the need arises. In Iowa, the eviction process involves several steps:

●      Providing written notice to the tenant with a specified time to remedy the violation (e.g., unpaid rent).

●      Filing an eviction lawsuit with the local court if the tenant does not comply with the notice.

●      Attending a court hearing to present your case.

●      If the court grants an eviction order, you can legally regain possession of your property.


Handling Abandoned Property

When a tenant leaves personal property behind after an eviction or move-out, you must follow Iowa law regarding abandoned property. This usually involves providing notice and storing the property for a specified period.


Maintenance and Repairs

Landlords in Iowa are responsible for maintaining the rental property. This includes:

●      Fixing structural issues

●      Repairing plumbing and electrical systems

●      Ensuring that heating and cooling systems work properly

Promptly addressing maintenance requests is crucial to maintaining a positive landlord-tenant relationship.


Right to Privacy

While landlords have the right to inspect their properties, tenants also have a right to privacy. Ensure that you provide proper notice and have a legitimate reason for entering the rental unit.


Conclusion

Understanding and fulfilling your Iowa landlord responsibilities is not just a legal requirement but also a path to fostering positive landlord-tenant relationships. By adhering to the Iowa landlord-tenant law and embracing your obligations, you’ll create a secure and comfortable environment for your tenants while safeguarding your investments. Remember, staying informed about your responsibilities is an ongoing process, and it’s essential to stay updated with any changes in the law. As you embark on your journey as an Iowa landlord, keep this ultimate guide as your reference to ensure that you’re not only compliant but also providing the best possible rental experience for your tenants. Here’s to responsible and successful property management in the Hawkeye State!