PREVENTING WATER HEATER EXPLOSIONS: ESSENTIAL SAFETY MEASURES

Water heaters, essential for every comfortable home, provide hot water for our daily needs, from showering to cooking. Yet, many do not realize that these domestic appliances can also be potential hazards. Left unchecked, water heaters may build up excessive pressure, leading to catastrophic explosions. Understanding the risks involved in operating a water heater, and more importantly, how to prevent such disasters, is vital. As homeowners, our responsibility stretches beyond enjoying the comforts of hot water; it includes ensuring the safety of our living spaces. With a little know-how and regular maintenance, we can effectively prevent any severe water heater problems.

Causes of Water Heater Explosions
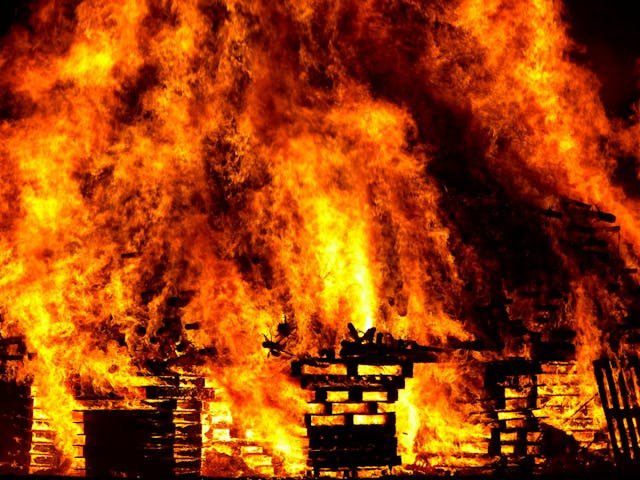
Water heater explosions, while rare, can cause significant damage and injury. Understanding the causes behind them is crucial for prevention and ensuring household safety.

1. Faulty Pressure Relief Valve
The pressure relief valve safely opens to let out extra pressure from the tank if it gets too high. If a valve fails, it can cause tanks to burst by allowing pressure to build up, which is a common reason for explosions.

2. Excess Pressure Buildup
There are several causes that can culminate in excess pressure build-up within the tank. These include a malfunctioning thermostat, which might permit water to overheat, or high incoming water pressure from the municipal line. This pressurization weakens the tank’s structural integrity, leading to a risk of explosion.

3. Gas Leakages
Gas-powered water heaters have an associated risk of gas leakage. Should leakage occur and gas accumulate in an enclosed space, it might ignite due to a spark from the heater unit, leading to a violent explosion.

4. Improper Installation
Enlisting a professional plumber for proper water heater installation is often underemphasized. Improper or DIY installations can cause safety features to fail and weak connections, leading to pressure build-up and possible explosions.

Warning Signs
Recognizing warning signs is crucial to preventing water heater explosions and maintaining household safety.

  • Leaks and Corrosion: This often indicates a deteriorating water heater, which can potentially lead to a rupture if ignored.
  • Strange Noises: Noises such as rumbling or popping often indicate sediment buildup, which may compromise the heater’s function and safety.
  • Rotten Egg Smell: A sulfur smell, similar to rotten eggs, could signal a gas leak in gas water heaters, posing substantial danger.
  • Irregular Water Pressure: Wide swings in water pressure may be symptomatic of system issues that could strain and risk the integrity of the water heater.


7 Ways to Prevent Water Heater Explosions
Preventing water heater explosions is essential for maintaining the safety and integrity of your residence. Implementing the following steps can significantly reduce the risk of such potentially devastating incidents.

1. Regular Maintenance Checks
The first step to ensuring the safety of your water heater is to establish a routine of professional inspections. These should be scheduled annually, allowing experts to properly evaluate your system’s health.

The check-up involves inspecting safety valves, heating elements, and the tank’s structural condition. Equally important is verifying the anode rod and thermostat’s functionality, as their failure can lead to dangerous outcomes.

2. Test the Pressure Relief Valve
To test your pressure relief valve, start by placing a bucket under the discharge pipe for water collection. Carefully lift the valve’s test lever until water flows out, which should happen immediately.

This procedure is best performed biannually, but at a minimum, yearly verification is recommended to confirm pressure is being released effectively. If the valve is non-responsive, it’s time for an immediate replacement to prevent dangerously high pressure build-up.

3. Monitor Water Pressure
High water pressure is a common root of water heater issues. Homeowners can check water pressure by attaching a gauge to a sink and should aim for a reading between 40-60 psi. Implementing a pressure-regulating device may be necessary if the pressure frequently exceeds this range, providing consistent regulation and safeguarding against undue stress on your water heater.

4. Annual Flushing of the Tank
One significant contributor to water heater inefficiency and overheating is sediment buildup. To counteract this, perform an annual tank flush. Simply connect a hose to the drain valve and let the water run until it’s clear of debris. This will help maintain your heater’s efficiency and longevity.

5. Thermostat Settings
Temperature control is vital, with the ideal setting being around 120–130 °F. Such calibration prevents the heat from rising to dangerous levels, which, in turn, could significantly increase internal tank pressure. Regularly check the thermostat to maintain safe temperature and pressure levels.

6. Checking and Replacing the Anode Rod
The anode rod is integral to your water heater’s defense against rust and corrosion. Inspecting this component at least once a year is recommended, with replacement being necessary as per the visible wear or as per the schedule suggested by the manufacturer.

Replacing the anode rod on time protects the tank’s interior and is important for the equipment’s safe use.

7. Install Leak Detectors
A highly effective way of preemptively addressing water heater problems is by installing leak detectors. Numerous varieties, from basic to smart home-integrated systems, offer immediate alerts in the event of a leak. Detecting and responding quickly to moisture can reduce the risk of malfunctions that might cause explosions.

Conclusion
Prioritizing preventative measures for water heaters is crucial to ensuring safety in your household. The importance of regular maintenance checks cannot be understated. Remember, professional plumbing help plays an essential role in maintaining these systems. Make water heater maintenance a paramount routine to ensure your home remains risk-free.

Author Bio

Cecil A. Palmer is a blog contributor for Showtime Plumbing LLC, focusing her sharp wit on your worst plumbing nightmares. She deftly pens articles aimed at keeping your pipes in check, sparing you from the chaos of unwelcome waterworks. Through her work with SpringHive Digital Marketing Agency, Cecil crafts compelling copy for various Plumbing Service clients, blending technical savvy with relatable anecdotes. Nestled in the heart of Tennessee with her husband and two little ones, she unwinds by exploring the great outdoors and immersing herself in the world of gardening and amateur photography.

8 ESSENTIAL STEPS TO TAKE AFTER A HOUSE FIRE

A house fire can be devastating and traumatic, leaving you feeling overwhelmed and unsure of what to do next. But you need to move fast and carefully to ensure your safety, evaluate the damage, and start the reconstruction and recovery process. This guide will outline eight essential steps to take after a house fire, providing you with practical advice and guidance to navigate this challenging situation with confidence and resilience.


1.   ENSURE SAFETY FIRST:

Following a home fire, your protection and the safety of your loved ones should always come first. Wait for emergency personnel to give the all-clear and confirm that it is safe to re enter your home before entering the house. Watch out for potential dangers, including loose ceiling tiles, unsteady flooring, and structural damage that might cause danger. Until your house is deemed safe to occupy, if necessary, seek temporary refuge with friends, relatives, or in a designated emergency shelter.


2.   CONTACT YOUR INSURANCE COMPANY:

One of the first calls you should make after a house fire is to your insurance company to report the incident and begin the claims process. Your insurance representative will help you identify the available coverage for repairs and replacements, evaluate the degree of the damage, and walk you through the process of filing a claim. Be ready to give thorough details on the origin of the fire, the degree of the damage, and any personal belongings that were affected. Maintain detailed records of any correspondence with your insurance provider, including claim numbers, contact details for adjusters, and proof of losses.


3.   DOCUMENT THE DAMAGE:

After ensuring your safety and contacting your insurance company, it’s essential to document the damage to your home and belongings thoroughly. To demonstrate the extent of the fire’s damage, capture images and videos of the entire home, including its exterior and interior spaces. Make a thorough inventory of all the damaged objects, noting their worth, condition, and any applicable serial numbers or other identifying details. This documentation will be invaluable when filing your insurance claim and can help ensure that you receive fair compensation for your losses.


4.   SECURE YOUR PROPERTY:

In the aftermath of a house fire, your home may be vulnerable to additional damage from weather, vandalism, or unauthorized entry. Take action to safeguard your property and keep it safe. Board up windows and doors to prevent intruders and secure any openings in the roof or walls to prevent water damage. To keep an eye on the site and prevent trespassers, make arrangements for temporary fencing or security patrols. During the recovery process, you can minimize the possibility of more loss and damage by taking proactive steps to safeguard your property.


5.   SEEK PROFESSIONAL ASSISTANCE:

Dealing with the aftermath of a house fire can be overwhelming, and you may need assistance from professionals with specialized skills and expertise. Consider working with trustworthy experts in fire damage restoration in Los Angeles to evaluate the damage, clear the debris, and restore your house to its pre-fire state. These experts have the tools, knowledge, and expertise necessary to manage the cleanup and restoration process safely and effectively, so you can concentrate on recovering and rebuilding.


6.   NOTIFY UTILITY PROVIDERS AND SERVICE PROVIDERS:

After a house fire, it’s essential to notify your utility providers and service providers to suspend services and prevent further charges. In order to disconnect services from the damaged property and prevent any safety risks, get in touch with your gas, electric, and water providers, notify your phone, cable, and internet service providers to move your services to a temporary location if needed, or temporarily cease service. Additionally, let your postal service know about the circumstances and make plans to forward mail or pause delivery until you are able to get back home.


7.   EVALUATE YOUR FINANCIAL SITUATION:

A house fire can have significant financial implications, from the cost of repairs and replacements to temporary housing and living expenses. Examine your alternatives for financial help and assistance, and take some time to evaluate your financial status. If you’re unable to meet your financial obligations due to the fire, speak with your bank or mortgage lender about possible forbearance or payment arrangements.


8.   BEGIN THE RECOVERY AND REBUILDING PROCESS:

Once the immediate aftermath of the fire has been addressed, it’s time to focus on the long-term process of recovery and rebuilding. To create a thorough strategy for restoring your house and replacing damaged items, collaborate closely with contractors, insurance companies, and other experts. Throughout the rebuilding process, show patience and responsibility, and don’t be afraid to ask for assistance or seek out support from friends, family, and local resources.


CONCLUSION

Recovery from a house fire can be daunting, but by following these essential steps and seeking support from professionals and community resources, you can navigate the challenges with confidence and resilience. Remember that you are not alone and that you can repair and revitalize both your life and your house with enough time and effort.

It’s also crucial to acknowledge that recovery is a process that takes time. Be patient with yourself and with the circumstances as you move forward.

HOW TO PICK THE RIGHT AREA FOR YOUR BEACH RENTAL

A beach vacation is a classic holiday getaway but can be expensive. Renting a beach house can be a convenient and cost-effective alternative to standard beach resorts.

Instead of being restricted to tiny rooms at a hotel with a hundred other guests, your group can have the run of a spacious, private house, and you won’t have to compete with other vacationers for a choice spot on the beach or by the pool. You’ll also have use of the kitchen, patio or deck, and entertainment center.

However, finding the perfect beach rental requires more than skimming through online ads and picking the first house with decent photos. Location is everything, as the saying goes. Here are some considerations when choosing the right area for your beach rental.


First, Decide What You Want 

Beach houses come in many different types, so it’s crucial to decide what’s important to you. A home right on the beach is convenient but will cost more. You may be willing to save by walking a couple of blocks. For the younger crowd, some beach houses include water sports facilities like a boat or jet skis. If you want privacy, you may want to get a home with a private beach area. If you’re traveling with kids, you may look for a home with extra rooms, a pool, or a game room.


Set a Budget

Sure, you want the get the most for your travel dollars, but you also want to be careful not to go overboard on spending. A housing budget can help ensure you don’t get carried away. It can also help you narrow down your choices.

The length of your stay is also a consideration. A more expensive house might be more comfortable, while a cheaper rental might enable your group to stay longer.


Get the Exact Address

Many ads describe beach rentals by their distance from the water. But a home that’s an easy, two-block walk to the beach may be better than one that’s just 100 feet from the shore but with no way to get there. When you have the exact address, Google Maps can show you the area around the home, including beach views and access.


Consider Living Arrangements

With a larger group, sleeping arrangements are important. Some beach rentals claim to accommodate 20 people, but only if they double up on bunkbeds or queen-size beds. On the other hand, kids are great at bunking up, and most enjoy it. To avoid unpleasant surprises, think carefully about where everyone will stay. Examine the floor plan and photos carefully and make sure the space has what you need.


Research the Location

Safety is important when you’re on vacation; many people are relaxing and less vigilant than at home. It’s advisable to stay in a safe area with a low rate of violent and property crime. You won’t want to come back from a day at the beach only to find your personal belongings are gone.

Likewise, you’ll want to know what restaurants, stores, and other amenities are close. Since you will probably be eating at home some of the time, you’ll want to make sure you can get groceries conveniently. But you will also probably want to try local restaurants. A home with nothing nearby except a pizza delivery shop can quickly become tiresome. On the other hand, a home located near several all-night bars can make it hard to sleep.


Check Customer Reviews

Reviews by previous renters will tell you about the experiences of others who’ve stayed at a house. Customer reviews are a great way to get honest assessments of a rental and help you decide if it’s worth your time and money.

Many owners attempt to sugarcoat their houses by downplaying less desirable features in their property descriptions. Customer reviews can help you find out the pros and cons of each property. But remember that the customers who post reviews are usually the ones who had either a great time or a terrible time, so don’t rely solely on reviews when making your decision. 

The lack of any reviews doesn’t necessarily mean a property is undesirable. It may just be a new listing. If you have questions, you can contact the owner directly to collect more information and get a better feel about the property.


Stick With Well-Known and Reputable Platforms

There are several popular rental sites including Airbnb, Vrbo, and Vacasa. Sometimes the same property is listed on multiple platforms with different rates. So, it can pay to comparison shop. A reputable platform assures you of a smooth and secure reservation process.

 Different platforms have different features. For example, Airbnb is the market leader and enables renters to filter properties by dozens of criteria. Vrbo runs background checks on all hosts and offers alternative accommodations if anything goes wrong on arrival.


Written by Taylor McKnight, Author for Key West Tiki Boat

MAXIMIZE YOUR ONLINE PRESENCE: STRICTLY PLUMBERS’ GUIDE TO DIGITAL DOMINANCE

In the competitive world of plumbing services, establishing a strong online presence isn’t just an option—it’s a necessity. At Strictly Plumbers, we specialize in propelling plumbing businesses into the digital age with targeted, effective marketing strategies. Understanding the ins and outs of plumber marketing, we tailor our approach to ensure your business not only gets found online but becomes the go-to choice for customers in need

Why Partner with Strictly Plumbers?

As a dedicated plumber marketing company, Strictly Plumbers knows that generic marketing strategies don’t cut it in the specialized world of plumbing services. That’s why we focus exclusively on plumber marketing, leveraging industry-specific insights to boost your online visibility and lead generation. From crafting compelling plumbing Facebook ads to deploying strategic plumber SEO tactics, our team is equipped to handle all aspects of your digital marketing efforts.

Elevate Your Online Game with Plumber SEO and Social Media

The cornerstone of any successful online marketing strategy is visibility. Our plumber SEO company services are designed to elevate your website’s ranking on search engines, ensuring that when customers search for plumbing services, your business appears front and center. We meticulously research and target keywords that potential customers use, increasing the likelihood of them finding and choosing your services.

But we don’t stop at SEO. At Strictly Plumbers, we harness the power of social media for plumbers, creating engaging content and targeted ads that resonate with your audience. By showcasing your services, sharing customer testimonials, and providing valuable plumbing tips, we help you build a community around your brand, fostering trust and loyalty among current and prospective customers.

Boost Your Leads with Plumbers PPC and Facebook Ads

Pay-per-click advertising, including plumbers PPC, offers a fast track to increased visibility and lead generation. Our team expertly manages your PPC campaigns, focusing on high-intent keywords that drive prospective customers directly to your website. Combined with our eye-catching plumber Facebook ads, we create a multi-faceted approach that maximizes your exposure and attracts quality leads.

Innovate with Chatbot for Plumbers

In today’s fast-paced world, customers expect immediate answers. Our chatbot for plumbers service revolutionizes how you interact with website visitors, providing instant responses to their inquiries, scheduling appointments, and even offering preliminary quotes. This not only enhances the customer experience but also streamlines your operations, allowing you to focus on delivering top-notch plumbing services.

Your Digital Partner for Growth

At Strictly Plumbers, we’re not just a plumber marketing agency; we’re your partner in digital growth. By combining our deep understanding of the plumbing industry with cutting-edge marketing strategies, we help your business stand out in a crowded online marketplace. Whether through SEO, social media, PPC, or innovative chatbot solutions, we’re dedicated to driving your success.

Elevate your plumbing business withStrictly Plumbers and watch your digital presence—and your customer base—grow. Let’s dominate the digital world together.

5 SIGNS YOUR AC UNIT MIGHT NOT BE WORKING PROPERLY

Your air conditioning (AC) equipment is essential for your house to remain comfortable, especially in the sweltering summer months. But just like any other item, air conditioners can have problems that impair their functionality. Early detection of malfunctioning components may save expensive repairs and guarantee that your house remains cool and cozy. This post will discuss five typical indicators that your air conditioner may not be functioning correctly.

WEAK AIRFLOW

Weak airflow coming from your air conditioning vents is a direct sign of possible system issues. Issues like clogged air filters, obstructed ducts, or a broken blower motor may be the cause if you find that the airflow feels weaker than normal or that some areas are not receiving enough cooling. Limiting airflow not only reduces cooling effectiveness but also strains the system, increasing energy consumption and even damaging components. To resolve this problem, it’s critical to routinely check and clean the air filters, remove any blockages from the ducting, and, if required, have the blower motor inspected by a specialist.

WARM AIR COMING FROM VENTS

Blowing heated air out of the vents instead of chilly air is another obvious symptom that your air conditioner is having problems. Numerous problems, including leaks of refrigerant, faults with the compressor, or a broken thermostat, might be the cause of this. For instance, insufficient refrigerant levels may make it difficult for the air conditioner to chill the air sufficiently, allowing warm or barely warm air to enter your house. Ignoring this problem might result in more harm to the system’s compressor and other essential parts. If you live in West Texas, then a trained  HVAC Amarillo specialist must examine the system, determine the source of the problem, carry out any required repairs, and recharge the refrigerant in order to solve this issue.

STRANGE NOISES

Your air conditioner may be making unusual noises, which are frequently a sign of underlying technical problems. Noises like as rattling, pounding, grinding, or squealing may indicate issues with the compressor, fan motor, or other internal parts. These noises shouldn’t be disregarded because they might be signs of impending harm or failure. If odd noises are ignored, the system may sustain more damage, or, in the worst-case scenario, the AC unit may break down entirely. It’s critical to arrange for a professional inspection and repair service as soon as possible to identify and address the problem.

FREQUENT CYCLING ON AND OFF

Short cycling, which occurs when your air conditioner cycles on and off often, may indicate an underlying issue. Numerous problems, such as clogged air filters, leaky refrigerant, or oversized air conditioners, might result in short cycling. In addition to compromising comfort, this erratic cycling overworks the system, increasing energy consumption and accelerating component wear and tear. It is crucial to address the underlying cause of short cycling in order to stop more damage and guarantee the AC unit operates efficiently. A skilled technician can identify the problem and suggest workable fixes, such as changing or cleaning the air filter, fixing refrigerant leaks, or adjusting the unit’s size.

INCREASED ENERGY BILLS

Unexpected increases in your energy costs without a matching rise in use may be a sign of AC unit problems or inefficiency. Higher energy costs are sometimes the consequence of a malfunctioning system, which uses more energy to chill your house. It’s critical to get your air conditioning equipment evaluated by a professional to detect and resolve any underlying problems if you observe a noticeable and inexplicable spike in your energy expenses. By taking quick action to fix these issues, you may reduce your energy costs and stop more system damage. Furthermore, planning routine maintenance inspections will assist in maximizing your air conditioner’s performance and gradually lower energy usage.

CONCLUSION

Early detection of these symptoms of AC breakdown will help you take quick action to fix problems and stop more harm to your cooling system. It’s critical to arrange an expert assessment and repair if you observe any of these symptoms to guarantee your air conditioning equipment is operating properly and efficiently. Early issue-solving will save maintenance costs, increase energy efficiency, and keep your family and yourself comfortable indoors.

REMOVING STUBBORN CONSTRUCTION STAINS: TIPS FOR PAINT, CAULK, AND MORE

Are you struggling with stubborn stains left over from construction projects? Whether it’s paint splatters, caulk residues, or adhesive marks, these stains can be a headache to deal with. Fear not! In this comprehensive guide, we’ll walk you through the process of effectively removing construction stains. From paint to caulk and everything in between, we’ll tell you how you can get rid of them efficiently.

GATHER THE NECESSARY SUPPLIES

To effectively remove construction stains, you’ll need the right tools and materials at your disposal. Here are some essential supplies to have on hand:

ü  Chemical paint remover

ü  Scrapers including putty knives and paint scrapers,

ü  Solvents such as mineral spirits or acetone

ü  gloves, goggles, and a mask to protect yourself from harsh chemicals and fumes.

ü  clean cloths or rags

PRECAUTIONARY MEASURES TO TAKE

Before you start tackling stains, it’s important to take some precautions to ensure your safety and the safety of those around you. Here are some tips to keep in mind:

·      Familiarize yourself with the instructions and safety precautions listed on the labels of any cleaning products you’ll be using.

·      Before applying any cleaning product to a large area, test it in a small, inconspicuous area to ensure it won’t damage the surface.

·      Open windows and doors to allow for proper ventilation while you work, especially if you’re using chemical cleaners.

·      Wear gloves, goggles, and a mask to protect yourself from exposure to harsh chemicals and fumes.

·      Dispose of used cleaning cloths, gloves, and other waste materials properly according to local regulations.

PAINT STAIN REMOVAL TECHNIQUES

Paint stains can be a real pain to deal with, especially when they’ve dried and hardened onto surfaces. But fear not, if you are doing post-construction cleaning in Brooklyn all by yourself, there are several techniques you can try to effectively remove them. Let’s break it down step by step.

CHEMICAL PAINT REMOVERS

One of the most effective ways to tackle paint stains is by using chemical paint removers. These products are specially formulated to break down paint, making it easier to scrape or wipe away. You simply apply the remover to the affected area, let it sit for a specified amount of time, and then use a scraper or cloth to remove the softened paint. Be sure to follow the manufacturer’s instructions carefully and wear gloves and protective eyewear to avoid skin and eye irritation.


MECHANICAL METHODS

If you prefer a more hands-on approach, mechanical methods like scraping and sanding can also be effective for removing paint stains. Use a putty knife or scraper to gently scrape away the paint, being careful not to damage the underlying surface. For stubborn stains, you can try using sandpaper to sand away the paint layer by layer. This method requires a bit more elbow grease, but it can be very effective, especially on rough or uneven surfaces.

NATURAL ALTERNATIVES

If you’re looking for a more eco-friendly option, there are natural alternatives you can try for removing paint stains. Vinegar and baking soda, for example, are two common household items that can work wonders on paint stains. Simply mix equal parts vinegar and water, apply it to the stain, and let it sit for a few minutes before scrubbing with a brush or cloth. Baking soda can also be mixed with water to form a paste, which can be applied to the stain and scrubbed away once it dries.

TIPS FOR SPECIFIC SURFACES

When dealing with paint stains, it’s important to consider the specific surface you’re working on. Different materials require different approaches to ensure effective stain removal without causing damage. Here are some tailored tips for handling paint stains on specific surfaces:

Wood Surfaces

·      Avoid abrasive methods to prevent damage to the finish.

·      Use gentle scraping or sanding techniques.

·      Test in a small area before applying any method extensively.

Metal Surfaces

·      Aggressive methods like sanding or chemical paint removers may be suitable.

·      Test in a small area to ensure compatibility and avoid damage.

Concrete Surfaces

·      Employ a combination of scraping, sanding, and chemical removers.

·      Test each method in a small, inconspicuous area first.

EASY TIPS FOR CAULK STAIN REMOVAL

Dealing with caulk stains can be a bit tricky, but with the right strategies, you can make them disappear like magic! Caulk, often used around windows, doors, and other fixtures, can leave unsightly marks if not removed properly. Here’s how to tackle those stubborn caulk stains:

SOFTENING THE CAULK

The first step in removing caulk stains is to soften the caulk to make it easier to remove. You can do this by applying heat to the caulk using a hairdryer or a heat gun set to a low temperature. Hold the heat source a few inches away from the caulk and move it back and forth until the caulk becomes soft and pliable.

CUTTING AND SCRAPING

Once the caulk is softened, it’s time to remove it. Use a sharp utility knife or a putty knife to carefully cut along the edges of the caulk, loosening it from the surface. Then, gently scrape away the softened caulk using the knife, taking care not to damage the surrounding area.

APPLYING A SOLVENT

If there are any stubborn remnants of caulk left behind, you can use a solvent to dissolve them. Apply a small amount of solvent, such as rubbing alcohol or mineral spirits, to a clean cloth and gently rub it over the remaining caulk residue. This should help to loosen it and make it easier to wipe away.

CAULK REPLACEMENT

Once you’ve removed the caulk stains, you may need to replace the caulk to seal the area properly. Choose a high-quality caulk that is suitable for the surface you’re working on, whether it’s silicone, latex, or another type. Follow the manufacturer’s instructions for applying the caulk, and make sure to smooth it out evenly for a clean finish.

CONCLUSION

Removing stubborn construction stains may seem daunting, but with the right approach, it’s entirely achievable. By understanding the nature of the stains and employing the appropriate tools and techniques, you can effectively restore surfaces to their former glory. Remember to prioritize safety, patience, and persistence, and don’t hesitate to seek professional cleaner help for the best renovation cleaning in Brooklyn if needed.