Purchasing your first home is a thrilling milestone, representing a major step toward financial independence and personal achievement. The process can be filled with potential pitfalls that may turn this dream into a challenging experience. These are some of the most frequent mistakes to steer clear of when purchasing your first home.
UNDERESTIMATING THE COSTS INVOLVED
One of the most vital mistakes first-time homebuyers make is underestimating the total costs associated with purchasing a home. Your total cost doesn’t end up with the price of the property. Numerous additional expenses will quickly add up.
These include stamp duty, legal fees, building inspections, and potentially unexpected repairs or renovations. Failing to budget for these can lead to financial strain and stress. To avoid this, it’s essential to conduct thorough research and have a clear understanding of all potential costs, ensuring you have a financial buffer in place.
IGNORING THE IMPORTANCE OF A PRE-APPROVAL
Jumping into the housing market without securing a mortgage pre-approval is a common error. A pre-approval gives you a clear picture of your borrowing capacity and strengthens your position as a serious buyer.
Without it, you may find yourself falling in love with a property that is out of your financial reach or missing out on opportunities due to delays in securing financing. Getting pre-approved helps streamline the buying process and provides peace of mind, knowing exactly how much you can afford.
GETTING EMOTIONALLY ATTACHED
Buying a home is a significant emotional milestone, but allowing emotions to drive your decisions can be a costly mistake. It’s easy to fall in love with a property and overlook its flaws or ignore practical considerations.
To avoid regret, it’s essential to remain objective and consider factors such as the home’s resale value, location, and condition. Enlisting the help of trusted advisors such as Link Properties real estate consultants can provide an unbiased perspective and help keep your emotions in check.
NEGLECTING TO RESEARCH THE NEIGHBOURHOOD
Choosing a home isn’t just about the property itself. The surrounding neighbourhood plays a crucial role in your overall satisfaction and quality of life, too. Yet, many first-time buyers focus solely on the house and fail to investigate the area thoroughly.
It’s essential to evaluate every aspect of the location you currently have in mind. Thoroughly exploring and researching the neighbourhood will ensure it aligns with your lifestyle requirements and long-term objectives.
OVERLOOKING THE INSPECTION PROCESS
Another critical mistake is neglecting the importance of a comprehensive home inspection. While it might be tempting to save money by skipping this step, it can lead to costly surprises down the road.
A professional building inspection can uncover hidden issues, such as structural problems, pest infestations, or faulty wiring. Imagine having to deal with a termite infestation after you move into your new house. Although it is not a common issue, it’s better to be safe and inspect the property before signing any contracts.
FAILING TO PLAN FOR THE FUTURE
Many first-time buyers make the mistake of choosing a home that suits their current needs without considering their future plans. Your circumstances and lifestyle may change over time, so it’s crucial to select a property that can adapt to these changes.
Consider factors such as the potential for family growth, job relocations, or evolving lifestyle preferences. Of course, you don’t know what the future brings, but opting for a house that offers some kind of flexibility is the way to go.
OVEREXTENDING FINANCIALLY
It’s easy to get caught up in the excitement of buying your first home and stretch your budget to its limits. However, overextending yourself financially can lead to significant stress and potential financial hardship.
It’s essential to set a realistic budget and stick to it, considering not only the purchase price but also ongoing expenses such as mortgage repayments, insurance, maintenance, and utilities. Ensuring you have a comfortable financial buffer will help you manage unexpected costs and maintain a stable financial position.
IGNORING THE FINE PRINT
When buying a home, it’s crucial to pay close attention to the fine print in all contracts and agreements. Many first-time buyers make the mistake of not fully understanding the terms and conditions of their mortgage, insurance policies, or purchase agreements.
You should aim to read and comprehend all documents thoroughly and seek professional advice if needed. Understanding the fine print can prevent misunderstandings, protect your interests, and ensure a smooth transaction process.
RUSHING THE DECISION
Rushing into a decision is a common mistake among first-time homebuyers. The pressure to secure a property can lead to hasty choices that you may later regret.
It’s important to take your time, conduct thorough research, and consider all factors before making a decision. Patience and careful planning will increase the likelihood of finding a home that truly meets your needs and expectations.
CONCLUSION
Buying your first home is an exciting journey that requires careful consideration and planning. By avoiding these common mistakes, you can navigate the process more smoothly and make a well-informed decision that brings long-term satisfaction and security.
Detecting and repairing a leak in a home’s pool is essential for maintaining both the structure of the pool and the surrounding property. Leaks can lead to significant water loss, increased utility bills, and potential damage to the pool’s equipment and surroundings. Identifying the presence of a leak requires careful observation and testing to pinpoint the exact location and cause. Once a leak is detected, prompt and effective repair is crucial to prevent further issues. This guide provides detailed steps on how to detect and repair leaks in a home’s pool, ensuring its optimal performance and longevity.
OBSERVING WATER LOSS PATTERNS
The initial step in detecting a pool leak is to observe the water loss patterns in the pool. A noticeable decrease in the water level beyond normal evaporation rates can indicate a leak. To assess this, homeowners should perform the bucket test by placing a bucket filled with water on the pool step and marking the water levels both inside and outside the bucket. By comparing the water loss in the pool to that in the bucket over 24 hours, any significant discrepancies can reveal the presence of a leak. Consistent and unexplained drops in water levels warrant further investigation.
INSPECTING POOL EQUIPMENT AND PLUMBING
The next step involves a thorough inspection of the pool’s equipment and plumbing system. Leaks can often originate from damaged pipes, fittings, or pool equipment such as pumps and heaters. Homeowners should examine all visible plumbing connections and equipment for signs of leakage, such as corrosion, dampness, or water accumulation. Additionally, checking the pool’s filtration system for leaks is essential, as a malfunctioning filter can contribute to water loss. Ensuring that all equipment is functioning correctly can help in pinpointing the source of the leak.
CONDUCTING A DYE TEST
A dye test is a useful method for detecting leaks in specific areas of the pool, such as the shell, skimmers, or returns. By introducing a colored dye or food coloring into the pool water near suspected leak areas, homeowners can observe whether the dye is drawn towards any cracks or gaps. This visual indication helps in identifying the exact location of the leak. It is important to perform the dye test in still water conditions to avoid interference with the results. The dye test is a precise tool for locating leaks that are not immediately visible through other inspection methods.
EXAMINING POOL SURFACES FOR CRACKS
Pool surfaces, including the walls, floor, and tile grout, should be inspected for visible cracks or damage. Cracks in the pool’s structure can lead to significant water loss and should be addressed promptly. Homeowners should look for hairline fractures, loose tiles, or deteriorating grout that might indicate a potential leak. Using a flashlight to examine less visible areas can aid in detecting hidden damage. Addressing any observed cracks or damage through appropriate repairs can prevent further water loss and structural issues.
HIRING A PROFESSIONAL LEAK DETECTION SERVICE
Hiring a professional leak detection service is essential for accurately identifying and addressing leaks in your home’s pool. These experts use advanced technology and techniques to pinpoint the source of leaks that can not be immediately visible. For reliable and precise results, consider employing a service like True Blue Leak Detection, which specializes in thorough and effective leak identification. By relying on professionals, you can ensure that the problem is addressed efficiently, minimizing damage and preventing further issues. Engaging with a reputable leak detection service provides peace of mind and helps maintain the integrity of your pool.
PERFORMING REPAIRS AND MAINTENANCE
Once the leak has been detected, the next step involves performing the necessary repairs and ongoing maintenance. For minor leaks, homeowners can use pool repair kits to seal cracks or gaps in the pool surface or plumbing. For more extensive damage, professional repair services can be required to ensure a durable and effective fix. Regular maintenance, such as checking for signs of wear and tear and monitoring water levels, helps in preventing future leaks. Implementing routine inspections and addressing any issues promptly ensures the pool remains in optimal condition and minimizes the risk of recurring leaks.
CONCLUSION
Detecting and repairing a leak in a home’s pool requires careful observation, testing, and maintenance. By following the outlined steps—observing water loss patterns, inspecting equipment and plumbing, conducting dye tests, examining pool surfaces, and hiring professionals when needed—homeowners can effectively identify and address leaks. Prompt repairs and ongoing maintenance are essential for preserving the pool’s integrity and preventing further issues. A proactive approach to leak detection and repair ensures a well-maintained pool, reduces water loss, and avoids costly damage. Implementing these strategies safeguards the pool’s performance and enhances its longevity.
Smart homes, which enhance daily living with comfort, convenience, and security, are no longer a thing of the future. Imagine coming home to a place where all of your electronics are seamlessly connected, the lighting is automatically adjusted according to the time of day, and the temperature is controlled to your liking. Thanks to smart home technology, this is a feasible reality rather than just a pipe dream. Making your house a smart home entails integrating a number of essential gadgets that complement one another and improve your quality of life.
SMART HUBS AND CONTROLLERS
The brains behind your smart home ecosystem are smart hubs or controllers, which let you manage many devices from a single location. The brain of your house is a smart hub, which connects and controls all of your gadgets with ease. These hubs can control lighting, thermostats, security systems, and more using voice commands and app interfaces. By allowing you to manage all of your smart devices from one location and eliminating the need to switch between numerous apps, these controllers make life easier. One example of automating daily duties is to set up routines that turn off lights and lock doors when you say “goodnight.” Smart hub integration with different smart home installation providers guarantees proper device setup and seamless operation, making your experience hassle-free.
INTELLIGENT LIGHTING OPTIONS
There’s more to smart lighting systems than just the ease of remote light control. They offer programmable lighting sequences that improve the atmosphere in your house. You may customize brightness, color, and schedules with devices to fit your needs and activities. Picture your lights decreasing in the evening to unwind or gently brightening to wake you up in the morning. By enabling you to turn lights off remotely or program them to turn off automatically when a room is empty, smart lighting also increases energy efficiency. Your lighting will be aesthetically pleasing and functionally maximized with the help of smart home installation services, which makes the setup of these systems simple.
CUTTING-EDGE INTELLIGENT SECURITY SYSTEMS
Any smart home must have a strong security system since it offers enhanced monitoring and alarm features that provide peace of mind. Smart security gadgets may be anything from motion detectors to security cameras to video doorbells to smart locks. Comprehensive security systems let you keep an eye on your house in real-time from any location. You can communicate with guests even when you’re not home, thanks to capabilities like motion detection, night vision, and two-way communication that these systems offer. You may remotely lock or unlock doors for visitors or service providers with smart locks.
AIR QUALITY MONITORS AND SMART THERMOSTATS
A comfortable house must have reliable climate control, and smart thermostats with accurate and effective temperature management are available. These gadgets pick up on your preferences and set up heating and cooling regimens that maximize energy savings and lower electricity costs. Some smart air quality sensors also track humidity levels, indoor contaminants, and general air quality. In order to make your interior environment better and guarantee that the air you breathe is pure and healthy, these gadgets offer real-time feedback and suggestions. By installing these systems, you can be sure that the temperature in your house is secure and comfortable.
INTELLIGENT AUDIO AND VIDEO SYSTEMS
Use intelligent audio and video technologies to enhance your entertainment with immersive, high-quality experiences. Smart speakers also come with multi-room audio features and great sound quality. With the integration of these systems with your smart hub, you may use voice commands to control music and other audio material. Voice search, personalized suggestions, and seamless connection with other smart devices are just a few of the features that make smart TVs and streaming devices like Roku, Apple TV, and Amazon Fire TV Stick better for watching. Having your entertainment systems configured for maximum performance by professionals who specialize in smart home installation ensures a seamless and entertaining atmosphere.
CONCLUSION
Adding smart technology to your house is an investment in security, convenience, and well-being. You may design a comfortable and effective living area that meets your needs by combining smart hubs with lighting, security systems, thermostats, and entertainment equipment. As smart home technology continues to advance, the possibilities for home improvement are endless. Upgrade to a smarter house now and start living in the future.
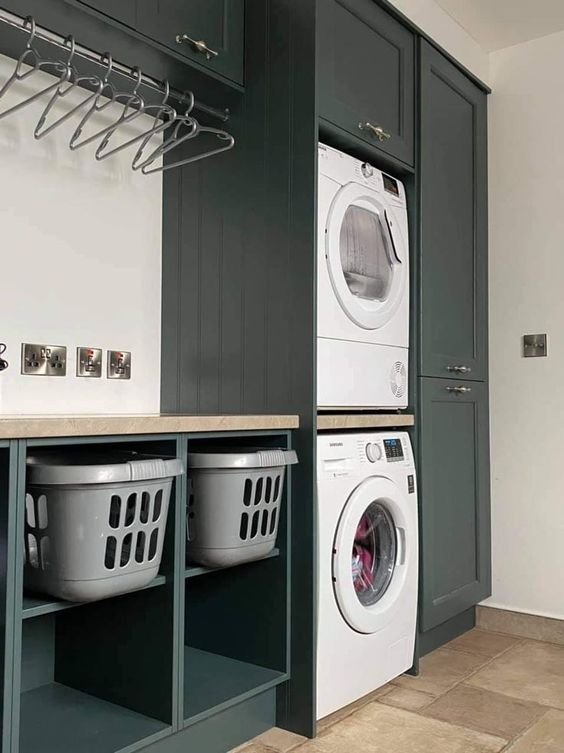
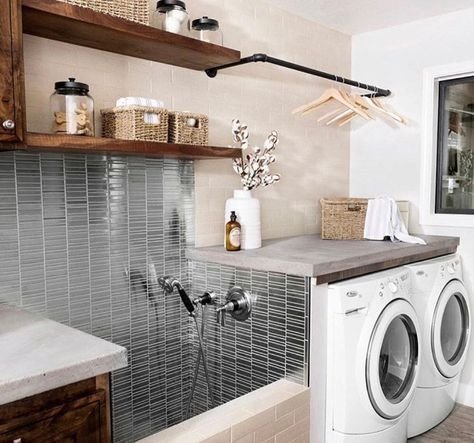
Laundry rooms are often overlooked when it comes to home design. However, with a bit of creativity and attention to detail, this utilitarian space can be transformed into a stylish and functional area that enhances the overall aesthetic of your home. Here are some ideas and tips for creating a beautiful and efficient laundry room.
1. Embrace Minimalism
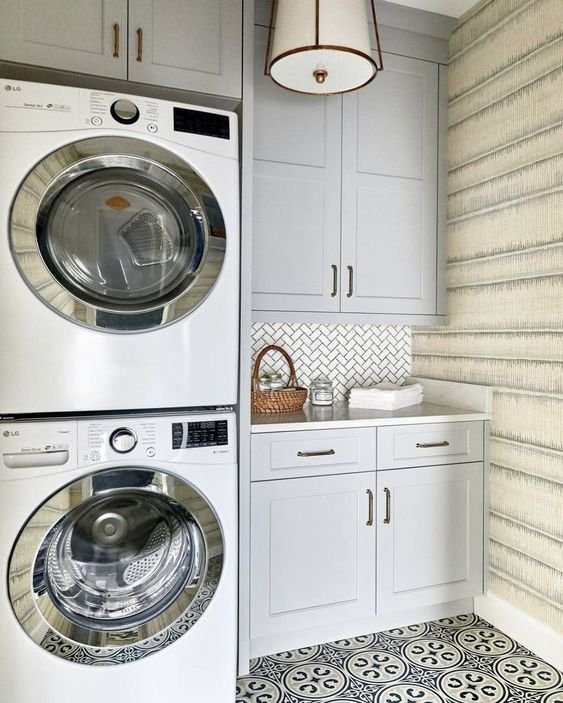
Minimalism is a popular trend in home design, and it works exceptionally well in laundry rooms. By keeping the space clutter-free and focusing on clean lines and simple colors, you can create a serene and orderly environment. Opt for neutral colors like white, grey, or beige, and incorporate sleek storage solutions to keep everything organized. Open shelving can add to the minimalist feel while providing easy access to essentials.
In many homes, the laundry room is a small space that requires efficient use of every inch. Utilizing vertical space can help maximize functionality without sacrificing style. Install cabinets or shelves that reach up to the ceiling to store laundry supplies, cleaning products, and other necessities. A wall-mounted drying rack or pegboard for hanging items can also save space and add a decorative touch.
Natural light can make any room feel more inviting and spacious. If possible, consider adding a window or skylight to your laundry room. If natural light is not an option, opt for bright, energy-efficient lighting fixtures that mimic daylight. Mirrors can also help reflect light and create the illusion of a larger space.
4. Choose Stylish Storage Solutions
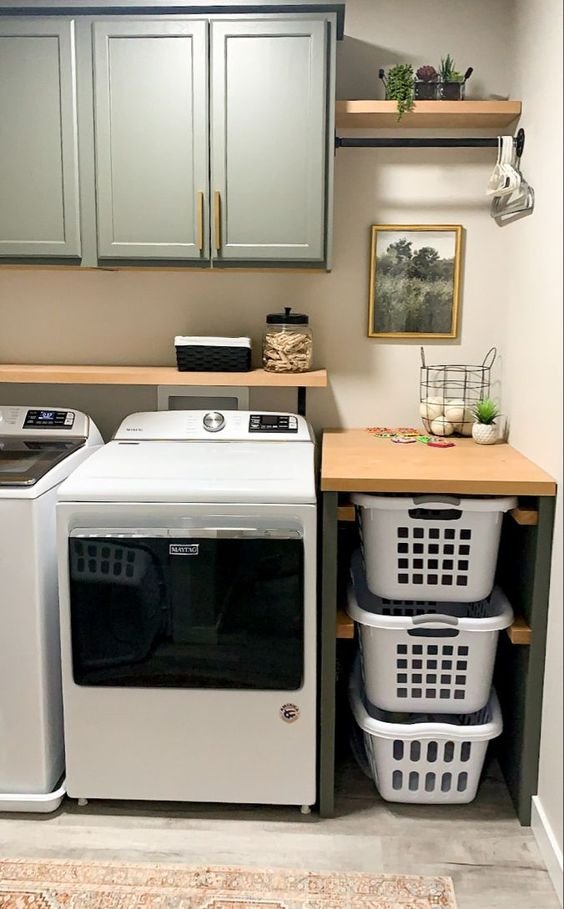
Functional storage doesn’t have to be boring. Choose stylish baskets, bins, and containers to keep your laundry room organized and aesthetically pleasing. Woven baskets, glass jars, and decorative boxes can add a touch of elegance while keeping items neatly stored away. Labeling containers can also help maintain order and add a personalized touch.
5. Add a Pop of Color
While neutral colors create a clean and calming environment, adding a pop of color can bring personality and vibrancy to your laundry room. Consider painting an accent wall, incorporating colorful tiles, or adding bright accessories like rugs, curtains, or artwork. Just a touch of color can make the space feel more inviting and cheerful.
6. Incorporate Functional Furniture
Furniture can play a crucial role in both the functionality and aesthetics of your laundry room. A folding station, for instance, provides a convenient spot to fold clothes and can be designed to blend seamlessly with the room’s decor. A bench with storage underneath can serve as a place to sit and sort laundry while providing additional storage space.
7. Use High-Quality Materials
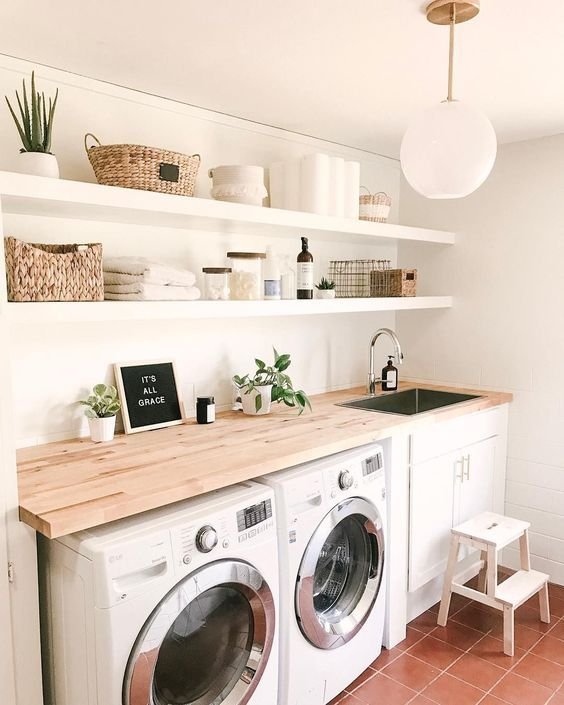
Investing in high-quality materials can enhance the durability and appearance of your laundry room. Consider durable countertops made of quartz or granite, which are not only stylish but also resistant to stains and scratches. For flooring, opt for materials like porcelain tile or luxury vinyl, which can withstand moisture and heavy use while adding a touch of sophistication.
8. Personalize with Decor
Personal touches can make your laundry room feel like an extension of your home’s style. Add decorative elements such as framed artwork, potted plants, or a stylish clock. Even small details like decorative knobs on cabinets or a chic laundry hamper can elevate the overall look of the room.
9. Consider Smart Technology
Incorporating smart technology can enhance the functionality of your laundry room while adding a modern touch. Smart washers and dryers can be controlled via smartphone apps, allowing you to start and monitor laundry cycles remotely. Other smart devices, such as automated lighting and voice-activated assistants, can make laundry day more efficient and enjoyable.
10. Create a Multi-Functional Space
If space allows, consider designing your laundry room to serve multiple purposes. Combining the laundry area with a mudroom, pantry, or craft space can make the room more versatile and valuable. Carefully planning the layout and incorporating multifunctional furniture can help create a seamless and efficient space that meets various needs.
Conclusion
An aesthetically pleasing laundry room can significantly enhance your home’s functionality and charm. By focusing on smart design choices, stylish storage solutions, and personal touches, you can create a laundry room that is both beautiful and practical. Whether you prefer a minimalist approach or a more vibrant design, there are countless ways to transform this essential space into a highlight of your home.
Home improvements are vital for enhancing both the value and comfort of your home. Whether you’re looking to boost curb appeal with outdoor enhancements, add personalized touches to your interior, or make energy-efficient upgrades, there are countless ways to improve your living space.
This comprehensive guide covers essential home improvements that every homeowner should consider to create a more enjoyable and valuable home environment.
LANDSCAPING AND OUTDOOR ENHANCEMENTS
Investing in landscaping and outdoor enhancements can significantly boost your home’s curb appeal and overall value.
One impactful addition is a wrought iron fence. These fences offer a timeless, elegant look and enhance security for your property. Wrought iron fences are known for their durability and low maintenance, making them a practical choice for homeowners.
Outdoor lighting is another valuable enhancement. Strategically placed lights can highlight your landscaping features, improve safety, and create a welcoming ambiance in the evenings.
Consider installing a pergola or gazebo to provide shaded areas for relaxation and outdoor dining. These structures can be adorned with climbing plants or lights to enhance their beauty and utility.
Finally, incorporating comfortable and stylish outdoor furniture can make your outdoor spaces more inviting. Choose weather-resistant materials to ensure longevity and maintain the look and feel of your outdoor areas.
PERSONALIZED INTERIOR DÉCOR
Adding personalized touches to your interior décor can transform your house into a warm and inviting home.
Custom photo blankets are a perfect example. These blankets can be adorned with cherished family photos, memorable vacation snapshots, or even artistic designs that reflect your personal style. They are not only a unique decorative piece but also provide comfort and warmth, making them ideal for cozying up on the couch or as a heartfelt gift.
consider incorporating personalized wall art. Custom canvas prints, framed photos, or even a gallery wall featuring a collection of your favorite images can add a personal touch to any room. Monogrammed pillows and throws are another great option, offering both style and comfort while showcasing your family initials or a special message.
Personalized clocks can add a unique element to your décor, combining functionality with sentimental value. Custom name plaques or wooden signs reflecting your family name or a favorite quote can also make a statement in entryways, kitchens, or living rooms.
Customized furniture, such as an engraved coffee table or a bespoke bookshelf, can become a focal point in your home, blending personalization with practicality. Personalized doormats and welcome signs can greet guests with a warm and inviting touch as they enter your home.
KITCHEN AND BATHROOM REMODELS
Kitchens and bathrooms are often the first areas potential buyers look at, and they can significantly influence a home’s appeal. Upgrading to energy–efficient, stainless steel appliances can make your kitchen more attractive and functional.
Replacing old countertops with granite or quartz and updating cabinets can give your kitchen a fresh, modern look. Installing new faucets, showerheads, and lighting can make a big difference in the bathroom’s appearance and functionality.
ADDING A DECK OR PATIO
Outdoor living spaces are highly desirable, especially in regions with favorable weather. Adding a deck or patio can extend your living area and provide a great space for entertaining. A wooden deck offers a classic choice with a warm, natural look.
Composite decking, which is low–maintenance and durable, is becoming increasingly popular. A stone patio can add elegance and durability to your outdoor space, enhancing both its aesthetic and functional appeal.
Tip: Some home improvements require immediate attention. Prioritize projects that will save you money right away or prevent significant future damage, especially quick and easy fixes like sealing drafts and replacing filters.
ENERGY-EFFICIENT UPGRADES
Energy efficiency is a major selling point for modern homes. These upgrades reduce utility bills and make your home more environmentally friendly. Adding or upgrading insulation in your attic, walls, and floors can significantly reduce heating and cooling costs.
Installing energy-efficient windows can prevent heat loss in the winter and keep your home cooler in the summer. Although the initial investment can be high, solar panels can greatly reduce your energy bills and increase your home’s value.
SMART HOME TECHNOLOGY
Integrating smart home technology can make your home more convenient and attractive to tech-savvy buyers. Smart thermostats help you save on energy costs and provide remote control via smartphone.
Smart lighting systems enhance security and create a customizable ambiance. Modern home security systems with cameras, motion detectors, and remote monitoring add significant value and peace of mind.
ROOFING AND INSULATION UPGRADES
Upgrading your roofing and insulation is a crucial home improvement that can significantly enhance your home’s energy efficiency and overall comfort. A well-insulated roof reduces heat loss in the winter and keeps your home cooler in the summer, leading to lower energy bills.
Start by inspecting your current roofing for any signs of damage, such as missing shingles or leaks. If your roof is in poor condition, consider replacing it with durable materials like asphalt shingles, metal roofing, or clay tiles, depending on your climate and aesthetic preferences. Insulation upgrades are equally important.
Adding or replacing attic insulation with materials like fiberglass, cellulose, or spray foam can greatly improve thermal efficiency.
According to the U.S. Department of Energy, properly insulating your home can save up to 15% on heating and cooling costs.
Additionally, installing a radiant barrier can further reduce heat transfer and enhance your home’s energy performance. These upgrades improve comfort and increase your home’s resale value.
GARAGE AND STORAGE SOLUTIONS
Effective garage and storage solutions can transform a cluttered, underutilized space into a functional and organized area. Begin by decluttering your garage and sorting items into categories: tools, sports equipment, seasonal items, etc.
Installing shelving units and cabinets can provide ample storage and keep items off the floor, making the space more accessible and tidy.
Pegboards and wall-mounted racks are excellent for organizing tools and equipment, allowing for easy access and visibility. For those who need additional workspace, consider setting up a workbench with built-in storage drawers.
Overhead storage systems are ideal for bulky, infrequently used items, such as holiday decorations or camping gear. If you have a two-car garage, consider adding a partition to create a dedicated storage or workspace while still accommodating your vehicles.
PLUMBING AND ELECTRICAL SYSTEM UPDATES
Updating your plumbing and electrical systems is essential for maintaining a safe and efficient home. Outdated plumbing can lead to leaks, water damage, and increased utility bills. Start by inspecting your plumbing for any signs of corrosion, leaks, or clogs.
Replacing old pipes with modern materials like PEX or copper can improve water flow and reduce the risk of leaks. Additionally, consider upgrading to a tankless water heater for increased energy efficiency and endless hot water supply.
Electrical system updates are equally important. Ensure your home’s wiring meets current safety standards and can handle the electrical load of modern appliances and devices. Upgrading your electrical panel and adding dedicated circuits for high-demand appliances can prevent overloaded circuits and reduce the risk of electrical fires.
Installing GFCI outlets in wet areas, such as kitchens and bathrooms, adds an extra layer of safety. Smart home technologies, like programmable thermostats and automated lighting, can enhance your home’s efficiency and convenience.
Regular maintenance and timely upgrades to your plumbing and electrical systems ensure a safe, functional, and energy-efficient home.
TRANSFORM YOUR HOME WITH ESSENTIAL IMPROVEMENTS
Making thoughtful home improvements can greatly enhance your living experience and increase your property’s value. From upgrading your kitchen and bathroom to adding personalized décor and energy-efficient features, each enhancement contributes to a more comfortable and appealing home.
Follow this guide to make strategic upgrades that reflect your style and meet your needs, ensuring a beautiful and functional living space for years to come.
Storing attic items can be a daunting task, especially when you have a variety of items that need safe, organized storage. One solution that has been gaining popularity is renting Intermediate Bulk Containers (IBC totes). But is it worth it? Let’s dive into the benefits and drawbacks of using IBC totes for attic storage.
What Are IBC Totes?
IBC totes are large, reusable containers typically used for transporting and storing liquids and bulk materials. They are made of high-density polyethylene (HDPE) and have a sturdy metal frame, making them durable and versatile. These containers come in various sizes, but the most common is the 275-gallon tote, which offers ample storage space.
Benefits of Using IBC Totes for Attic Storage
1. Durability
IBC totes are built to withstand heavy use and harsh conditions. Their robust construction ensures that your items will be protected from damage, moisture, and pests. This makes them ideal for storing items that are sensitive to environmental conditions, such as electronics, books, and seasonal decorations.
2. Stackability
One of the standout features of IBC totes is their stackability. They can be stacked securely, maximizing vertical space in your attic. This can be especially beneficial if you have a small attic or limited attic storage space.By stacking totes, you can keep your items organized and easily accessible.
3. Ease of Access
IBC totes typically have a large opening at the top, making it easy to load and unload items. Some models also come with a spout or valve, which can be useful if you need to store and dispense liquids. This ease of access can save you time and effort when organizing and retrieving your stored items.
4. Cost-Effective
Renting IBC totes can be a cost-effective solution compared to purchasing traditional storage containers. Many companies offer flexible rental options, allowing you to rent the totes for as long as you need them. This can be particularly useful if you only need temporary storage or are planning a move.
Drawbacks of Using IBC Totes for Attic Storage
1. Size and Weight
While the large size of IBC totes can be a benefit, it can also be a drawback. The totes are bulky and can be heavy when filled, making them difficult to move around. This can be a challenge if your attic has limited space or if you need to frequently rearrange your stored items.
2. Initial Setup
Setting up IBC totes in your attic can require some effort. You may need to clear out existing items and make space for the totes. Additionally, because of their size, you might need assistance in transporting and positioning the totes in your attic.
3. Rental Costs
Although renting IBC totes can be cost-effective, the costs can add up over time. It’s important to compare the rental fees with the cost of purchasing traditional storage containers to determine which option is more economical for your needs.
Is It Worth It?
The decision to rent IBC totes for attic storage depends on your specific needs and circumstances. If you require durable, stackable, and spacious storage solutions, IBC totes can be an excellent choice. They offer significant advantages in terms of protection and organization, particularly for items that need to be stored in a controlled environment.
However, if you have limited attic space or need to frequently access your stored items, the size and weight of IBC totes may pose challenges. Additionally, it’s important to weigh the long-term rental costs against the benefits to determine if this solution is financially viable for you.
For those looking to explore rental options, a reputable provider like Verdetrader.com can offer a range of IBC totes to suit your storage needs. By considering all factors, you can make an informed decision about whether renting IBC totes is the right solution for storing your attic items.
Conclusion
Renting IBC totes for attic storage can be a practical and efficient solution for many homeowners. Their durability, stackability, and ease of access make them a strong contender for storing a variety of items. However, it’s essential to consider the size, weight, and rental costs to ensure that this storage solution aligns with your needs. By evaluating the pros and cons, you can make a decision that will help you keep your attic organized and your items safe.
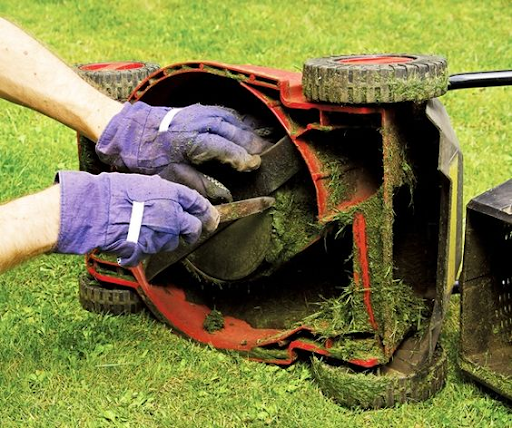
Welcome to our guide on DIY lawn mower repair tips! Learning to troubleshoot and fix common mower issues yourself can save you time and money, keeping your mower in top shape for a lush, healthy lawn all season long.
TOOLS AND SAFETY PRECAUTIONS
Essential Tools Having the right tools on hand is essential for any DIY repair job:
Wrenches and Screwdrivers: Essential for removing and tightening bolts and screws throughout the mower, including those securing the mower cables.
Socket Set: Useful for various mower parts that require socket fittings, ensuring proper tightening and maintenance of mower components.
Pliers and Adjustable Wrench: These tools are invaluable for gripping and turning different components, including nuts and bolts on mower cables and other parts.
Mower-Specific Tools: Include specialized tools such as a blade balancer for ensuring balanced blade operation, a spark plug wrench for easy removal and replacement of spark plugs affecting mower cables, carburetor adjustment tools for maintaining engine performance, and a tension spring tool for adjusting and replacing lawn mower tension springs.
Safety Gear
Always prioritize safety when working on your mower:
Gloves: Protect hands from sharp mower blades, heat from the engine, and chemicals used in maintenance tasks, safeguarding against accidental cuts and burns on mower cables.
Goggles: Shield eyes from debris dislodged during maintenance and potential sparks that can occur when working around the engine or mower cables.
Closed-toe Shoes: Ensure feet are protected from accidental contact with mower blades, hot surfaces, or falling tools, minimizing the risk of injury when handling mower cables and other parts.
COMMON LAWN MOWER ISSUES AND FIXES
Trouble Starting the Mower
If your mower is hard to start, follow these steps:
Check Spark Plug: Inspect for wear or deposits; replace if necessary.
Fuel System: Ensure the fuel line is clear and the carburetor is clean and adjusted properly.
Uneven Cutting or Scalping
To achieve a smooth, even cut across your lawn:
Adjust Mower Deck: Set the deck height according to your lawn’s needs.
Level Blades: Check and adjust blade levels to avoid uneven cutting and potential damage to mower cables.
Excessive Vibration Vibration can indicate issues with blades or mower components:
Inspect Blades: Look for balance issues or damage; balance or replace blades as needed.
Check Bolts and Nuts: Tighten any loose bolts to reduce vibration and ensure mower cables remain secure.
MAINTENANCE AND PREVENTION
Regular Maintenance Checks Keep your mower running smoothly with these maintenance tasks:
Air Filter: Regularly clean or replace the air filter to maintain optimal engine performance. A clean air filter ensures efficient airflow, which is essential for engine operation and reduces strain on mower cables and other components.
Oil Change: Follow the manufacturer’s recommendations for oil changes. Fresh oil lubricates the engine, including mower cables, reducing friction and wear. Regular oil changes also extend the life of your mower’s engine and ensure reliable performance.
Blade Sharpening: Keep mower blades sharp to achieve a clean, precise cut on your lawn. Dull blades can tear grass, leading to uneven cuts and increased strain on the engine and mower cables. Sharpen blades regularly to maintain lawn health and mower efficiency.
Preventive Measures
Avoid future issues with these preventive steps:
Fuel Stabilizer: Add a fuel stabilizer to the gas tank before storing your mower. This prevents fuel degradation and buildup in the carburetor, which can affect engine performance and power cables. Stabilizing fuel ensures easier starting and smoother operation when you use the mower next season.
Proper Storage: Store your mower in a dry, sheltered area, such as a garage or shed, to protect against rust and moisture. Moisture can lead to corrosion of mower cables and other metal parts. Cover the mower with a fitted cover to further shield it from dust and debris during storage, preserving its condition and extending its lifespan.
ADVANCED REPAIRS AND WHEN TO SEEK PROFESSIONAL HELP
Complex Issues
Some mower problems may require advanced skills or professional assistance:
Engine Overhaul: Addressing major engine issues may require specialized knowledge and tools.
Transmission Problems: Issues with mower transmission often need professional diagnosis and repair to avoid damaging mower cables and other components.
Signs to Seek Professional Help
Know when it’s time to consult a professional:
Electrical Issues: Faulty wiring or electrical components should be handled by a qualified technician.
Major Engine Malfunctions: If your mower won’t start or runs rough despite DIY efforts, a professional diagnosis may be necessary.
Extensive Damage: Significant damage to mower cables or other components requires expert evaluation to ensure safe and effective repair.
CONCLUSION
Mastering DIY lawn mower repair skills empowers you to maintain your mower efficiently and effectively. By following these tips, you can tackle common issues, extend the life of your mower, and enjoy a beautifully manicured lawn with confidence.
When considering a lawn upgrade, you may be curious about the cost of artificial grass in Florida, especially if you’re a homeowner looking for a low-maintenance solution. The price can vary based on factors like the type of turf and the area to be covered.
Generally, you can expect to pay between $6 and $19 per square foot for artificial grass installation, including materials and labour.
Understanding the financial commitment is essential. For instance, many homeowners spend an average of $5,749 for a project that typically covers around 500 square feet of lawn space. This means that the total cost to install artificial turf for most homeowners in Florida usually hovers around $7,400.
Beyond the upfront costs, artificial turf saves time and money on lawn maintenance over the long run. With the Florida heat, you can enjoy a lush, green yard without the constant care required by natural grass.
This article provides a detailed breakdown and insights from industry experts at artificialgrass-orlando.com, an artificial grass company based in Florida, you’ll discover more about the costs, benefits, and factors to consider when thinking about transitioning to artificial grass in your own yard.
UNDERSTANDING THE BASICS OF ARTIFICIAL GRASS
Artificial grass, also known as synthetic turf, comes in various types and materials. It offers different benefits compared to natural grass, allowing you to make an informed choice.
TYPES OF ARTIFICIAL TURF
You can find three main types of artificial grass: polyethylene, nylon, and polypropylene.
Polyethylene is the most common. It looks realistic and feels soft, making it great for lawns and playgrounds.
Nylon is durable and suitable for high-traffic areas. It holds its shape well but can be more expensive.
Polypropylene is the least costly but not as durable. It’s often used for decorative or temporary installations.
When choosing a type, consider where you will install it and how much wear and tear it will face.
COMPARING ARTIFICIAL GRASS TO NATURAL GRASS
Artificial grass has several advantages over natural grass. For starters, it requires less maintenance. You won’t need to mow, water, or fertilize it. This can save you time and money in the long run.
Natural grass can provide a cooling effect and is environmentally friendly but requires regular upkeep and watering. Weigh these factors based on your needs and lifestyle.
KEY BENEFITS AND DOWNSIDES
Choosing artificial grass comes with several benefits, including durability and low maintenance.
Durability: It can handle heavy foot traffic, making it ideal for sports fields or busy backyards.
Water Savings: You save on water bills since artificial grass doesn’t need regular watering.
Allergy Reduction: It doesn’t produce pollen, which can help those with allergies.
However, there are downsides to consider.
The upfront cost for installation is higher compared to natural grass.
Synthetic turf can heat up more in sunny conditions, which may not be comfortable to walk on.
By balancing these pros and cons, you can decide if artificial grass is right for your area.
FACTORS INFLUENCING ARTIFICIAL GRASS COSTS
Several key elements play a significant role in determining the cost of artificial grass installation. Understanding these factors can help you make informed decisions that align with your budget and preferences.
TURF MATERIAL AND TEXTURE
The type of turf material you choose greatly impacts the cost. Synthetic grass comes in various qualities, with options varying from basic to premium.
Basic Turf: Typically made from lower-grade synthetic fibres and costs around $2 to $6 per square foot.
Premium Turf: Higher-quality materials such as synthetic fibres designed for a more natural appearance can range from $6 to $12 per square foot.
Additionally, turf texture influences the price. Thicker, denser grass may require more material and therefore, higher costs. Brands like ForeverLawn and SYNLawn offer different textures, which can add to or reduce your expenses.
PROPERTY SIZE AND SHAPE
The size of your property plays a crucial role in calculating total costs. Larger areas require more turf, leading to higher overall expenses. For example, covering 1,000 square feet can cost between $7,500 to $13,000 for installation.
The shape of your yard can also influence the cost. Unusual layouts or hard-to-reach areas might require more labour and extra cuts of turf, which could increase your installation costs. It’s advisable to measure your space accurately to get a clearer understanding of the expenses you might incur.
INSTALLATION COMPLEXITY
The complexity of the installation will directly affect your total costs. If you choose to have features like decks or patios integrated with the turf, the work involved can increase labour costs significantly.
For a simple installation on a flat surface, labour costs might range from $2 to $5 per square foot. However, if your project involves additional grading or removing old grass, this could rise to $6 to $10 per square foot. It’s essential to consider these factors when budgeting for your artificial grass project.
INSTALLATION PROCESS AND EXPENSES
When installing artificial grass, you should understand the steps involved and the associated costs. The installation process includes preparation of the ground, laying and securing the turf, and final touches. Each step plays a key role in ensuring a successful installation.
PREPARING THE GROUND FOR INSTALLATION
The first step is to prepare the area where the artificial grass will go. This involves removing any existing grass, weeds, and debris. You want a clean surface to work with.
Once cleared, you should grade the soil to ensure proper drainage. This may involve adding base materials such as crushed rock or decomposed granite to create a solid foundation. A level base helps prevent water pooling and keeps your turf looking good.
Next, you’ll want to install a weed barrier. This material helps prevent weeds from growing through the artificial grass. The entire ground preparation process can involve costs for materials and labour, generally adding $1 to $3 per square foot to your total expenses.
LAYING AND SECURING THE TURF
After preparing the ground, you can lay down the turf. First, roll out the artificial grass and position it correctly over the prepared area. Pay attention to the seams and ensure they align properly. You can use seam tape and special adhesive to secure the edges where pieces meet.
During this phase, infill material may be added for stability and weight. Options for infill include sand or rubber granules. This not only adds weight but also helps the blades stand upright, making the grass look more natural.
Labour costs for this part of the installation can range from $2 to $5 per square foot, depending on your location and the complexity of the job.
FINISHING TOUCHES AND CLEANUP
Once the turf is laid, you’ll need to add any finishing touches. This includes brushing up the grass to ensure the blades are standing tall and looking fresh. Make sure the turf edges are secure and tidy.
After brushing, it’s important to clean up the site. Remove any leftover materials, tools, or debris from the installation area. A clean space not only looks good but also ensures the longevity of your new turf.
The costs for this final phase can vary, but typically, cleanup can add an additional $0.50 to $1 per square foot to your total project expense.
MAINTENANCE, DURABILITY, AND ADDITIONAL COSTS
Maintaining artificial grass can be simple and cost-effective. By focusing on regular care and understanding durability, you can make informed decisions about this investment. This section covers what you need to know about routine cleaning, repair considerations, and long-term savings.
ROUTINE CLEANING AND CARE
To keep your artificial grass looking its best, regular cleaning is essential. You should remove debris like leaves or branches to prevent dirt buildup. A leaf blower or broom can be helpful.
Every few months, rinse the turf with water to remove dust and pet waste. For deep cleaning, use a mixture of water and mild soap. Be careful with chemicals; avoid pesticides or fertilizers that could damage the turf.
Consider infill maintenance as well. If you have infill materials, like silica sand or rubber, you will need to replenish them every few years. This helps maintain the surface’s softness and durability.
REPAIR AND REPLACEMENT CONSIDERATIONS
Even though artificial grass is durable, certain issues may arise over time. Damage can occur due to heavy use or extreme weather. Pay attention to any faded areas or wear and tear.
If you notice loose seams, you can often fix them with grass adhesive or tape. For larger repairs, it may be necessary to replace sections of the turf. Many companies offer patch kits that match your turf style.
Having a weed barrier fabric installed can reduce the chances of weeds growing under your turf. This further enhances durability and decreases future repair costs.
LONG-TERM SAVINGS VERSUS UPFRONT COSTS
Although the initial investment for artificial grass can be high, it often pays off in the long run. You won’t need to spend money on mowing, watering, or fertilizing your lawn. This can save you several hundred dollars each year.
Additionally, reduced maintenance costs mean you spend less on equipment and servicing. Many homeowners find that the durability of synthetic turf leads to lower overall expenses over time.
Evaluating these factors will help you understand the true value of artificial grass. It can be a practical choice that balances upfront costs with long-term benefits.
TOP ARTIFICIAL GRASS BRANDS AND OPTIONS
When choosing artificial grass, it’s important to consider brand features and costs. Below are some top brands that offer various options to suit different needs.
HIGHLIGHTING BRAND FEATURES AND COSTS
ForeverLawn: Known for its high-quality turf, ForeverLawn offers products with a mix of textures. Their prices range from $5.93 to $12.68 per square foot. The blades are designed to mimic natural grass closely.
SYNLawn: This brand provides durable options with prices between $6.61 and $9.71 per square foot. SYNLawn features different blade shapes, including V-shaped and C-shaped, which enhance the realistic appearance.
ProGreen: ProGreen is popular for its realistic look and feel. The turf is typically priced at about $3.50 to $6.50 per square foot.
PreGra: Their offerings are budget-friendly, ranging from $3.51 to $5.26 per square foot. The turf is designed for various applications, including residential and commercial spaces. By evaluating these brands, you can determine what fits your budget and design expectations.
CHOOSING THE RIGHT TURF FOR YOUR NEEDS
Selecting the right artificial grass involves understanding your specific needs. Consider factors such as usage, installation area, and maintenance preferences.
Blade Shape: Different blade shapes, like S-shaped or W-shaped, affect both appearance and feel. S-shaped blades provide softness, while W-shaped blades offer more durability.
Texture: Choose a texture that aligns with how you’ll use the space. For play areas, a tougher option is wise, whereas a softer texture may suit a decorative lawn.
Purpose: Think about whether the turf will be for pets, play, or low-maintenance landscaping. Brands like Perfect Turf focus on durability for pet owners.
By carefully evaluating these features, you can find the best artificial grass option for your particular environment and lifestyle.
Renovating your home is an exciting journey—from creating vision boards and gathering inspiration from magazines to spending hours on Pinterest and choosing the perfect design. The possibilities are endless, but so is the potential environmental impact if you’re not actively considering it.
Reducing your renovation’s carbon footprint benefits not only the planet but also your wallet in the long run. Eco-friendly renovations can lead to lower energy bills, a healthier living environment, and increased property value.
Let’s dive into some practical ways to make your renovation greener and more sustainable.
UNDERSTANDING YOUR CARBON FOOTPRINT
A carbon footprint is the total amount of greenhouse gasses, primarily carbon dioxide, emitted directly or indirectly by human activities. In the context of renovations, this includes several stages:
In the context of renovations, it could include the following:
Material Extraction and Manufacturing: The production of building materials often involves energy-intensive processes and the release of greenhouse gasses.
Transportation: Moving materials from manufacturers to your home requires fuel and generates emissions.
Construction: The use of heavy machinery and equipment during construction adds to carbon emissions.
Waste Disposal: Demolition and construction waste, if not properly managed, ends up in landfills, producing methane and other greenhouse gasses.
Understanding these contributions helps in identifying areas where you can reduce your impact.
ACTIONABLE STEPS TO REDUCE CARBON FOOTPRINT WHEN RENOVATING
Adopting eco-friendly practices when renovating doesn’t have to be complicated or expensive.
For homeowners, a few thoughtful choices and strategies can make a significant difference. As for individuals in the construction industry, they can take proactive steps to minimize the environmental impact of their projects, paving the way to sustainable and eco-friendly building practices.
Here’s a guide to actionable steps everyone can take to reduce a renovation’s carbon footprint, from planning to execution.
1. PLAN AHEAD
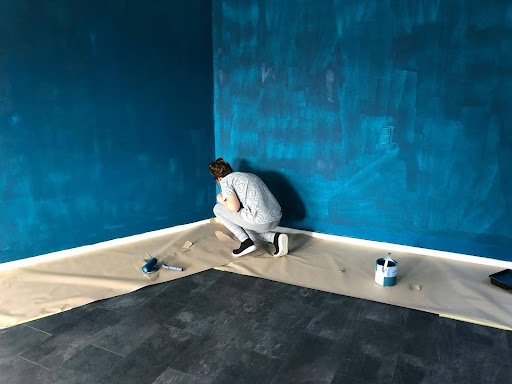
The first step to an eco-friendly renovation is careful planning. Start by designing your project with sustainability at the forefront. Consider energy-efficient layouts, proper ventilation, and natural lighting.
Opt for designs that maximize space efficiency and reduce energy consumption. For example, open floor plans can enhance natural light distribution, reducing the need for artificial lighting.
2. USE RECYCLED MATERIALS
Using recycled materials can significantly reduce the environmental impact of your renovation. These materials require less energy to produce and help divert waste from landfills.
Look for recycled steel, reclaimed wood, and recycled glass. These materials are not only eco-friendly but also add unique character to your home.
3. OPT FOR LOW-VOC PRODUCTS
To ensure your indoor environment remains healthy, it’s crucial to be aware of Volatile Organic Compounds (VOCs). These chemicals, which can easily become gasses, are often found in construction materials and can degrade your indoor air quality.
Low-VOC products reduce the release of harmful chemicals, improving indoor air quality and reducing health risks. They also contribute to a lower overall carbon footprint.
4. INVEST IN ENERGY-EFFICIENT APPLIANCES
Looking to save on energy bills? Check for the Energy Star label on your appliances! This label means the appliance meets the tough energy efficiency standards set by the U.S. Environmental Protection Agency.
Energy-efficient appliances consume less electricity and water, leading to significant cost savings over time and a reduced environmental impact.
5. OPT FOR SCREEN DOORS
Screen doors are a simple yet effective way to enhance your home’s energy efficiency. They allow for natural ventilation while keeping out insects, reducing the need for air conditioning and artificial cooling.
By optimizing airflow, screen doors help maintain a comfortable indoor climate, contributing to lower energy consumption.
6. INCORPORATE SOLAR ENERGY
Installing solar panels can drastically cut down on your home’s reliance on fossil fuels. Solar energy systems provide a renewable source of energy, reducing your carbon footprint.
By harnessing the power of the sun, these systems convert sunlight into electricity, which can be used to power various appliances and devices in your home.
7. IMPROVE INSULATION
Proper insulation is crucial for maintaining energy efficiency. Consider eco-friendly options like cellulose insulation made from recycled paper or cotton insulation made from recycled denim.
Good insulation keeps your home warm in the winter and cool in the summer, reducing the need for heating and cooling systems, thus saving energy and lowering your carbon footprint.
8. UTILIZE NATURAL LIGHTING
Design your renovation to take full advantage of natural light. Large windows, glass doors, and open spaces can help bring in more daylight, reducing the need for artificial lighting.
Installing skylights and large windows can enhance natural light in your home. They not only reduce energy consumption but also create a bright and welcoming atmosphere.
9. IMPROVE PLUMBING EFFICIENCY
Maximize your water savings by installing low-flow toilets, faucets, and showerheads. These innovative fixtures use significantly less water while ensuring top-notch performance, helping you conserve resources and reduce utility bills.
If you have an irrigation system, upgrade to a smart system that adjusts watering schedules based on weather conditions and soil moisture. This reduces water wastage and ensures efficient irrigation.
10. USE SUSTAINABLE LANDSCAPING
Transform your garden into a low-maintenance paradise by choosing native plants that need little water. Adopt xeriscaping to reduce or even eliminate the need for irrigation. Sustainable landscaping practices not only conserve water but also decrease maintenance and enhance your garden’s resilience.
11. RECYCLE CONSTRUCTION WASTE
Proper disposal and recycling of construction waste play a crucial role in reducing the environmental impact of renovations. To do this effectively, separate different materials such as wood, metal, and concrete. Each material should be placed in its designated recycling bin to ensure it is processed correctly and diverted from landfills.
CONCLUSION
Reducing your renovation’s carbon footprint is not only beneficial for the environment but also for your health and finances. By incorporating sustainable practices and materials, you can create a more eco-friendly home that is comfortable, efficient, and valuable.
Start small with a few changes and gradually implement more as you see the benefits. Remember, every step towards sustainability counts!
For more informative articles about home improvement, check out our Blog!
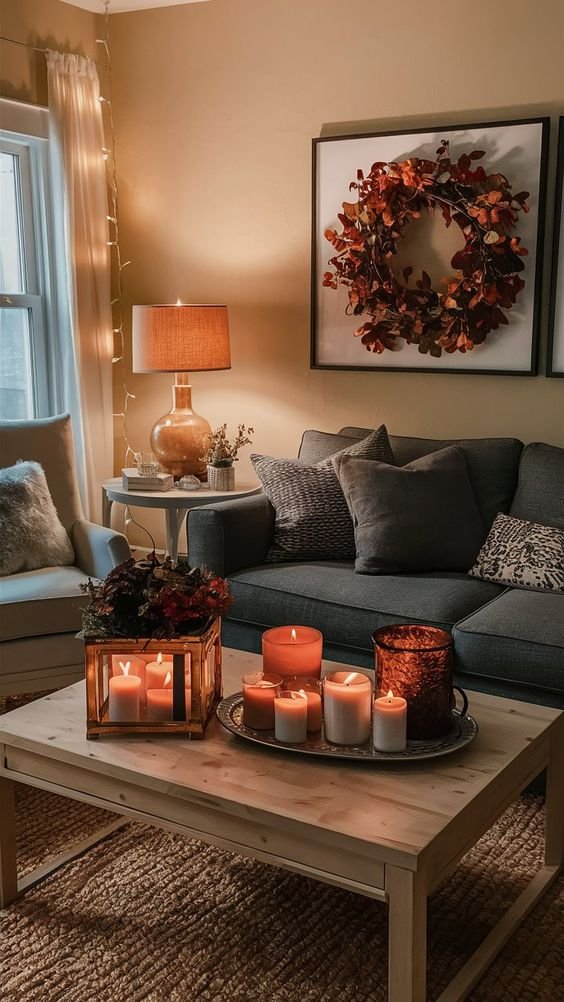
As the sweltering days of summer give way to the crisp, cool embrace of autumn, our homes too can transition to reflect the beauty and warmth of the season. Autumn, with its vibrant colors, earthy scents, and comforting textures, offers a unique opportunity to create a cozy and inviting sanctuary. Whether you’re looking to make small changes or embark on a full seasonal makeover, here’s how to create the perfect autumn home.
Embrace Autumn Colors
Autumn is synonymous with a rich palette of colors. Think deep oranges, warm reds, golden yellows, and earthy browns. Incorporate these hues into your home to instantly evoke the essence of fall.
1. Textiles: Switch out lightweight summer fabrics for heavier, cozier options. Introduce autumn colors through throw blankets, cushions, and rugs. A plaid or tartan blanket in warm tones can add a touch of seasonal charm to your living room or bedroom.
2. Walls and Decor: If you’re feeling bold, consider painting an accent wall in a warm, autumnal shade. For a subtler touch, decorate with artwork, wreaths, and garlands that reflect the season’s colors.
Layer in Comfort
As temperatures drop, layering becomes key not only in your wardrobe but also in your home decor. Creating layers of comfort makes your space feel warm and inviting.
1. Throws and Pillows: Drape cozy blankets over sofas and chairs, and pile on plush pillows in varying textures. Think velvet, faux fur, and chunky knits to add depth and interest.
2. Rugs: Swap out lightweight rugs for thicker, more luxurious ones. Layering a smaller, patterned rug over a larger, neutral one can add warmth and style to your space.
Bring Nature Indoors
Autumn is the perfect time to incorporate natural elements into your home decor. The beauty of the season’s foliage and harvest can be showcased indoors.
1. Centerpieces and Arrangements: Create stunning centerpieces with pumpkins, gourds, and seasonal flowers like mums and dahlias. Add in some eucalyptus or wheat for texture and a touch of green.
2. Decorative Accents: Use pinecones, acorns, and branches as decorative accents. A simple bowl of pinecones or a vase filled with branches can bring an autumnal feel to any room.
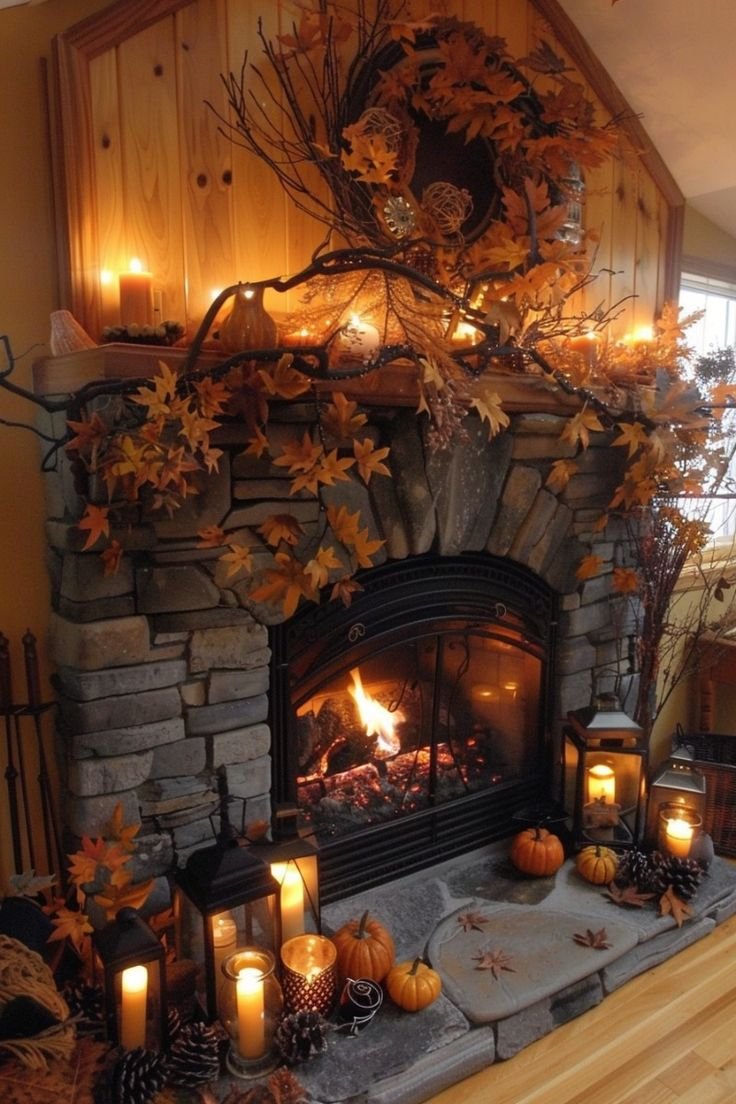
Set the Mood with Lighting
The shorter days and longer nights of autumn call for warm, inviting lighting. Create a cozy ambiance with the right lighting choices.
1. Candles: Scented candles in fragrances like pumpkin spice, apple cinnamon, and vanilla can make your home smell like autumn while providing a soft, flickering glow.
2. String Lights: Drape string lights around windows, door frames, or along mantels to add a magical touch. Opt for warm white or amber lights for a more autumnal feel.
3. Lamps and Lanterns: Incorporate table lamps and lanterns with warm-toned bulbs to create a soft, inviting glow. Consider adding dimmers to your existing lighting to control the ambiance.
Indulge Your Senses
Autumn is a sensory season. Engage all your senses to fully embrace the coziness of your autumn home.
1. Scents: Beyond candles, use essential oils or simmer pots with cinnamon sticks, cloves, and orange peels to fill your home with the aromas of fall.
2. Textures: Incorporate a variety of textures throughout your home. Think woolen throws, velvet cushions, and wooden accents. The tactile experience adds to the overall coziness.
3. Sounds: Create an autumn playlist with soft, acoustic tunes or nature sounds like rustling leaves and crackling fires to enhance the cozy atmosphere.
Seasonal Entertaining
Autumn is a wonderful time to gather with loved ones. Make your home the perfect place for entertaining during the season.
1. Dining Table: Set a beautiful autumn table with seasonal tablecloths, placemats, and centerpieces. Use earthy tones and natural materials like wood and stone for a rustic look.
2. Outdoor Spaces: Don’t forget your outdoor areas. As long as the weather permits, create a cozy outdoor space with fire pits, blankets, and warm lighting for chilly evenings.
3. Comfort Foods: Embrace autumn cooking with hearty soups, stews, and baked goods. The scent of freshly baked pumpkin bread or apple pie can make your home feel instantly inviting.
Conclusion
Creating the perfect autumn home is all about embracing the warmth, comfort, and beauty of the season. With a few thoughtful changes, you can transform your space into a cozy retreat that celebrates everything we love about fall. Whether you’re curling up with a good book, hosting a dinner party, or simply enjoying the changing colors outside your window, your autumn home will be the perfect backdrop for all your seasonal activities.