Everything You Need to Know About Painting Old Brick Walls

Are you tired of looking at the same old brick walls day after day? Do you dream of a fresh and vibrant space that reflects your unique style? Look no further! In this article, we will explore the transformative power of paint and how it can breathe new life into old brick walls. Whether you’re a homeowner looking to update your living space or a business owner wanting to revamp your storefront, painting your brick walls can create a stunning visual impact. From bold and vibrant colors to subtle and sophisticated hues, the possibilities are endless. Not only does a fresh coat of paint enhance the aesthetic appeal of your space, but it also protects your walls from weathering and damage. So why wait? Let’s dive in and discover how you can unleash the potential of your brick walls with the simple stroke of a brush.

BENEFITS OF PAINTING OLD BRICK WALLS

Painting old brick walls comes with a myriad of benefits that go beyond just the visual appeal. One of the most significant advantages is the ability to completely transform the look and feel of a space. Whether you want to create a cozy and rustic atmosphere or a modern and industrial vibe, painting your brick walls can help you achieve the desired ambiance.

Additionally, painting your brick walls provides an extra layer of protection against the elements. Over time, weathering and exposure to the elements can cause brick walls to deteriorate. By applying a coat of paint, you can protect the bricks from moisture, reducing the risk of cracks and damage.

Furthermore, painted brick walls are much easier to clean and maintain compared to bare brick. Dust and dirt tend to accumulate on the rough surface of bare brick, making it a challenging task to keep the walls looking clean. However, with painted brick walls, a simple wipe-down with a damp cloth is usually sufficient to maintain their appearance.

PREPARING THE BRICK SURFACE FOR PAINTING

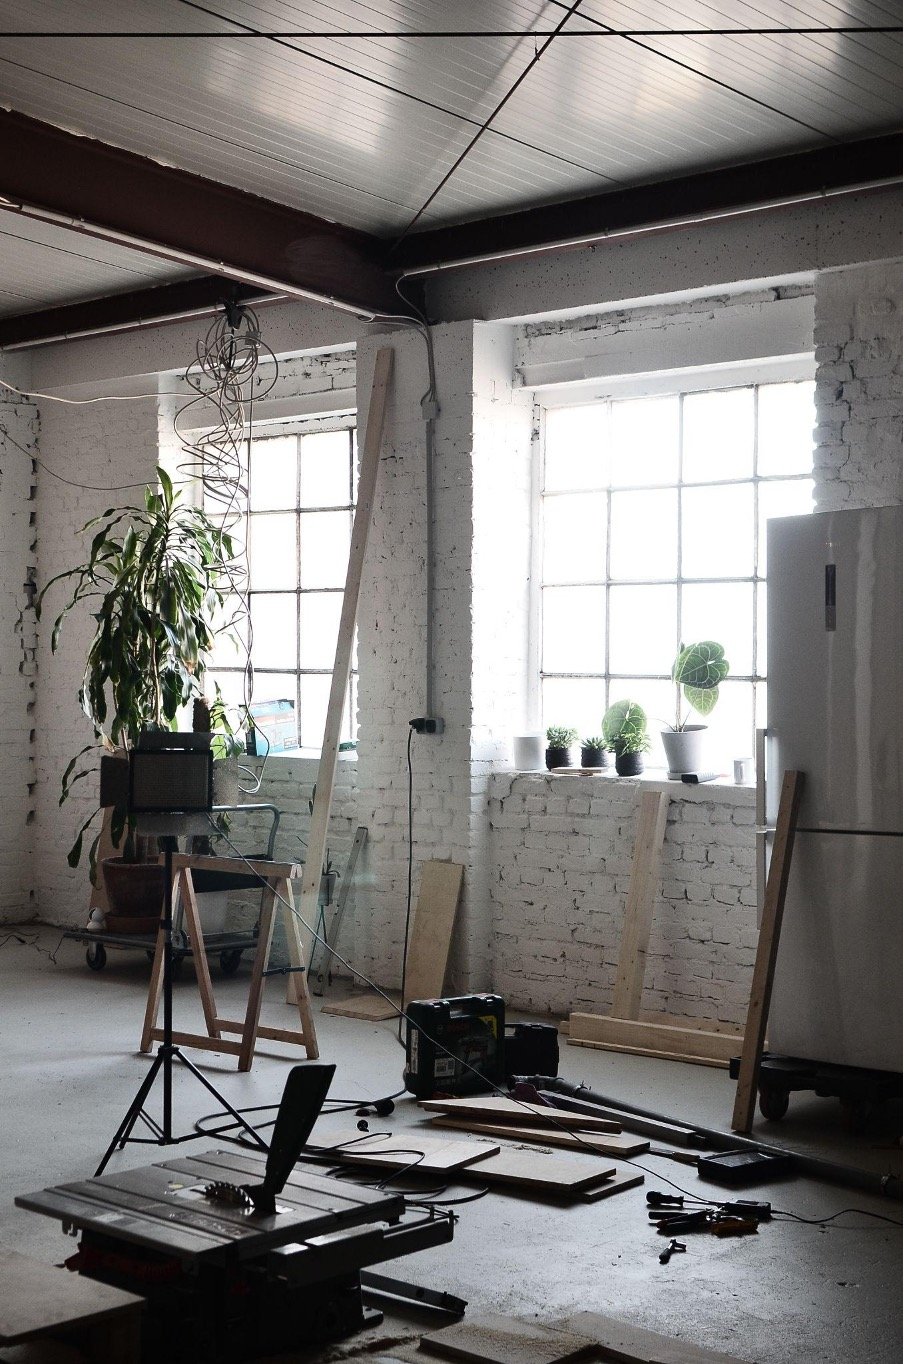
Before you start painting your old brick walls, it is crucial to properly prepare the surface to ensure the best results. The first step is to thoroughly clean the brick walls to remove any dirt, dust, or debris. A power washer or a stiff-bristle brush can be used to scrub the surface and remove any stubborn stains.

Once the walls are clean and dry, it is essential to inspect them for any cracks or loose mortar. These should be repaired before painting to ensure a smooth and even finish. Use a mortar repair product to fill in any cracks or gaps, and allow it to dry completely.

To create a suitable surface for the paint to adhere to, it may be necessary to apply a primer. A primer helps seal the pores of the brick and provides a better surface for the paint to bond to. Choose a primer specifically designed for masonry surfaces and apply it evenly using a roller or brush.

CHOOSING THE RIGHT PAINT FOR OLD BRICK WALLS

Selecting the right paint for your old brick walls is crucial to achieving the desired result. When choosing a paint, consider the type of finish you prefer, as well as the durability and longevity you desire.

For a more traditional and timeless look, consider using mineral-based limewash paint. These paints are breathable, allowing moisture to escape from the bricks and preventing peeling or cracking. They also provide a beautiful matte finish that enhances the natural texture of the brick. 

If you prefer a more modern and sleek appearance, consider using acrylic paint. Acrylic paints are known for their durability and resistance to fading, making them an excellent choice for outdoor brick walls. They also offer a wide range of color options, allowing you to experiment with bold and vibrant shades.

For interior brick walls, water-based latex paints are a popular choice. They are easy to clean, quick-drying, and come in a variety of finishes, including matte, satin, and semi-gloss. These paints are also low in odor, making them suitable for indoor use.

STEPS TO PAINT OLD BRICK WALLS

Now that you have prepared the brick surface and chosen the right paint, it’s time to start painting your old brick walls. Here are the steps to follow for a successful painting project:

●      Begin by applying a coat of paint to the corners and edges of the walls using a brush. This will ensure that these areas are properly covered.

●      Once the corners and edges are painted, use a roller to apply the paint to the larger sections of the walls. Start from the top and work your way down, applying even pressure to achieve a smooth and consistent finish.

●      Avoid applying too much paint at once, as it can lead to drips and uneven coverage. Instead, apply thin layers of paint and allow each layer to dry before applying the next. This will help you achieve a professional-looking finish.

●      If you want to add texture or create a distressed look, consider using a sponge or rag to dab or wipe the paint while it is still wet. This technique can add depth and character to your painted brick walls.

●      Once you have finished painting, allow the walls to dry completely before adding any additional coats. Follow the manufacturer’s instructions for drying time to ensure the best results.

TIPS FOR ACHIEVING A PROFESSIONAL FINISH

Achieving a professional finish when painting old brick walls requires attention to detail and careful execution. Here are some tips to help you achieve the best results:

●      Use high-quality paint and tools to ensure a smooth and even application. Investing in good-quality materials will make a noticeable difference in the final outcome.

●      Take your time and work in small sections to ensure that the paint is applied evenly. Rushing the process can lead to streaks, drips, and an overall uneven finish.

●      Consider using a paint sprayer for larger areas to achieve a more uniform and efficient application. However, be mindful of overspray and protect surrounding surfaces to avoid unnecessary cleanup.

●      When applying multiple coats of paint, sand lightly between each coat to remove any imperfections and create a smooth surface. This will help the subsequent coats adhere better and result in a flawless finish.

●      Pay attention to the lighting in the room or space where the brick walls are located. Different lighting conditions can affect how the paint color appears, so it’s a good idea to test a small area or use paint samples before committing to a particular color.

CREATIVE IDEAS FOR PAINTED BRICK WALLS

Painting your old brick walls opens up a world of creative possibilities. Here are some ideas to inspire you:

●      Create a focal point by painting a single brick wall in a bold and vibrant color. This can add visual interest and make a statement in any room.

●      Experiment with geometric patterns or stencils to add a unique and personalized touch to your painted brick walls. This can be a fun and creative DIY project that allows you to showcase your artistic side.

●      Consider using different shades of the same color to create a subtle and sophisticated look. This technique adds depth and dimension to the walls while maintaining a cohesive color scheme.

●      Opt for a whitewashed or distressed look for a rustic and vintage feel. This technique involves applying diluted white paint to the brick surface, allowing some of the natural brick color to show through.

●      If you’re feeling bold, consider a mural or a hand-painted design on your brick walls. This can be a stunning focal point and a conversation starter in any space.

MAINTENANCE AND CARE FOR PAINTED BRICK WALLS

To ensure that your painted brick walls retain their beauty and longevity, it is important to provide regular maintenance and care. Here are some tips to help you keep your painted brick walls looking their best:

●      Clean the walls regularly to remove dust, dirt, and any other debris. Use a mild detergent and a soft brush or cloth to avoid damaging the paint.

●      Avoid using harsh chemicals or abrasive cleaners that can strip away the paint or damage the brick surface. Stick to gentle cleaning solutions and techniques.

●      Inspect the walls periodically for any signs of damage or wear. If you notice any chips, cracks, or peeling paint, touch up the affected areas promptly to prevent further deterioration.

●      Consider applying a clear coat or sealer to the painted brick walls to provide an additional layer of protection. This can help prolong the life of the paint and enhance its durability.

●      If you live in an area with extreme weather conditions, such as high humidity or freezing temperatures, take extra precautions to protect your painted brick walls. This may include applying additional coats of paint or using specialized weather-resistant products.

CONCLUSION

Painting old brick walls is a fantastic way to transform your space and unleash its full potential. From enhancing the aesthetic appeal to providing protection against the elements, painting your brick walls offers a multitude of benefits. With proper preparation, the right paint selection, and careful execution, you can achieve a professional finish that will breathe new life into your old brick walls. So why settle for the ordinary when you can create the extraordinary? Grab that brush and let your creativity soar as you embark on the journey of transforming your space one stroke at a time.

Guest Contributor: Stephanie Snyder

THE SECRET TO HOME PERFECTION: HARNESSING THE POWER OF CONSISTENT MAINTENANCE

Tired of constant repairs and costs? Dream of a perfectly maintained home that runs effortlessly? The secret is consistent maintenance. Transform your living space into a well-oiled machine through regular upkeep.

Explore the importance of maintenance, creating a schedule that suits you, and the benefits of proactive care in this article. Revolutionize the way you take care of your home with efficient maintenance tips and strategies.

Mold Remediation Services in North Central Florida provide professional and comprehensive mold remediation services in North Central Florida, effectively removing mold and restoring indoor air quality to ensure a safe and healthy living environment.

Take control of your living space and unlock the secret to home perfection. Let’s begin!

KEY TAKEAWAYS

●      Regular upkeep is important for keeping the home safe, functional, and valuable.

●      Creating a maintenance schedule helps to prevent costly repairs and provides peace of mind.

●      Proactive measures, such as regular inspections and cleaning, can help prevent expensive repairs.

●      Incorporating technology and DIY techniques can enhance efficiency and save time and money.

THE IMPORTANCE OF REGULAR UPKEEP

Keep your home in top shape with regular upkeep and inspections. Catch issues early to save time, money, and stress.

Regular upkeep is of utmost importance when it comes to maintaining the long-term quality, functionality, and appeal of your home. Scheduling routine inspections and addressing any issues promptly can save you from costly repairs and unexpected emergencies in the future.

By staying on top of maintenance tasks such as cleaning, organizing, and checking for wear and tear, you can ensure that your living space remains safe, comfortable, and aesthetically pleasing.

Consistent upkeep also contributes to a positive mindset and overall well-being, as a well-maintained home promotes peace, tranquility, and pride of ownership.

So, prioritize regular upkeep to enjoy a home that not only stands the test of time but also provides a sanctuary for you and your loved ones.

CREATING A MAINTENANCE SCHEDULE

Stay on top of home upkeep with a scheduled maintenance routine.

Regular checks and maintenance prevent expensive repairs and offer peace of mind. Embrace technology for efficient home maintenance through apps and smart devices. Plan ahead for a comfortable, beautiful home.

Start today and enjoy the benefits of a well-maintained home.

PREVENTING COSTLY REPAIRS

Avoid costly repairs and maintain your home’s integrity through proactive measures. Regularly inspect appliances, HVAC, and plumbing to catch issues early. Prevent water damage by cleaning gutters and checking for foundation leaks.

Save money and gain peace of mind with proactive maintenance. Increase component lifespan, reduce emergencies, and create a welcoming environment. Roll up your sleeves and start today for a grateful home and wallet.

TIPS FOR EFFICIENT HOME MAINTENANCE

Maximize your home’s lifespan and minimize emergencies with efficient maintenance tips. Save time by tackling small tasks regularly.

Embrace DIY maintenance hacks to save money and fix common issues. Stay proactive to save on costly repairs and create an excellent and efficient home. Roll up your sleeves and become a maintenance superstar. Your home will thank you.

TRANSFORMING YOUR LIVING SPACE THROUGH CONSISTENT CARE

Transform your living space into a comforting haven with regular maintenance. Commit to daily efforts for a clean and inviting sanctuary. Stay on top of small tasks to avoid overwhelm and enjoy a positive mindset.

Save time, money, and stress by maintaining proper working order. View maintenance as an opportunity for growth and self-improvement. Embrace mindful living and witness the incredible transformation of your space and life.

CONCLUSION

Unlock the secret to home perfection through consistent maintenance. Stay proactive, prevent costly repairs, and maintain a pristine living space. Transform your home into a sanctuary by embracing efficient maintenance.

Let’s get motivated and energized to care for our homes, creating an inspiring and rejuvenating space with just a little effort.

FREQUENTLY ASKED QUESTIONS

WHAT ARE SOME COMMON MISTAKES HOMEOWNERS MAKE WHEN IT COMES TO REGULAR UPKEEP?

Common mistakes homeowners make with regular upkeep include neglecting important areas like gutters, HVAC systems, and landscaping. By focusing on these neglected areas, you can transform your home into a haven of perfection.

HOW OFTEN SHOULD I CLEAN OR REPLACE AIR FILTERS IN MY HOME?

You should clean or replace your air filters every 1 to 3 months to maintain a healthy home environment. Regular cleaning frequency and filter replacement ensure clean air, keeping you energized and motivated to enjoy your perfect home.

ARE THERE ANY SPECIFIC MAINTENANCE TASKS THAT SHOULD BE DONE SEASONALLY?

Don’t overlook the importance of seasonal maintenance tasks! They’re essential for keeping your home in top shape. From cleaning gutters to inspecting HVAC systems, regular upkeep ensures a beautiful and well-functioning home year-round.

HOW CAN I PREVENT WATER DAMAGE IN MY HOME?

Prevent water damage in your home by prioritizing regular maintenance. It’s crucial to stay proactive and fix any leaks or cracks immediately. By doing so, you’ll protect your property and ensure a safe, dry, and perfect home.

WHAT ARE SOME SIGNS THAT INDICATE THE NEED FOR IMMEDIATE REPAIRS OR MAINTENANCE IN A HOME?

“Notice any signs of home repair urgency? Don’t wait! Act now to prevent further damage. Regular home maintenance is vital for a safe and beautiful living space. Take charge and maintain your home’s perfection!”

EXTENDING YOUR HOME’S AESTHETIC TO THE GARDEN

For many homeowners, their indoor living spaces are thoughtfully designed and decorated to reflect their unique style and personality. However, creating a harmonious transition from indoors to outdoors can enhance the property’s overall appeal and provide a seamless connection with nature. Extending the home’s aesthetic to the garden offers an opportunity to transform the outdoor space into a beautiful and inviting extension of the interior. This article will explore how homeowners can create a cohesive and stylish outdoor environment that complements their indoor living spaces.


1. Unifying Color Palettes

Successful integration between indoors and outdoors begins with selecting a cohesive color palette. Take cues from the interior color scheme and extend it to the garden. Consider using similar shades for outdoor furniture, cushions, and decorative elements to create a sense of continuity.

Introduce plants and flowers that echo the colors used indoors. For example, if the living room features a calming palette of blues and greens, incorporate plants with similar hues, such as lavender, hydrangeas, and hostas, into the garden. This unification of colors creates a sense of flow and harmony between the indoor and outdoor spaces.


2. Cozy Outdoor Living

Create comfortable and inviting outdoor seating areas that mimic the coziness of indoor living rooms. Invest in plush outdoor sofas, chairs, and ottomans with weather-resistant cushions. You should layer the seating with throw pillows and soft blankets for added comfort. To anchor the seating areas and define spaces, consider adding outdoor rugs. Rugs made from durable materials such as polypropylene can withstand the elements while adding warmth and style to the patio or deck. To ensure the space remains relaxed and welcoming, you will need to learn how to look after your lawn and outdoor spaces properly.


3. Extending Design Themes

To ensure cohesion between the outside and the inside, you could incorporate architectural elements that mirror the home’s design style. For example, if the house features a contemporary design with clean lines, consider adding modern pergolas, sleek water features, and minimalist planters in the garden.

You can also extend the use of materials and textures from indoors to outdoors. If the interior features natural stone or wood, incorporate these elements into outdoor pathways, walls, and furniture. This consistency in materials creates a visual connection between the spaces.


4. Outdoor Lighting

Create a magical ambiance with string lights and lanterns that illuminate the garden during the evening. String lights can be draped across pergolas or hung from trees, while lanterns can be placed strategically throughout the garden to provide soft and inviting lighting. Use up-lighting and spotlights to highlight architectural features, sculptures, or focal points in the garden. This creates a dramatic effect and draws attention to specific areas, like indoor accent lighting.


Conclusion

Extending the home’s aesthetic to the garden creates a seamless and harmonious transition between indoor and outdoor living spaces. Unifying color palettes, bringing indoor comfort outdoors, extending design themes, and thoughtful outdoor lighting are key elements that enhance the property’s overall appeal. By creating a beautiful and inviting outdoor environment, homeowners can enjoy a delightful and cohesive living experience that connects them with the beauty of nature right at their doorstep.

EFFECTIVE WAYS TO KEEP YOUR HOUSE COMFORTABLE DURING SUMMER

As summer temperatures rise, keeping your house cool becomes a top priority for maintaining comfort and well-being. Escaping the sweltering heat and creating a relaxing indoor environment is not only essential for your own comfort but also contributes to energy efficiency. Here are some practical and eco-friendly tips to help you beat the heat and keep your house cool during the scorching summer months.

Use Proper Insulation

Good insulation is a crucial factor in maintaining a cool home during summer. Insulating your house effectively prevents heat from infiltrating the interior and keeps the cool air inside. Focus on sealing gaps around windows and doors and consider using reflective window films to block out direct sunlight while still allowing natural light to filter through.

Windows and Curtains

During the day, close windows and curtains on the side of your home facing direct sunlight to block out the heat. When the outside temperature cools down in the evening, open windows and use fans to promote cross-ventilation. You can also invest in blackout curtains or light-colored drapes to reduce heat absorption and keep your rooms cooler.

Ceiling Fans and Portable Fans

Ceiling fans are an excellent and energy-efficient way to circulate air and create a cooling breeze indoors. Set your ceiling fans to rotate counterclockwise during summer to push air downward and create a wind-chill effect. Additionally, using portable fans in strategic locations can further enhance air circulation and help cool down specific areas.

Make Use of Natural Ventilation

Make the most of cooler nights and mornings by allowing natural ventilation to cool your home. Open windows and doors on opposite sides of your house to encourage cross-ventilation. This simple technique can bring in fresh air and flush out accumulated heat, providing a comfortable indoor environment without relying on air conditioning.

Opt for Energy-Efficient Cooling Systems

If you need to use air conditioning, consider upgrading to a more energy-efficient model. Look for units with a high SEER (Seasonal Energy Efficiency Ratio) rating to ensure effective cooling while minimizing energy consumption. Regular maintenance of your cooling system, such as cleaning or replacing filters, is essential to maintain its efficiency.

Create Shade Outdoors

Strategically planting trees or installing awnings, pergolas, or canopies outside your home can significantly reduce the amount of direct sunlight that enters your living spaces. This natural shade not only keeps your house cooler but also enhances your outdoor living areas.

Minimize Heat Sources

During hot summer days, avoid using heat-generating appliances like ovens and stoves. Instead, opt for outdoor cooking or utilize small kitchen appliances like microwaves and slow cookers. Incandescent light bulbs also emit heat, so consider switching to energy-efficient LED bulbs, which produce significantly less heat.

Stay Hydrated and Dress Comfortably

Personal comfort plays a vital role in dealing with summer heat. Stay hydrated by drinking plenty of water, and wear lightweight and breathable clothing made from natural materials like cotton. Using cooling towels or taking refreshing showers can also help you feel cooler during the hottest parts of the day.

Conclusion

With these practical tips, you can keep your house cool and comfortable during the scorching summer months without resorting to excessive energy consumption. By being mindful of insulation, ventilation, shade, and energy-efficient cooling options, you can create a refreshing oasis within your home, allowing you to enjoy the summer while staying cool and comfortable.

HOW TO DEAL WITH COLORADO LEASE AGREEMENTS

Are you a landlord in the breathtaking state of Colorado? Dealing with lease agreements effectively is crucial to ensure a smooth and legally compliant rental experience. In this informative blog post, we will guide you through the ins and outs of Colorado lease agreements, equipping you with essential knowledge and best practices to create, manage, and navigate these contracts in accordance with state rental laws. Whether you’re a seasoned landlord seeking to refine your leasing process or a newcomer venturing into the rental market, this comprehensive guide will empower you to establish a strong foundation for a successful and harmonious landlord-tenant relationship. Let’s delve into the world of Colorado lease agreements and unlock the key to a thriving rental business.


Know the Basics of a Lease Agreement

A lease agreement is a legally binding contract between a landlord and a tenant, outlining the terms and conditions of the rental arrangement. Understanding the fundamental components of a lease agreement is vital. This includes knowing the parties involved, the property’s address, the lease term, rent amount, security deposit, and any rules and regulations that pertain to the tenancy.


Create a Clear and Concise Lease Document

When drafting a lease agreement, clarity is key. Use straightforward language that is easy for both parties to understand. Ensure that the document covers all essential aspects of the tenancy, leaving no room for misinterpretation. A well-structured and comprehensive lease agreement sets the foundation for a successful rental relationship.


Include Necessary Disclosures

Colorado law requires specific disclosures to be included in lease agreements. For example, landlords must disclose the existence of lead-based paint in properties built before 1978. Additionally, you must inform tenants about the landlord’s contact information and any fees related to returned checks.


Outline Rent Payment Terms

Clearly specify the rent amount, the due date, and the accepted payment methods in the lease agreement. Include late fees and penalties for overdue rent to encourage timely payments. Abiding by the rent payment terms ensures a consistent cash flow and reduces potential disputes.


Set Rules for Security Deposits

In Colorado, landlords are allowed to charge a security deposit of up to one month’s rent for unfurnished properties and one and a half month’s rent for furnished properties. Outline the conditions for retaining or returning the security deposit at the end of the tenancy, and provide tenants with a written receipt for the deposit.


Address Maintenance and Repairs

Clearly outline the obligations of both the landlord and the tenant concerning maintenance and repairs. Colorado law requires landlords to maintain the property in a habitable condition and promptly address essential repairs. Specify the procedures for reporting repair requests and any limitations on tenant-initiated repairs.


Include Pet Policies

If you allow pets on the property, clearly outline the pet policies in the lease agreement. State any pet fees or deposits required, the maximum number of pets allowed, and any specific rules related to pet ownership.


Detail Entry and Inspection Policies

Colorado law grants tenants the right to privacy, so it’s crucial to define entry and inspection policies in the lease agreement. Specify the notice period required before entering the property for non-emergency purposes, such as repairs or inspections.


Understand Lease Renewal and Termination

Clearly outline the procedures for lease renewal and termination. In Colorado, the notice period for lease termination is generally 21 days for month-to-month tenancies and 60 days for fixed-term leases. Ensure that both parties are aware of their rights and obligations during these processes.


Comply with Fair Housing Laws

Ensure that your lease agreement complies with fair housing laws, prohibiting any discriminatory clauses or practices based on race, color, religion, sex, disability, familial status, national origin, sexual orientation, or gender identity.


Conclusion

Mastering the art of dealing with Colorado lease agreements is essential for landlords to ensure a harmonious and legally sound rental experience. By adhering to Colorado rental laws, including necessary disclosures, setting clear terms for rent payments and security deposits, and respecting tenant rights, landlords can establish a strong foundation for a successful rental business. Remember, a well-crafted lease agreement not only protects both parties but also fosters a positive and mutually beneficial relationship between landlords and tenants in the vibrant landscape of Colorado.